by
by 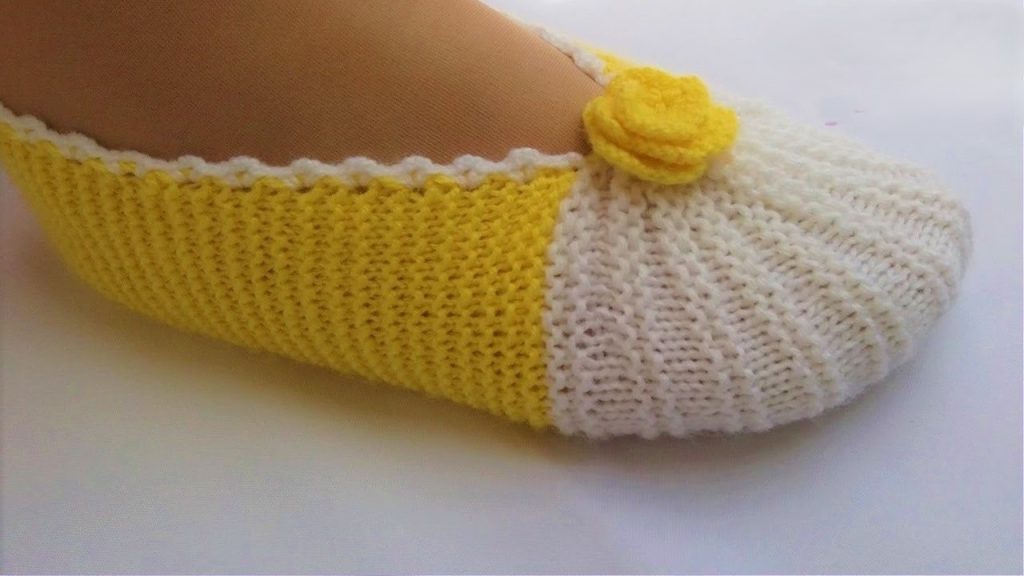
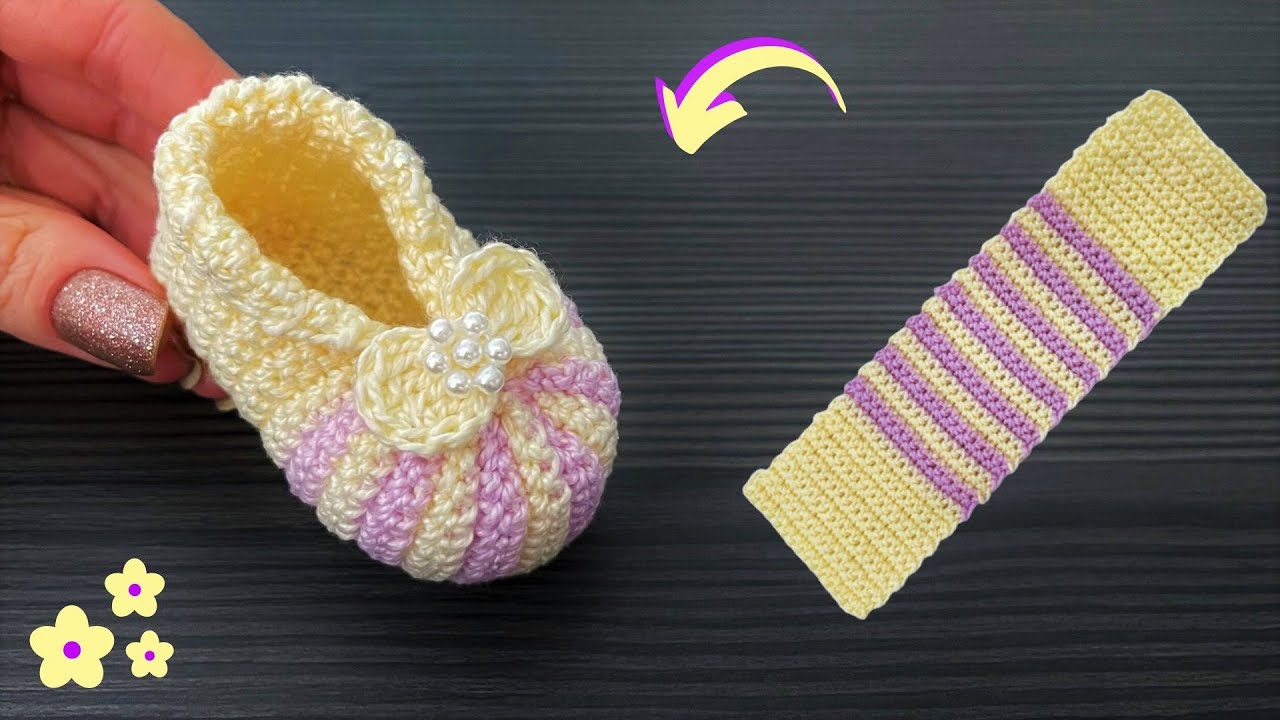
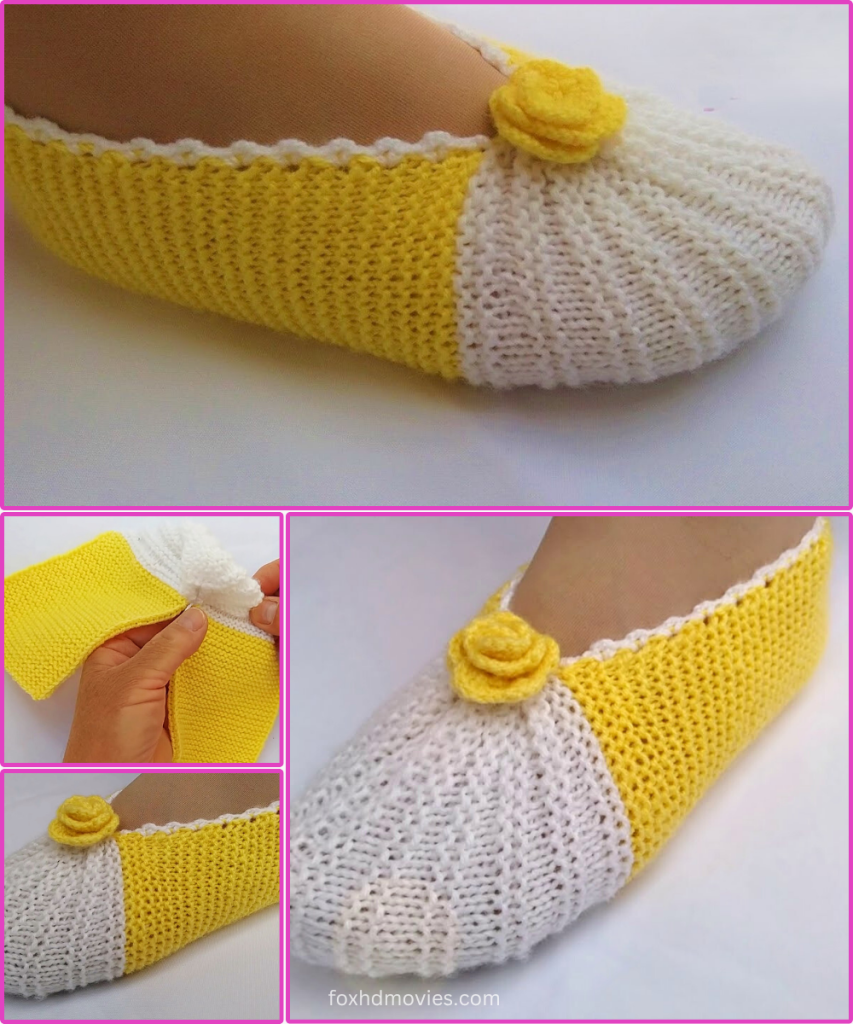
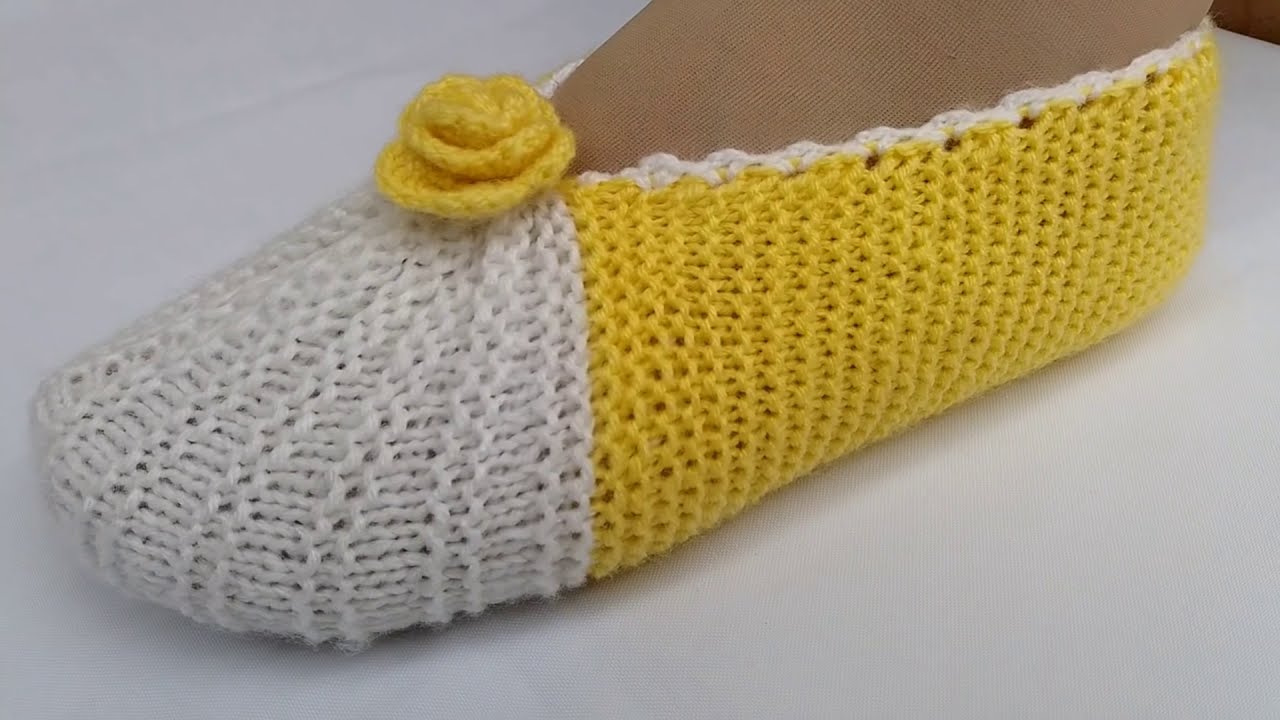
There’s something so utterly delightful about a pair of ballet-style slippers, especially when they’re handmade with love! These charming two-tone knit slippers, with their bright pop of color and sweet little floral accent, are the perfect cozy companions for lounging around the house. They offer a snug, comfortable fit and a touch of playful elegance.
What I particularly adore about this design is the clever use of two contrasting colors to create a visually interesting heel and toe, topped off with that delicate scalloped edge and a dainty knitted flower. While it involves a couple of knitting techniques, it’s a very achievable project for an intermediate knitter, or even an adventurous beginner ready to try short rows and simple shaping!
Ready to cast on some comfort and style? Let’s gather our needles and yarn!
Materials You’ll Need:
- Worsted Weight (Aran/10-ply) Yarn:
- Color A: Approximately 100-120 yards (e.g., Cream/Off-White for the toe)
- Color B: Approximately 100-120 yards (e.g., Bright Yellow for the heel/sides)
- Color C: Small amount (approx. 5-10 yards) for the flower (e.g., matching Yellow or a contrasting pop)
- Tip: Choose a soft, yet durable, yarn like acrylic, wool blend, or cotton blend for maximum comfort.
- Knitting Needles: Size US 7 (4.5mm) straight or circular needles (for working flat).
- Adjust needle size to obtain gauge.
- Yarn Needle: For seaming and weaving in ends.
- Scissors
- Stitch Markers (Optional but Recommended): For marking turns in short rows.
- Measuring Tape: For checking gauge and slipper length.
Gauge (Don’t Skip This!)
Getting the correct gauge is crucial for slippers to ensure they fit well. 18 stitches x 26 rows = 4 inches (10 cm) in stockinette stitch.
Please knit a quick swatch before beginning. If your swatch is larger than this, try smaller needles. If it’s smaller, go up a needle size.
Sizing Notes:
This pattern is written for an average women’s US shoe size 7-8.
- Finished slipper sole length: Approximately 9.5-10 inches (24-25 cm).
To adjust for other sizes:
- For smaller sizes: Cast on fewer stitches for the toe section and work fewer rows for the side panel.
- For larger sizes: Cast on more stitches for the toe section and work more rows for the side panel.
- The total length of your knitted piece (before seaming) should be roughly 1.5 – 2 inches shorter than your actual foot length to allow for stretch and a snug fit.
Abbreviations (US Terms):
- CO: Cast on
- BO: Bind off
- K: Knit
- P: Purl
- St(s): Stitch(es)
- WS: Wrong Side
- RS: Right Side
- yo: Yarn over
- k2tog: Knit 2 stitches together (decrease)
- ssk: Slip, slip, knit (decrease)
- W&T: Wrap and turn (for short rows – explained below)
- MC: Main Color (Toe/Top – Cream)
- CC: Contrasting Color (Sides/Heel – Yellow)
- FC: Flower Color (Yellow)
Let’s Get Knitting!
We’ll knit this slipper flat, primarily in stockinette stitch (knit on RS, purl on WS), then seam it. The toe section uses short rows to create that lovely rounded shape.
Part 1: The Toe (MC)
We start at the toe, working flat.

Using MC (e.g., Cream):
CO 38 stitches.
Row 1 (WS): Purl. Row 2 (RS): Knit.
Short Row Section: This section creates the rounded toe. We’ll use the “wrap and turn” method. If you’re unfamiliar, there are many great video tutorials online!
Row 3 (WS): Purl 30, W&T. Row 4 (RS): Knit 22, W&T. Row 5 (WS): Purl 14, W&T. Row 6 (RS): Knit 6, W&T.
Now, we’ll work back across the stitches, picking up the wraps:
Row 7 (WS): Purl to the first wrapped stitch. Purl the wrapped stitch and its wrap together (or pick up wrap and purl it with the stitch). Continue purling to the end of the row. Row 8 (RS): Knit to the first wrapped stitch. Knit the wrapped stitch and its wrap together (or pick up wrap and knit it with the stitch). Continue knitting to the end of the row.
Next Rows (Toe Top): Row 9 (WS): Purl. Row 10 (RS): Knit.
Repeat Rows 9 and 10 a total of 10 more times (20 rows total after short rows), ending with a Purl row (WS). This creates the main top part of the toe before we switch colors for the sides.
Cut MC, leaving a tail for weaving in.
Part 2: The Slipper Sides & Heel (CC)
Now we switch to our contrasting color for the body of the slipper.

Attach CC (e.g., Yellow).
Row 1 (RS): Knit. Row 2 (WS): Purl.
Repeat Rows 1 and 2 for a total of 40-45 rows (or until the piece, when held against your foot, reaches your heel, with a little extra for the heel shaping). End on a Purl row (WS).
- The exact number of rows here depends on your foot size and desired slipper depth. Aim for the knitted fabric to comfortably wrap from the top of your foot around to your heel.
Heel Shaping (Optional, but gives a better fit): We’ll do a simple decrease for the heel.
Row 1 (RS): K1, ssk, knit to last 3 sts, k2tog, K1. (2 stitches decreased) Row 2 (WS): Purl. Repeat Rows 1 and 2 for a total of 2-3 times (4-6 stitches decreased), or until your desired heel shape is achieved.
BO all stitches loosely. Leave a long tail (at least 20-24 inches) for seaming.
Part 3: The Top Edge / Cuff (MC)
This creates that pretty white scalloped edge visible at the top opening.
Using MC (Cream):
With the RS of your slipper body facing you, pick up and knit stitches evenly along the top edge of the slipper opening (around the ankle). Aim for approximately 45-50 stitches.
Row 1 (RS – Eyelet Row): K1, yo, k2tog; repeat from * to * across to last st, K1. Row 2 (WS): Purl.
Bind off all stitches. Fasten off and weave in ends.
Part 4: Seaming Your Slipper
Now, to turn your flat piece into a shoe!
- Fold and Seam: Fold your knitted piece in half lengthwise, with the wrong sides facing each other, so the purl bumps are on the inside.
- Toe Seam: Using your yarn needle and the tail from the toe section, carefully seam the edges of the toe section together. Stitch from the tip of the toe up towards the main body of the slipper. Use a mattress stitch for an invisible seam, or whip stitch for a sturdy, visible seam.
- Heel Seam: Using the long tail from the heel section, seam the heel of the slipper. This will be a short seam at the back. Pull it snug to create a rounded heel.
- Sole Seam: Continue seaming the remaining open edges along the bottom of the slipper (the sole). Make sure both sides are evenly matched as you seam.
- Weave in All Ends: Secure all knots and weave in any remaining yarn tails neatly on the inside of the slipper.
Repeat all steps for the second slipper.
Part 5: The Little Knitted Flower (FC)
This simple flower adds the perfect touch!
Using FC (e.g., Yellow):
CO 4 stitches.
Row 1 (RS): K4. Row 2 (WS): P4. Repeat Rows 1 and 2 a total of 8-10 times (or until you have a strip about 1.5-2 inches long).
Finishing the Flower: BO all stitches. Leave a long tail. Thread the tail onto your yarn needle. Carefully gather one long edge of the knitted strip by weaving your needle through the edge stitches. Pull tightly to cinch it into a spiral (a rosebud shape). Use the tail to secure the shape with a few stitches, then use the remaining tail to sew the flower onto the side of the slipper, where the toe (cream) meets the body (yellow).
Video tutorial
Your Sunshine Steps Slippers are Complete!
Slip them on and enjoy the comfort and handmade charm! These are wonderful for yourself or as a thoughtful gift. The two-tone design makes them extra special.
I hope you enjoyed knitting this pattern! If you create these lovely slippers, please share your photos – I would absolutely love to see them. Tag me on social media and let me know what colors you chose!
Happy knitting!