 by
by 
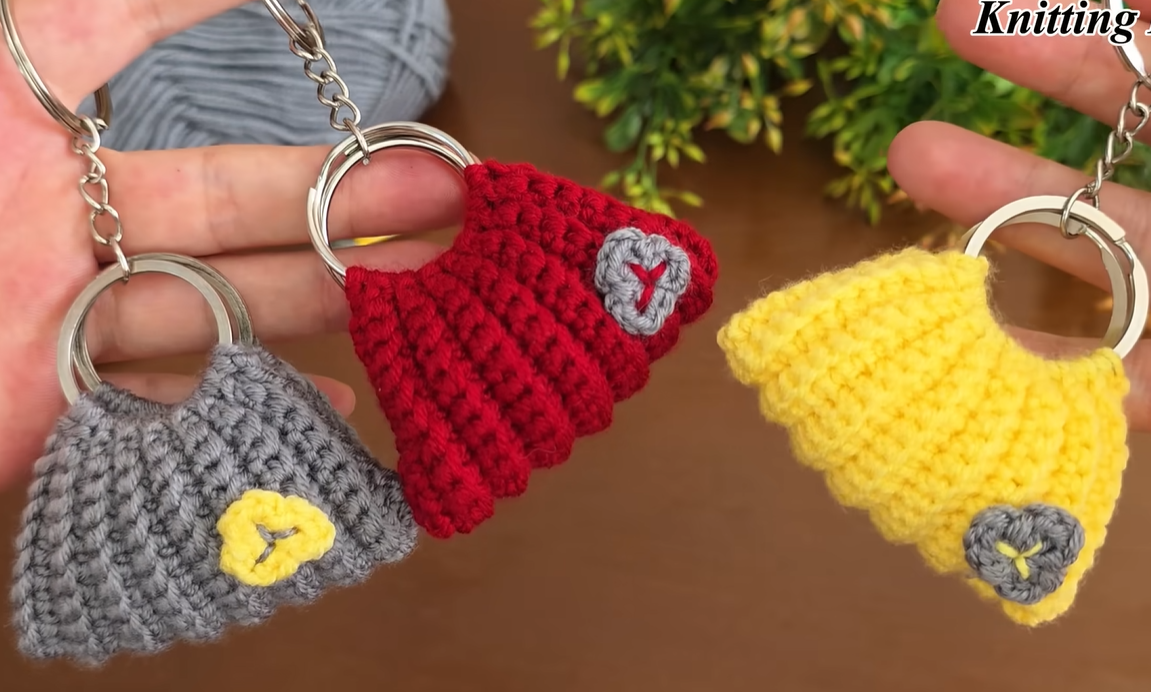
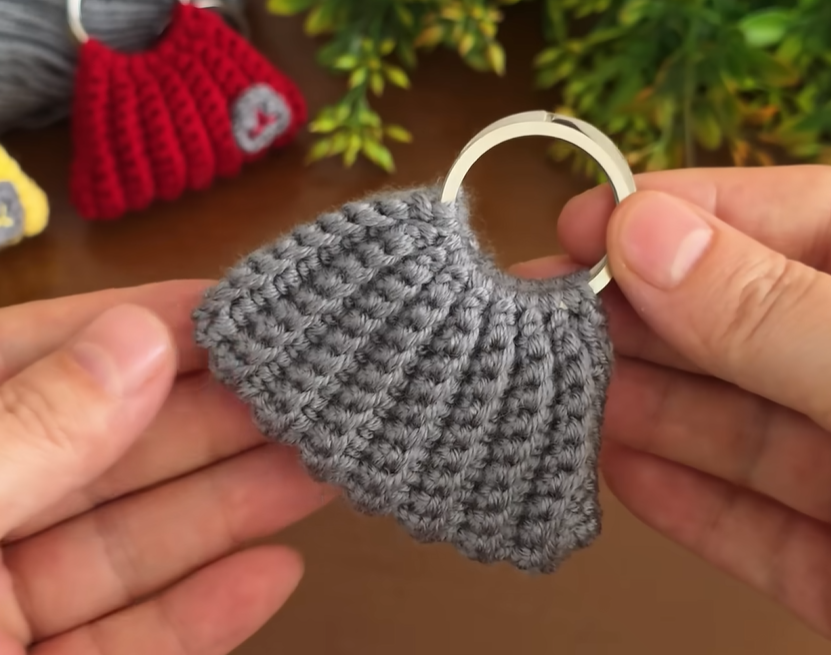
This pattern creates a small, decorative pouch that can be used as a keychain or a charm. It features a cinched top around the key ring and a flared, textured body.
Materials:
- Yarn: DK (Double Knitting) or Worsted weight yarn in grey (or red, yellow, or your preferred color). A small amount is needed (approx. 10-15g).
- Contrast Yarn: Small amount of yellow or grey yarn for the decorative stitch/patch.
- Crochet Hook: 3.5mm (E) or 4.0mm (G) hook (adjust to your yarn weight and desired fabric density).
- Key Ring: One standard metal split key ring.
- Yarn Needle: For weaving in ends and embroidering the detail.
- Scissors
Notes:
- This pattern is worked in rows, then joined to form a tube, and finally cinched at the top.
- The ribbed texture is created by working in the back loop only (BLO) for certain stitches.
- “Ch 2” at the beginning of a row counts as a
hdcordcdepending on the stitch used for the row. If usingdcwhere it sayshdc, “ch 3” would count as the firstdc.
Abbreviations (US Terms):
- ch: chain
- sl st: slip stitch
- sc: single crochet
- hdc: half double crochet
- dc: double crochet
- BLO: back loop only
- st(s): stitch(es)
Pattern Instructions:
Part 1: The Pouch Body (worked flat initially)
Start with your main color yarn (e.g., Grey).
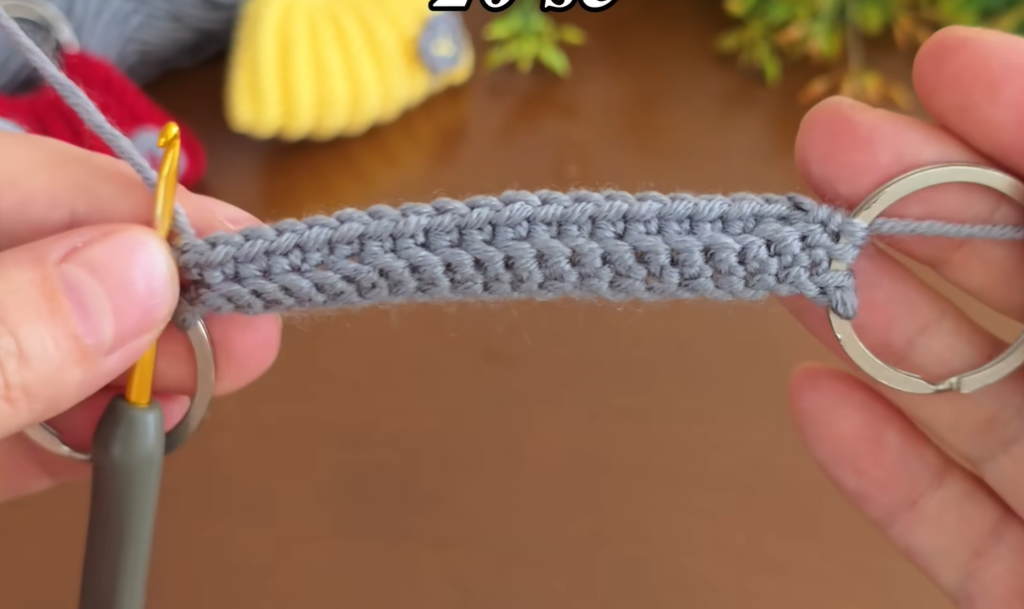
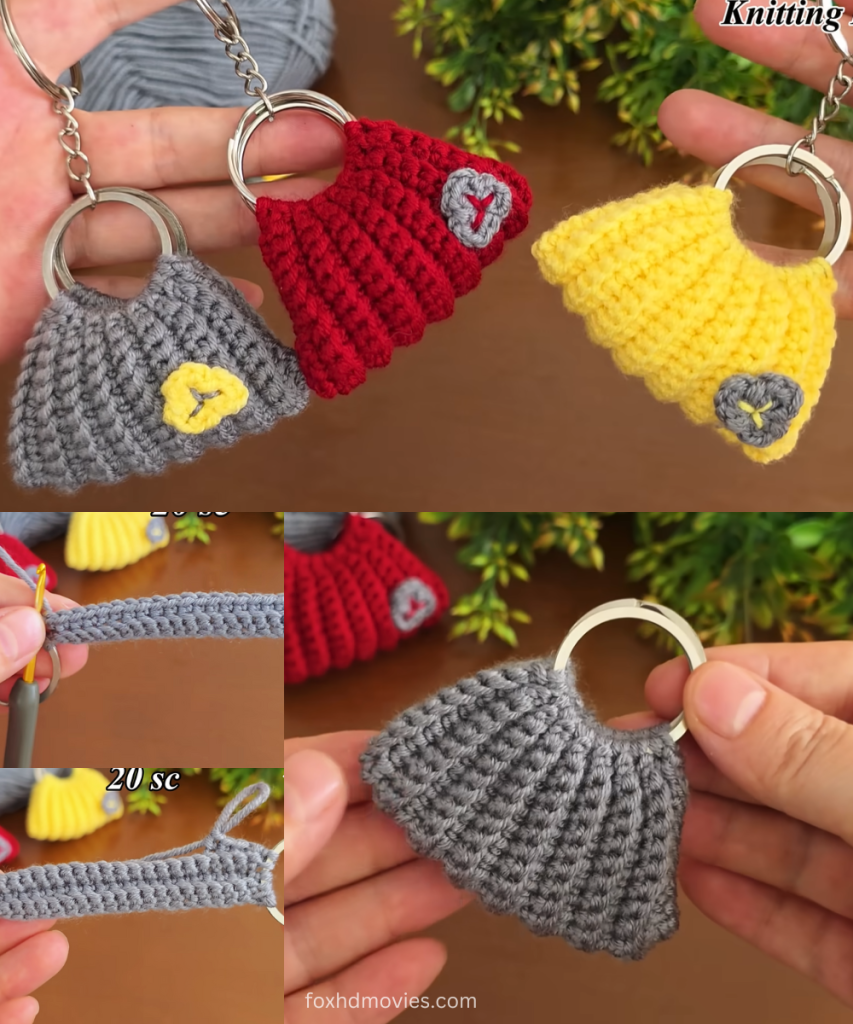
Row 1 (Foundation Chain): Ch 18.
Row 2: Hdc in the 3rd chain from the hook (counts as first hdc), hdc in each chain across. (16 hdc) * Ch 2 (counts as first hdc). Turn.
Row 3: Hdc in the BLO of each stitch across. (16 hdc) * Ch 2. Turn. * This row creates the ribbed texture.
Rows 4-12 (or until desired length): Repeat Row 3. * For a small keychain, 10-12 rows in total should be sufficient to create the height. The image suggests about 10-12 rows visible before the cinching.
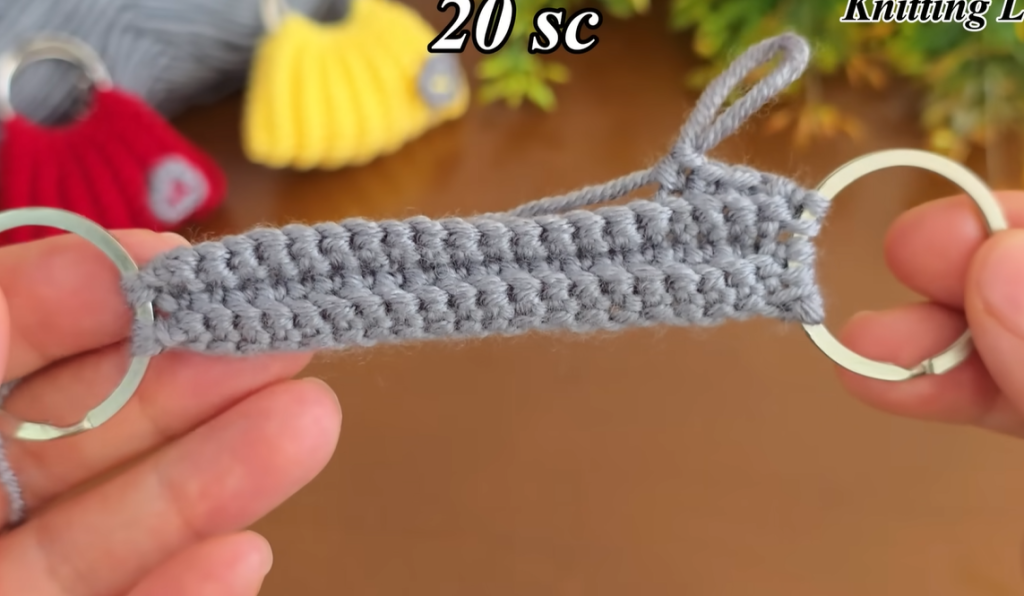
Part 2: Joining to Form a Tube
- Do NOT turn after the last row. Fold your crocheted piece so that the first row and the last row meet.
- Working through both loops of the last row and the beginning chain of the first row,
sl stacross to join the edges, forming a tube.- Alternatively, you can stitch the seam closed using a yarn needle after fastening off, but slip stitching gives a neater continuous look.
Part 3: Shaping the Bottom (Optional – for a flatter base)
You can either leave the bottom open for a purely decorative shape, or slightly cinch it. For a more defined “pouch” look as seen, we will slightly gather it.
- Rotate your work so you are working along the bottom edge (the foundation chain edge).
Ch 1.Scevenly around the bottom opening (approximately 16scaround the opening).Sl stto the firstsc.Ch 1. In the next round, worksc2tog(single crochet 2 together) around to slightly close the opening, leaving a small hole if you desire. Or simplysl stacross the opening to close it completely.- Fasten off, leaving a tail. Use the tail to sew up any remaining gap or to secure the bottom if needed. Weave in ends.
Part 4: Attaching the Key Ring and Cinching the Top
- Place the metal key ring over the top opening of your crocheted tube.
- Re-attach your main color yarn at any point around the top opening.
Ch 1. Workscstitches around the key ring and through the top edge of your crocheted tube simultaneously. This will cinch the top around the key ring and secure it. Work evenly until the key ring is snuggly covered and the top is gathered as desired (approx. 18-20scdepending on key ring size and desired gather).Sl stto the firstscto join.- Fasten off. Weave in ends securely.
Part 5: Adding the Decorative Patch/Embroidery
The grey keychain has a small yellow “Y” or heart-like shape embroidered onto a light grey background patch.
- For the patch: With a small amount of contrast yarn (e.g., light grey or white),
ch 3. Work 2dcinto the first chain.Ch 1, turn. Work 3dcinto thedcof the previous row. Fasten off. This creates a small, roughly triangular/heart-shaped piece. (Alternatively, you can just cut a small piece of felt or fabric). - For the “Y” / Heart: With your second contrast yarn (e.g., Yellow), use a yarn needle to embroider a simple “Y” shape, or a small heart, or a simple star stitch onto the center of the small patch you just made.
- Attaching the patch: Using your yarn needle and a length of the main color yarn, sew the small decorative patch onto the front of your crocheted pouch keychain.
Video tutorial
Variations for Red and Yellow Keychains:
- Red Keychain: Use red yarn for the main body. The decorative patch appears to be grey with a red “Y” or cross stitch. Follow the same pattern, just change yarn colors.
- Yellow Keychain: Use yellow yarn for the main body. The decorative patch appears to be grey with a black or dark grey simple shape (possibly a star or a small geometric design).
You now have a unique and detailed pattern to create these charming crocheted pouch keychains!