by
by 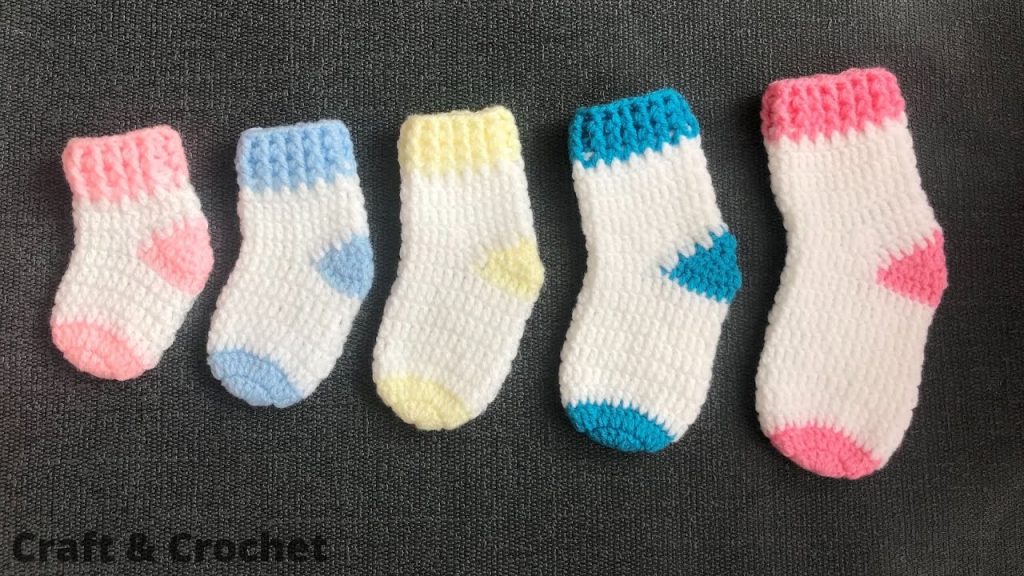
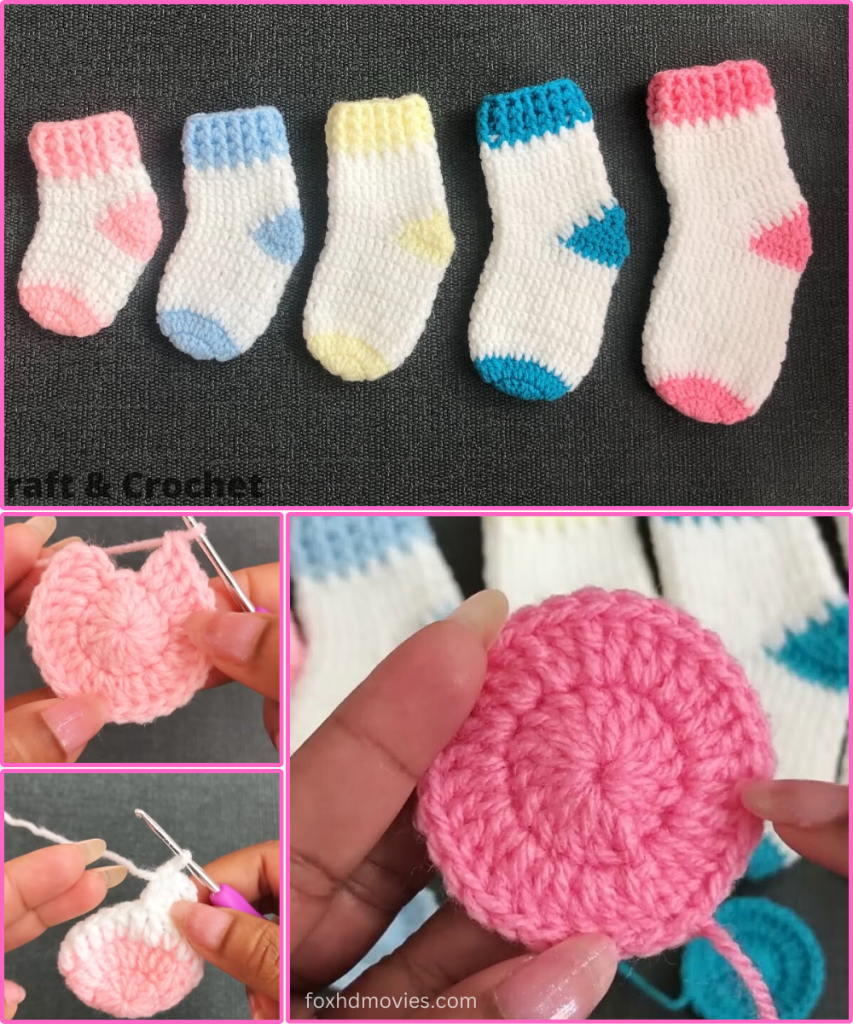
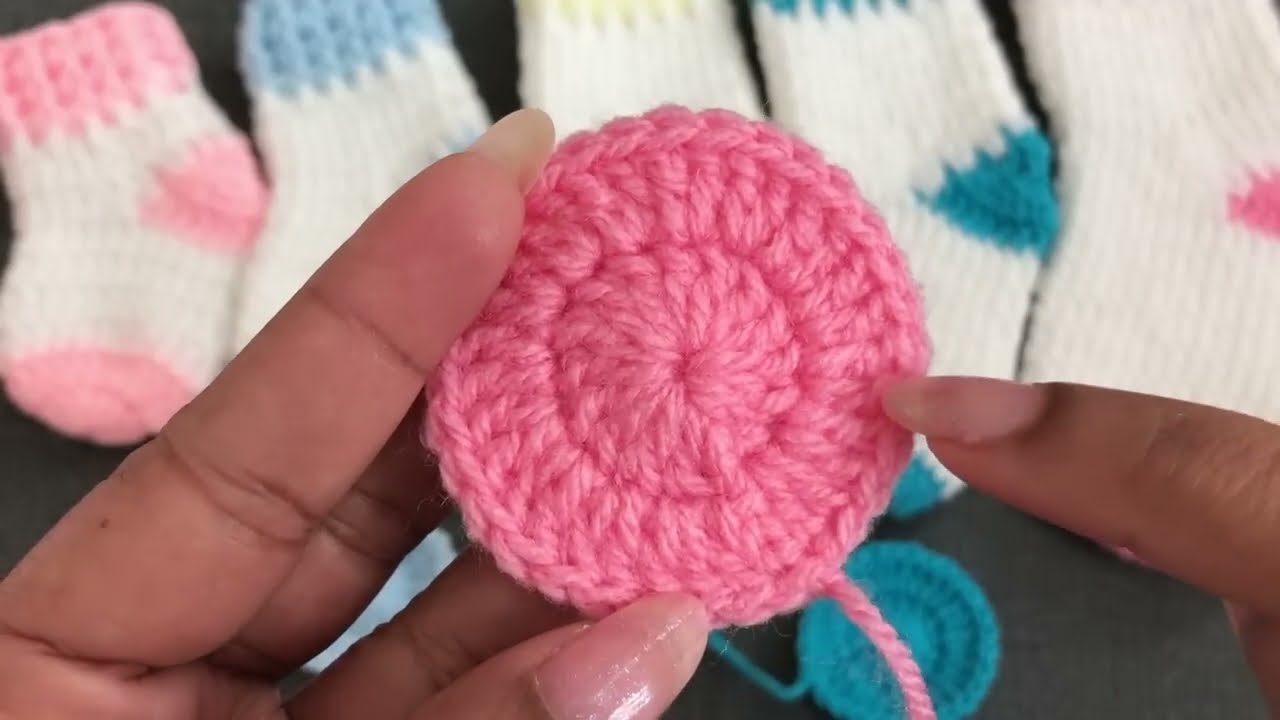
There’s nothing quite as sweet as little baby socks, especially when they’re handmade with love! These charming color-block crocheted socks, featuring contrasting toes, heels, and cuffs, are not just adorable but also wonderfully practical for keeping tiny feet snug and stylish. They come in various sizes in the image, showing just how versatile this pattern can be!
What I particularly love about this design is the clever use of color changes to create a distinct, modern look, without being overly complicated. The ribbed cuff adds a nice stretchy finish, and the main body is worked in simple, dense stitches to provide warmth. This is a rewarding project for intermediate crocheters, or a determined beginner ready to try shaping and color work!
Ready to add a splash of color to little wardrobes? Let’s grab our hooks and yarn!
Materials You’ll Need:
- DK Weight (Light Worsted / 8-ply) Yarn:
- Main Color (MC): Approximately 40-50 yards (e.g., White for the main body).
- Contrasting Color 1 (CC1): Approximately 5-10 yards (for Toe/Heel/Cuff – e.g., Pink, Light Blue, Yellow, Teal).
- Contrasting Color 2 (CC2): Optional, if you want a third color for the cuff or heel, as seen in some samples.
- Tip: Choose a soft, washable, baby-friendly yarn. Cotton or acrylic blends are excellent choices.
- Crochet Hook: Size D/3.25mm or E/3.5mm (or size needed to obtain gauge).
- A slightly smaller hook than you might typically use for DK yarn helps create a dense fabric that holds its shape well.
- Yarn Needle: For weaving in ends.
- Scissors
- Stitch Markers (Recommended!): Especially helpful for sole/toe rounds.
Gauge (Crucial for Baby Sock Sizing!)
Achieving the correct gauge is absolutely essential for baby socks, as even a small difference can mean they don’t fit. 20 single crochet stitches x 22 rows = 4 inches (10 cm).
Please make a quick swatch before starting! Adjust your hook size until you meet this gauge. If your swatch is larger, go down a hook size. If it’s smaller, go up.
Sizing Notes:
This pattern is written for an approximate 0-3 month size (smaller pink/white sock in image).
- Finished Sole Length: Approximately 3.5 inches (9 cm).
To adjust for larger sizes (up to 12 months, as seen in the image):
- 3-6 Months (approx. 4 inches / 10 cm sole): Add 2-3 chains to the starting chain for the toe (Part 1). Add 1 more increase round to the sole (Part 1). Add 2-3 more rounds to the foot section (Part 3). Use an E/3.5mm hook.
- 6-12 Months (approx. 4.5 inches / 11.5 cm sole): Add 4-5 chains to the starting chain for the toe. Add 2 more increase rounds to the sole. Add 4-5 more rounds to the foot section. Use an F/3.75mm hook.
- Always check the sole measurement against a baby’s actual foot or a reliable size chart.
Abbreviations (US Terms):
- ch: chain
- sl st: slip stitch
- sc: single crochet
- hdc: half double crochet
- inc: increase (2 sc in the same stitch)
- sc2tog: single crochet 2 stitches together (decrease)
- fo: fasten off
- MC: Main Color (White)
- CC1: Contrasting Color 1 (e.g., Pink, Blue, Yellow, Teal)
- CC2: Contrasting Color 2 (if using a third color for the cuff)
- BLO: Back Loop Only (for ribbing)
Let’s Get Crocheting!
We’ll work these socks from the toe up to the cuff, changing colors for distinct sections.
Part 1: The Toe (CC1)
We’ll start with an oval shape for the toe.
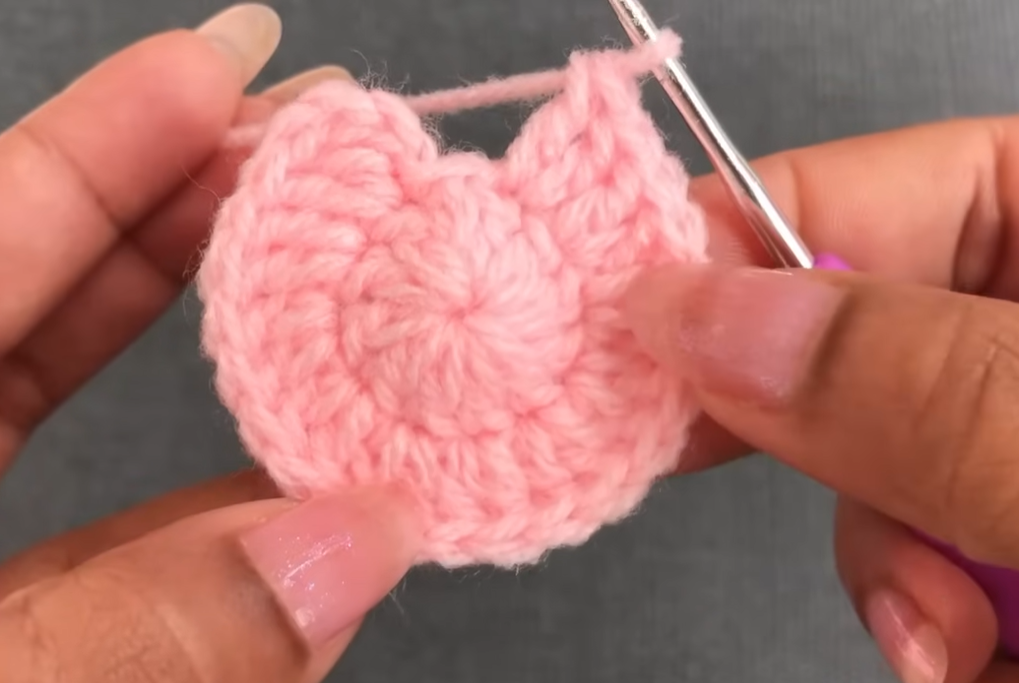
Using CC1 (e.g., Pink):
Ch 9. (Adjust this chain length for different sizes.)
Round 1: 2 sc in 2nd ch from hook, sc in next 6 ch, 4 sc in last ch. Working down the opposite side of the chain: sc in next 6 ch, 2 sc in last ch. Join with sl st to first sc. (20 stitches)
- Place a stitch marker in the first sc of the round.
Round 2: Ch 1. Inc in next 2 sc, sc in next 6 sc, inc in next 4 sc, sc in next 6 sc, inc in next 2 sc. Join with sl st to first sc. (28 stitches)
Fasten off CC1.
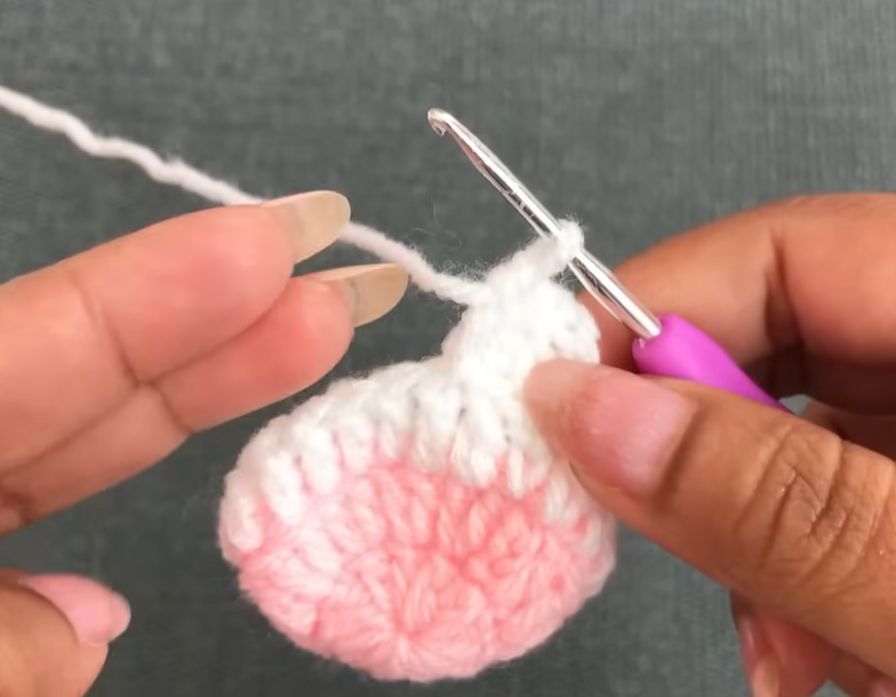
Part 2: The Foot (MC)
Now we transition to the main color for the body of the foot.
Attach MC (White) with a sl st in any stitch.
Round 1 (Defining Sole): Ch 1. Sc in each stitch around, working in the back loop only (BLO). Join with sl st to first sc. (This creates a neat ridge where the toe meets the foot). (28 sc)
Rounds 2 – 10: Ch 1. Sc in each stitch around. Join with sl st to first sc. (28 sc)
- Work these rounds until the foot section reaches the beginning of where the heel should be.
- Note: If adjusting for larger sizes, add more rounds here before starting the heel.
Do not fasten off MC.
Part 3: The Heel (CC1)
We’ll work the heel flat, using short rows to create the heel cup, then rejoin for the rest of the sock.
Change to CC1 (e.g., Pink). (Keep MC attached, as we’ll use it again for the leg.)
Row 1 (Heel Flap – RS): Ch 1. Sc in next 14 stitches. Turn. (14 sc)
- You are now working only on these 14 stitches for the heel flap.
Rows 2 – 8 (Heel Flap): Ch 1. Sc in each sc across. Turn. (14 sc)
- This creates the height of your heel flap. For larger socks, add 1-2 more rows here.
Shaping the Heel Turn: Row 9 (RS): Ch 1. Sc in next 9 sc, sc2tog, sc in next sc. Turn. (11 sc) Row 10 (WS): Ch 1. Sc in next 4 sc, sc2tog, sc in next sc. Turn. (6 sc) Row 11 (RS): Ch 1. Sc in next 5 sc, sc2tog, sc in next sc. Turn. (7 sc)
- Continue working in this manner: Ch 1, sc to 1 stitch before the gap, sc2tog over the stitch before the gap and the next stitch past the gap, sc in the last stitch. Turn.
- Keep going until all heel flap stitches have been worked into the decreases, and you’re left with about 8-10 stitches for the heel.
Do not fasten off CC1.
Part 4: The Leg (MC)
Now, we’ll reconnect to the main body of the sock and work up the leg.
Continue with CC1 to pick up stitches around the heel opening, then switch to MC.
- Ch 1. Sc in each of the remaining heel stitches.
- Sc evenly up the side of the heel flap (approx. 6-8 sc depending on your flap height).
- Attach MC (White). Sc across the 14 unworked stitches from the foot (the instep).
- Sc evenly down the other side of the heel flap (approx. 6-8 sc).
- Join with sl st to first sc of the round. (You should have roughly 28-32 stitches, depending on pick-up count and initial size.)
Rounds 1 – 10 (Leg): Ch 1. Sc in each stitch around. Join with sl st to first sc.
- Work these rounds until the leg reaches your desired height before the cuff. For larger socks, add more rounds here.
Fasten off MC.
Part 5: The Cuff (CC1 or CC2)
Finally, the decorative ribbed cuff!
Attach CC1 (e.g., Pink) or CC2 (if using a third color) with a sl st in any stitch.
Round 1 (Ribbed Cuff): Ch 1. Sc in each stitch around, working in the back loop only (BLO). Join with sl st to first sc. (Number of stitches should be the same as your leg rounds).
Rounds 2 – 5: Ch 1. Sc in each stitch around, working in the back loop only (BLO). Join with sl st to first sc.
- Work more rounds for a taller cuff if desired.
Fasten off, leaving a tail for weaving in.
Finishing:
- Weave in all ends securely using your yarn needle. This is crucial for baby items to prevent unraveling.
- Repeat all steps to create the second matching sock.
Video tutorial
Your Adorable Color-Block Baby Socks are Complete!
Aren’t they just the sweetest? These socks are perfect for keeping little toes cozy and adding a pop of handmade charm to any outfit. Play with different color combinations to create a whole collection!
I hope you enjoyed crocheting these lovely baby socks! If you make them, I would absolutely love to see your finished projects. Share your photos on social media and tag me (if you have an associated platform)!
Happy hooking!