 by
by 
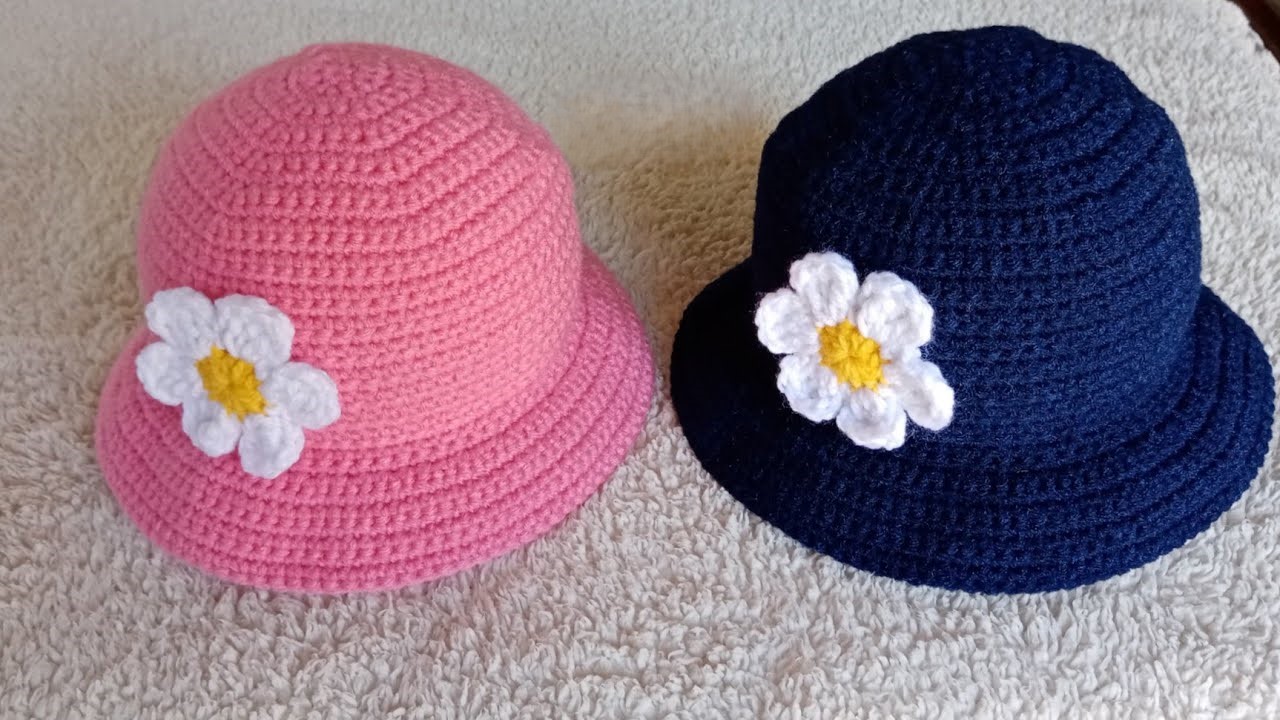
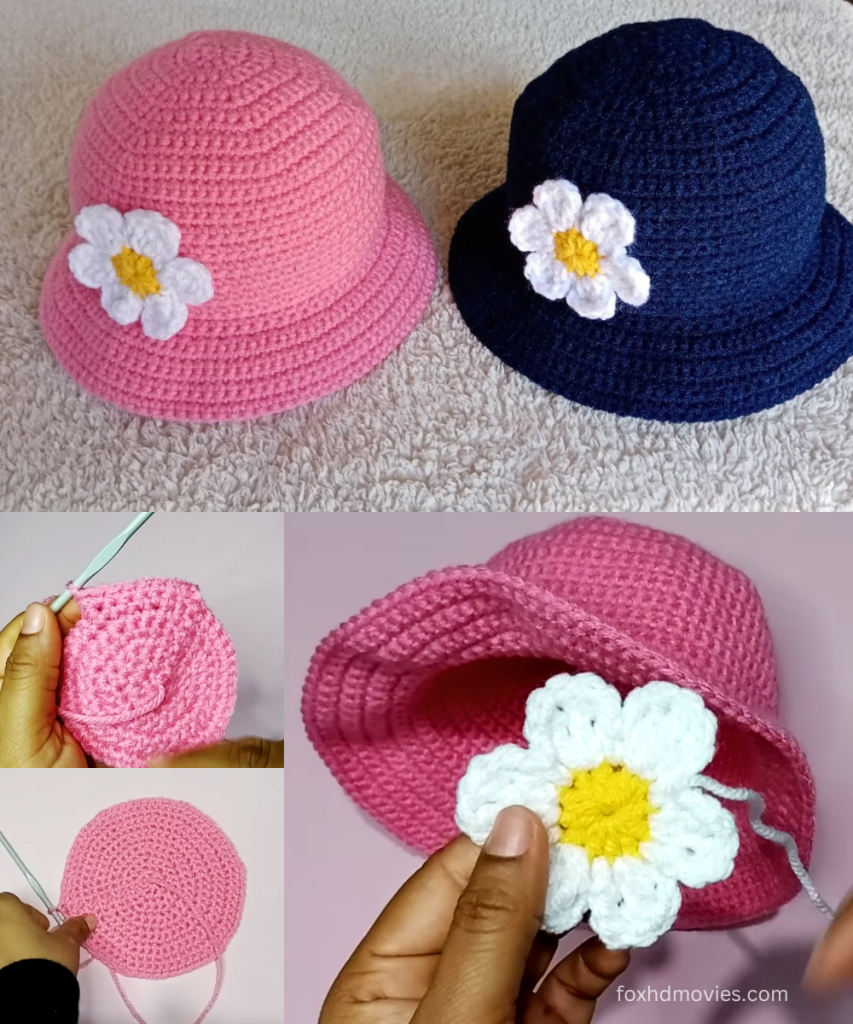
This pattern creates a cute and functional bucket hat, perfect for sunny days, and can be easily customized with different colors. The hat is worked from the top down.
Approximate Size: Child (Head Circumference 18-20 inches / 46-51 cm)
Materials:
- Yarn: DK (Double Knitting) or Worsted weight yarn (Category 3 or 4)
- Main Color (MC): Approx. 100-150g (Pink or Navy Blue)
- White (for daisy petals): Small amount
- Yellow (for daisy center): Very small amount
- Crochet Hook: 4.0mm (G/6) or 4.5mm (7) hook (adjust to achieve desired gauge and fabric density for a hat).
- Yarn Needle: For weaving in ends and sewing on the applique.
- Scissors
- Stitch Marker (optional but recommended)
Gauge: Working in sc or hdc, 16 stitches x 14 rows = 4 inches (10 cm) with a 4.0mm hook, unblocked.
- It’s crucial to check your gauge. If your hat is too small/large, adjust your hook size.
Abbreviations (US Terms):
- ch: chain
- sl st: slip stitch
- sc: single crochet
- hdc: half double crochet
- dc: double crochet
- inc: increase (work 2 stitches into the same stitch)
- st(s): stitch(es)
- BLO: back loop only
- FLO: front loop only
- F.O.: Fasten Off
Pattern Instructions: The Hat
The hat is worked in continuous rounds from the top down. Use a stitch marker to mark the beginning of each round.
Part 1: Crown of the Hat (Flat Circle)
Start with your Main Color (MC).

Round 1: Make a magic ring (or ch 3 and sl st to first ch to form a ring). Ch 1 (does not count as a stitch), work 8 hdc into the ring. Sl st to the first hdc to join. (8 hdc)
Round 2: Ch 1, inc in each hdc around. Sl st to the first hdc. (16 hdc)
Round 3: Ch 1, (hdc, inc) around. Sl st to the first hdc. (24 hdc)
Round 4: Ch 1, (hdc in next 2 sts, inc) around. Sl st to the first hdc. (32 hdc)
Round 5: Ch 1, (hdc in next 3 sts, inc) around. Sl st to the first hdc. (40 hdc)
Round 6: Ch 1, (hdc in next 4 sts, inc) around. Sl st to the first hdc. (48 hdc)
Round 7: Ch 1, (hdc in next 5 sts, inc) around. Sl st to the first hdc. (56 hdc)
Round 8: Ch 1, (hdc in next 6 sts, inc) around. Sl st to the first hdc. (64 hdc)
Round 9: Ch 1, (hdc in next 7 sts, inc) around. Sl st to the first hdc. (72 hdc)
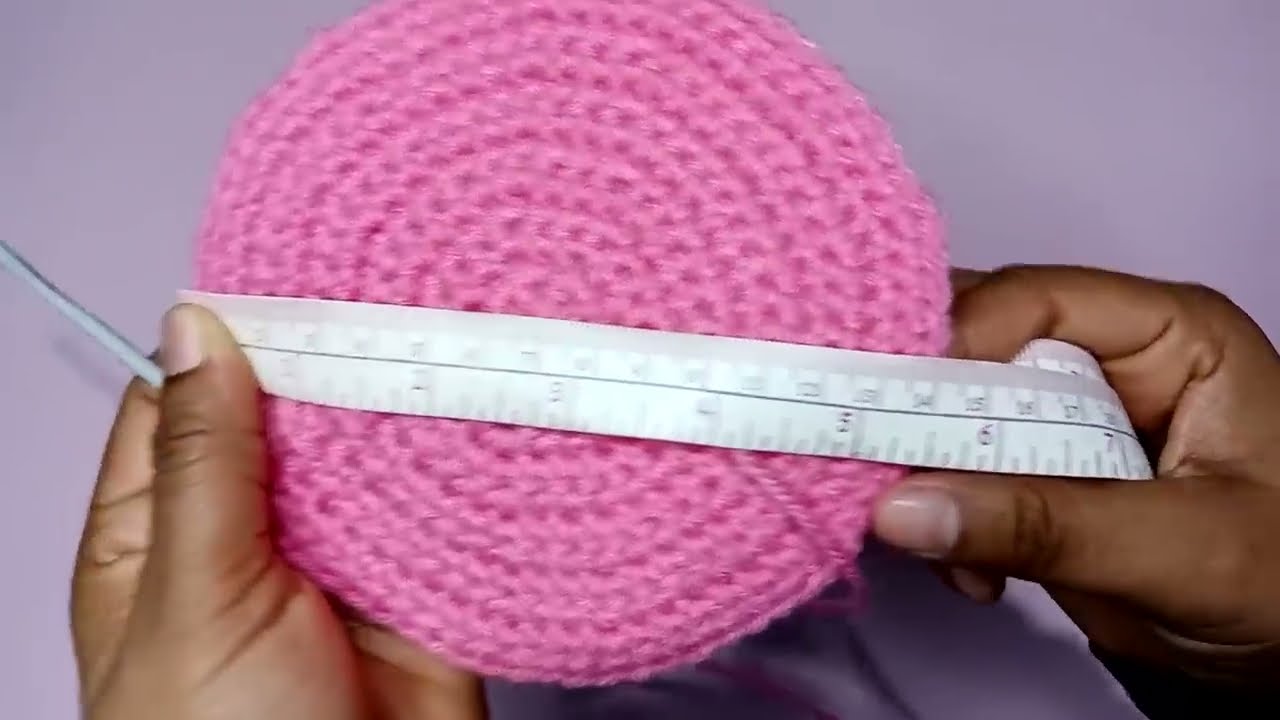
- Measure the diameter of your circle. For a child’s hat (18-20 inch circumference), the diameter should be approximately 5.75-6.5 inches (14.5-16.5 cm). If it’s too small, add another increase round (e.g.,
hdcin next 8 sts,inc). If too large, remove an increase round. The circumference of the finished crown should be close to the target head circumference /pi.
Part 2: Side of the Hat (No Increases)
This section forms the straight sides of the hat.
Round 10: Ch 1, hdc in BLO of each stitch around. Sl st to the first hdc. (72 hdc) * This round creates a defined ridge where the crown transitions to the sides.
Round 11-20 (or until desired depth): Ch 1, hdc in each stitch around. Sl st to the first hdc. (72 hdc) * Continue until the hat reaches the top of the ears or your desired depth before the brim starts. For a child’s hat, this is typically 5.5-6.5 inches (14-16.5 cm) from the top of the crown to the last row before the brim. Adjust the number of rounds as needed.
Part 3: The Brim
The brim uses increases to flare outwards.
Round 21: Ch 1, (hdc in next 8 sts, inc) around. Sl st to the first hdc. (80 hdc)
Round 22: Ch 1, hdc in each stitch around. Sl st to the first hdc. (80 hdc)
Round 23: Ch 1, (hdc in next 9 sts, inc) around. Sl st to the first hdc. (88 hdc)
Round 24: Ch 1, hdc in each stitch around. Sl st to the first hdc. (88 hdc)
Round 25: Ch 1, (hdc in next 10 sts, inc) around. Sl st to the first hdc. (96 hdc)
Round 26: Ch 1, hdc in each stitch around. Sl st to the first hdc. (96 hdc)
Round 27 (Optional for wider brim): Ch 1, sc in each stitch around. Sl st to the first sc. (96 sc) * Working a final round of sc can give the brim a slightly firmer edge.
Finishing the Hat: F.O. Weave in all loose ends securely.
Pattern Instructions: The Daisy Applique
This daisy has 8 petals, but you can adjust the number for a fuller or sparser look.
Part A: Daisy Center (Yellow Yarn)
Round 1: Make a magic ring. Ch 1 (does not count as a stitch), work 6 sc into the ring. Sl st to the first sc to join. (6 sc) F.O., leaving a long tail for sewing onto the hat.

Part B: Daisy Petals (White Yarn)
Round 1: Make a magic ring. Ch 1 (does not count as a stitch), work 8 sc into the ring. Sl st to the first sc to join. (8 sc)
Round 2: Now we create the petals. (Ch 2, 3 dc into the same stitch, ch 2, sl st into the same stitch). Sl st into the next sc of Round 1. Repeat (ch 2, 3 dc into the same stitch, ch 2, sl st into the same stitch). Sl st into the next sc around for 8 petals. * Ensure each petal is worked into its own sc from Round 1, with a sl st in between to move to the next stitch.
Finishing the Daisy: F.O., leaving a long tail for sewing the daisy onto the hat. Weave in the starting tail.
Video tutorial
Assembly:
- Place the yellow daisy center directly over the center of the white daisy petals. Use the tail from the yellow center to sew it securely onto the white petals.
- Position the finished daisy applique onto the side of the crocheted hat, as shown in the picture.
- Using the tail from the white petals (or a new piece of white yarn), sew the entire daisy applique securely onto the hat. Weave in all remaining ends.
Your beautiful crocheted bucket hat with a daisy applique is now complete!