by
by 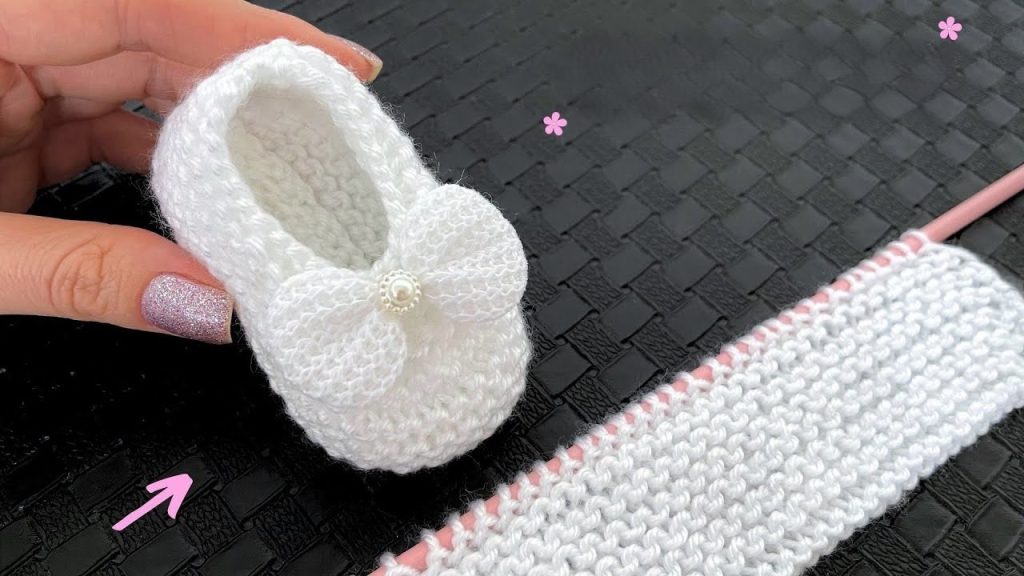
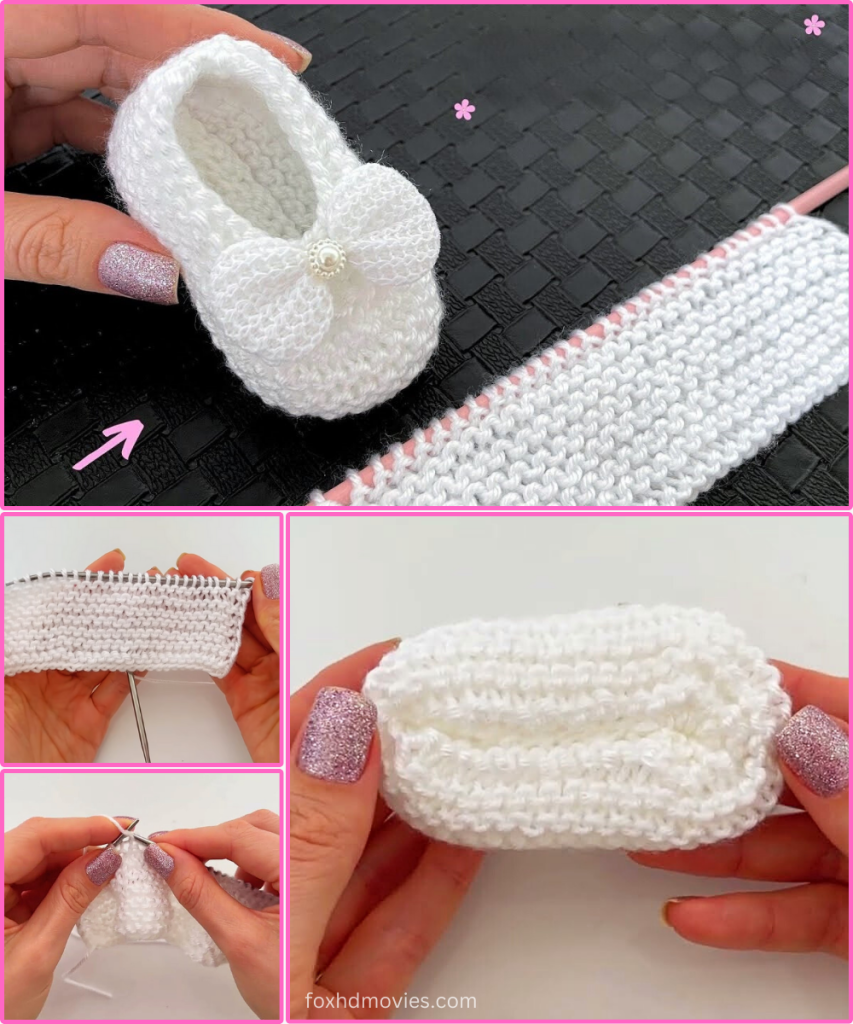
What I particularly love about this design is its clever “flat-to-form” construction. You knit a simple rectangular piece, which then gets shaped into the slipper with minimal seaming. The garter stitch creates a lovely, squishy fabric, and the added crocheted bow provides that delicate, elegant touch. This is a rewarding project for adventurous beginners in knitting, or intermediate crafters looking for a quick and satisfying make that combines a bit of knitting and crochet!
Ready to cast on some sweetness? Let’s gather our materials and begin crafting these precious little shoes!
Materials You’ll Need:
- DK Weight (Light Worsted / 8-ply) Yarn: Approximately 50-70 yards of a soft, washable yarn (e.g., White).
- Tip: A soft cotton, acrylic, or baby-specific wool blend yarn will work best for comfort and durability.
- Knitting Needles: Size US 5 (3.75mm) straight needles (or a circular needle if you prefer working flat on one).
- Crochet Hook: Size D/3.25mm or E/3.5mm (for the bow).
- Yarn Needle: For seaming, weaving in ends, and attaching the pearl.
- Scissors
- Small Pearl Bead: 1 bead per shoe (approx. 6mm-8mm), with a hole large enough for your yarn needle and a thin strand of yarn/thread.
- Stitch Markers (Optional): To mark the center of your knitted piece for easier shaping.
Gauge (Crucial for Baby Shoe Sizing!)
Achieving the correct gauge is absolutely essential for baby shoes, as even a small difference can mean they don’t fit well. 22 stitches x 44 rows (22 garter ridges) = 4 inches (10 cm) in Garter Stitch.
Please knit a quick swatch (at least 4×4 inches) before starting! Adjust your knitting needle size until you meet this gauge. If your swatch is larger, go down a needle size. If it’s smaller, go up.
Sizing Notes:
This pattern is written for an approximate 0-6 month size.
- Finished Sole Length: Approximately 3.75 – 4 inches (9.5 – 10 cm).
To adjust for larger sizes (e.g., 6-12 months):
- Cast on 2-4 more stitches and knit an additional 10-20 rows for the main rectangular body.
- The overall length of your knitted rectangle (before seaming) should be about 1.5 – 2 inches longer than the desired finished sole length to allow for shaping.
- Always check your measurements against a baby’s actual foot or a reliable size chart.
Abbreviations (US Terms):
- CO: Cast on
- K: Knit
- K2tog: Knit 2 stitches together (decrease)
- BO: Bind off
- st(s): Stitch(es)
- ch: chain (crochet)
- sc: single crochet (crochet)
- sl st: slip stitch (crochet)
- fo: fasten off
Let’s Get Crafting!
We’ll start by knitting the flat main body of the shoe, then shape and seam it, and finally add the sweet little crocheted bow.
Part 1: The Main Shoe Body (Knitted)
We’ll knit a simple garter stitch rectangle.

Using your chosen yarn (e.g., White):
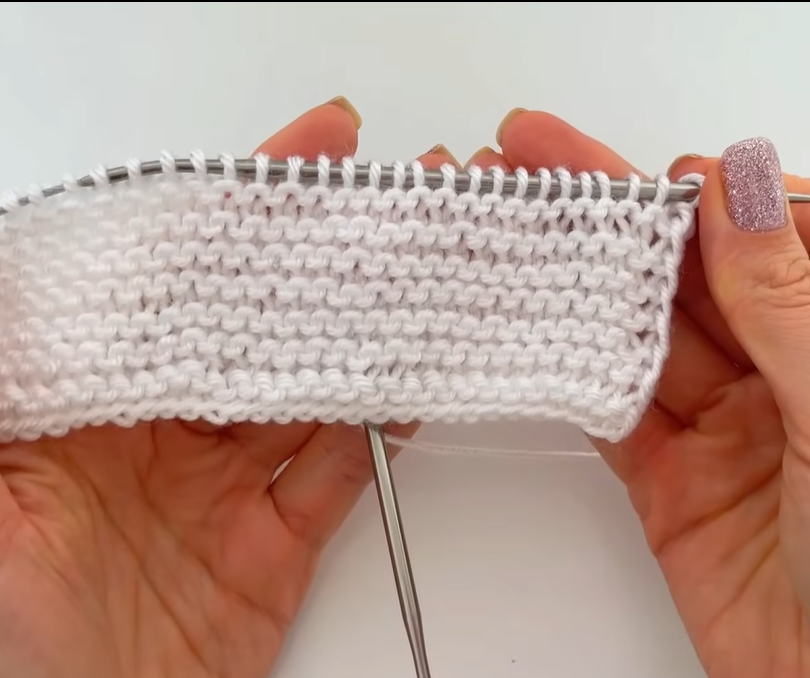
CO 30 stitches.
Rows 1 – 50: Knit all stitches.
- You are creating a simple garter stitch rectangle. The number of rows determines the length of your finished shoe.
- For a longer shoe, add more rows here (e.g., Rows 1-60 for 6-12 months).
- Your knitted piece should now be approximately 9-10 inches long (about 45-50 garter ridges).
BO all stitches loosely. Leave a very long tail (at least 20-24 inches) for seaming.
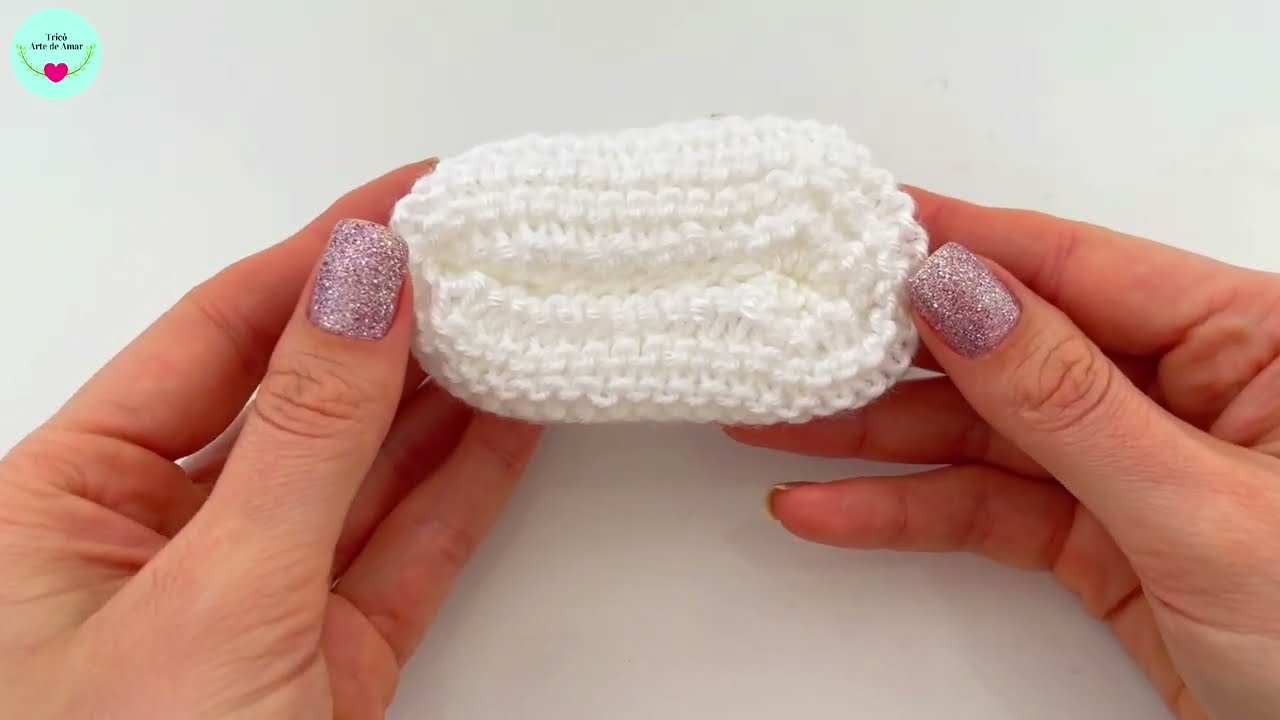
Part 2: Shaping and Seaming the Shoe
This is where your flat rectangle transforms into a shoe!
- Fold and Prepare: Lay your knitted rectangle flat. Fold it in half lengthwise, wrong sides together (so the garter ridges are on the outside).
- Seam the Toe: Take the bind-off edge. Using your yarn needle and the long tail you left, carefully seam the end together to form the toe. You can use a mattress stitch for an invisible seam, or a simple whip stitch for a neat, sturdy seam. Stitch across the entire width of the bind-off edge, cinching slightly to create a rounded toe shape.
- Seam the Heel: Now, bring the two bottom edges of your folded rectangle together to form the sole and back of the heel. Measure approximately 2.5 – 3 inches (6.5 – 7.5 cm) from the cinched toe along the bottom edge. This will be the sole. Start seaming from the other end (the cast-on edge) for about 1.5 – 2 inches (4 – 5 cm) to form the back of the heel. Use the cast-on tail for this seam.
- Seam the Sole: Continue seaming from the heel seam towards the toe seam, stitching the two raw edges together along the entire sole of the shoe. Ensure both sides are evenly matched as you seam.
- Weave in Ends: Secure all knots and weave in any remaining yarn tails neatly on the inside of the shoe.
Repeat all steps for the second shoe.
Part 3: The Crocheted Bow (Make 1 per shoe)
This delicate bow adds the perfect touch!
Using the same yarn (e.g., White) and your crochet hook:
Ch 7.
Row 1: Sc in 2nd ch from hook and in each ch across. Ch 1, turn. (6 sc)
Rows 2-4: Sc in each sc across. Ch 1, turn. (6 sc)
Fasten off, leaving a long tail (about 10-12 inches) for assembly and attaching the pearl.
Assembling the Bow:
- Pinch the center of the sc rectangle you just made.
- Wrap the long tail tightly around the pinched center a few times to create the bow shape. Secure with a knot on the back.
- Attach Pearl: Thread your yarn needle with a thin strand of yarn (matching or clear sewing thread). Pass it through the hole of one pearl bead. Position the pearl directly in the center front of the bow. Stitch through the back of the bow multiple times to secure the pearl firmly. Knot and weave in ends.
Attaching the Bow to the Shoe: Carefully position the completed bow on the top of the shoe, directly over the center of the toe, as shown in the image. Using your yarn needle and a small piece of matching yarn, securely stitch the bow onto the shoe. Hide your knots and ends inside the shoe.
Video tutorial
Your Little Pearl Slippers are Complete!
Slip them onto tiny feet and admire your beautiful, handmade creation! These charming little shoes are perfect for special occasions, or simply for adding a touch of elegance to everyday outfits.
I hope you enjoyed knitting and crocheting this lovely project! If you make these adorable baby shoes, I would absolutely love to see them. Share your photos on social media and tag me (if you have an associated platform)!
Happy crafting!