 by
by 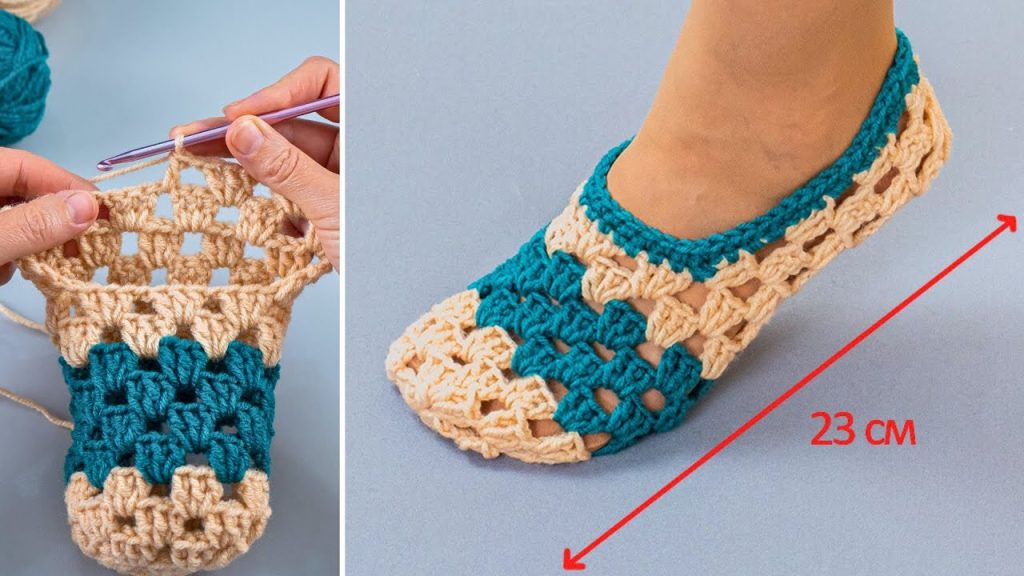
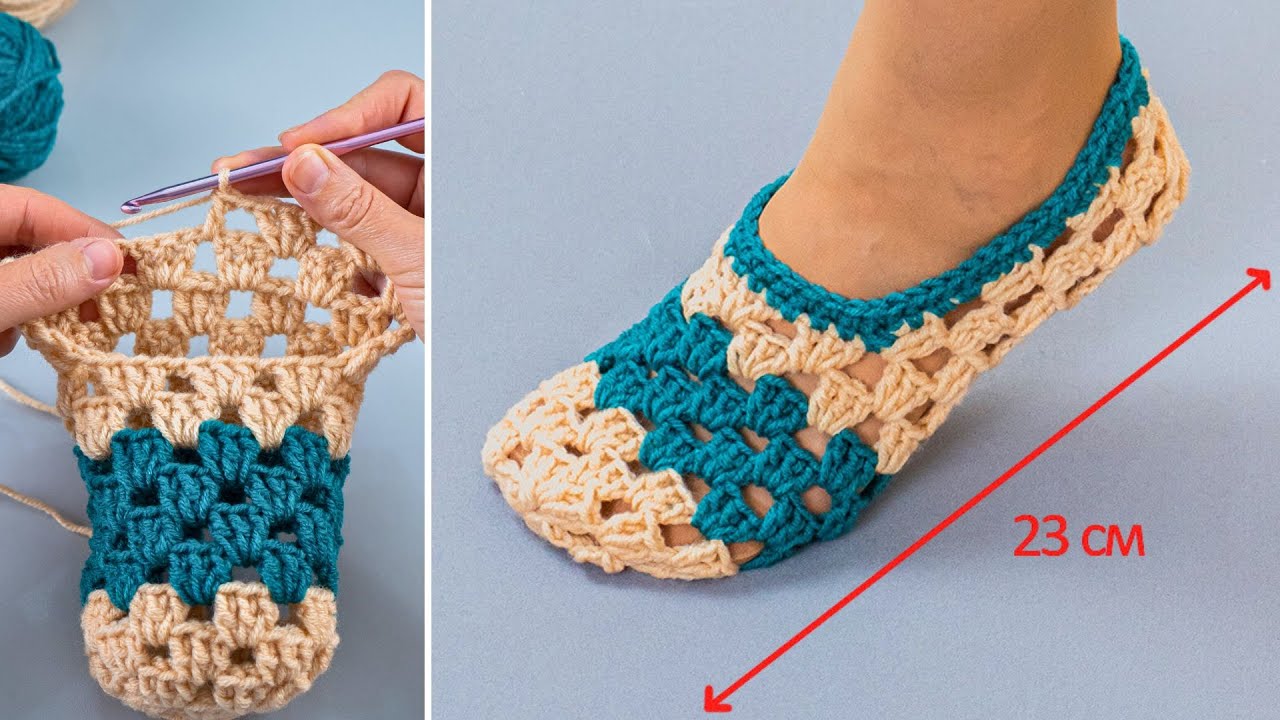
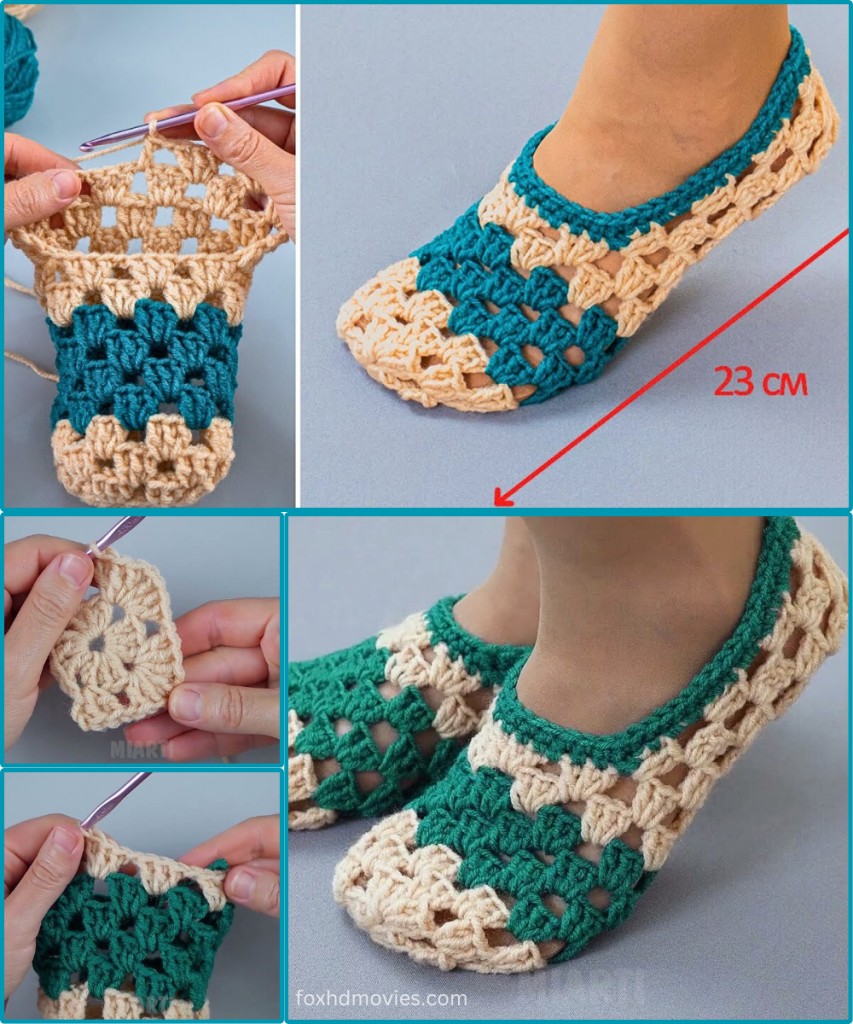
Tired of cold feet? Or maybe you’re just looking for a fun and rewarding crochet project? Look no further! These charming two-toned crochet slippers are not only stylish but also incredibly comfortable. Plus, they make fantastic gifts!
This pattern utilizes the classic granny square stitch, worked in rows to create a unique texture and a snug fit. We’ll be making them in a versatile size that results in a 23 cm sole, which generally fits a women’s US shoe size 6-7, or a European size 37-38. But don’t worry, I’ll also give you tips on how to adjust the size!
Before You Start: Gather Your Supplies!
- Yarn:
- Color A (Main Color, e.g., Cream/Light Tan): Approximately 100-120 yards of Worsted Weight (Aran/10-ply) yarn. Cotton or a cotton blend is recommended for durability and breathability.
- Color B (Accent Color, e.g., Teal/Turquoise): Approximately 60-80 yards of Worsted Weight (Aran/10-ply) yarn.
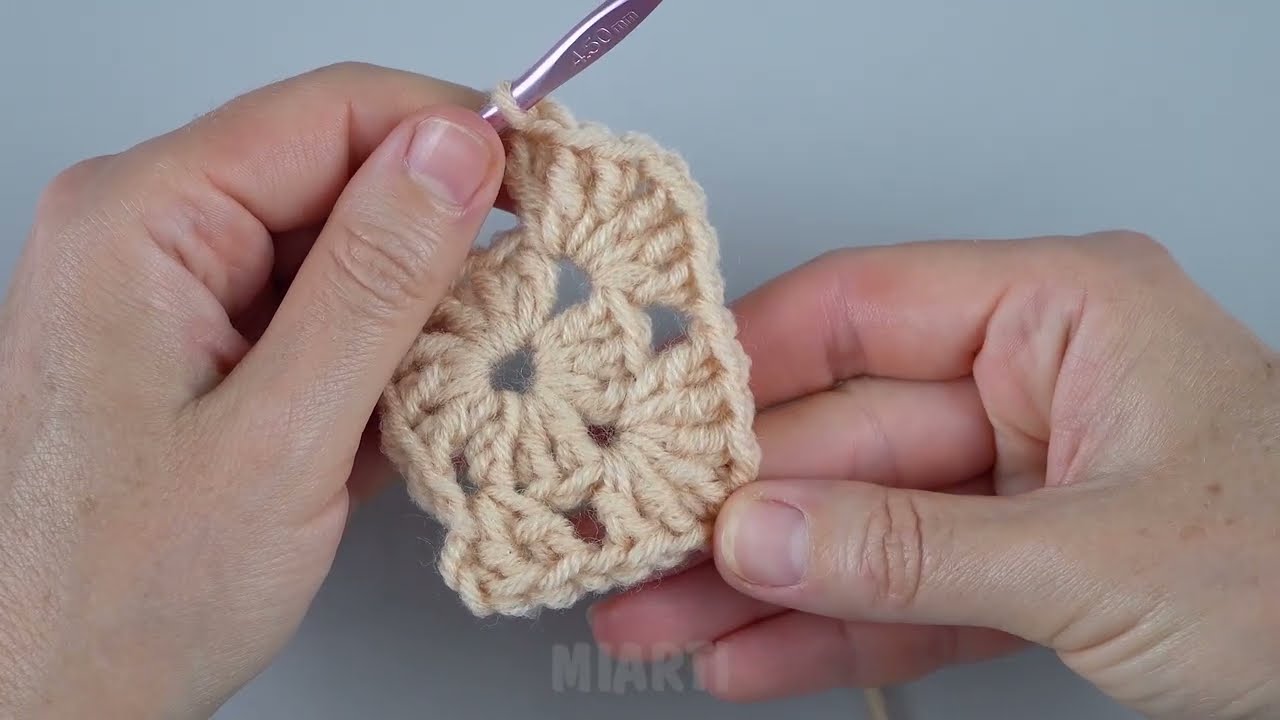
- Crochet Hook: 4.0 mm (G/6) or size needed to obtain gauge.
- Yarn Needle: For weaving in ends.
- Scissors
- Tape Measure: Essential for checking your progress and final length!
Gauge:
Getting the right gauge is crucial for achieving the correct size.
- One “granny cluster” (3 DC) and the chain-1 space should measure approximately 1.5 cm wide.
- Two rows of granny clusters should measure approximately 2 cm tall.
Abbreviations (US Crochet Terms):
- CH: Chain
- SL ST: Slip Stitch
- SC: Single Crochet
- DC: Double Crochet
- SP: Space
- GRANNY CLUSTER: (3 DC)
Let’s Get Crocheting!
We’ll start by working the toe and instep of the slipper, then work our way towards the heel.
Part 1: The Slipper Top (Toe & Instep) – Worked in Rows
- Using Color B (Teal/Turquoise)Row 1: CH 4, SL ST to first CH to form a ring. CH 3 (counts as first DC), 2 DC into the ring, CH 1. (3 DC, CH 1) three times into the ring. SL ST to top of beginning CH 3. (4 Granny Clusters, 4 CH-1 SPs) This creates your starting square. Think of this as the very front tip of your slipper.Row 2: CH 3. In the first CH-1 SP, work (2 DC, CH 1, 3 DC). In the next CH-1 SP, work (3 DC, CH 1, 3 DC). Repeat this in the next two CH-1 SPs. SL ST to top of beginning CH 3. (8 Granny Clusters, 8 CH-1 SPs) You are essentially working two granny clusters into each corner of the previous square.
- Switch to Color A (Cream/Light Tan)Row 3: CH 3. In the first CH-1 SP, work (2 DC, CH 1, 3 DC). In the next CH-1 SP, work (3 DC, CH 1, 3 DC). Continue this around, working (3 DC, CH 1, 3 DC) in each CH-1 SP. SL ST to top of beginning CH 3. You’re still increasing, but not as drastically as the previous row. This will start to shape the top of the foot.Row 4: CH 3. In the first CH-1 SP, work (2 DC, CH 1, 3 DC). Work (3 DC) in the next space between granny clusters. In the next CH-1 SP, work (3 DC, CH 1, 3 DC). Continue this pattern around. SL ST to top of beginning CH 3. You’re now adding single granny clusters in the “sides” of your growing square, while still increasing at the corners.Continue Alternating Colors for Rows:
- Row 5: Use Color B. Work in the same manner as Row 3 (increasing at corners, no single clusters in between).
- Row 6: Use Color A. Work in the same manner as Row 4 (increasing at corners and adding single clusters in between).

Part 2: The Slipper Body – Working in a Continuous Round (No More Increases)
Now, we’re going to stop increasing and start building up the sides and length of the slipper.
- Switch to Color A (Cream/Light Tan)Round 1: CH 3. From this point forward, you will work (3 DC) into every single space between the granny clusters around the entire piece. Do NOT work any CH 1 spaces or increase clusters. SL ST to top of beginning CH 3. This will start to create the “sides” of your slipper and prevent it from expanding further.Round 2: CH 3. Continue working (3 DC) into every space between the granny clusters. SL ST to top of beginning CH 3.
- Switch to Color B (Teal/Turquoise)Round 3: CH 3. Continue working (3 DC) into every space between the granny clusters. SL ST to top of beginning CH 3.
- Switch to Color A (Cream/Light Tan)Round 4: CH 3. Continue working (3 DC) into every space between the granny clusters. SL ST to top of beginning CH 3.Continue working rounds, alternating colors (B, A, B, A…) until your slipper, when laid flat, measures approximately 23 cm from the tip of the toe to the very back edge. This will take several more rounds, likely 4-6 more rounds depending on your gauge. Try it on your foot if possible to get the perfect length!When trying it on, the open end should come up to the top of your ankle or just below.

Part 3: The Heel Seam
Once you’ve reached your desired length (23 cm!), it’s time to close up the heel.
- Fold your slipper in half lengthwise, lining up the stitches perfectly.
- Using your yarn needle and a long tail of Color A (the last color you used), whip stitch or mattress stitch the back edges together to form the heel. Securely weave in your ends. Alternatively, you can SL ST the two edges together with your hook for a flatter seam.
Finishing Touches:
- Weave in all remaining loose ends neatly.
- Repeat the entire process to make the second slipper!
Video tutorial
Sizing Tips & Adjustments:
- For a Smaller Slipper: Reduce the number of rows in “Part 1: The Slipper Top” and/or reduce the number of rounds in “Part 2: The Slipper Body.” You can also go down a hook size.
- For a Larger Slipper: Increase the number of rows in “Part 1: The Slipper Top” and/or increase the number of rounds in “Part 2: The Slipper Body.” You can also go up a hook size.
- Adjusting Width: The width is primarily determined by your initial increases and gauge. If the slipper feels too wide, ensure your tension is tight enough. If it’s too narrow, you might need to adjust your hook size or add more initial increases if you’re comfortable modifying the pattern.
And there you have it! Your very own pair of handmade, cozy crochet slippers. Slip them on and enjoy the comfort, or wrap them up for a thoughtful, personalized gift. Happy crocheting!