 by
by Hello, lace-loving crocheters!

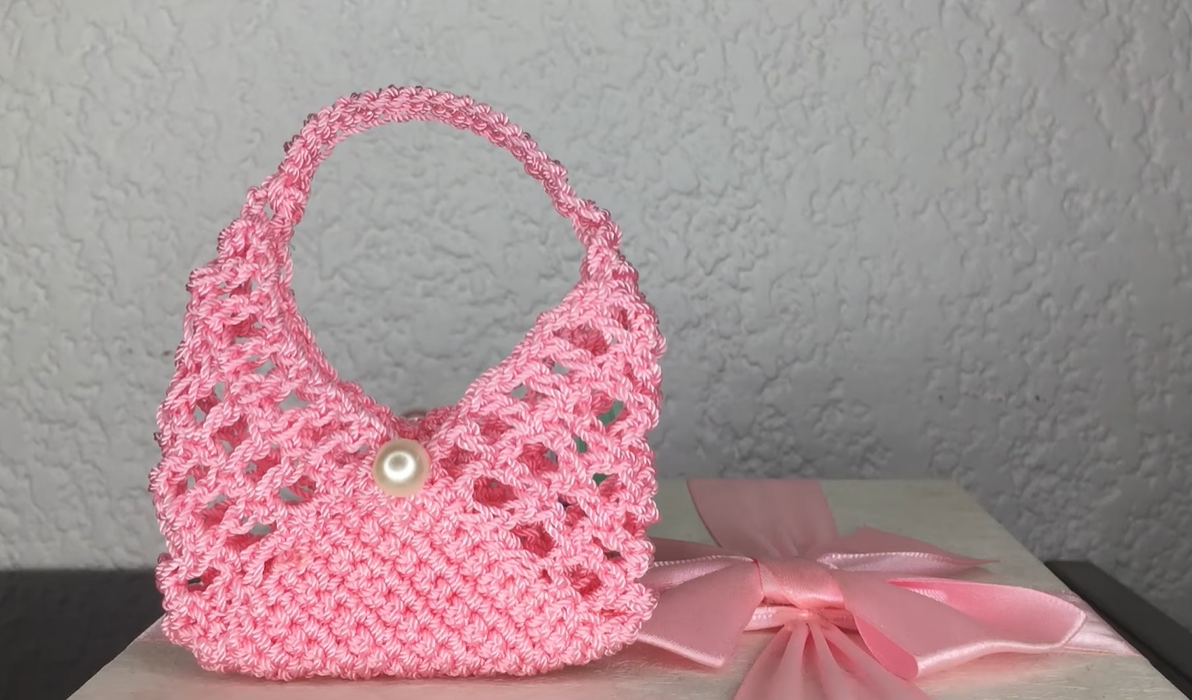
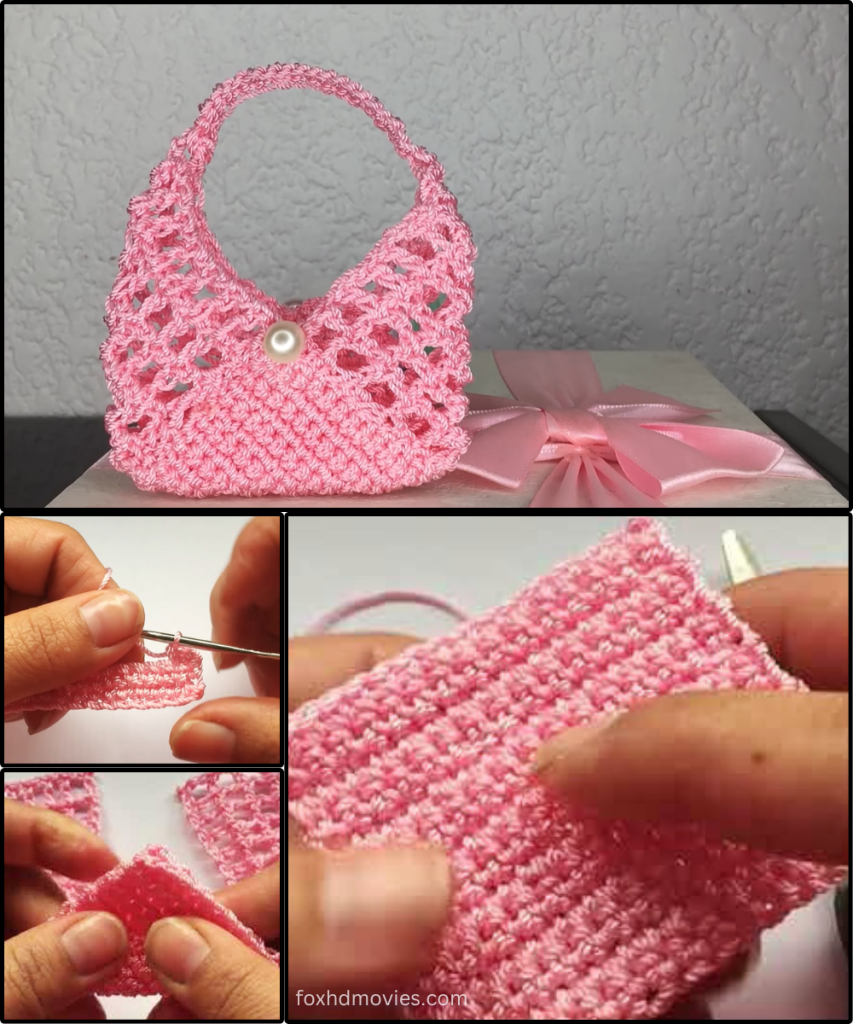
Are you enchanted by delicate textures and sweet, small projects? Today, we’re going to create the lovely “Petal Lace” Mini Bag! This charming little purse, as seen in the image, features a beautiful openwork stitch pattern that resembles soft petals, a sturdy rounded base, a graceful handle, and a single pearl accent for a touch of classic elegance.
This bag is perfect for holding tiny treasures, special occasion favors, or simply as a decorative piece. It’s a fantastic way to practice working with slightly more open stitch patterns while creating something truly delightful.
Ready to stitch up a little bit of lace and luxury? Let’s gather our yarn and hooks!
What you’ll need:
- Yarn: A Sport or DK (light worsted) weight yarn in a lovely soft pink (or color of your choice). You’ll need about 25-35 yards. Cotton or a cotton blend yarn would be ideal for good stitch definition and drape.
- Crochet Hook: A hook size appropriate for your chosen yarn. For Sport/DK weight yarn, a 3.0mm (D/3) or 3.5mm (E/4) hook would work well to achieve the delicate lace effect. (The hook used in the image appears to be around a 3.0mm).
- Scissors
- Tapestry Needle (for weaving in ends)
- One small pearl bead (approx. 6-8mm) for embellishment.
- Sewing Needle and Thread: Matching thread for securely attaching the pearl.
Abbreviations (US Terms):
- ch: chain
- st(s): stitch(es)
- sl st: slip stitch
- sc: single crochet
- dc: double crochet
- inc: increase (work 2 sts in the same st)
- sk: skip
- rep: repeat
- BLO: Back Loop Only
- V-st: V-stitch ({dc, ch 1, dc} in the same stitch/space)
The “Petal Lace” Mini Bag Pattern (Make 1)
We’ll start with a flat oval base, then work up the lacy sides in rounds, and finally add the handle and embellishment.
Part 1: The Base (Worked in continuous rounds)
Use a stitch marker to mark the first stitch of each round if you’re working in a spiral. Work relatively tightly for a sturdy base.
- Ch 11.
- Round 1: Sc in the 2nd ch from hook. Sc in the next 8 ch. 3 sc in the last ch. (Now working along the opposite side of the chain) Sc in the next 8 ch. 2 sc in the last ch (the very first chain you worked into). (22 sc total).
- You’ve formed an oval base. Do not join with a sl st; continue to the next round.
- Round 2: Inc in the first st. Sc in the next 8 sts. Inc in the next 3 sts. Sc in the next 8 sts. Inc in the last 2 sts. (28 sc total).
- Move your stitch marker to the new first stitch of each round.
- Round 3: Sc in the first st. Inc in the next st. Sc in the next 9 sts. Inc in the next 2 sts. Sc in the next 9 sts. Inc in the next st. (32 sc total).
- Your base is now complete. For a neat edge, you can work the first round of the bag body into the back loops of this round.
Part 2: The Bag Body (Lace Pattern)
This section creates the openwork lacy sides. We will join rounds here.
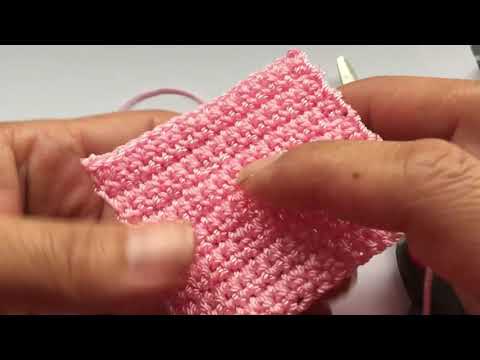
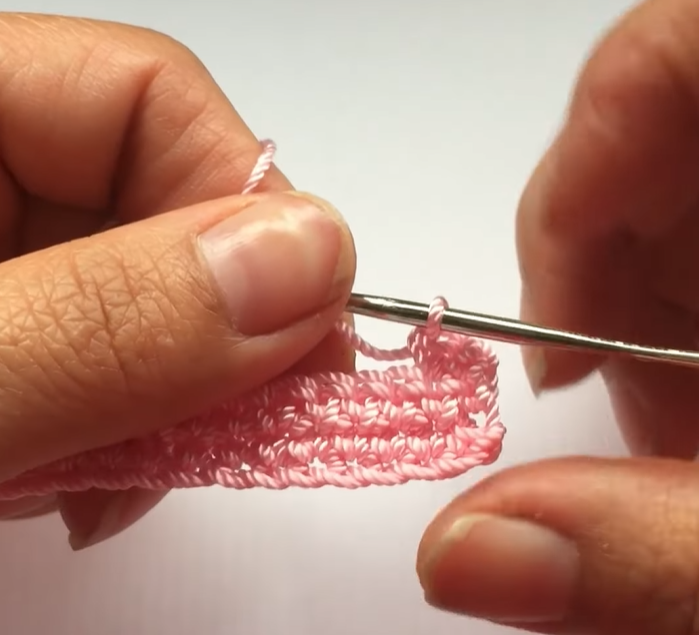
- Round 4 (Creating the Side Wall): Sl st into the first st of the round. Ch 1 (does not count as a st). Sc in the BLO (back loop only) of each sc around. Sl st to the first sc to join. (32 sc).
- Working in the back loop here creates a defined ridge, marking the bottom edge of your bag.
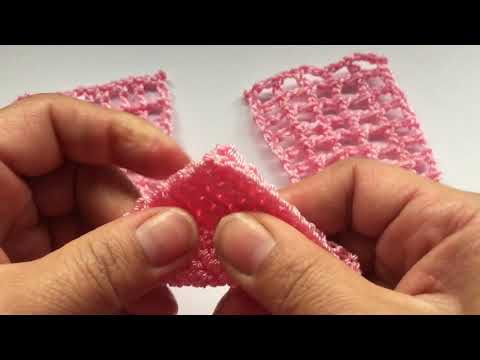
- Round 5 (First Lace Row): Ch 3 (counts as 1st dc). Dc in the same st. Sk next st. *Sc in next st. Sk next st. {2 dc} in next st*. Rep from * to * until you have 2 stitches remaining. Sk next st, sc in last st. Sl st to the top of the beginning ch-3 to join. (16 dc, 8 sc).
- This round sets up the pattern for the lace. You should have 8 pairs of 2dc clusters.
- Round 6 (Second Lace Row): Ch 3 (counts as 1st dc). Dc in the next dc (the second dc of the previous 2dc cluster). Sk next sc. *Sc in the space between the next two 2dc clusters. Sk next dc. Dc in the next 2 dc*. Rep from * to * around. Sl st to the top of the beginning ch-3 to join. (16 dc, 8 sc).
- You are essentially making 2dc clusters into the 2dc clusters of the previous round, and sc into the sc’s (or spaces) of the previous round, creating an offset, interlocking pattern.
- Repeat Round 6: Continue repeating Round 6 for a total of 4-5 lace pattern rows for the body, including Round 5. The image shows about 4 full lace pattern rows.
- So, if you started with Round 5 as your first lace row, you would repeat Round 6 three or four more times.
- Final Top Edge (Optional, for a cleaner edge before handle): Ch 1. Sc in each dc and sc around. Sl st to join. (32 sc).
- This provides a solid base for the handle.
Part 3: The Handle
We’ll now create the simple, sturdy handle.
- Round (Handle Foundation): Ch 1. Sc in the next 6 sts.
- Ch 15 (this creates the length of your handle). Sk the next 10 sts (these skipped stitches will form the handle opening).
- Sc in the remaining 16 sts. Sl st to the first sc to join. (22 sc, 1 ch-15 space).
- Ensure the handle chain is roughly centered over one side of the bag.
- Round (Handle Construction): Ch 1. Sc in the next 6 sc.
- Work 16 sc around the ch-15 space (working directly into the chain stitches).
- Sc in the remaining 16 sc. Sl st to the first sc to join. (38 sc).
- This covers the chain and creates a firm handle loop.
- Final Handle Round: Ch 1. Sc in each sc around. Sl st to the first sc to join. (38 sc).
- This final round creates a neat and sturdy top edge for the bag and handle.
Finishing:
- Fasten off, leaving a tail of about 6 inches.
- Weave in all loose yarn ends securely using your tapestry needle.
Part 4: Embellishment (The Pearl)
- Placement: Decide on the placement for your pearl bead on the front of the bag, roughly centered in the middle of a lace pattern.
- Attach: Using your sewing needle and matching thread, securely sew the pearl bead onto the front of the bag. Pass the thread through the bead and then through the crochet fabric a few times for security. Knot your thread securely on the inside of the bag and trim any excess.
Video tutorial
Tips for Your “Petal Lace” Mini Bag:
- Tension for Lace: For lace patterns, aim for a consistent tension that is not too tight, allowing the stitches to relax and form the openwork design.
- Yarn Fiber: Cotton or cotton blend yarns are excellent for this pattern as they provide good stitch definition, hold their shape well, and have a lovely drape for the lace.
- Stitch Count: Pay close attention to your stitch counts, especially in the lace rounds, to ensure the pattern repeats correctly.
- Customization:
- Colors: This bag would look equally beautiful in white, cream, lavender, or even a soft blue.
- Embellishment: Instead of a pearl, you could sew on a tiny crocheted flower, a small button, or a charm.
- Size: To make a larger version, add more increase rounds to the base and more lace pattern repeats to the body. You may also need a longer chain for the handle.
- Lining (Optional): For very tiny items or if you want to ensure nothing falls through the lace, you could sew a simple fabric lining for the inside of the bag.
This “Petal Lace” Mini Bag is a delightful project that combines elegance with the charm of handmade crochet. Enjoy creating this darling accessory!
Happy Crocheting!