by
by 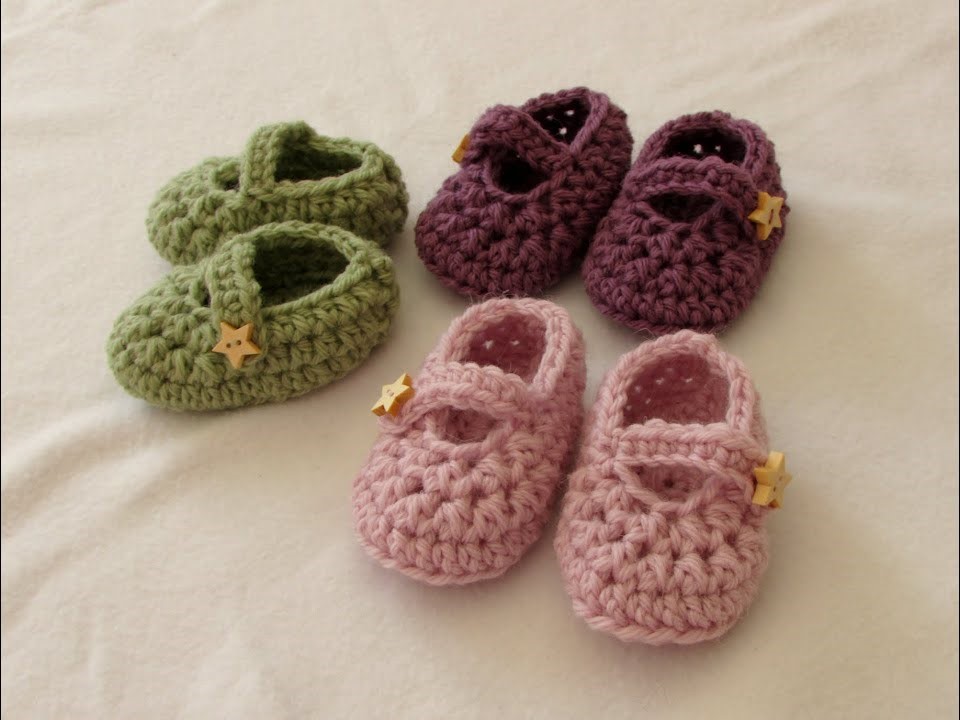
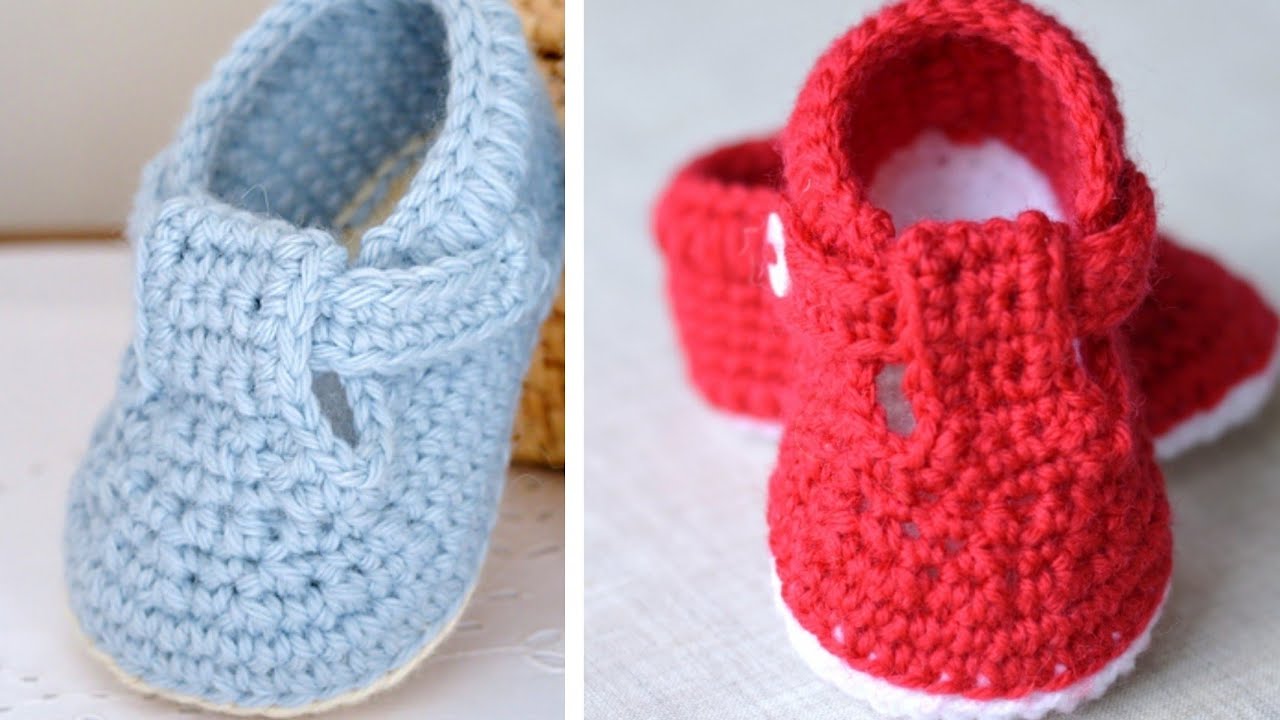
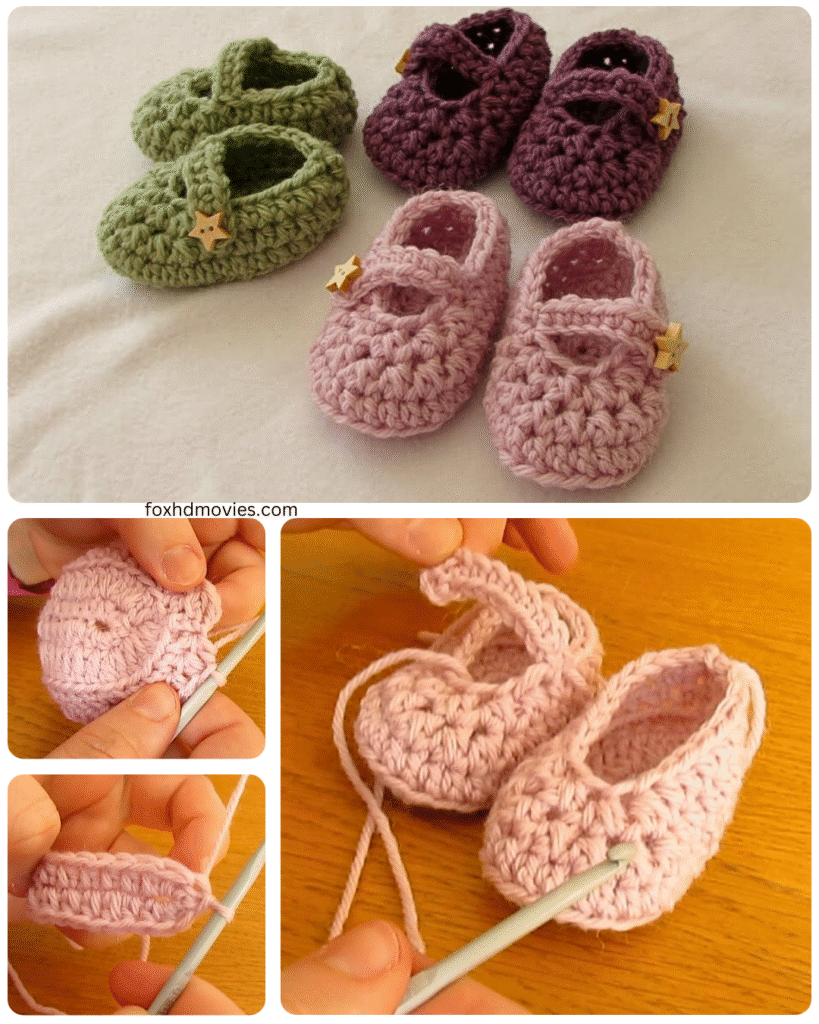
There’s something incredibly special about tiny baby feet, and dressing them up in handmade crochet shoes just adds to the cuteness overload! Mary Jane shoes are a classic for a reason – sweet, simple, and they actually tend to stay on little feet better than some other styles.
If you’re new to crochet or just want a quick and satisfying project, this easy baby Mary Jane pattern is perfect. Using basic stitches like single crochet and half double crochet, you can whip up a pair of these in an afternoon. They make a fantastic baby shower gift or a lovely addition to your own little one’s wardrobe.
Ready to get started? Let’s grab our hooks and some soft yarn!
Skill Level: Easy Sizes: Approximately 0-3 Months (adjustments noted for size) Finished Sole Length: Approx. 3.5 – 3.75 inches (9 – 9.5 cm)
Materials You’ll Need:
- Soft worsted weight yarn (Category 4) – Cotton or a soft acrylic works great. You’ll need less than 50g per pair.
- Crochet hook size H/8 (5.0 mm) – Or size needed to obtain gauge
- Tapestry needle for weaving in ends
- Scissors
- 2 small buttons (about 1/2 inch or 1.25 cm)
- Stitch marker (optional, but helpful for rounds)
Abbreviations (US Terms):
- ch: chain
- st(s): stitch(es)
- sl st: slip stitch
- sc: single crochet
- hdc: half double crochet
- sc2tog: single crochet 2 together (decrease)
- BLO: back loop only
- FLO: front loop only
- FO: fasten off
Gauge: 4 hdc stitches x 3 rows = 1 inch (2.5 cm) in hdc. Getting gauge is important for sizing! Make a quick swatch.
Notes:
- This pattern is worked in rounds for the sole and part of the upper, then in rows for the toe shaping and strap.
- Join rounds with a slip stitch to the first stitch of the round unless otherwise instructed.
- Ch 1 at the beginning of hdc/sc rounds does NOT count as a stitch unless specified.
- Use a stitch marker to keep track of the beginning of your rounds if needed.
Video tutorial
Let’s Get Crocheting!
Make 2 Soles:
We’ll start by creating an oval sole.
Round 1: Ch 9. Hdc in the 2nd ch from hook and in the next 6 chs. 6 hdc in the last ch. Now, working along the other side of the starting chain: hdc in the next 6 chs. 3 hdc in the last ch. Join with sl st to the first hdc. (21 sts)
- Tip: The 6 hdc in the last chain and 3 hdc in the first chain (which already has 1 hdc in it making it 4 total this round) create the curved ends of the oval.
Round 2: Ch 1 (does not count as a st). 2 hdc in the first st. Hdc in the next 6 sts. 2 hdc in the next 6 sts. Hdc in the next 6 sts. 2 hdc in the last st. Join with sl st to the first hdc. (31 sts)
- Optional for a slightly wider sole or if your gauge is tight: Ch 1, 2 hdc in first st, hdc in next 8 sts, 2 hdc in next 8 sts, hdc in next 8 sts, 2 hdc in last st. Join. (39 sts) – If you do this, your stitch counts for the upper will be different, so it’s easiest to stick to the main pattern for “easy”.

Make 2 Uppers (attaching to the Sole):
Now we’ll work the upper part of the shoe directly onto the sole.
Round 3: Ch 1 (does not count as a st). Working in the BLO of the stitches from Round 2, sc in each st around. Join with sl st to the first sc. (31 sc)
- Working in the BLO creates a nice defined edge for the base of the shoe.
Round 4: Ch 1 (does not count as a st). Sc in each st around. Join with sl st to the first sc. (31 sc)
Round 5: Ch 1 (does not count as a st). Sc in the first 8 sts. (This brings you towards the toe area). Now we will work the toe decreases in rows across the front of the shoe.
Toe Shaping (Worked in Rows):
Do NOT join Round 5. We are now working back and forth across the front part of the shoe.
Row 1: Ch 1, turn. Sc2tog over the first 2 sts. Sc in the next 7 sts. Sc2tog over the next 2 sts. (9 sts)
Row 2: Ch 1, turn. Sc2tog over the first 2 sts. Sc in the next 5 sts. Sc2tog over the next 2 sts. (7 sts)
Row 3: Ch 1, turn. Sc2tog over the first 2 sts. Sc in the next 3 sts. Sc2tog over the next 2 sts. (5 sts)
- Optional Row 4 for a more pointed toe: Ch 1, turn. Sc2tog over the first 2 sts. Sc in the next st. Sc2tog over the next 2 sts. (3 sts) – Stick to 3 rows for the easiest version.
Continuing the Upper (Worked in Rounds again):
Now we will work around the entire top edge of the shoe opening to create a neat finish.
Round 6 (or Round 5 if you skipped the last Toe Row): Ch 1. Sc around the entire top edge of the shoe opening, working along the sides of the toe rows and across the remaining stitches at the back. Aim for an even number of stitches. Join with sl st to the first sc. (Approx. 25-28 sts depending on how many sc you fit along the sides of the rows)
Round 7: Ch 1. Sc in each st around. Join with sl st to the first sc. (Same st count as Round 6)
Round 8: Ch 1. Sc in each st around. Join with sl st to the first sc. FO. (Same st count as Round 6)
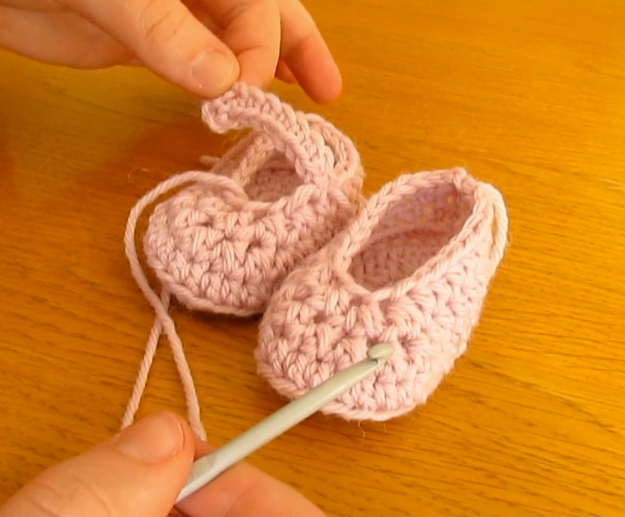
Make 2 Straps:
Now for the classic Mary Jane strap!
Attach yarn with a sl st to the right side of the shoe opening, about 2 rows down from the top edge (Roughly where a button would sit on the other side).
Row 1: Ch 15 (or desired length for strap). Sc in the 2nd ch from hook and in each ch across (14 sc). Sl st into the stitch on the opposite side of the shoe opening to secure the strap.
- Tip: Hold the strap across the shoe to make sure it’s the right length before you slip stitch. You want it to comfortably reach the other side.
Row 2: Ch 1, turn. Sc in each of the 14 sc along the strap. FO, leaving a tail for sewing on the button later. (14 sc)
Finishing:
- Weave in all your ends neatly using your tapestry needle.
- Try the shoe on a baby doll or your hand to determine the best placement for the button on the opposite side of the strap attachment.
- Using the yarn tail left from the strap (or a new piece of yarn), sew the button securely onto the shoe where the strap will comfortably reach across. The button should fit through the gap between the sc stitches on the strap.
- Repeat for the second shoe.
Sizing Adjustments:
- Larger Size (e.g., 3-6 months): Start with a longer initial chain (e.g., ch 12 or 14). Add more increase rounds to the sole. You may also need to add more rows to the upper before starting the toe decreases, and potentially add an extra decrease row if needed. Use a slightly larger hook (e.g., I/9 – 5.5 mm) or slightly thicker yarn.
- Smaller Size (e.g., Newborn): Start with a shorter initial chain (e.g., ch 7 or 8). You might only need one increase round for the sole. Reduce the initial number of sc before starting the toe decreases, and potentially one less decrease row for the toe. Use a smaller hook (e.g., G/7 – 4.5 mm) or lighter weight yarn.
Always check the measurement of the sole against a size chart or existing baby shoe for accuracy.