by
by 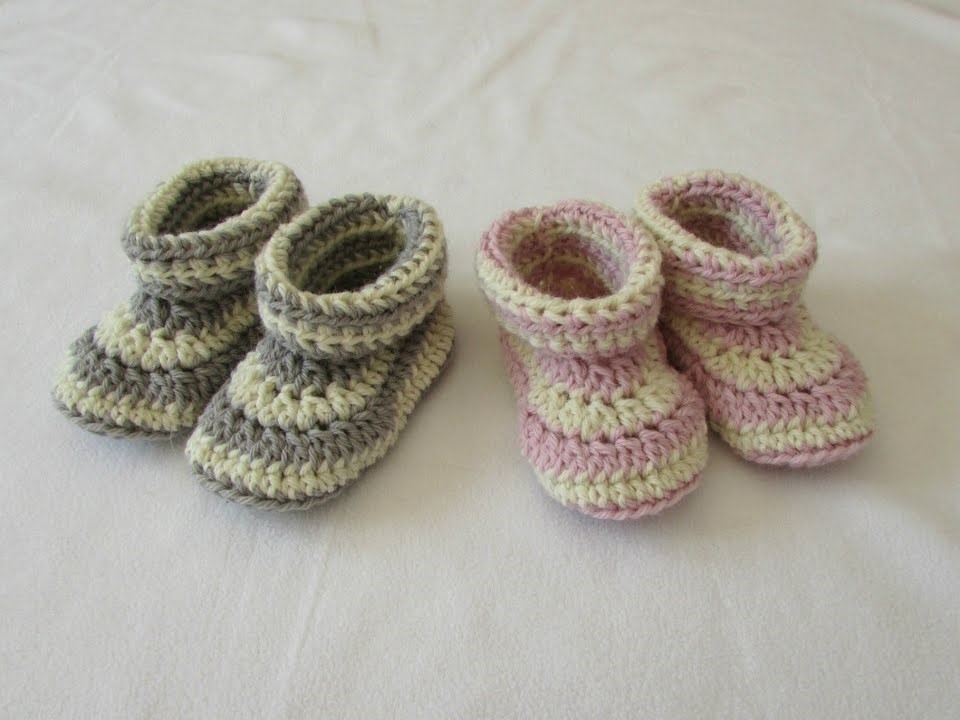
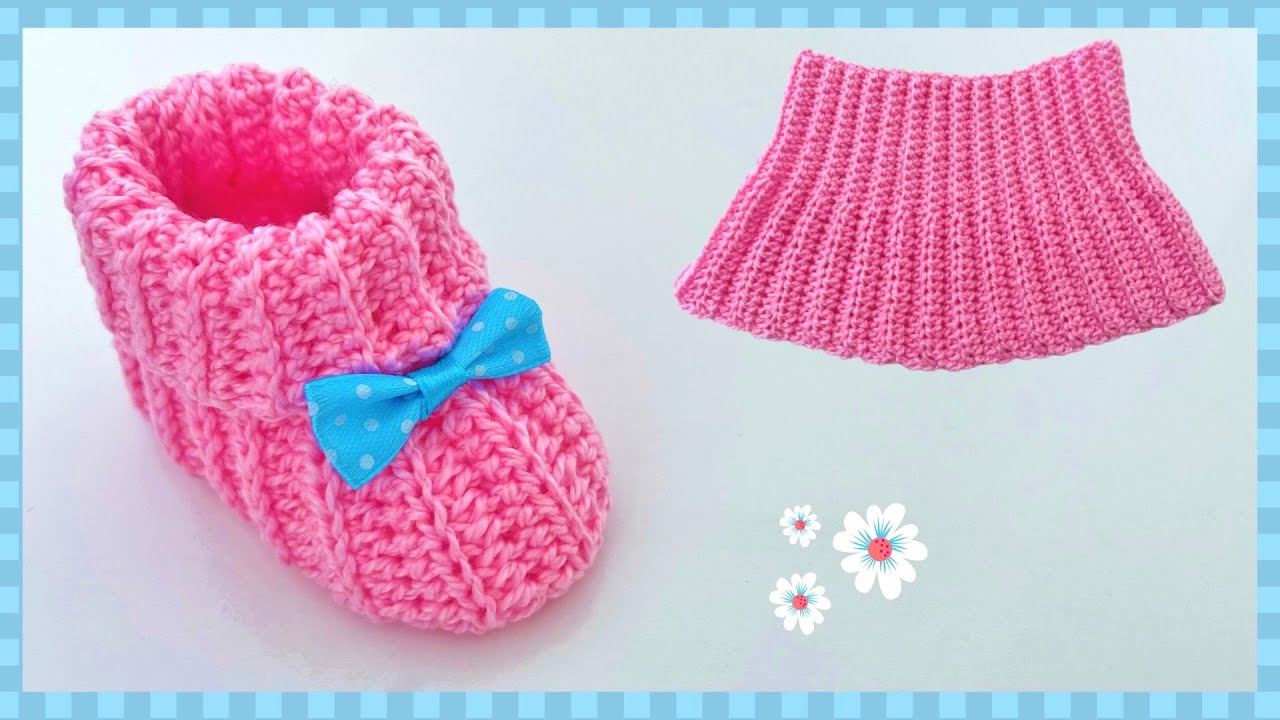
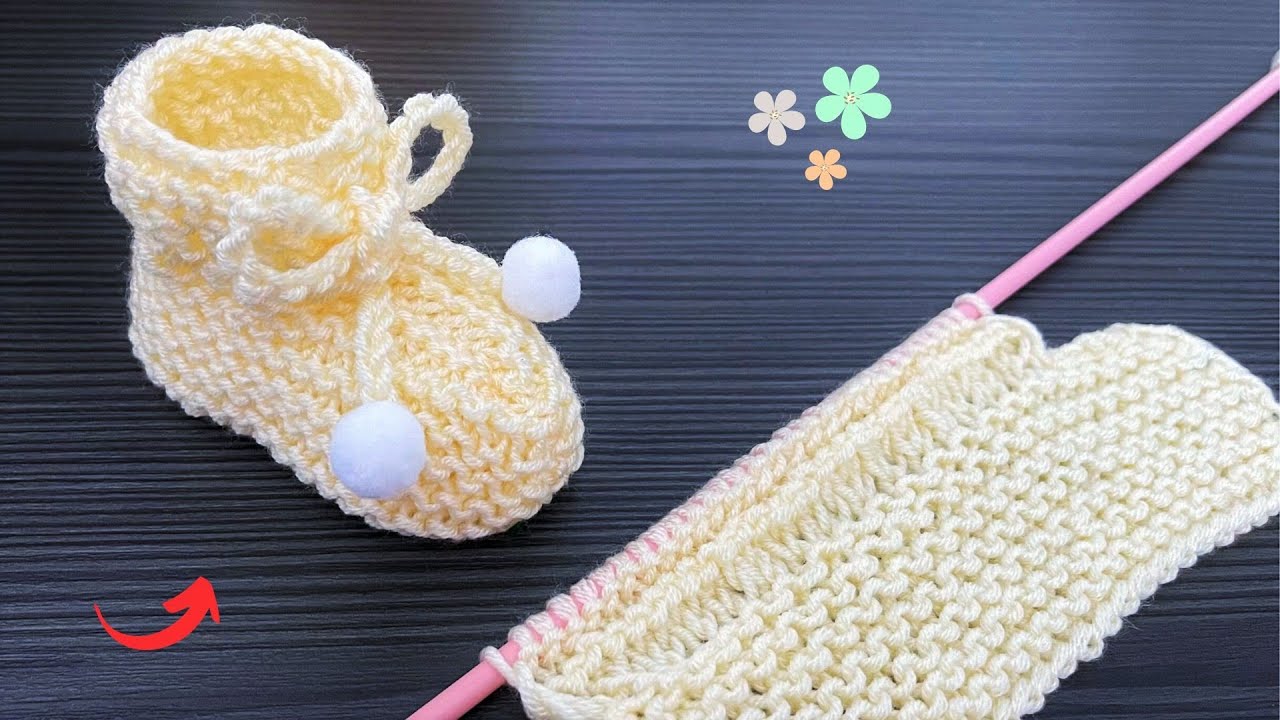
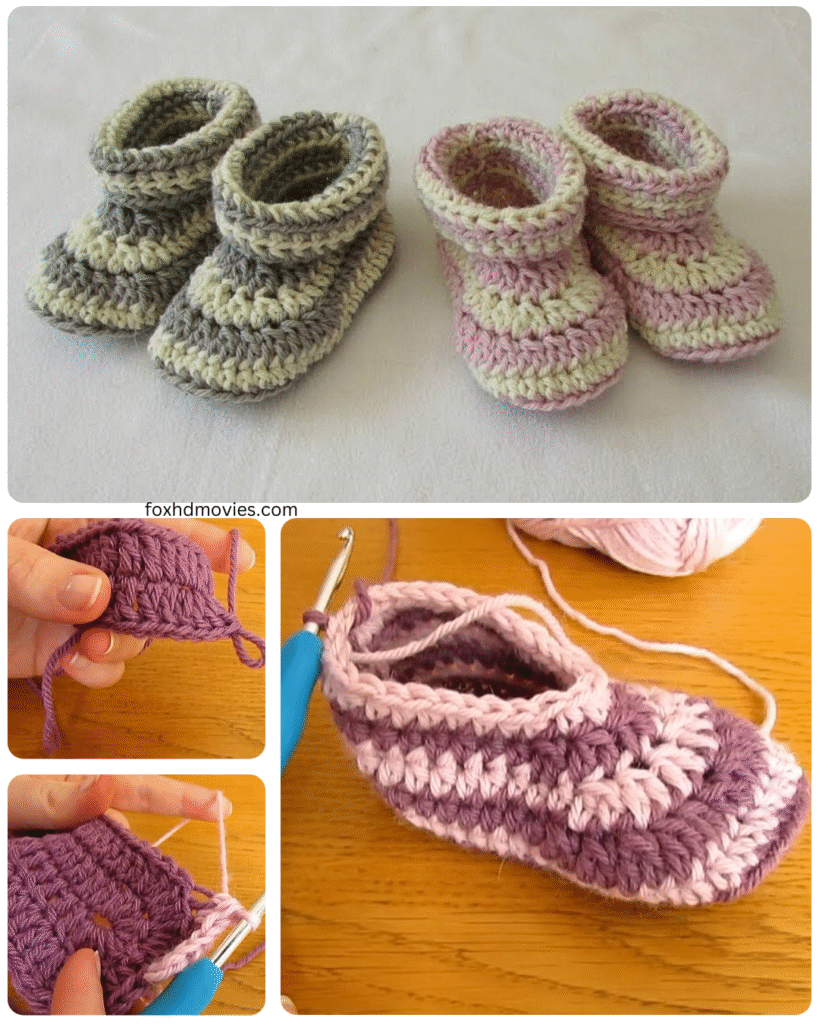
There’s something undeniably heartwarming about tiny feet clad in handmade treasures. Crochet booties are a classic for a reason – they’re quick to work up, make for perfect gifts, and offer a wonderful opportunity to practice various crochet techniques. This pattern will guide you through creating a sweet and practical pair of cuffed booties for children, featuring a cozy ribbed cuff that helps them stay put on active little feet.
This pattern is designed for ambitious beginners and beyond. If you know your basic stitches, you can definitely make these!
Why You’ll Love This Pattern:
- Adorable Design: The simple construction and ribbed cuff create a timeless look.
- Practicality: The cuff helps keep booties on, a common challenge with little ones!
- Customizable: Easily adjust colors and add embellishments to make them unique.
- Skill Builder: Practice working in rounds, increasing and decreasing, and creating ribbing.
Materials You’ll Need:
- Worsted weight yarn in your chosen color(s). Cotton or a cotton blend is great for breathability, while acrylic or a wool blend offers warmth.
- Crochet hook in a size appropriate for your yarn (check the yarn label for a recommendation, but a G/4.00mm or H/5.00mm is a common choice for worsted weight). You might need to go up or down a hook size to meet gauge.
- Tapestry needle for weaving in ends.
- Scissors.
- Stitch marker (optional, but highly recommended for working in rounds).
Gauge:
Achieving the correct gauge is important to ensure your booties turn out the intended size. Work a swatch in half double crochet (hdc).
- [Insert a specific gauge measurement here, e.g., “14 hdc and 10 rows = 4 inches (10 cm)”]
If your swatch is too small, try a larger hook. If your swatch is too large, try a smaller hook.
Abbreviations (US Terms):
- ch: chain
- sl st: slip stitch
- sc: single crochet
- hdc: half double crochet
- dc: double crochet
- inc: increase (work 2 stitches in the same stitch)
- dec: decrease (work 2 stitches together – sc2tog, hdc2tog, etc.)
- BLO: back loop only
- st(s): stitch(es)
- rnd: round
- fo: fasten off
Special Stitches:
- Half Double Crochet Two Together (hdc2tog): Yarn over, insert hook into the next stitch, yarn over and pull up a loop (3 loops on hook). Yarn over, insert hook into the next stitch, yarn over and pull up a loop (5 loops on hook). Yarn over and pull through all 5 loops on your hook.
Video tutorial
Pattern Notes:
- This pattern is worked in joined rounds unless otherwise specified.
- Chain stitches at the beginning of rounds typically do not count as a stitch.
- Join rounds with a slip stitch to the first stitch of the round.
- Numbers in parentheses at the end of a round indicate the total stitch count for that round.
Sizing:
This pattern will provide instructions for a few common child sizes. Keep in mind that gauge and yarn choice can affect the final size. Measuring the child’s foot is always the best way to determine the appropriate size.
- Newborn (approx. 3-3.5 inches sole length)
- 3-6 Months (approx. 3.5-4 inches sole length)
- 6-12 Months (approx. 4-4.5 inches sole length)
Let’s Get Started!
(Instructions will be provided for each size, with stitch counts adjusted accordingly. The following is a general outline of the construction.)

Sole (Make 2):
The sole is worked in oval rounds. We’ll start with a foundation chain and work around both sides.
- Rnd 1: Chain [number] (this will vary by size). Hdc in the 2nd chain from the hook and in each chain across until the last chain. Work [number] hdc in the last chain. Now, working along the opposite side of the foundation chain, hdc in each chain across until the last chain. Work [number] hdc in the last chain. Join with a sl st to the first hdc. ([stitch count])
- Rnd 2: Ch 1. Inc in the first stitch. Hdc in the next [number] stitches. Work [number] inc in the next [number] stitches. Hdc in the next [number] stitches. Work [number] inc in the last [number] stitches. Join with a sl st to the first hdc. ([stitch count])
- Rnd 3: Ch 1. Inc in the first stitch. Hdc in the next [number] stitches. *Inc in the next stitch, hdc in the next stitch.* Repeat from * to * [number] times. Hdc in the next [number] stitches. *Inc in the next stitch, hdc in the next stitch.* Repeat from * to * [number] times. Join with a sl st to the first hdc. ([stitch count])
- Continue increasing in subsequent rounds as needed to create the desired sole length for your chosen size. Refer to the approximate sole lengths provided in the sizing section. Each increase round will typically involve strategically placed increases around the curves of the oval.
Body of the Bootie:
Now we’ll start building up the sides of the bootie. We’ll typically work in the back loop only for the first round to create a defined edge for the sole.
- Rnd 4: Ch 1. Working in the BLO, hdc in each stitch around. Join with a sl st to the first hdc. ([stitch count])
- Rnd 5 – [Number]: Ch 1. Hdc in each stitch around. Join with a sl st to the first hdc. ([stitch count]) Repeat this round until the body of the bootie reaches just below the ankle bone.

Shaping the Toe:
We’ll now decrease stitches to shape the front of the bootie.
- Rnd [Number]: Ch 1. Hdc in the next [number] stitches. Hdc2tog [number] times. Hdc in the remaining stitches around. Join with a sl st to the first hdc. ([stitch count])
- Rnd [Number]: Ch 1. Sc in the next [number] stitches. Sc2tog [number] times. Sc in the remaining stitches around. Join with a sl st to the first sc. ([stitch count])
- Continue decreasing in subsequent rounds as needed until the toe is shaped. The number and placement of decreases will vary by size.
Creating the Cuff:
The cuff is typically worked directly onto the top edge of the bootie opening. We’ll create ribbing by working in the back loop only.
- Row 1: Attach yarn for the cuff with a sl st to the back of the bootie opening. Ch [number] (this will be the height of your cuff when folded). Sc in the 2nd chain from the hook and in each chain across. Sl st into the next 2 stitches on the bootie opening. Do not turn. ([number] sc sts)
- Row 2: Skip the 2 sl sts. Working in the BLO, sc in each sc across. Ch 1, turn. ([number] sc sts)
- Row 3: Working in the BLO, sc in each sc across. Sl st into the next 2 stitches on the bootie opening. Do not turn. ([number] sc sts)
- Repeat Rows 2 and 3 around the entire opening of the bootie. You will end on a Row 2.

Joining the Cuff:
Now we’ll seam the short edges of the cuff together to form a tube.
- Fold the cuff so the two short edges meet.
- Working through the back loop of the last row and the starting chain of the cuff, sl st the two edges together neatly.
- Fo and weave in the end.
Finishing:
- Weave in all remaining loose ends securely using your tapestry needle.
- Turn the cuff down.
- Repeat all steps to make the second bootie.
Optional Embellishments:
- Add a little crochet tie or ribbon threaded through stitches around the ankle.
- Sew on a cute button or appliqué.
- Embroider initials or a simple design onto the cuff.