 by
by 
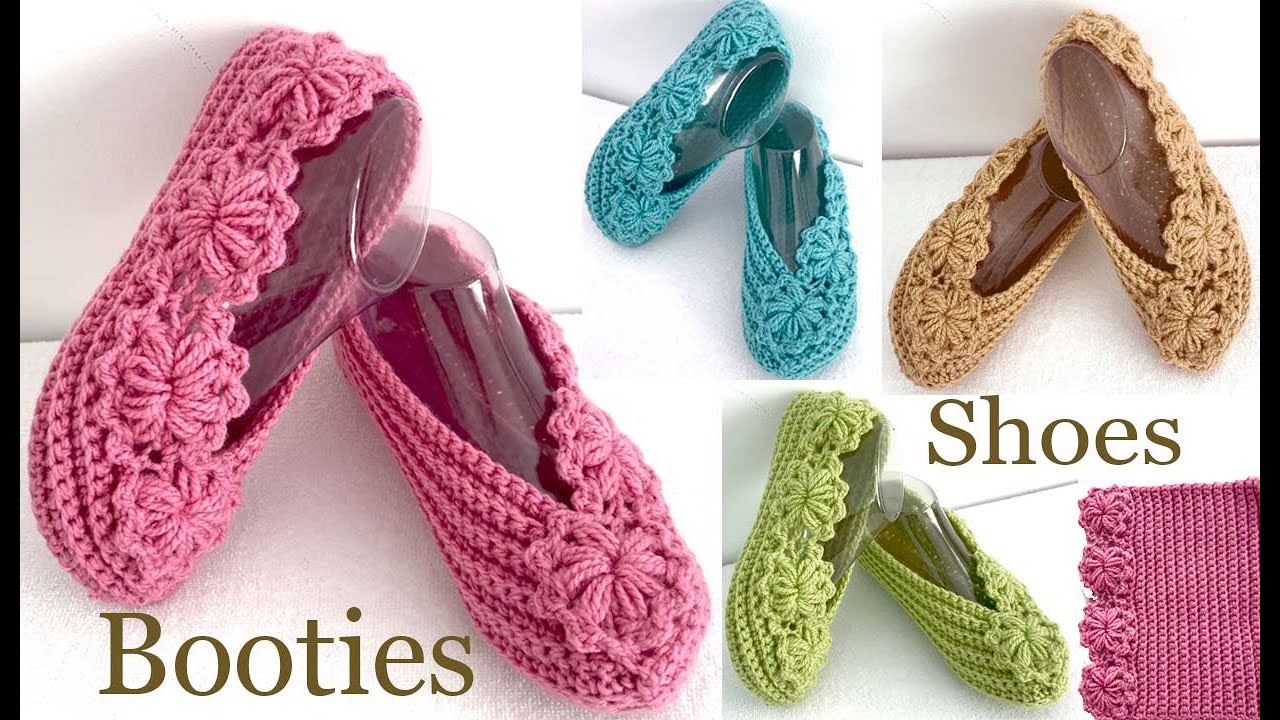
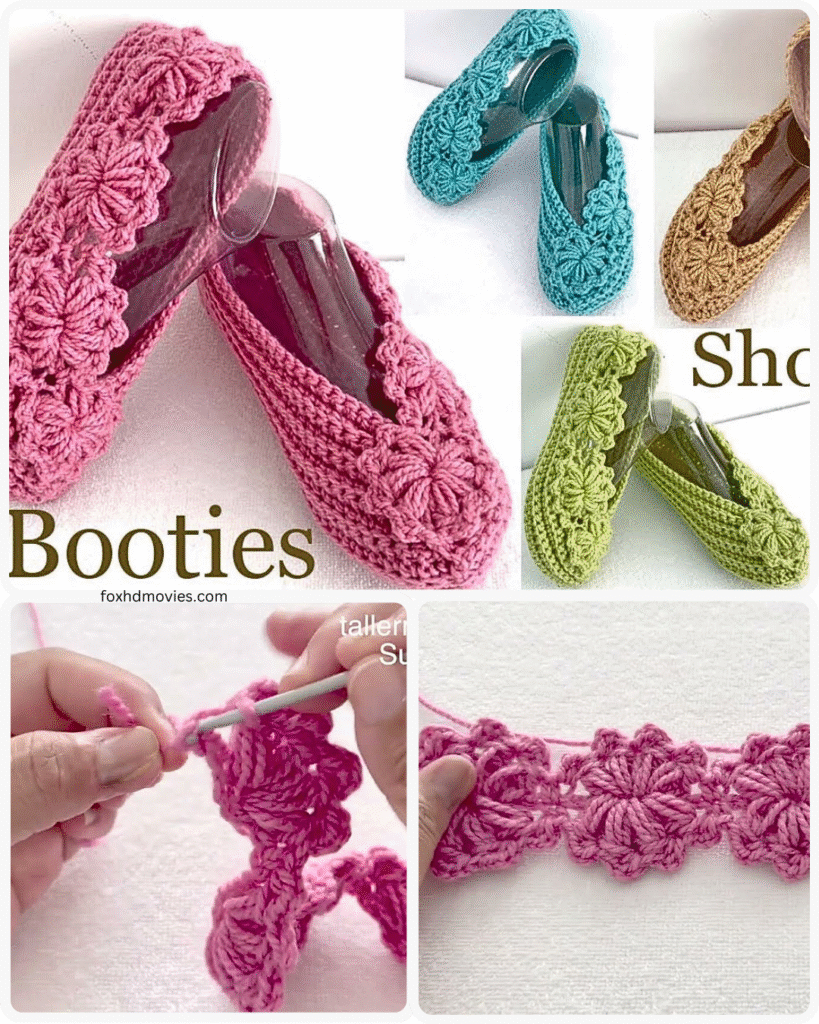
This pattern will guide you through creating a pair of cozy slippers using basic crochet stitches. The design is simple and customizable to fit any size foot. These slippers are not only a joy to make but also provide warmth and comfort, making them perfect for lounging at home. The pattern’s versatility allows you to personalize them with various colors, yarns, and embellishments, making each pair unique.
Materials
- Yarn: Worsted weight yarn (approximately 200-300 yards). The amount of yarn can vary based on the size of the slippers and the thickness of the yarn. Consider using a soft, durable yarn for added comfort and longevity.
- Crochet Hook: Size H-8 (5 mm) or size needed to obtain gauge. The hook size is crucial for achieving the correct gauge and ensuring your slippers fit properly. If your gauge doesn’t match, experiment with slightly larger or smaller hooks.
- Scissors
- Yarn Needle: A yarn needle with a large eye is essential for weaving in ends and seaming the slipper pieces together.
- Stitch markers: (optional) These can be helpful for marking the beginning of rows or specific points in your work, especially for beginners.
- Non-slip grip: (optional, such as fabric paint or adhesive grips) Adding a non-slip grip to the soles is highly recommended for safety, especially on smooth floors. You can find specialized fabric paints or purchase pre-made adhesive grips designed for footwear.
Gauge
- 4 inches = 14 half double crochet stitches and 10 rows. Achieving the correct gauge is important for ensuring your slippers are the intended size. If your gauge is off, your slippers may be too large or too small. Take the time to crochet a small swatch (a sample piece) and measure it before starting the main project.
Abbreviations
- Ch: Chain
- Hdc: Half double crochet
- Hdcblo: Half double crochet in the back loop only
- Sc: Single crochet
- Sl st: Slip stitch
- St(s): Stitch(es)
- Turn: Turn your work
Sizing
The size of these slippers is easily customizable. You will crochet a rectangle, and its dimensions will determine the slipper size. This method allows you to create slippers that perfectly fit any foot, from children to adults.
- Length: Measure the length of your foot from toe to heel. This measurement will be the length of your rectangle. For the most accurate measurement, place your foot on a piece of paper and trace around it. Then, measure the longest distance.
- Width: The width of the rectangle should be about half the circumference of your foot at the widest point. To find this measurement, wrap a measuring tape around the widest part of your foot (usually around the instep) and divide that number in half.

Pattern Instructions
Make two rectangles following the instructions below:
Foundation Chain
- Chain the number of stitches equal to the length of your foot. The foundation chain is the base of your rectangle, so ensure it’s the correct length. A slightly stretchy chain can provide a bit more flexibility in the final fit.
Body of the Slipper
- Row 1: Skip the first chain, hdc in the back bump of each chain; turn. (You will have one less stitch than your starting chain). Crocheting into the back bump creates a neater edge.
- Row 2: Ch 1, hdc in each stitch across; turn.
- Row 3: Ch 1, hdcblo in each stitch across; turn. Working in the back loop only creates a ribbed texture, adding visual appeal and flexibility to the slipper.
- Rows 4-: Repeat Row 3 until the piece measures the desired width. Continue repeating Row 3, checking the width against your foot measurement periodically.

Finishing the Rectangle
- Fasten off, leaving a long tail of yarn (approximately 20-24 inches) for seaming. The long tail is crucial for seaming the slipper together. Ensure it’s long enough to avoid having to join more yarn later.
Assembly
- Folding the Rectangle:
- Lay the rectangle flat with the wrong side facing up. This ensures the seams are on the inside of the finished slipper.
- Fold the bottom third of the rectangle up. This fold forms the toe of the slipper.
- Seaming the Toe:
- Using the yarn needle and the long tail, whip stitch or slip stitch the folded edge closed to create the toe of the slipper. Choose the seaming method you prefer; both whip stitch and slip stitch create a strong seam. For a decorative touch, you can use a contrasting yarn color for seaming.
- Seaming the Heel:
- Fold the top two-thirds of the rectangle down over the toe section. This creates the basic slipper shape.
- Seam the back of the slipper using the whip stitch or slip stitch, starting from the heel and going towards the ankle opening. Seam about two-thirds of the way. This opening allows your foot to slip in and out comfortably.
- Finishing:
- Weave in all loose ends securely. This step is essential for a neat and durable finish. Use your yarn needle to weave the ends back into the fabric of the slipper, ensuring they won’t unravel.
- Repeat steps 1-4 to make the second slipper.
- (Optional) Add non-slip grip to the soles of the slippers. For added safety and durability, consider applying a non-slip treatment to the soles. This will prevent slipping and extend the life of your slippers.