 by
by 
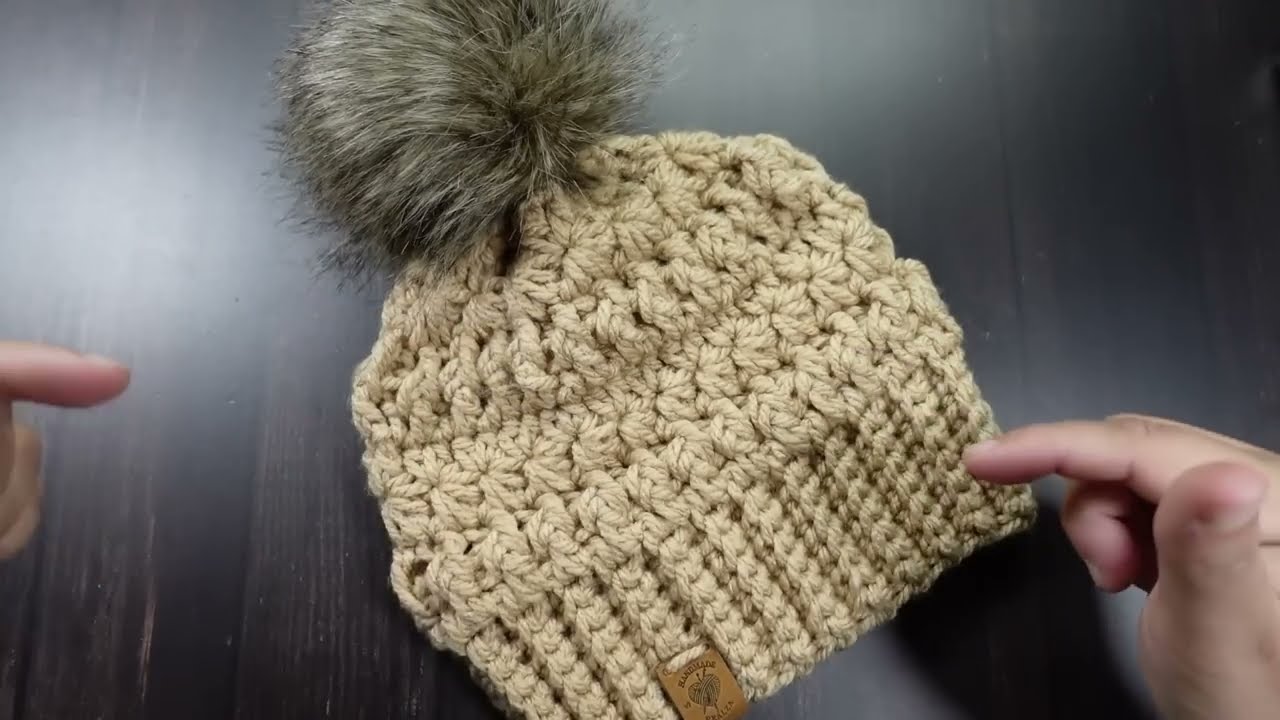
This pattern provides instructions for crocheting a simple hat that can be adapted for various sizes, from children to adults. The hat is worked in rounds, starting from the top and working down, creating a seamless and comfortable fit. This design is excellent for beginners and allows for a wide range of customization, making it a versatile project for anyone wanting to crochet a hat.
Materials
- Worsted weight yarn: The amount of yarn needed varies depending on the hat size. For a baby hat, approximately 100 yards should suffice, while an adult hat may require up to 200 yards. Consider using a soft, durable yarn that feels comfortable against the skin. Merino wool, acrylic blends, or superwash wool are popular choices.
- Crochet hook size H-8 (5 mm): This is a common hook size for worsted weight yarn and provides a good balance between stitch definition and fabric drape. However, always check your gauge and adjust the hook size if necessary to achieve the desired results.
- Yarn needle: A yarn needle with a large eye is essential for weaving in loose ends, ensuring a neat and professional finish.
- Scissors: Sharp scissors are needed for cutting the yarn cleanly.
- Stitch marker (optional but recommended): A stitch marker helps to keep track of the beginning of each round, especially when working in continuous spirals. This is particularly useful for beginners or when working on larger projects.

Gauge
- 4 inches = 14 half double crochet (hdc) stitches and 10 rounds. It’s crucial to check your gauge before starting the project. If you have too many stitches in 4 inches, your hat will be smaller than intended; if you have too few, it will be larger. To check your gauge, crochet a small swatch (a sample piece) of about 4×4 inches using the hdc stitch and the hook you plan to use. Then, measure the number of stitches and rounds within a 4-inch square. If your gauge doesn’t match, adjust your hook size: use a smaller hook for a tighter gauge (more stitches) and a larger hook for a looser gauge (fewer stitches).
Abbreviations
- ch – chain
- hdc – half double crochet
- inc – increase (2 hdc in the same stitch)
- sl st – slip stitch
- st(s) – stitch(es)
Sizes
The following measurements are approximate and serve as a general guideline. Keep in mind that head sizes can vary significantly within each age group, so it’s always best to measure the head circumference for the most accurate fit. This will ensure that the hat is comfortable and fits well.
| Size | Head Circumference | Approx. Age |
|---|---|---|
| Baby | 16-18 inches (40-45 cm) | 6-12 months |
| Toddler | 18-20 inches (45-50 cm) | 1-3 years |
| Child | 20-22 inches (50-55 cm) | 4-10 years |

Pattern
Instructions are the same for all sizes, with variations in the number of rounds to achieve the desired dimensions.
- Magic Ring: Start with a magic ring. The magic ring provides a closed and neat beginning for the hat, eliminating the hole that can sometimes occur when starting with a traditional chain. If you are not comfortable with the magic ring, you can ch 2, and work the first round into the second chain from the hook.
- Round 1: Work 6 hdc into the magic ring. (6 sts) Ensure that your stitches are evenly spaced and not too tight.
- Round 2: 2 hdc in each st around. (12 sts) This round doubles the number of stitches, creating the initial shaping of the hat.
- Round 3: *hdc in the next st, 2 hdc in the next st* repeat from * to * around. (18 sts) This round introduces the increase pattern that will gradually expand the hat.
- Round 4: *hdc in the next 2 sts, 2 hdc in the next st* repeat from * to * around. (24 sts) The number of stitches between increases increases in each round.
- Round 5: *hdc in the next 3 sts, 2 hdc in the next st* repeat from * to * around. (30 sts)
- Round 6: *hdc in the next 4 sts, 2 hdc in the next st* repeat from * to * around. (36 sts)
- Round 7: *hdc in the next 5 sts, 2 hdc in the next st* repeat from * to * around. (42 sts)
- Round 8: *hdc in the next 6 sts, 2 hdc in the next st* repeat from * to * around. (48 sts)
- Continue increasing in this manner (adding one more hdc before the increase each round) until you reach the required diameter for your chosen size. It’s crucial to measure the diameter of your circle as you go to ensure the hat will fit correctly. The diameter of the circle should be approximately:
- Baby: 4 inches
- Toddler: 5 inches
- Child: 6 inches
- Continue increasing in this manner (adding one more hdc before the increase each round) until you reach the required diameter for your chosen size. It’s crucial to measure the diameter of your circle as you go to ensure the hat will fit correctly. The diameter of the circle should be approximately:
- Body of the Hat: Once you reach the correct diameter, continue crocheting hdc in each stitch without increasing. This section forms the main body of the hat, providing the depth and coverage. Work even rounds until the hat reaches the desired length. The length from the crown to the brim is approximately:
- Baby: 4-5 inches
- Toddler: 5-6 inches
- Child: 6-7 inches
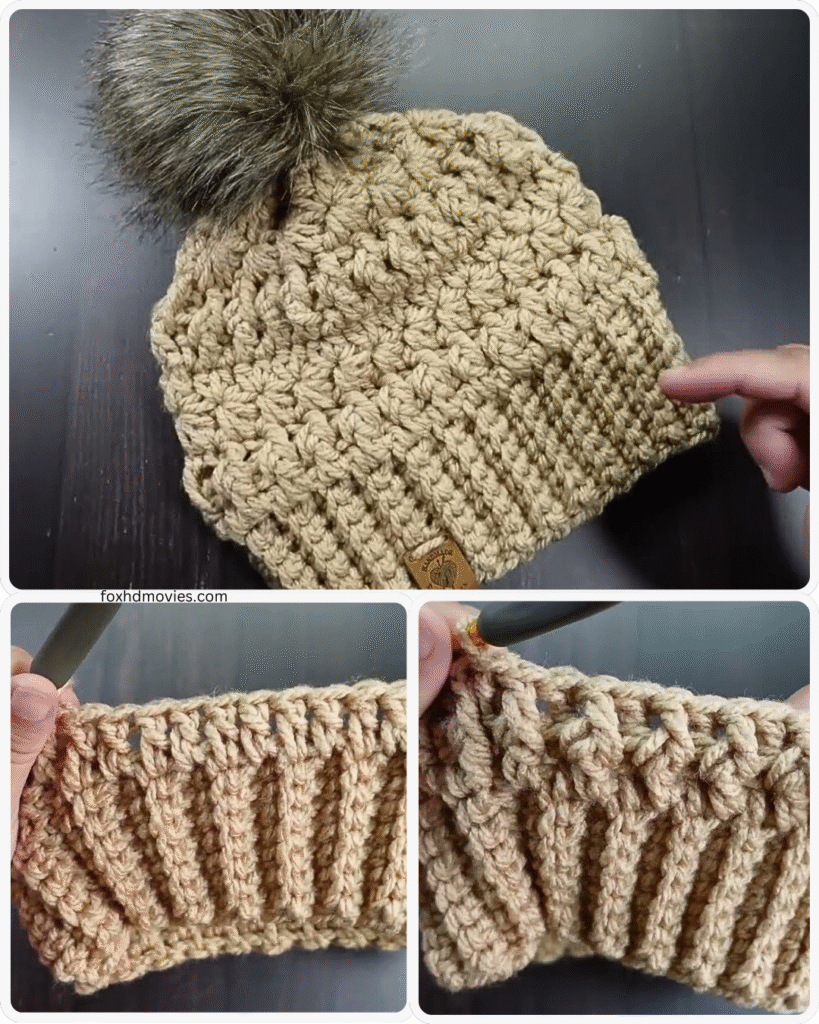
- Brim (Optional):
- For a simple brim, you can work a few rounds of single crochet (sc) or half double crochet (hdc). This creates a neat and finished edge.
- For a folded brim:
- Round 1: hdc in each st around.
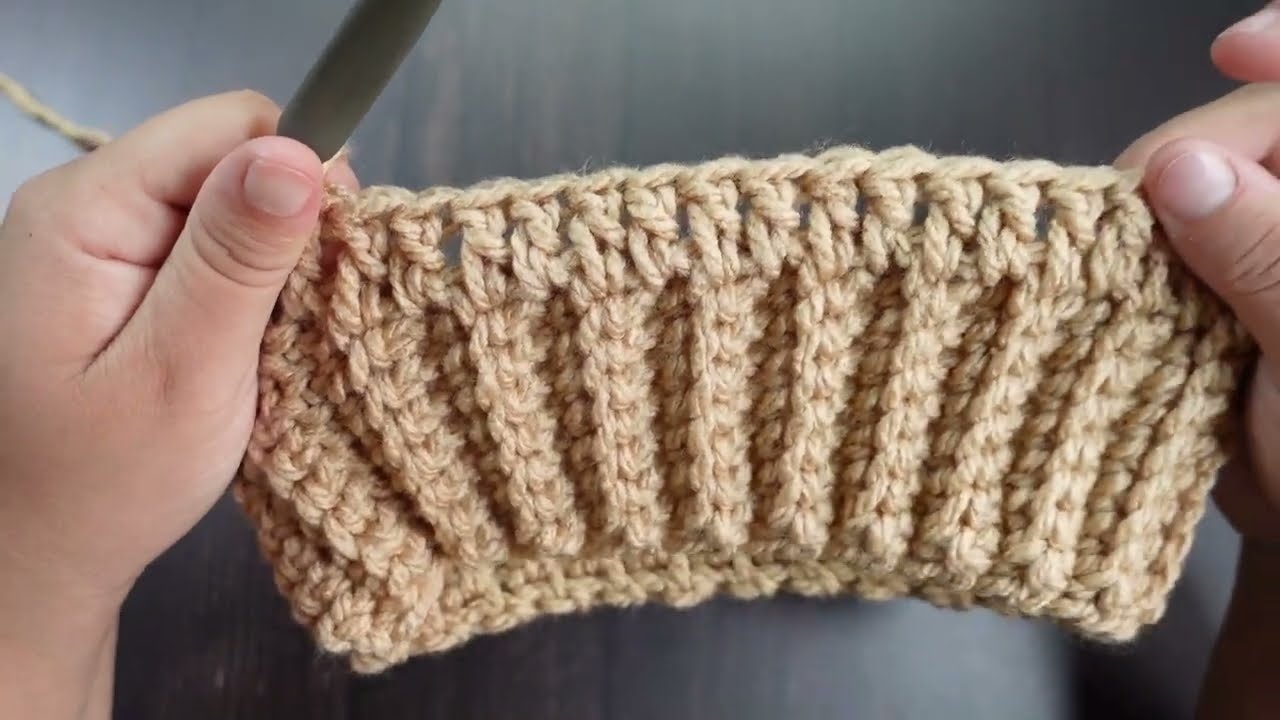
- Round 2-4: Ch 1, hdc in the back loop only of each st around. Working in the back loop only creates a ribbed texture that adds elasticity and a decorative touch to the brim.
- Fold the brim up and slip stitch to the hat. This method creates a thicker, more substantial brim that can be folded up for extra warmth or style.
- Finishing:
- Fasten off and weave in all loose ends securely using a yarn needle. This step is essential for a neat and durable finish.
- Optional: Add a pom-pom, tassels, or other embellishments. These additions can personalize the hat and add a touch of flair.