 by
by 
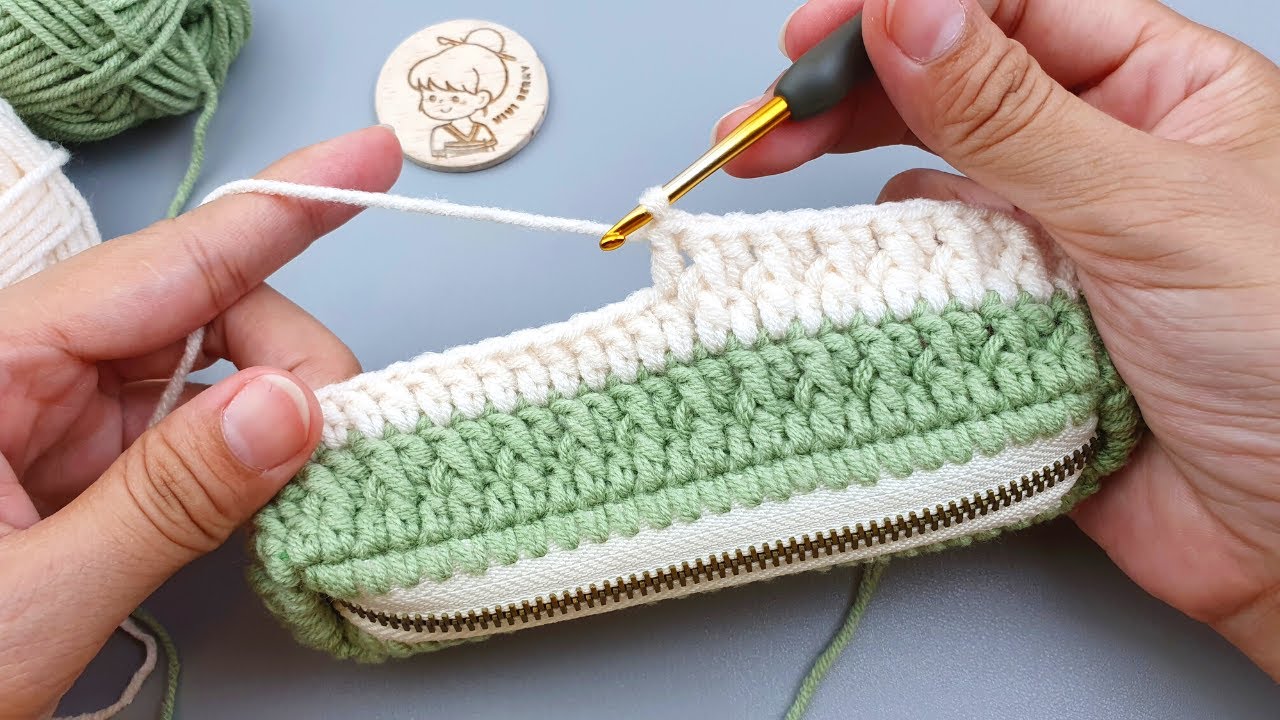
Finished Size (Approximate): 7 inches long x 3.5 inches tall x 2 inches deep (adjust by changing starting chain and number of rows)
Skill Level: Intermediate (requires knowledge of post stitches)
Materials:
- Yarn:
- Worsted weight (Aran/10 ply) cotton or cotton blend yarn in Color A (Green in image) – approximately 80-100 yards
- Worsted weight (Aran/10 ply) cotton or cotton blend yarn in Color B (Cream/Off-White in image) – approximately 60-80 yards
- Crochet Hook: G/6 (4.0 mm) or size needed to obtain gauge
- Zipper: 7-inch nylon or polyester zipper (matching Color B recommended for contrast)
- Tapestry Needle: For weaving in ends and sewing zipper
- Scissors
- Stitch Markers (optional but helpful)
Gauge (Important!): 15 half double crochet stitches and 12 rows = 4 inches (10 cm) For the ribbed section: 13 FPhdc/BPhdc stitches and 10 rows = 4 inches (10 cm). Always check your gauge and adjust your hook size if necessary to ensure your pouch turns out the correct size.
Abbreviations (US Terms):
- ch: chain
- sl st: slip stitch
- sc: single crochet
- hdc: half double crochet
- dc: double crochet
- FPhdc: front post half double crochet
- BPhdc: back post half double crochet
- st(s): stitch(es)
- Rnd: Round
- FO: Fasten off
Pattern Notes:
- The pouch is worked in continuous rounds for the base, then in joined rounds for the body.
- The ribbed texture is created using alternating Front Post Half Double Crochet (FPhdc) and Back Post Half Double Crochet (BPhdc) stitches.
- Ch 1 at the beginning of a round does not count as a stitch.
- Ch 2 at the beginning of a round counts as a FPhdc when starting a ribbed round.
- Color changes are made by completing the last yarn over of the last stitch of a round with the new color.
Part 1: Pouch Base (Color A)
The base is worked in continuous rounds to create an oval.
Rnd 1: With Color A, ch 26. 2 hdc in 3rd ch from hook (counts as first 3 hdc in corner). Hdc in next 22 chs. 5 hdc in last ch. Working down the other side of the starting chain: Hdc in next 22 chs. 3 hdc in the last ch (same ch as first hdc of the round). Do NOT join, continue to Rnd 2. (Total: 54 hdc) Place a stitch marker in the first hdc of the round to mark the beginning.
Rnd 2: 2 hdc in first hdc. Hdc in next 24 hdc. 2 hdc in next 3 hdc. Hdc in next 24 hdc. 2 hdc in next 2 hdc. (Total: 62 hdc) Move stitch marker to the first hdc of this round.
Rnd 3: 2 hdc in first hdc. Hdc in next 26 hdc. 2 hdc in next 2 hdc. Hdc in next 26 hdc. 2 hdc in next 2 hdc. (Total: 68 hdc) Move stitch marker to the first hdc of this round.
Rnd 4: Hdc in each hdc around. Join with a sl st to the first hdc of the round (the one with the stitch marker). (Total: 68 hdc) Your base should now be a flat oval.
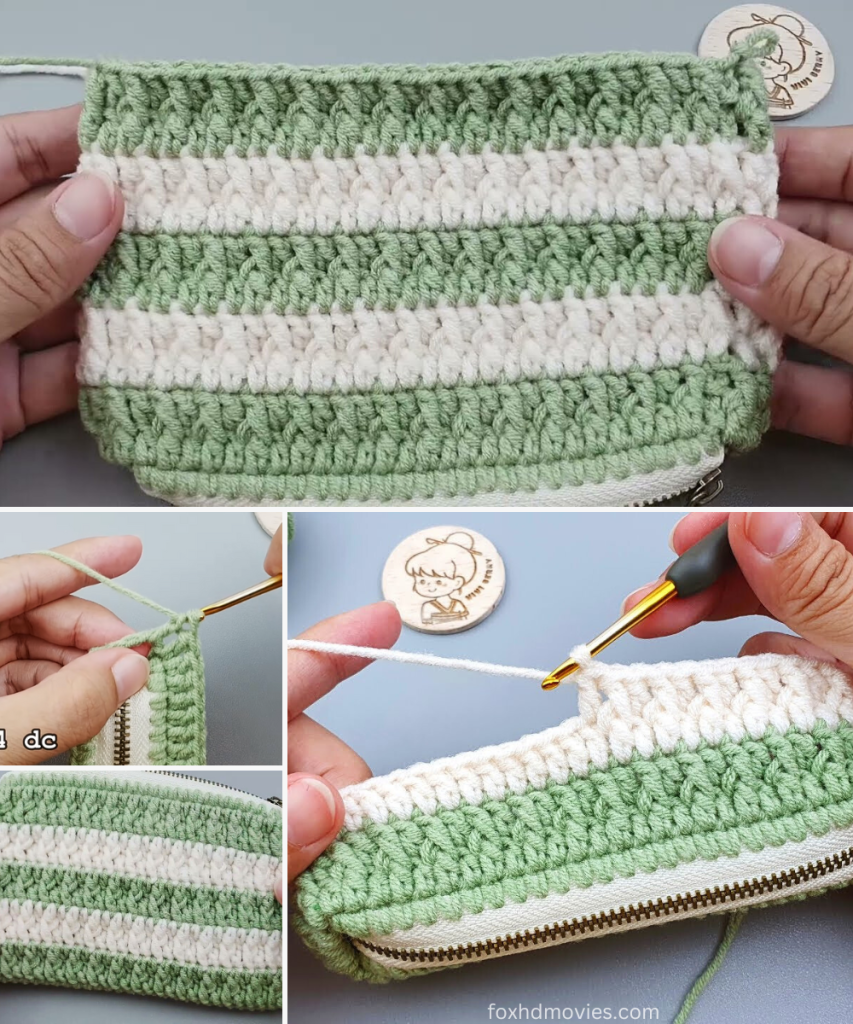
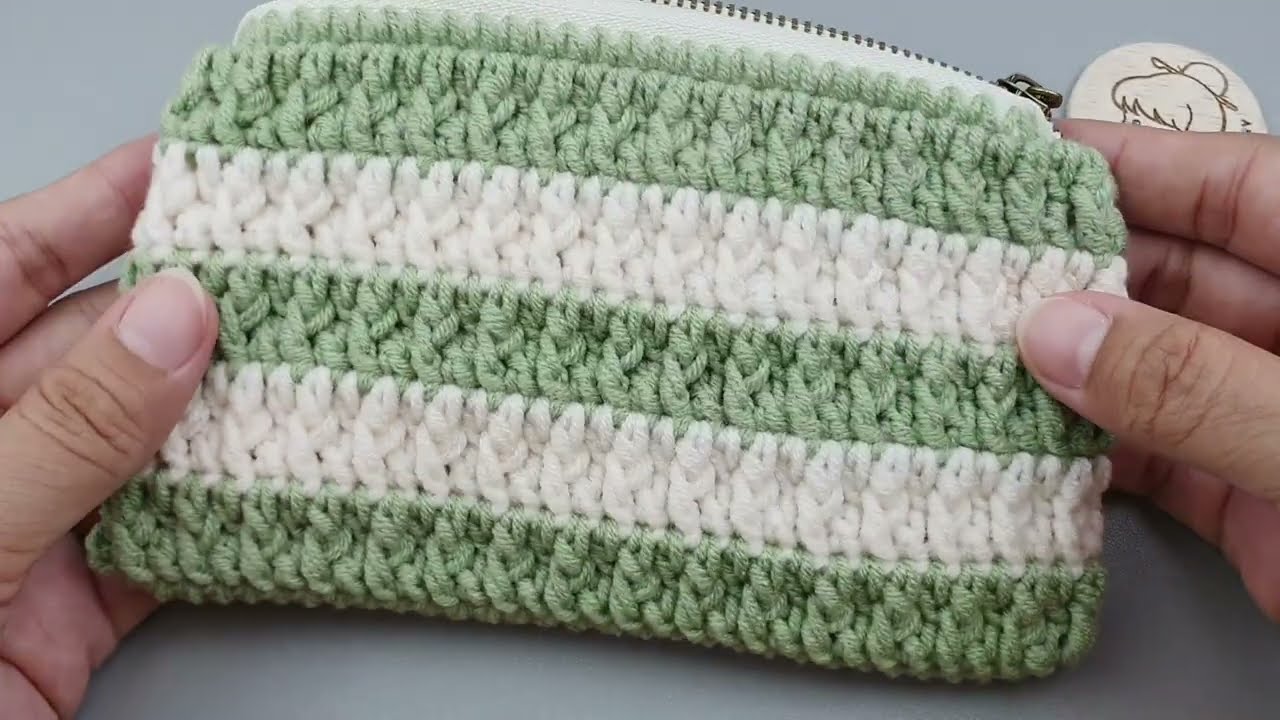
Part 2: Pouch Body – Ribbed Sections
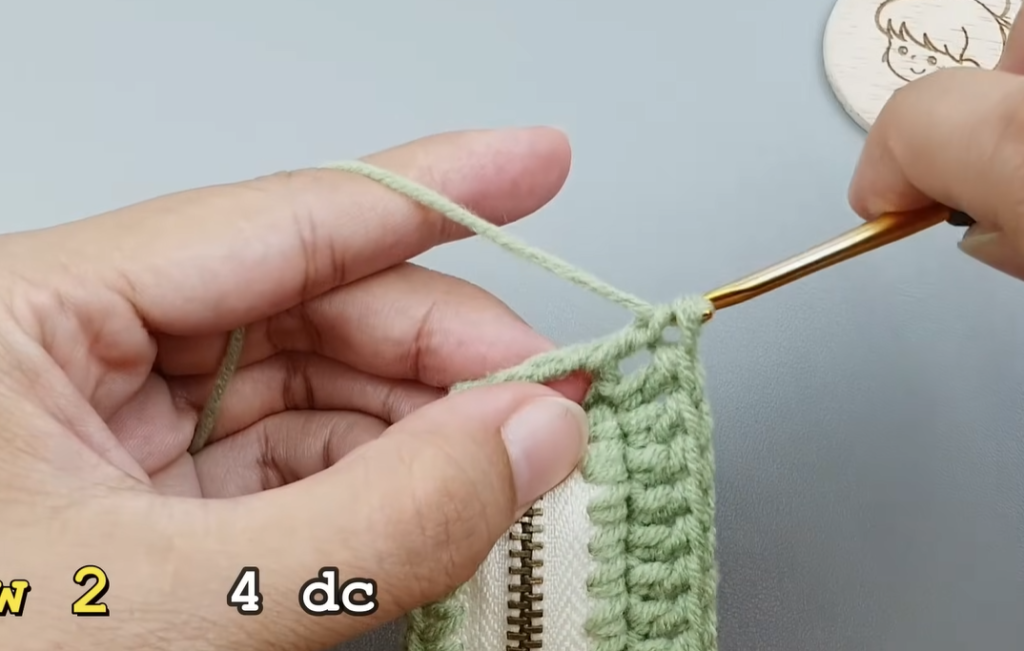
From this point, you will be working in joined rounds. The ch 2 at the beginning of a ribbed round counts as the first FPhdc.

Rnd 5 (Starting Ribbing – Color A): Ch 2 (counts as FPhdc). BPhdc around next st, FPhdc around next st. Repeat from * to * around. Join with a sl st to the top of the beginning ch 2. Make sure you alternate FPhdc and BPhdc correctly to form the ribbing. Your last stitch should be BPhdc. (Total: 68 stitches, 34 FPhdc, 34 BPhdc)
Rnd 6 – Rnd 8 (Color A): Ch 2 (counts as first FPhdc). Work post stitches according to the previous row’s pattern (FPhdc around FPhdc, BPhdc around BPhdc). Repeat from * to * around. Join with a sl st to the top of the beginning ch 2. This creates 4 rows of green ribbing. At the end of Rnd 8, change to Color B on the last yarn over of the sl st join.
Rnd 9 – Rnd 12 (Color B): With Color B, ch 2 (counts as first FPhdc). Work post stitches according to the previous row’s pattern. Repeat from * to * around. Join with a sl st to the top of the beginning ch 2. This creates 4 rows of cream ribbing.
Part 3: Top Edge (Color B)
This section creates a flat edge for sewing the zipper.
Rnd 13: With Color B, ch 1, sc in each stitch around. Join with a sl st to the first sc. (Total: 68 sc)
Rnd 14: Ch 1, sc in each sc around. Join with a sl st to the first sc. (Total: 68 sc)
FO, leaving a long tail (approx. 12-15 inches) for sewing in the zipper.
Part 4: Finishing
- Weave in all ends: Use your tapestry needle to neatly weave in any loose yarn tails.
- Prepare for Zipper: Lay your pouch flat. The top opening should be a flat rectangle.
- Attach Zipper:
- Position the zipper along the top opening of the pouch, centering it. The zipper tape should align with the sc rows you just made.
- Use stitch markers or pins to hold the zipper firmly in place.
- Using your tapestry needle and the long yarn tail (or a separate piece of matching yarn/strong thread), carefully hand-sew the zipper to the top edge of the pouch. Stitch through the fabric of the zipper tape and the top single crochet row of your pouch. Take small, even stitches for a clean and secure finish.
- Repeat for the other side of the zipper.
- You may want to backstitch a few times at the beginning and end of each side for extra security.
Enjoy your beautifully ribbed, handmade zipper pouch!
Video tutorial
Sizing Adjustments:
- To change length: Adjust the starting chain for Rnd 1. Each additional 2 chains will add approximately 1 inch to the length.
- To change height: Add or subtract rows in the ribbed body sections (Rnd 6-12).
- To change width/depth: Add or subtract rounds from the base (Rnd 2-4). Be mindful that adding more increase rounds will also increase the final stitch count for the body, so you’ll need to adjust the number of stitches you work in your ribbed rounds accordingly. Ensure your final stitch count for Rnd 4 is an even number to make the FPhdc/BPhdc pattern work smoothly.