by
by 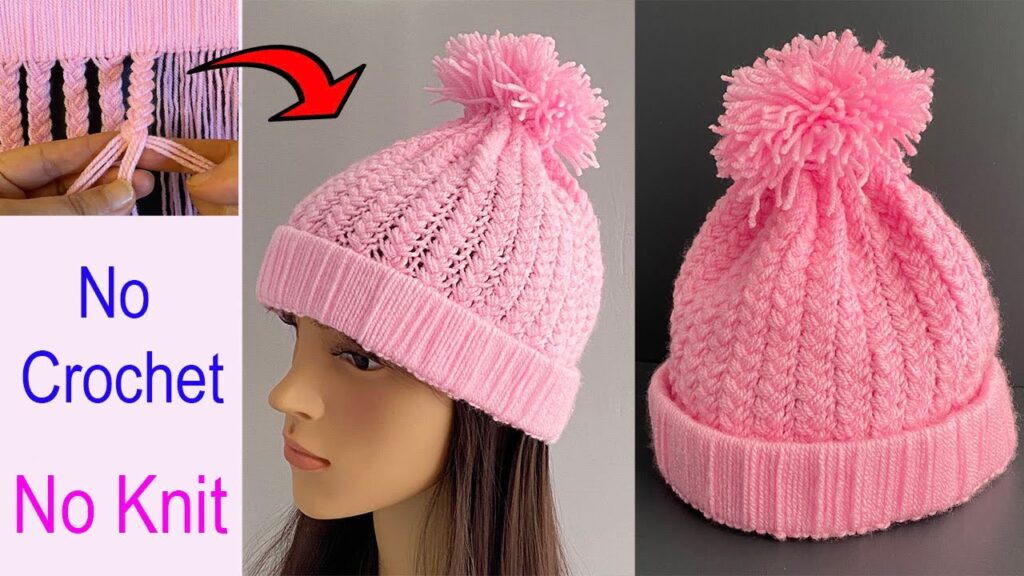
here is a detailed, step-by-step pattern for making a DIY Braided Beanie Hat without any crochet or knitting skills. This method uses fabric and some simple sewing (or fabric glue for a no-sew option).
Materials You’ll Need:
- Soft, Stretchy Fabric: Fleece, an old t-shirt (jersey knit), or any other fabric with good stretch will work best. You’ll need approximately 1/2 to 3/4 of a yard depending on the size of your head.
- Scissors: Sharp fabric scissors are recommended.
- Ruler or Measuring Tape: For accurate measurements.
- Pins or Fabric Clips (Optional but helpful): To hold fabric pieces together.
- Sewing Machine or Needle and Thread: For sewing the fabric pieces together.
- Fabric Glue (Optional): For a no-sew version, use a strong fabric glue that works on your chosen material.
- Paper or Cardstock (for template): To create pattern pieces.
- Pen or Marker: To draw on the template and fabric.

Step-by-Step Pattern:
Part 1: Creating the Beanie Body
- Measure Your Head:
- Use a flexible measuring tape to measure the circumference of your head where the beanie will sit. Write this measurement down (let’s call it Head Circumference).
- Measure the distance from the top of your head down to where you want the beanie to end on your forehead/neck. Write this measurement down (let’s call it Beanie Height).
- Create the Main Body Template:
- On your paper or cardstock, draw a rectangle.
- The width of the rectangle should be your Head Circumference plus 1 inch (for seam allowance if sewing, or for overlap if using fabric glue).
- The height of the rectangle should be your Beanie Height plus 1 inch (for seam allowance/overlap).
- Cut the Main Body Fabric:
- Fold your fabric in half, with the right sides facing each other if you are using a fabric with a distinct right and wrong side.
- Place your template on the folded fabric, aligning one of the longer edges with the fold.
- Pin or clip the template to the fabric to prevent it from shifting.
- Carefully cut out the rectangular shape through both layers of fabric. You will now have two identical rectangular pieces.
- Sew or Glue the Side Seam:
- Sewing Method: Place the two rectangular fabric pieces right sides together. Sew along one of the shorter edges (the height of your beanie) with a 1/2 inch seam allowance. This will create a tube.
- No-Sew Method (Fabric Glue): Lay one rectangular piece flat, wrong side up. Apply fabric glue along one of the shorter edges. Overlap the other rectangular piece on top, aligning the edges and pressing firmly to secure the glue. Allow the glue to dry completely according to the manufacturer’s instructions.
- Create the Top Closure:
- On your paper or cardstock, draw a circle or a slightly elongated oval. The diameter of the circle or the longer axis of the oval should be approximately 4-6 inches. The exact size depends on how gathered you want the top of your beanie to be. A larger circle will result in more gathers.
- Cut out this shape to create your top closure template.
- Cut the Top Closure Fabric:
- Fold your remaining fabric in half.
- Place your top closure template on the folded fabric.
- Cut out the shape through both layers of fabric. You will have two identical circular or oval pieces.
- Sew or Glue the Top Closure:
- Sewing Method: Place the two circular/oval fabric pieces right sides together. Sew around the edge with a 1/2 inch seam allowance, leaving a small opening (about 1-2 inches) for turning. Turn the piece right side out through the opening and then sew the opening closed.
- No-Sew Method (Fabric Glue): Apply fabric glue around the edge of one of the circular/oval pieces, leaving a small section unglued. Carefully place the other piece on top, aligning the edges and pressing firmly. Once dry, apply a small amount of glue to the unglued section and press to close.
- Attach the Top Closure to the Beanie Body:
- Sewing Method: Turn the main beanie body tube wrong side out. Pin the circular/oval top closure piece to the top opening of the tube, aligning the edges. You will need to gently gather the fabric of the tube as you pin to fit the circular shape. Sew all the way around with a 1/2 inch seam allowance.
- No-Sew Method (Fabric Glue): Turn the main beanie body tube wrong side out. Apply fabric glue around the top opening of the tube. Carefully place the circular/oval top closure piece on top, pressing down firmly. You will need to pleat or gather the fabric of the tube slightly to make it fit the circular shape. Allow the glue to dry completely.
Part 2: Creating and Attaching the Braids
- Cut Fabric Strips for Braids:
- Decide how many braids you want on your beanie. A good number is usually 4 to 6, depending on the look you prefer.
- For each braid, you will need three strips of fabric.
- Cut long strips of fabric. The length will depend on how long you want the braids to hang down. A good starting point is about 18-24 inches. You can always trim them later.
- The width of each strip can be between 1 to 2 inches, depending on how thick you want your braids to be.
- Make the Braids:
- Take three strips of fabric for one braid. Line up the ends at one side.
- Sewing Method: Sew the three strips together at the very top (about 1/2 inch from the end). This will create a secure starting point.
- No-Sew Method (Fabric Glue): Apply a small amount of fabric glue to the very top of the three strips and press them together to secure.
- Braid the three strips together just like you would braid hair. Keep the braid relatively loose for a more relaxed beanie look.
- Once you reach your desired braid length, secure the bottom end.
- Sewing Method: Sew the three strips together at the bottom end (about 1/2 inch from the end).
- No-Sew Method (Fabric Glue): Apply a small amount of fabric glue to the bottom end of the braid and press the strips together.
- Repeat this process to make the desired number of braids.
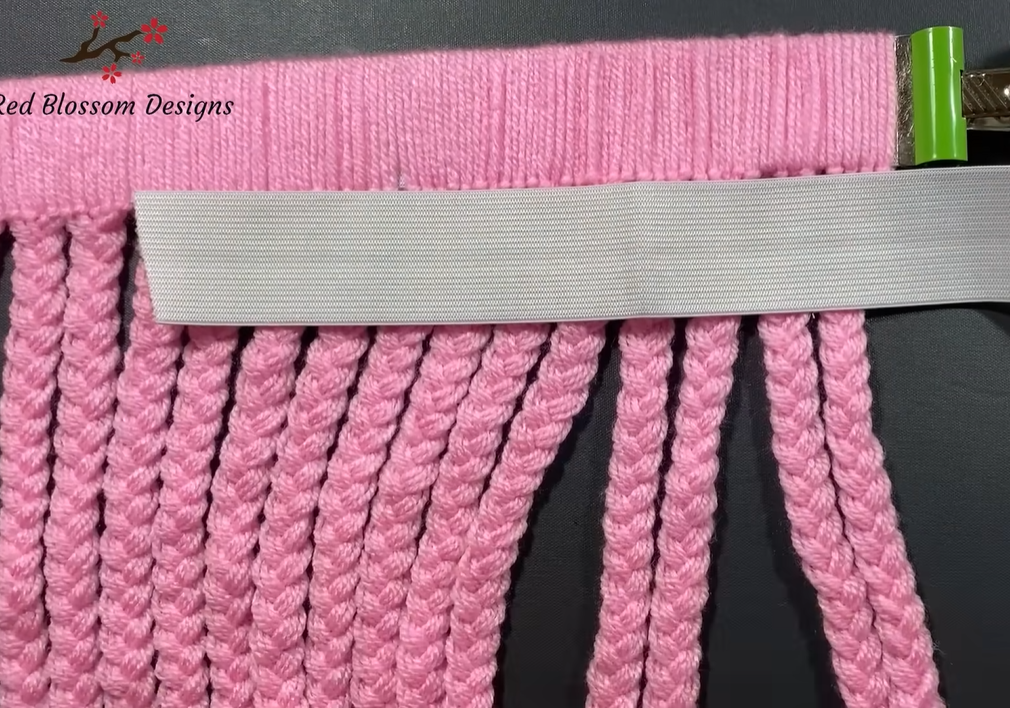
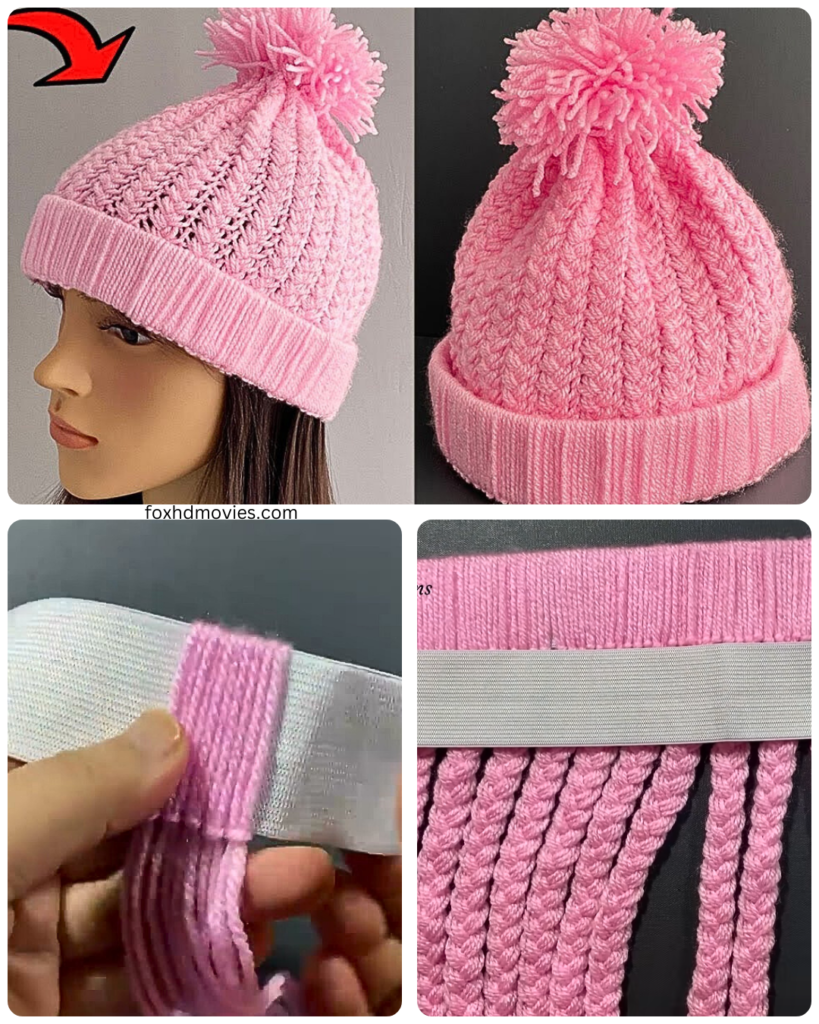
- Attach the Braids to the Beanie:
- Turn your beanie right side out.
- Decide where you want to attach the braids to the beanie. A common placement is along the bottom edge of the beanie, evenly spaced.
- Sewing Method: Turn the beanie wrong side out again. Position the top (secured) end of one braid at the bottom edge of the beanie. Pin it in place. Repeat this for all your braids, spacing them evenly. Sew the top ends of the braids securely to the inside of the beanie with a strong stitch. Turn the beanie right side out.
- No-Sew Method (Fabric Glue): Turn your beanie wrong side out. Apply a generous amount of fabric glue to the top (secured) end of one braid. Press it firmly to the inside of the bottom edge of the beanie. Hold it in place with pins or clips until the glue is dry. Repeat this process for all your braids, spacing them evenly. Allow the glue to dry completely before handling the beanie.
Part 3: Finishing Touches
- Trim the Braids (Optional): If your braids are too long, trim them to your desired length.
- Wear Your Braided Beanie! Turn your new beanie right side out completely and enjoy your handmade creation.
Video tutorial
Tips and Variations:
- Fabric Choice: Experiment with different stretchy fabrics for different looks and feels. Thicker fleece will create a warmer beanie, while a thin jersey knit will be lighter.
- Braiding Style: You can try different braiding techniques, like a fishtail braid, for a unique look.
- Number of Braids: Adjust the number of braids to your preference. Fewer braids will create a simpler look, while more braids will be more decorative.
- Braided Band: Instead of individual hanging braids, you could create one long braided strip and attach it around the bottom edge of the beanie like a decorative band.
- Embellishments: Feel free to add other embellishments like fabric bows, buttons, or small fabric shapes to personalize your beanie.