 by
by 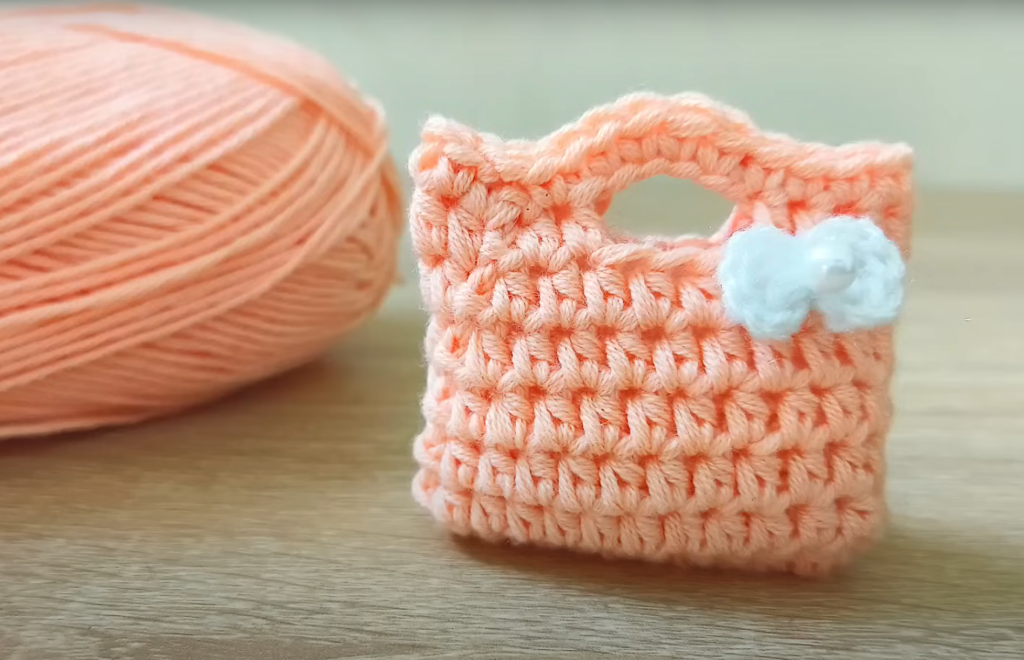
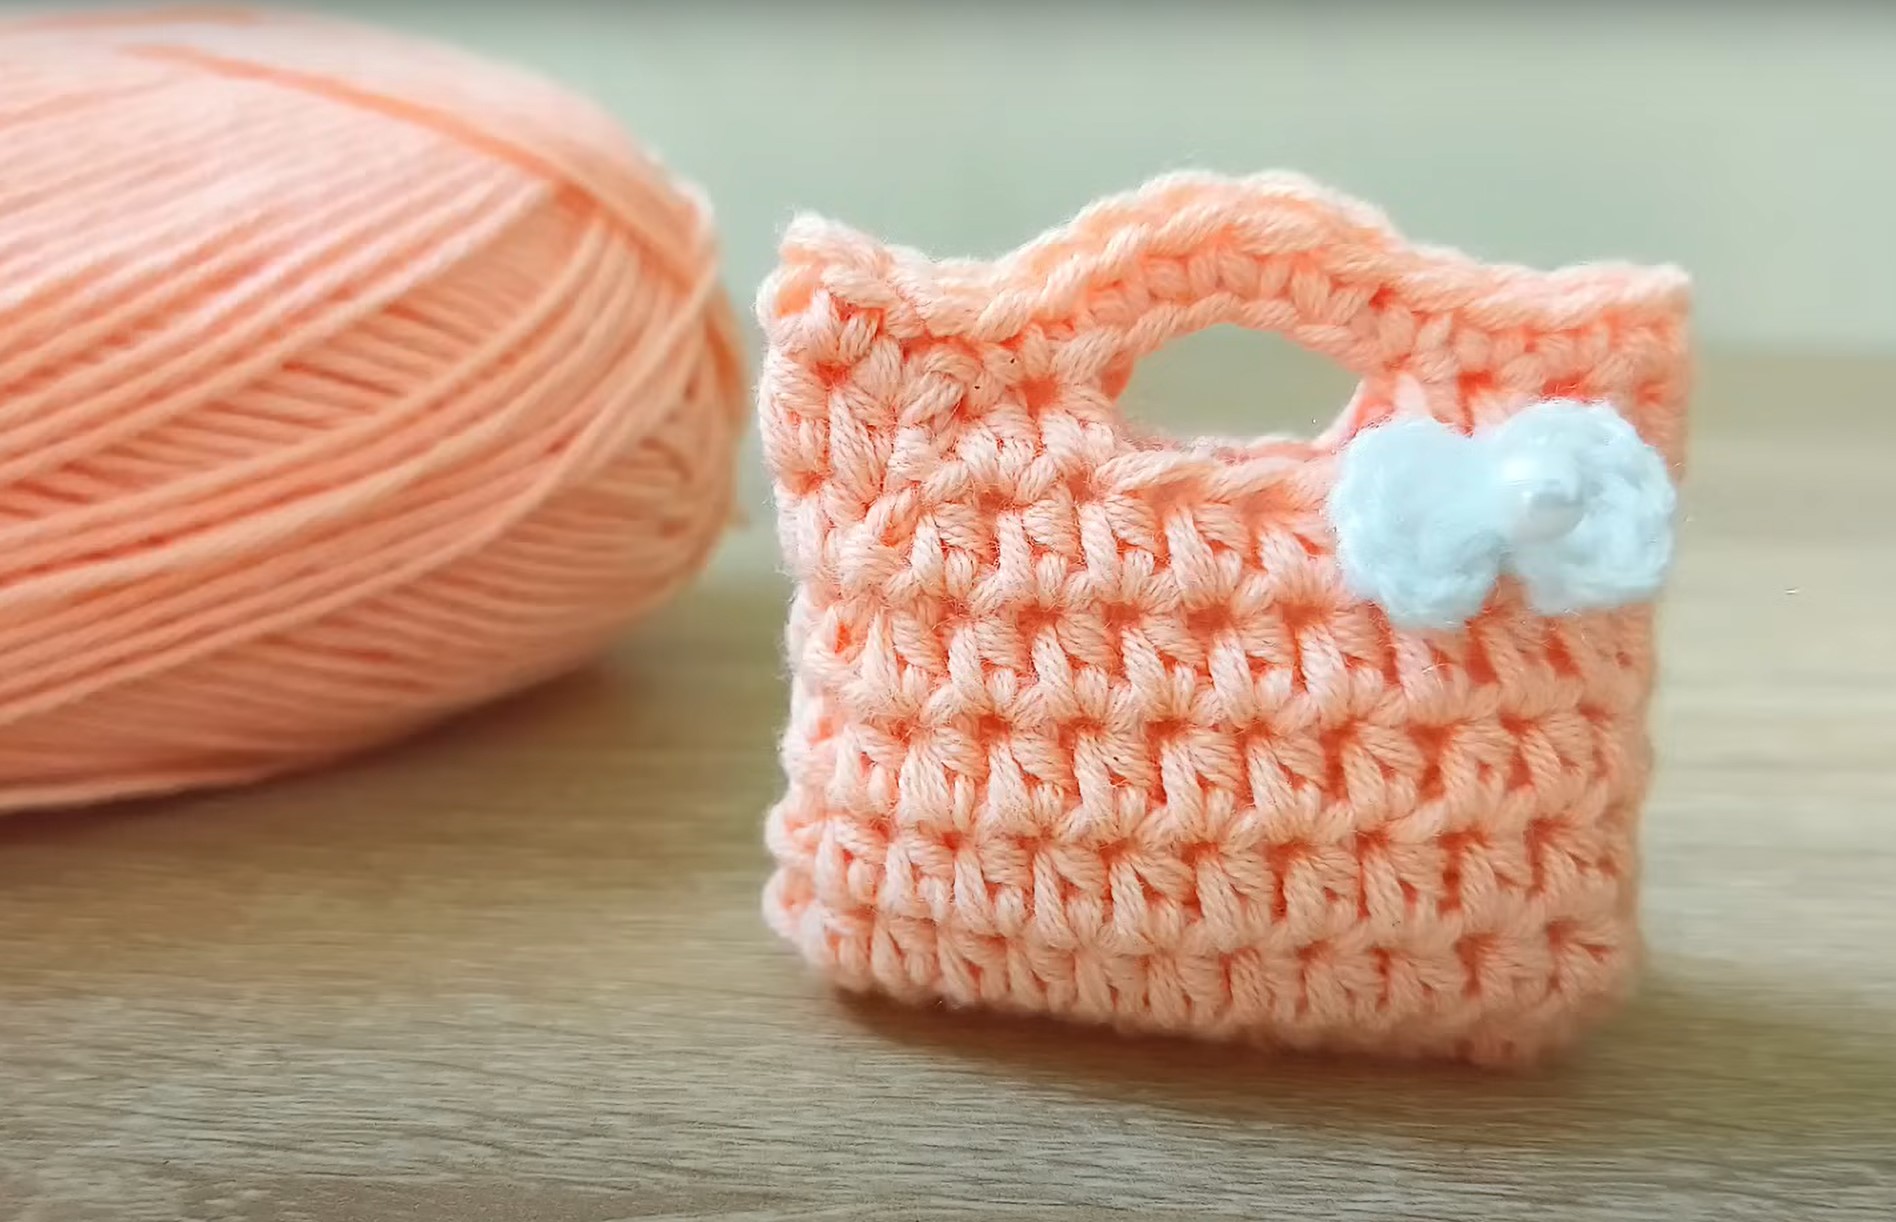
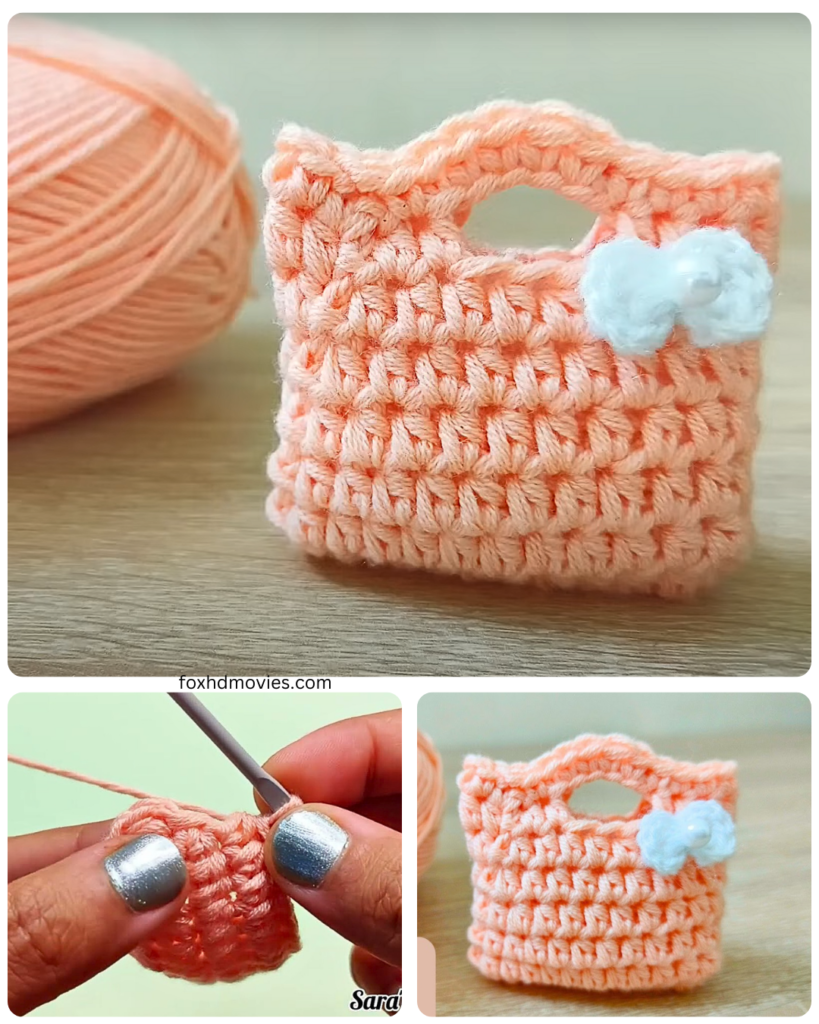
here is a detailed step-by-step pattern for how to make a cute crochet mini bag.
Skill Level: Beginner
Materials You Will Need:
- Yarn: Worsted weight cotton or acrylic yarn in your desired color(s). About 50-75 yards should be sufficient. You might want a contrasting color for a trim or strap.
- Crochet Hook: Size G/4mm or H/5mm (adjust based on your yarn weight and desired fabric density).
- Stitch Marker: To mark the beginning of your rounds.
- Scissors: To cut your yarn.
- Tapestry Needle: To weave in your ends.
- Optional: Buttons, beads, or other embellishments for decoration.
Abbreviations (US Crochet Terms):
- ch: chain
- sl st: slip stitch
- sc: single crochet
- hdc: half double crochet
- dc: double crochet
- inc: increase (work 2 stitches in the same stitch)
- dec: decrease 1 (work 2 stitches together)
- rnd: round
- st(s): stitch(es)
Gauge: Gauge is not crucial for this project, but if you want to ensure the size is as intended, you can crochet a small swatch (e.g., 4 inches by 4 inches) using the same yarn and hook and count your stitches and rows.
Pattern:
Part 1: The Bag Base
We will start by creating a flat circle for the base of the bag.
Rnd 1: Ch 2 (does not count as a stitch), work 6 sc into the first ch. Place a stitch marker in the first sc of this round. (6 sts)
Rnd 2: Inc in each st around. (12 sts)
Rnd 3: Sc in the next st, inc in the next st; rep from * to around. (18 sts)
Rnd 4: Sc in the next 2 sts, inc in the next st; rep from * to around. (24 sts)
Rnd 5: Sc in the next 3 sts, inc in the next st; rep from * to around. (30 sts)
Rnd 6: Sc in the next 4 sts, inc in the next st; rep from * to around. (36 sts)
Rnd 7: Sc in the next 5 sts, inc in the next st; rep from * to around. (42 sts)
Rnd 8: Sc in the next 6 sts, inc in the next st; rep from * to around. (48 sts)
- Continue increasing in this manner (adding one more single crochet between each increase in each round) until your base reaches your desired size. For a small mini bag, a diameter of about 4-5 inches (around 8-10 rounds total) is usually good.

Part 2: The Bag Body
Now we will work on the sides of the bag, creating height.
Rnd 9: Sc in each st around. Do not increase. (Continue to move your stitch marker at the beginning of each round). (Number of sts will be the same as your last round of the base)
Rnd 10 – onwards: Continue to sc in each st around until your bag reaches your desired height. You can change colors here if you like to create stripes.
- For a small mini bag, about 8-12 rounds of single crochet for the body should be sufficient. You can adjust this based on how tall you want your bag to be.

Optional: Adding a Textured Effect
You can vary the stitches in the body rounds to add texture. For example, you could alternate rounds of single crochet with rounds of half double crochet or even double crochet.
Part 3: Creating the Top Edge (Optional)
You can create a neat finished edge for your bag.
Option 1: Simple Single Crochet Edge
- Continue with one more round of sc around the top edge. Sl st to the first sc to join. Fasten off and weave in ends.
Option 2: Picot Edge
- Sc in the next st, ch 3, sl st in the first ch (this creates a small loop called a picot). Skip the next st, sc in the following st, ch 3, sl st in the first ch; rep from * to around. Sl st to the first sc to join. Fasten off and weave in ends.
Option 3: Crab Stitch (Reverse Single Crochet)
- Working from left to right (instead of right to left), insert your hook into the stitch to the right, yarn over, and pull through a loop. Yarn over and pull through both loops on your hook. Continue this around the entire top edge. Sl st to the first crab stitch to join. Fasten off and weave in ends.
Part 4: Creating the Strap
You have several options for creating a strap for your mini bag.
Option 1: Simple Chain Strap
- Attach your yarn to one side of the bag (decide where you want the strap to start).
- Ch the desired length for your strap. Consider how long you want the drop of the bag to be. For a small mini bag, a chain of 80-120 stitches might be a good starting point.
- Once you reach the desired length, sl st to the opposite side of the bag to secure the strap.
- Fasten off and weave in ends.
Option 2: Single Crochet Strap
- Attach your yarn to one side of the bag.
- Ch 5-10 (depending on how wide you want your strap).
- Sc in the second ch from the hook and in each ch across. (4-9 sts)
- Ch 1, turn.
- Sc in each st across.
- Repeat steps 4 and 5 until your strap reaches the desired length.
- Sl st to the opposite side of the bag to secure the strap.
- Fasten off and weave in ends.
Option 3: Braided Strap
- Cut three strands of yarn, each about 1.5-2 times the desired length of your finished strap.
- Tie the three strands together at one end and attach them securely to one side of your bag.
- Braid the three strands together.
- Once you reach the desired length, tie the ends together and attach them securely to the opposite side of the bag.
- Weave in any loose ends.
Part 5: Finishing Touches (Optional)
- Button Closure: You can add a loop to one side of the bag (made with chains) and sew a button onto the opposite side for a closure.
- Drawstring Closure: You can weave a length of yarn through the stitches near the top edge of the bag to create a drawstring closure.
- Embellishments: Sew on buttons, beads, or other decorative elements to personalize your mini bag.
Video tutorial
Tips for Success:
- Use a stitch marker to keep track of the beginning of your rounds, especially when working in continuous rounds.
- Pull your yarn snugly but not too tight to create even stitches.
- Don’t be afraid to experiment with different colors and stitch patterns.
- If you are unsure about a technique, there are many helpful video tutorials available online.