 by
by 
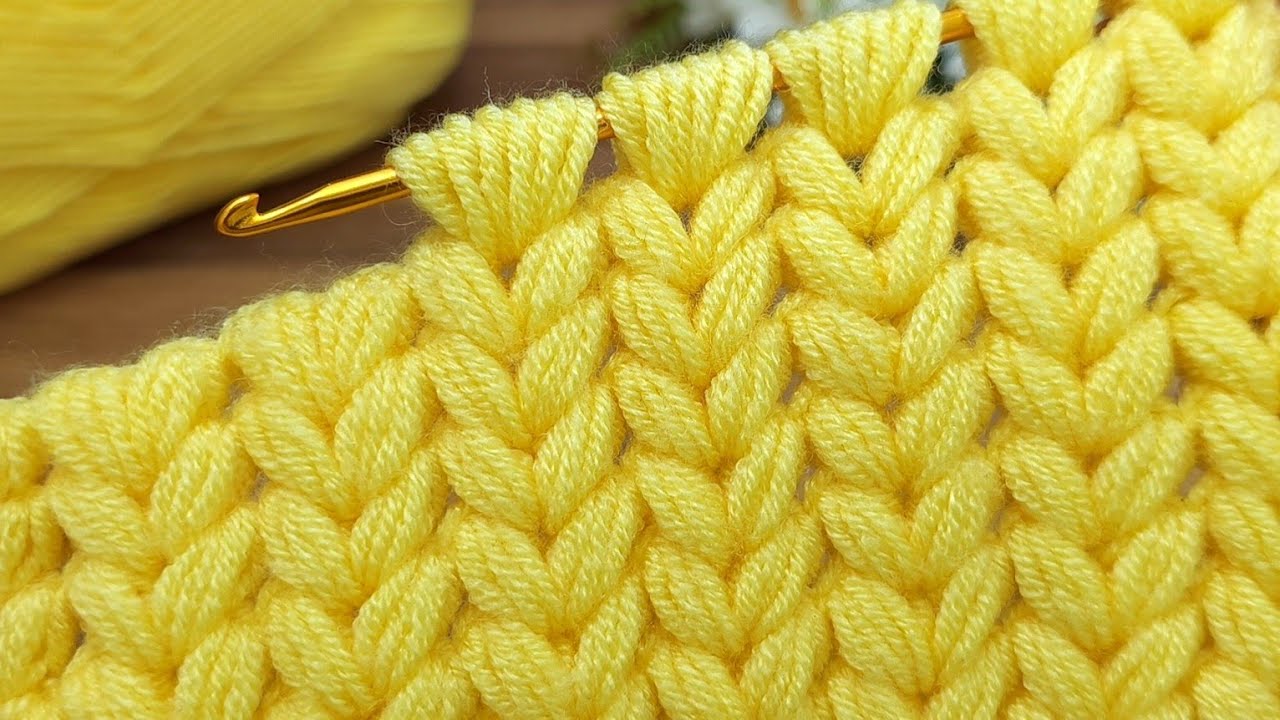
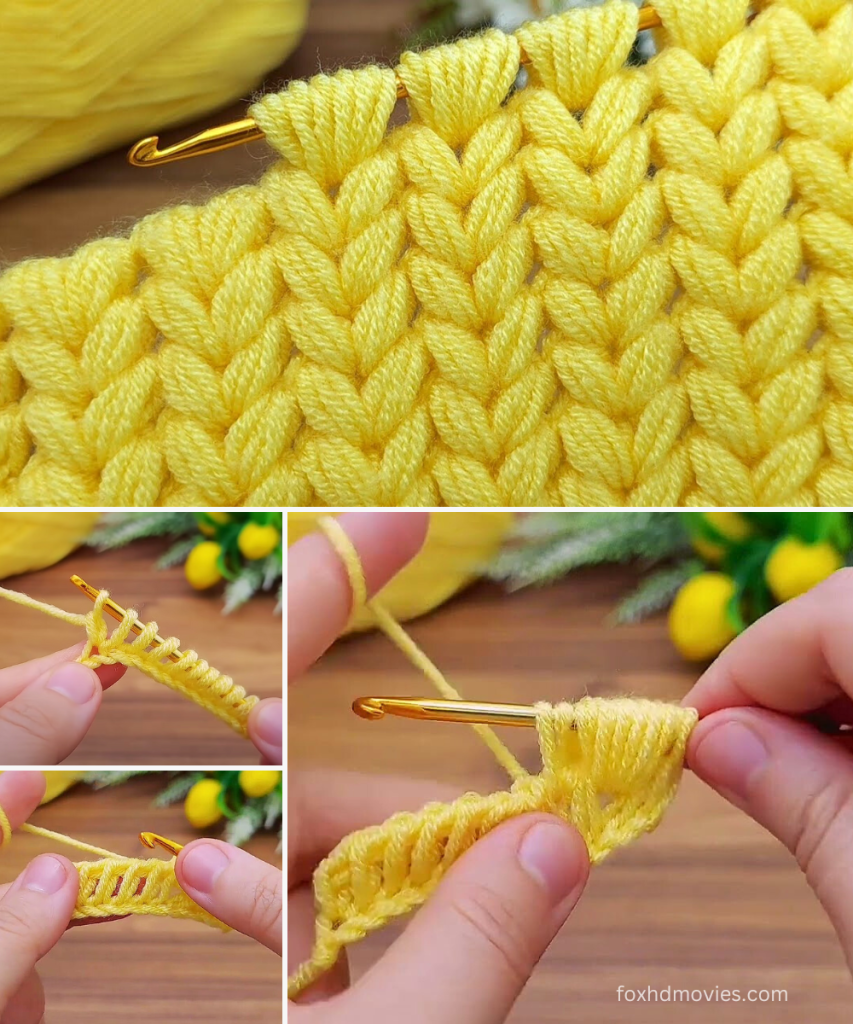
This stitch creates a beautiful, dense, and warm fabric with a distinct “V” pattern and a subtle textured reverse side, perfect for blankets, scarves, or even garments.
Skill Level: Intermediate Tunisian Crochet Yarn: Worsted Weight (Category 4) or Bulky (Category 5) yarn. The sample appears to use a plumper yarn. (Approx. 50-100 yards for a swatch). Hook: Tunisian crochet hook (Afghan hook) appropriate for your yarn weight. A 6.5 mm (K/10.5) to 8.0 mm (L/11) hook is recommended for worsted weight to achieve flexibility, or larger for bulky. Notions: Yarn needle, scissors, stitch markers (optional).
Gauge: Not critical for a swatch, but aim for a fabric that isn’t too stiff. Approximately 12 stitches x 8 rows (in Textured Tunisian V-Stitch) = 4 inches (unblocked).
Abbreviations (US Terms):
- ch: chain
- st(s): stitch(es)
- yo: yarn over
- FwdP (Forward Pass): The part of the row where you pick up loops onto your hook.
- RetP (Return Pass): The part of the row where you work off loops from your hook.
- sk: skip
- sl st: slip stitch
- fo: fasten off
- TKS: Tunisian Knit Stitch (Insert hook between the vertical bars, through the fabric, yo, pull up a loop.)
- TSS: Tunisian Simple Stitch (Insert hook under the vertical bar, yo, pull up a loop.)
Understanding the Stitch: This stitch relies on a specific placement of the hook, similar to Tunisian Knit Stitch, but with an added element to create the ‘V’ texture and density. The “puffs” seem to form on the return pass or are a result of the density of the forward pass.
Part 1: The Swatch Body
Step 1: Foundation Chain Begin by making a foundation chain. The number of chains determines the width of your project. For this stitch, an even number of chains is recommended for symmetry. For a Swatch: Ch 24 (this will give you 23 working stitches for the pattern).
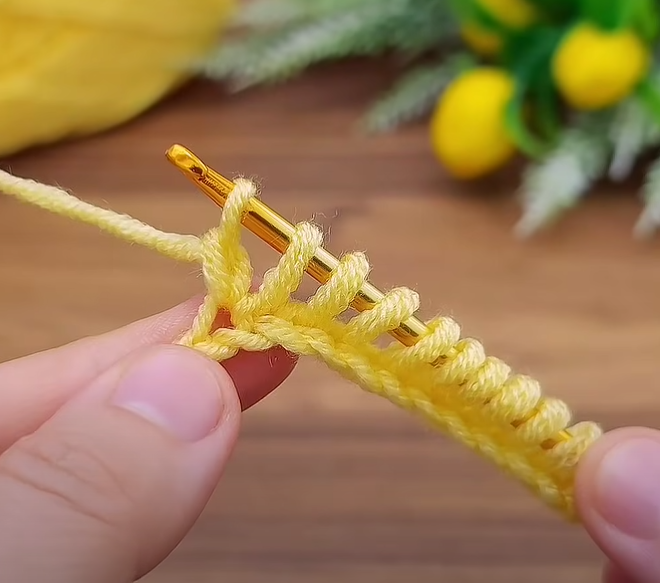
Step 2: First Forward Pass (Row 1 FwdP – Setup Row) This is your initial row of picking up loops, establishing the base for the “V” pattern.
- Insert hook into 2nd ch from hook, yo, pull up a loop.
- Insert hook into next ch, yo, pull up a loop. Repeat from * to * across the chain until you reach the last chain.
- You will have the same number of loops on your hook as your starting chain (e.g., 24 loops if you chained 24).
Step 3: First Return Pass (Row 1 RetP)
- Yo, pull through 1 loop (this creates the first chain of your return pass and secures the edge).
- Yo, pull through 2 loops on hook. Repeat from * to * until only 1 loop remains on your hook.
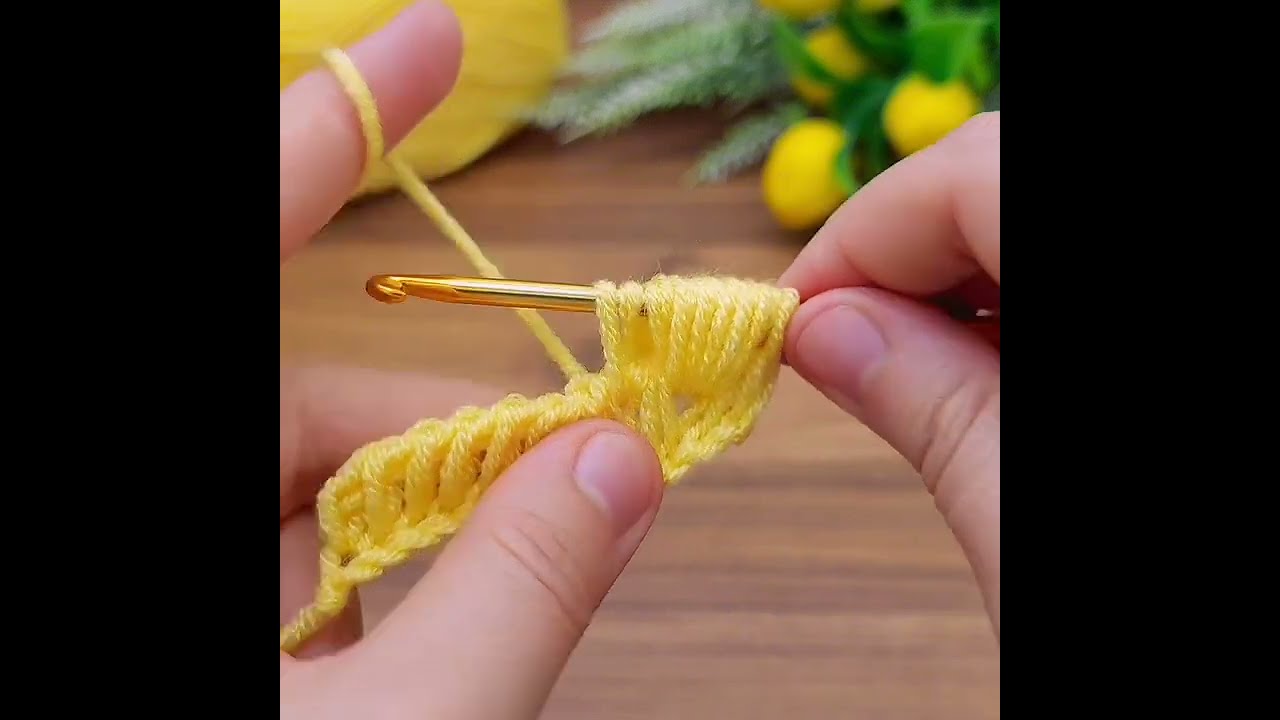
Step 4: Textured Tunisian V-Stitch Rows
This is where the magic happens! Each row will consist of a Forward Pass and a Return Pass.
Row 2 (and all subsequent FwdPs):
- Edge Stitch: Skip the first vertical bar (the one directly under your hook).
- Working the V-Stitch: *Insert hook from front to back between the vertical bars of the next stitch, pushing through to the back of the fabric (as if doing a TKS). Before yarning over, gently nudge the left leg of the vertical bar to the left, creating a more open space. Then, yo, pull up a loop (the loop will come through the fabric). *
- (Alternatively, for a slightly less defined ‘V’ but still textured: Insert hook into the space between the vertical bar and the next stitch, yo, pull up a loop, making sure to keep the loop on the hook somewhat loose).
- (The most likely method from the image for the main body: Insert hook from left to right, going behind the next vertical bar and coming out between it and the subsequent vertical bar. Yo, pull up a loop.) Let’s refine this to: The Primary Stitch: Insert your hook horizontally underneath the two strands that form the base of the next stitch (the horizontal bar directly below the vertical bar), AND then also bring your hook up between the vertical bar you’re working into and the next vertical bar (similar to TKS, but lower). Yo, pull up a loop. This creates a denser stitch that pulls the ‘V’ shape upwards.
- Repeat the “Primary Stitch” instruction from * to * across the row until you reach the last stitch.
- Important Edge Stitch: For the very last stitch of the Forward Pass, insert your hook under both the front and back vertical loops of the very last stitch of the previous row (often looks like a ‘V’ or ‘L’ on its side at the very end). Yo, pull up a loop.
- You will again have the same number of loops on your hook as your starting chain.
Row 2 (and all subsequent RetPs): This return pass is standard, but the texture from the FwdP will become apparent.
- Yo, pull through 1 loop.
- Yo, pull through 2 loops on hook. Repeat from * to * until only 1 loop remains on your hook.
Repeat Rows: Continue repeating the FwdP and RetP of Row 2 until your project reaches your desired length.

- For a Swatch: Work until it’s a square (approx. 6-8 inches long).
Part 2: Binding Off
To create a neat, finished edge that matches the beginning chain and prevents unraveling, you’ll bind off with slip stitches.
Bind Off Row (FwdP for Bind Off):
- Edge Stitch: Skip the first vertical bar.
- Binding Off V-Stitch: Perform the “Primary Stitch” as in the FwdP of Row 2 (insert hook horizontally underneath the two strands that form the base of the next stitch AND between the vertical bar you’re working into and the next vertical bar), yo, pull up a loop, AND immediately sl st through the loop on your hook.
- Repeat from * to * across the row.
- For the last stitch of the bind-off, insert hook under both vertical loops of the very last stitch, yo, pull up a loop, and immediately sl st through the loop on your hook.
- You should now have only 1 loop left on your hook, and your edge will look like a row of regular crochet slip stitches, but with the V-stitch texture.
Finishing: Fo, leaving a 6-inch tail. Weave in all ends securely using your yarn needle. Gently block your swatch if desired to relax the stitches.
Video tutorial
Tips for Success:
- Tension: Maintaining a consistent tension is key for this stitch to make the ‘V’s look even. A slightly looser tension often works better in Tunisian crochet to prevent stiffness and curling.
- Identifying the “Primary Stitch” placement: This is the trickiest part. Look closely at the image; the ‘V’ shape is formed by two legs. You are essentially working through the center of the previous ‘V’ by going under the horizontal bar at its base and then bringing the hook up through the fabric. It might take a few tries to get the feel for it.
- Curling: Tunisian crochet fabric, especially dense stitches, tends to curl. This stitch is quite dense, so some curling is normal. Blocking can help, and for larger projects, a border in a different stitch or a few rows of Tunisian Simple Stitch at the beginning and end can mitigate curling.
Enjoy creating this beautiful textured fabric!