 by
by 
Here is a detailed step-by-step pattern for a simple knitting stitch that is created using only two repeating rows:
Pattern Name: Simple Slip-Stitch Texture
This pattern creates a slightly textured fabric with a subtle visual interest. It’s easy to memorize and great for beginner knitters looking to move beyond basic knit and purl.
Materials:
- Yarn of your choice
- Knitting needles appropriate for your yarn
Instructions:
Cast On: Cast on an even number of stitches. This pattern works best with an even number of stitches.
Pattern:
Row 1 (Right Side):
- Knit the first stitch: Insert your right needle into the front loop of the first stitch on your left needle, from front to back.
- Wrap the yarn: Wrap the yarn counter-clockwise around the tip of your right needle.
- Pull through a loop: Pull the wrapped yarn through the loop on your left needle, creating a new stitch on your right needle.
- Slip the next stitch purlwise with yarn in front (sl1 wyif): Bring your yarn to the front of your work (between your needles). Insert your right needle into the next stitch on your left needle as if to purl (from back to front).
- Slip the stitch: Slide the stitch from your left needle onto your right needle without knitting it. The yarn should remain in front of your work.
- Repeat: Repeat steps 1 through 5 across the entire row. You will be alternating between knitting one stitch and slipping the next stitch with the yarn in front.
Row 2 (Wrong Side):
- Knit all stitches: Insert your right needle into the front loop of the first stitch on your left needle.
- Wrap the yarn: Wrap the yarn counter-clockwise around the tip of your right needle.
- Pull through a loop: Pull the wrapped yarn through the loop on your left needle, creating a new stitch on your right needle.
- Repeat: Continue knitting every stitch across the entire row.
Repeat: Repeat Row 1 and Row 2 for the desired length of your project.
Explanation of Terms:
- Knit (k): The basic knit stitch. Insert the right needle into the front loop of the stitch on the left needle, wrap the yarn, and pull through a new loop.
- Slip 1 purlwise with yarn in front (sl1 wyif): Insert the right needle into the next stitch on the left needle as if to purl (from back to front), and simply slide the stitch onto the right needle without working it. Keep the yarn held in front of your work.
- Right Side (RS): The side of your knitting that will be facing outwards in your finished project.
- Wrong Side (WS): The side of your knitting that will be facing inwards or the back of your finished project.
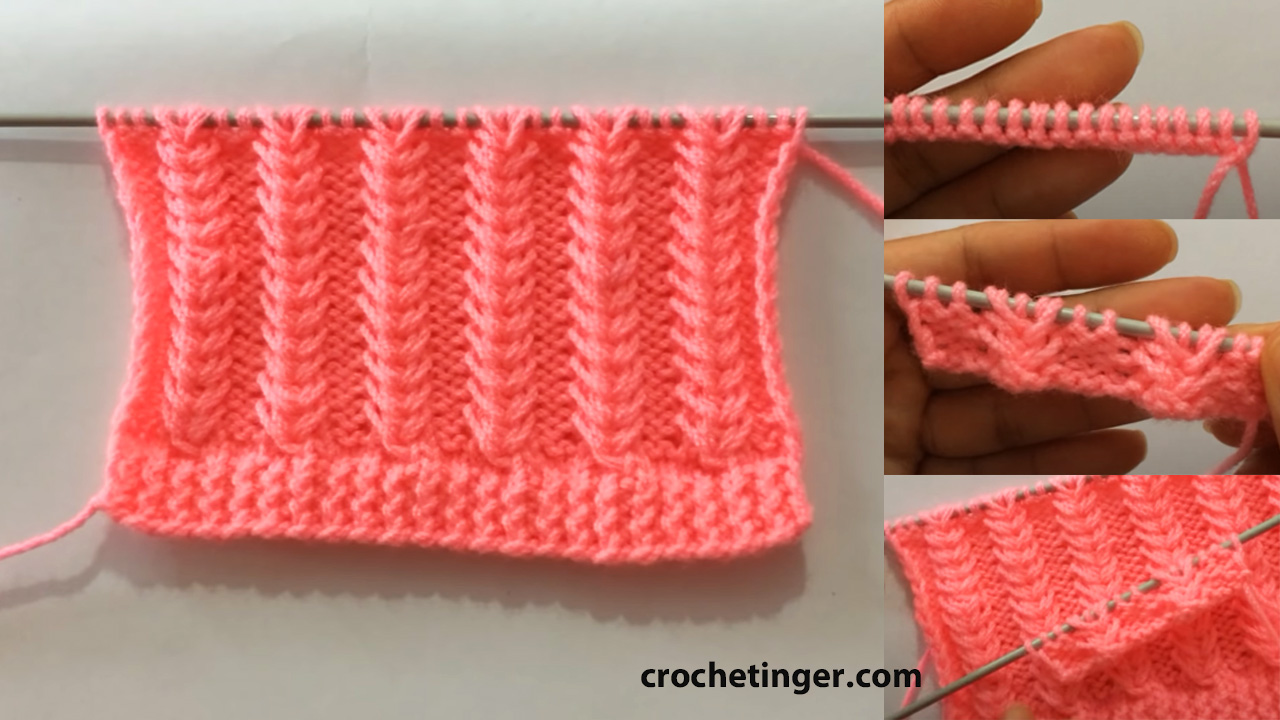
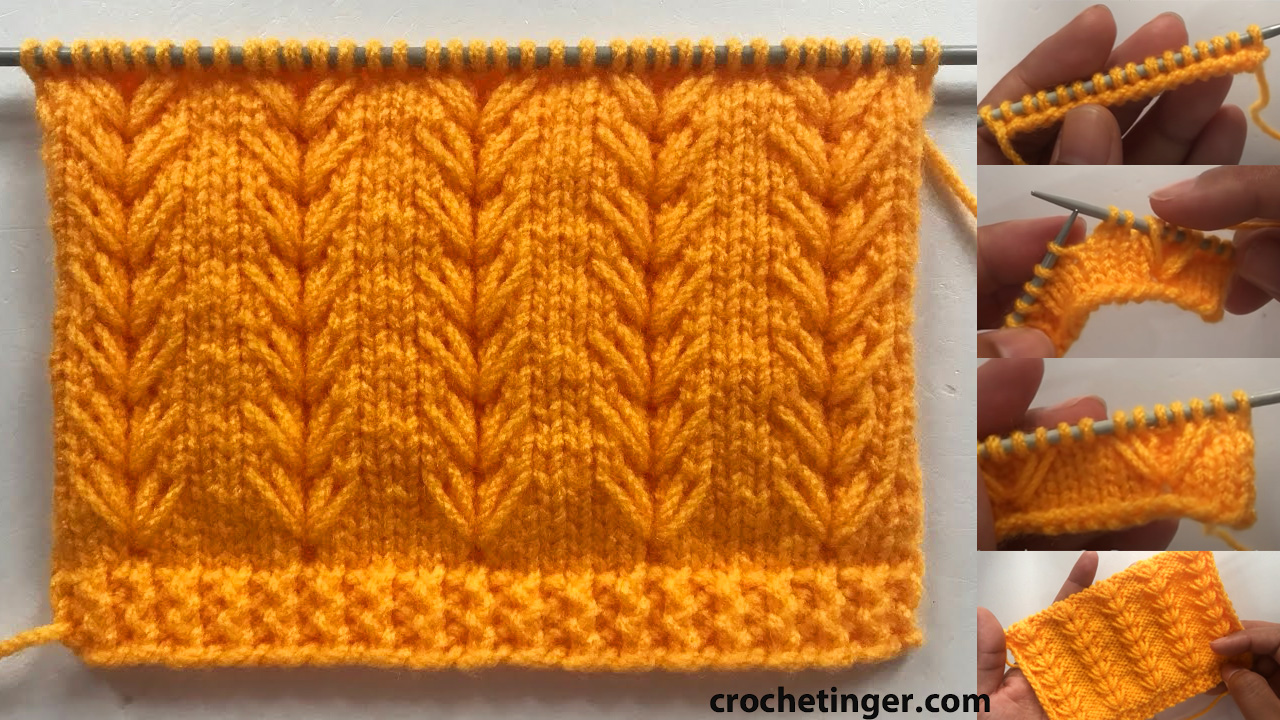
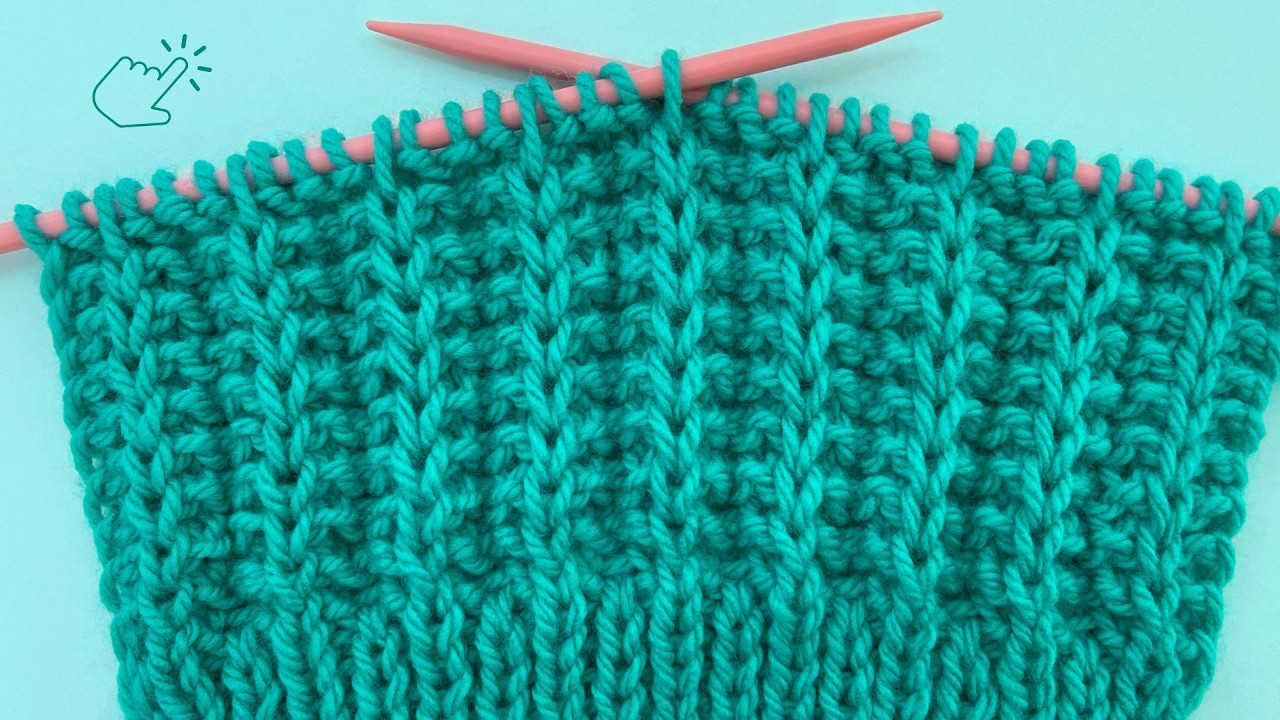
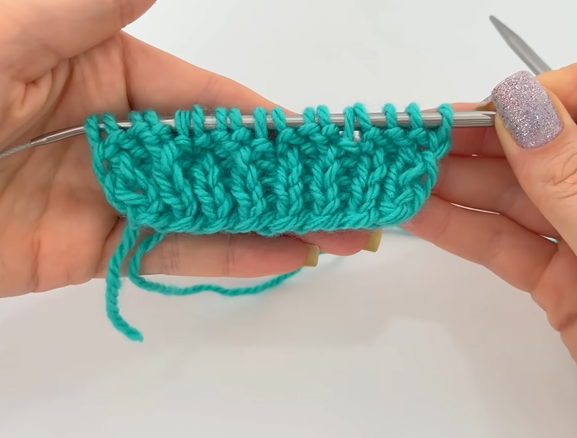
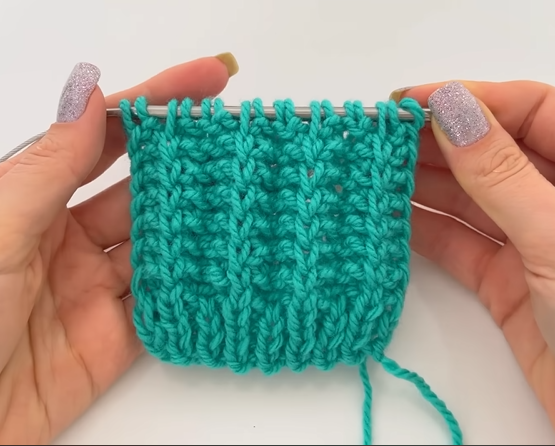
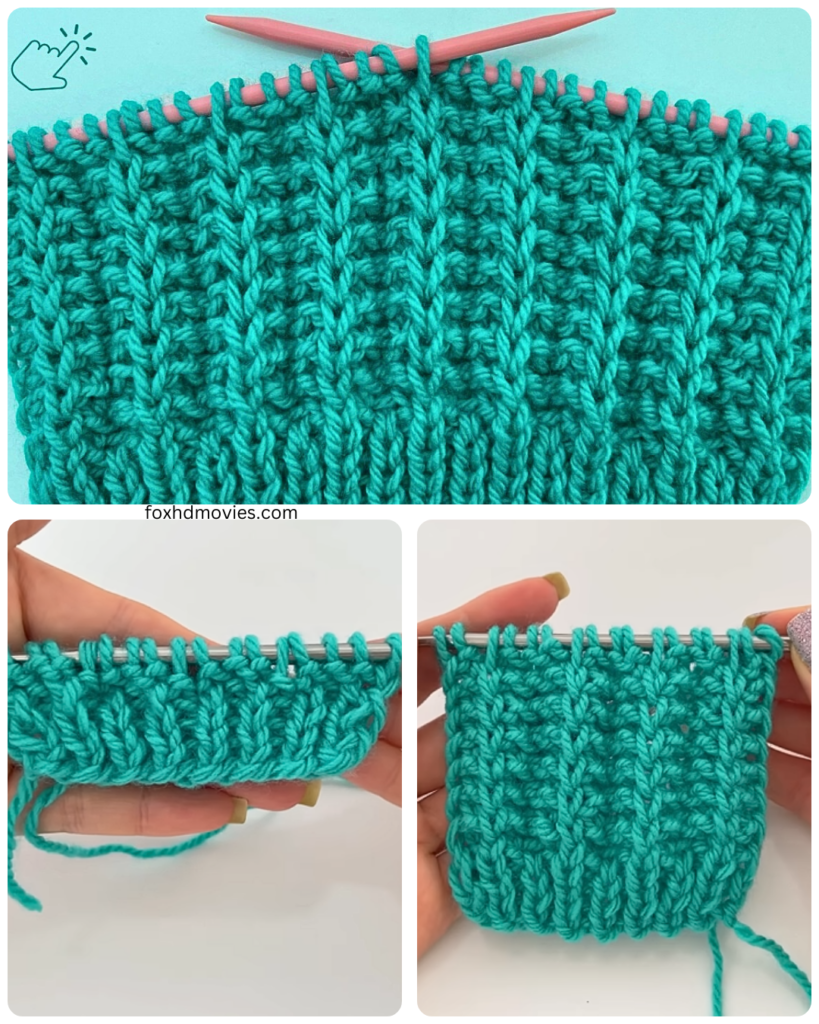
Visual Description of the Stitch:
This two-row repeat creates a fabric where the slipped stitches on Row 1 create slightly elongated, unworked stitches on the wrong side. On the right side, these slipped stitches create a subtle vertical texture alongside the knitted stitches.
Video tutorial
Tips and Variations:
- Gauge: Knit a small swatch (at least 4 inches by 4 inches) to determine your gauge (stitches and rows per inch) with your chosen yarn and needles.
- Edge Stitches: You may want to add edge stitches (e.g., knitting the first and last stitch of each row) for a neater edge.
- Yarn Weight and Needle Size: The look of the stitch will vary depending on the yarn weight and needle size you use. Experiment to find the look you prefer.
- Colorwork: This stitch can be interesting for simple colorwork by changing colors every two rows.