by
by 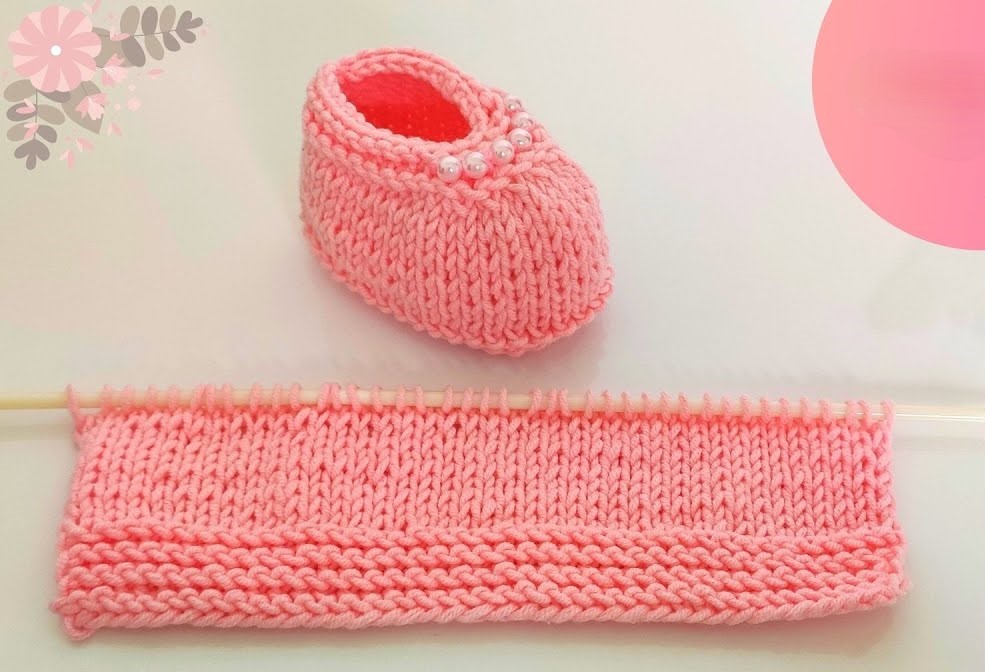
There’s a special joy in knitting for little ones, and these baby booties are a perfect project for knitters looking for a straightforward pattern with some engaging shaping. Inspired by a clear tutorial, this pattern guides you through creating a cozy bootie with distinct sections and clever decreases to form the foot. It’s designed for a 3-6 month size, but we’ll include tips for adjusting it!
Skill Level: Easy to Intermediate (basic decreases required)
Finished Size (Approximate):
- Sole Length: 4 – 4.25 inches (10 – 10.8 cm)
- Suitable for: 3-6 Months (based on the video’s suggested size)
Materials You’ll Need:
- Yarn: DK weight (Light Worsted / 8 ply) baby yarn in your chosen color. (Approximately 50-60 yards per pair).
- The video mentions “Paris wool,” which is often a DK weight acrylic blend. Choose a soft, washable yarn like baby acrylic, cotton blends, or superwash merino wool for comfort and easy care.
- Knitting Needles: Straight knitting needles (or circulars, working flat) in size US 4 (3.5 mm).
- The video uses straight needles, which is great for this flat construction.
- Tapestry Needle: Essential for seaming and weaving in ends.
- Scissors
- Stitch Markers (optional): Helpful for marking the center section during decreases.
Gauge (Crucial for Sizing!):
24 stitches and 32 rows = 4 inches (10 cm) in stockinette stitch.
- Why Gauge Matters: Achieving the correct gauge is vital to ensure your finished bootie is the right size. If your gauge is off, your bootie might be too big or too small!
- How to Swatch: Cast on 30 stitches. Knit in stockinette stitch (knit on RS rows, purl on WS rows) for about 40 rows. Bind off. Measure a 4-inch square in the middle of your swatch. If you have more than 24 stitches in 4 inches, try a larger needle size. If you have fewer, try a smaller needle size.
Abbreviations (US Knitting Terms):
- CO: Cast On
- K: Knit
- P: Purl
- K2tog: Knit 2 stitches together (decrease)
- SSK: Slip, slip, knit (decrease) – Slip 1 stitch knitwise, slip next stitch knitwise, then knit them together through the back loops.
- St(s): Stitch(es)
- RS: Right Side
- WS: Wrong Side
- BO: Bind Off
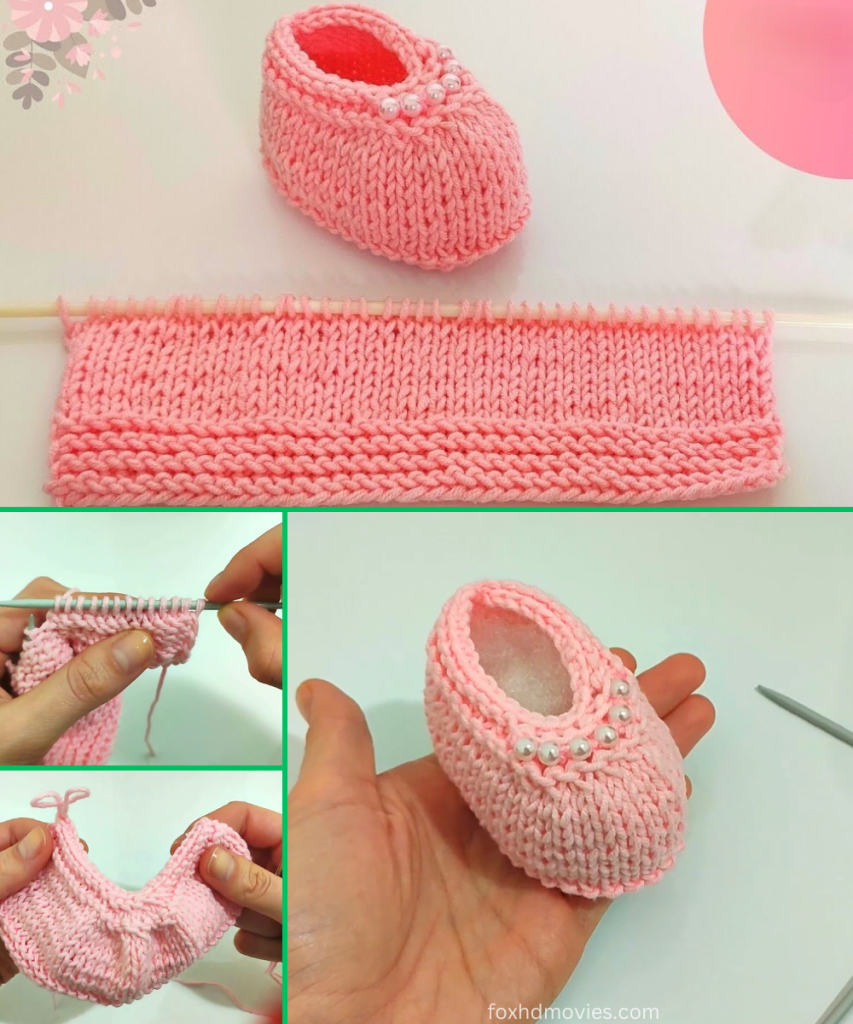
Let’s Start Knitting Your Bootie!
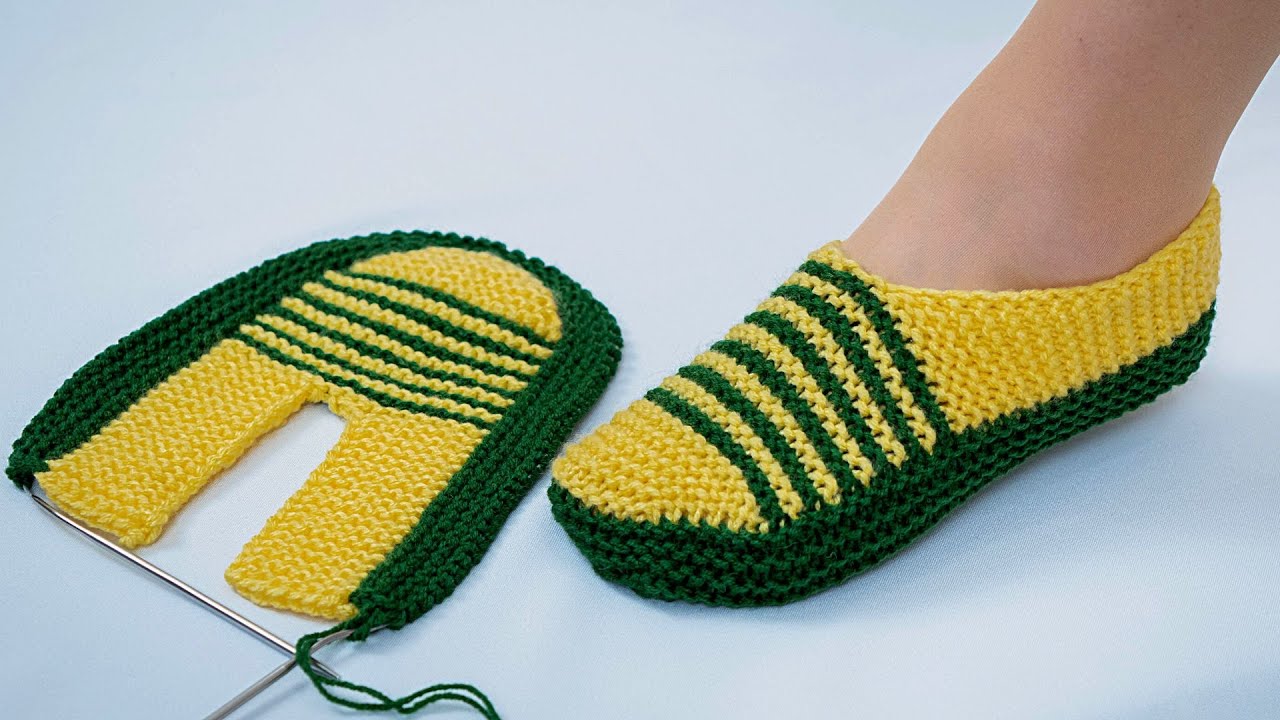
This bootie is knitted flat in one piece, then cleverly seamed to form its shape.
Part 1: The Base (Lower Edge & Sole)
Using your knitting needles, CO 40 stitches.
Rows 1-8: Knit all stitches. (8 rows total of garter stitch).
- This creates a sturdy, slightly rolled edge for the bottom of the bootie.
Part 2: The Main Body (Sides & Instep)
Now we’ll switch to stockinette stitch for the main body of the bootie.
Row 9 (WS): Purl all stitches. Row 10 (RS): Knit all stitches.
Repeat Rows 9 and 10 until you have completed 10 rows in stockinette stitch (ending on a WS Purl row).
- This section forms the sides and the top of the foot before the decreases begin.
Part 3: Shaping the Toe (Decreases)
This is where the magic happens, shaping the front of the bootie!
Set Up for Decreases: You have 40 stitches on your needle. We will work decreases in the middle section.

Row 19 (RS – First Decrease Row): K12. (K2tog) 7 times. K14. (33 sts)
- You’ve now decreased 7 stitches in the middle section, starting to form the toe.
Row 20 (WS): Purl all stitches.
Row 21 (RS – Second Decrease Row): K10. (K2tog) 6 times. K11. (27 sts)
- Another 6 stitches decreased, further shaping the toe.
Row 22 (WS): Purl all stitches.
Part 4: Finishing the Top Edge
Now, we’ll bind off all remaining stitches.
Row 23 (RS): Knit all stitches. Row 24 (WS): Purl all stitches.
BO all 27 stitches.
- The video shows a standard bind-off. You can use your preferred method.
Part 5: Assembling Your Bootie
This is where your flat knitted piece transforms into an adorable bootie!
- Prepare for Seaming: Lay your knitted piece flat with the RS facing up.
- Sew the Back Seam:
- Fold the piece in half lengthwise, bringing the cast-on edge and the bound-off edge together.
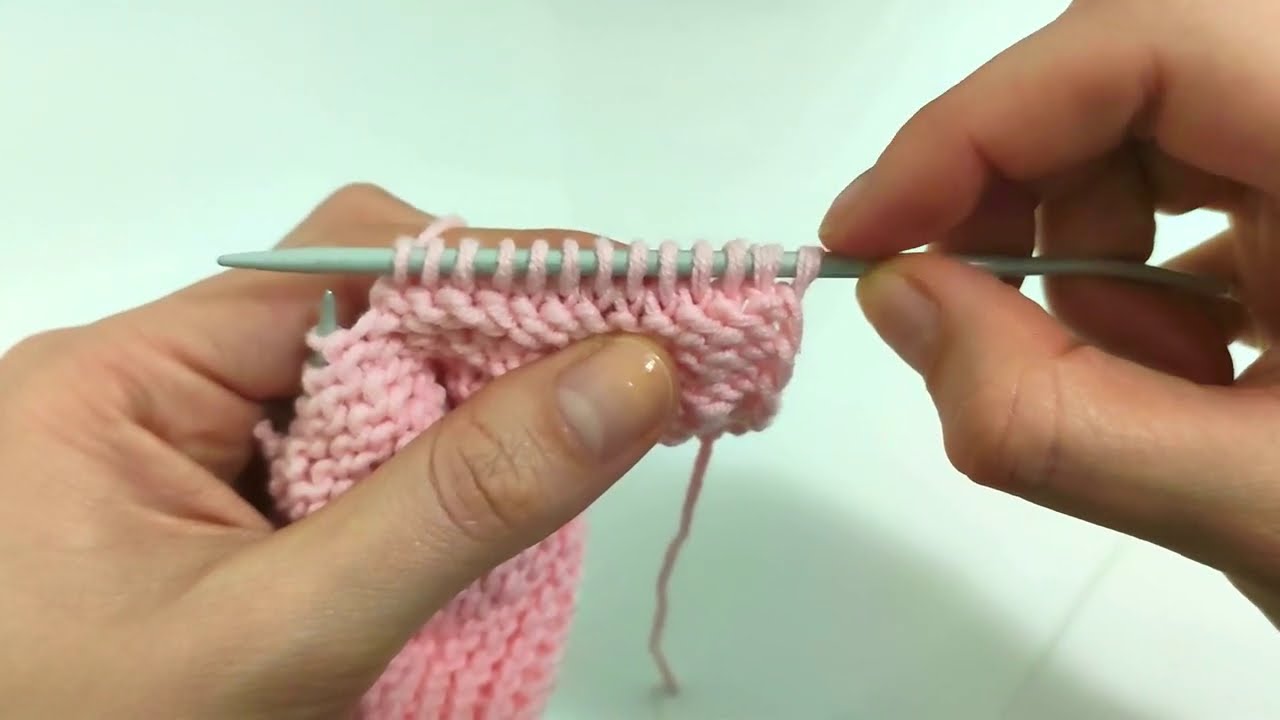
- Starting from the bound-off edge (the top of the bootie), use your tapestry needle and the yarn tail from the bind-off.
- Sew the back seam (the side edges of the stockinette section) using a mattress stitch for an invisible seam, or a whip stitch for a neat, visible seam. Sew until you reach the garter stitch section (Part 1).
- Sew the Sole:
- Continue seaming along the bottom edge of the garter stitch section (Part 1). This forms the sole of the bootie.
- When you reach the end of the garter stitch section, you’ll have a small opening at the very end of the sole. Pinch this corner together to form a small triangle (this creates the heel). Stitch across this triangle to close it neatly and give the heel a rounded shape.
- Turn Right Side Out: Carefully turn your bootie right side out.
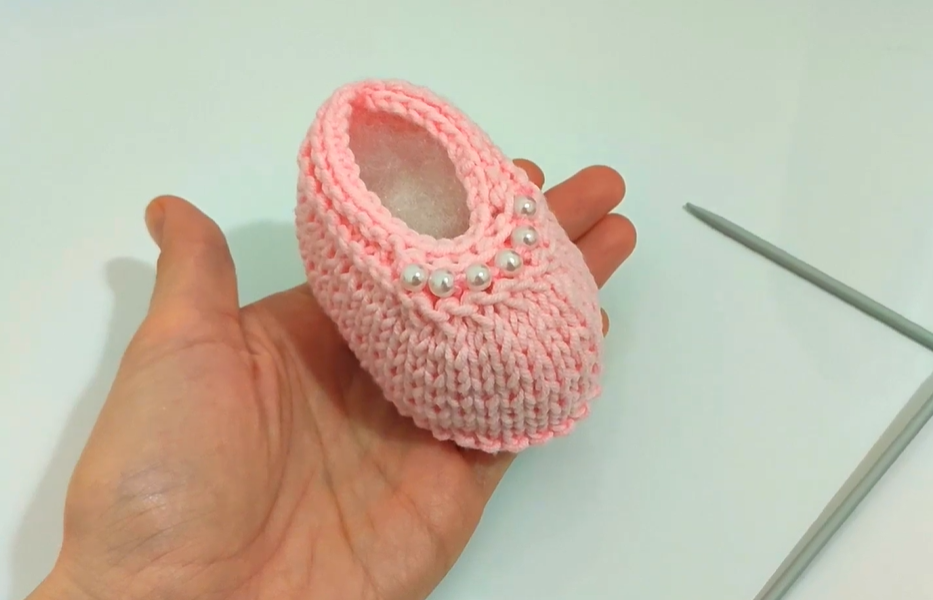
Part 6: Decorating Your Bootie (Optional Fun!)
Now for the creative part! As the video suggests, you can easily personalize your booties.
- Pearls or Buttons: Sew small pearl beads or cute buttons onto the front of the bootie for a classic look.
- Ribbon/Cord: Thread a thin ribbon or a knitted/crocheted cord through some stitches around the ankle for a charming tie.
- Embroidery: Add a simple embroidered design, like a tiny heart or star.
Part 7: Final Touches
- Weave in all ends: Make sure all your yarn tails are neatly woven in for a professional finish.
- Make a second bootie: Repeat all steps to create a matching bootie for the other foot!
Video tutorial
Sizing Adjustments:
This pattern is designed for 3-6 months based on the video’s specifications. Here’s how you can modify it for different sizes:
- For a smaller size (e.g., Newborn):
- Reduce the initial CO stitches (e.g., CO 36 stitches).
- Adjust the number of rows in Part 1 and Part 2 to achieve a smaller overall height.
- Adjust the number of stitches before and after the decreases in Part 3, and reduce the number of decreases in each row (e.g., 5 decreases, then 4 decreases).
- Your final stitch count before binding off will be lower.
- For a larger size (e.g., 6-9 months):
- Increase the initial CO stitches (e.g., CO 44 or 48 stitches).
- Add more rows in Part 1 and Part 2 to increase the height.
- Adjust the number of stitches before and after the decreases in Part 3, and increase the number of decreases in each row (e.g., 8-9 decreases, then 7-8 decreases).
- Your final stitch count before binding off will be higher.
General Sizing Tip: The initial cast-on number largely determines the circumference of the bootie. The number of rows in Part 1 and 2 determines the height before the toe shaping. Always refer to your gauge swatch to ensure your finished size is accurate!
I hope you enjoy knitting these adorable and easy baby booties! They make fantastic gifts and are a joy to create.