 by
by 
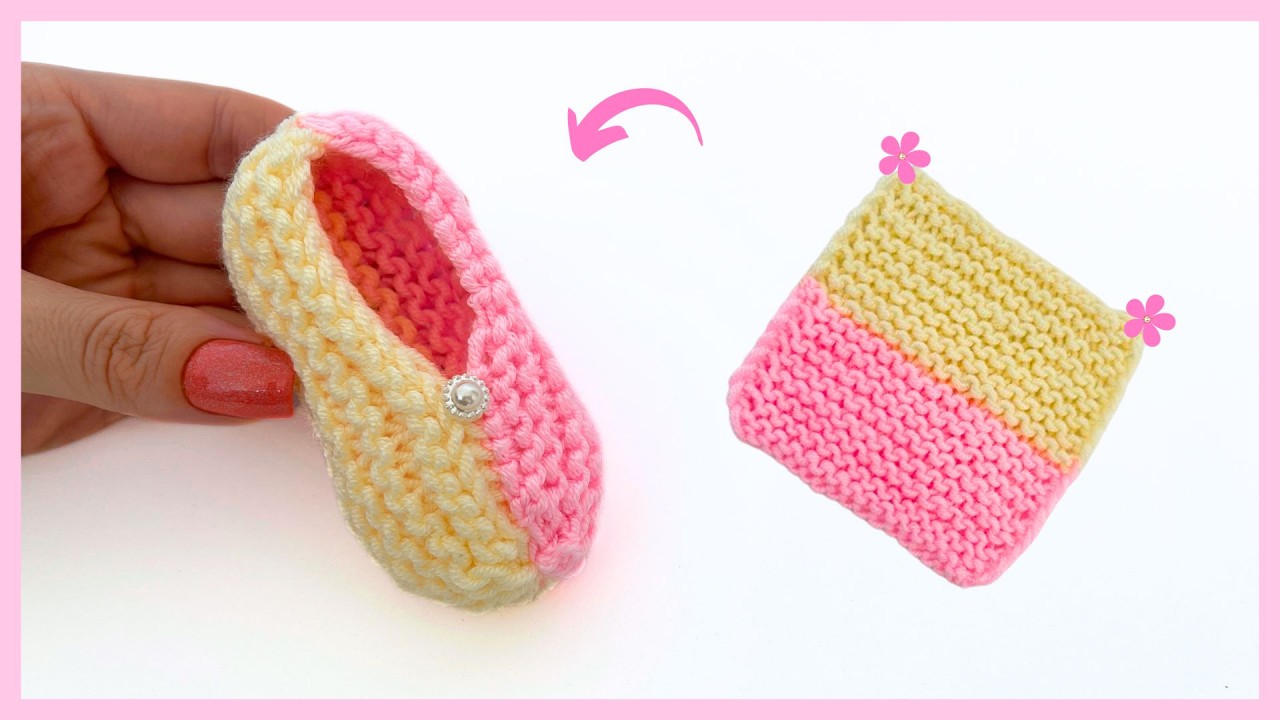
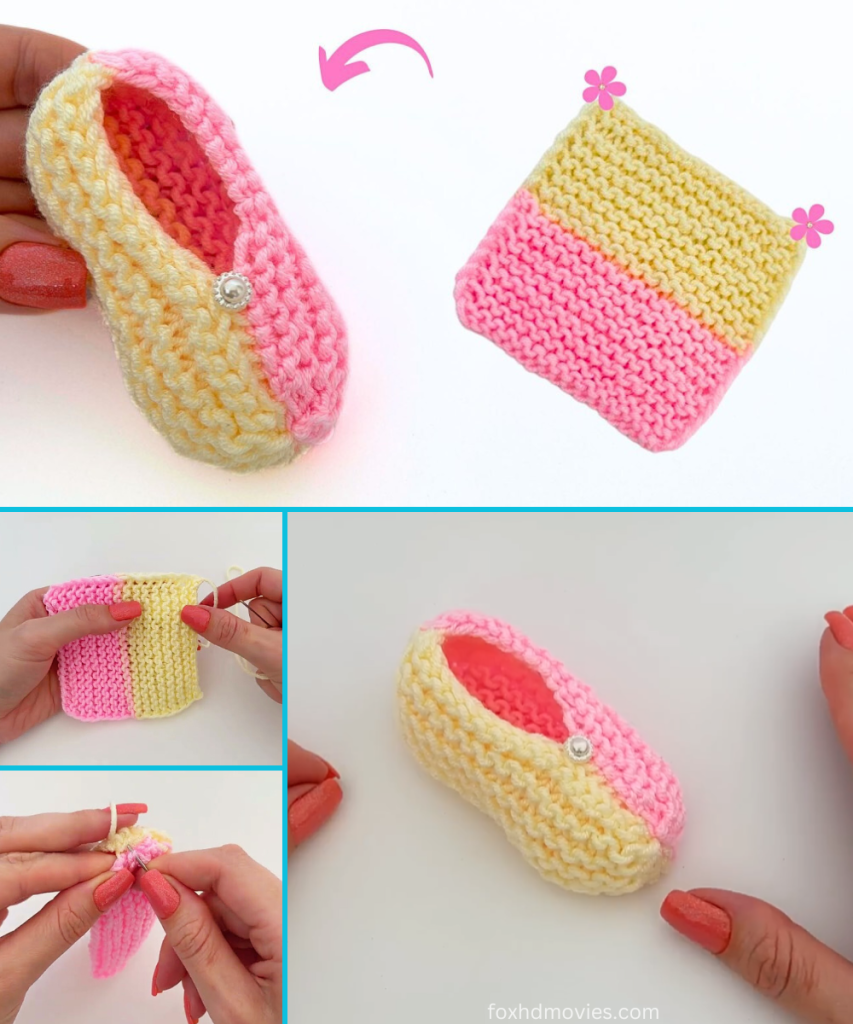
There’s nothing quite like the charm of handmade baby items, and these knitted booties are a true delight! This pattern is inspired by a wonderful tutorial that focuses on simplicity, making it perfect for knitters of all levels, even if you’re just starting out. We’ll create a cozy, adaptable bootie using two colors (just like the video, though you can use one!), with a clever construction that minimizes seaming.
Skill Level: Easy
Finished Size (Approximate):
- Sole Length: Approximately 3.5 – 3.75 inches (9 – 9.5 cm)
- Suitable for: Newborn to 3 Months (based on the video’s 9cm measurement for 18 stitches)
Materials You’ll Need:
- Yarn: DK weight (Light Worsted / 8 ply) baby yarn.
- Color A (Main Color): Approximately 40-50 yards (e.g., the primary color in the video).
- Color B (Accent Color): Approximately 20-30 yards (e.g., the top band color in the video).
- Tip: Choose soft, machine-washable yarns like baby acrylic, cotton blends, or superwash merino wool for baby’s comfort and easy care.
- Knitting Needles: Straight knitting needles (or circulars, working flat) in size US 4 (3.5 mm).
- The video uses straight needles, which simplifies things for beginners.
- Tapestry Needle: Essential for seaming and weaving in ends.
- Scissors
- Stitch Markers (optional): Handy for marking sections.
Gauge (Don’t Skip This Step!):
24 stitches and 32 rows = 4 inches (10 cm) in garter stitch (knitting every row).
- Why is gauge important? It ensures your finished bootie matches the intended size. If your gauge is off, your bootie might be too big or too small!
- How to Swatch: Cast on 30 stitches. Knit every row (garter stitch) for about 40 rows. Bind off. Measure a 4-inch square in the middle of your swatch. If you have more than 24 stitches in 4 inches, try a larger needle size. If you have fewer, try a smaller needle size.
Abbreviations (US Knitting Terms):
- CO: Cast On
- K: Knit
- P: Purl
- K2tog: Knit 2 stitches together (decrease)
- St(s): Stitch(es)
- RS: Right Side
- WS: Wrong Side
- BO: Bind Off
Let’s Get Started!
This bootie is knitted flat in one piece, then seamed to form its shape. The video highlights a “slipped first stitch” technique for neat edges, which we’ll incorporate.
Part 1: The Base (Sole & Lower Sides) – Color A
Using Color A and your knitting needles, CO 18 stitches.
- As per the video, 18 stitches for 0-3 months, measuring approximately 9 cm.
Row 1 (RS): Slip 1 st knitwise (with yarn in back), K to end of row. Row 2 (WS): Slip 1 st knitwise (with yarn in back), K to end of row.
Repeat Rows 1 and 2 until your piece measures approximately 5 cm (about 8 garter stitch ridges) from the cast-on edge.
- This forms the sole and the lower part of the bootie sides.
Part 2: Introducing Color B (Upper Sides)
Now, we’ll switch to our accent color for the upper part of the bootie.
Change to Color B: Drop Color A (don’t cut it yet, you’ll pick it up later if making a second bootie) and begin knitting with Color B.
Row 1 (RS): Slip 1 st knitwise (with yarn in back), K to end of row. Row 2 (WS): Slip 1 st knitwise (with yarn in back), K to end of row.
Repeat Rows 1 and 2 until your piece measures approximately 9 cm (about 14 garter stitch ridges) from the cast-on edge.
- This creates the main body of the bootie, including the ankle area.
Part 3: Finishing the Knitting (Top Edge)
Now we’ll bind off all stitches. The video shows a neat way to do this by knitting two stitches together.
Bind Off Row (RS): K2tog, K2tog (slip the resulting stitch back to the left needle), K2tog (slip the resulting stitch back to the left needle). Repeat K2tog, slipping the new stitch back to the left needle, until only one stitch remains. Cut yarn, pull through the last loop to secure.
Part 4: Assembling Your Bootie
This is where your flat knitted piece transforms into an adorable bootie!
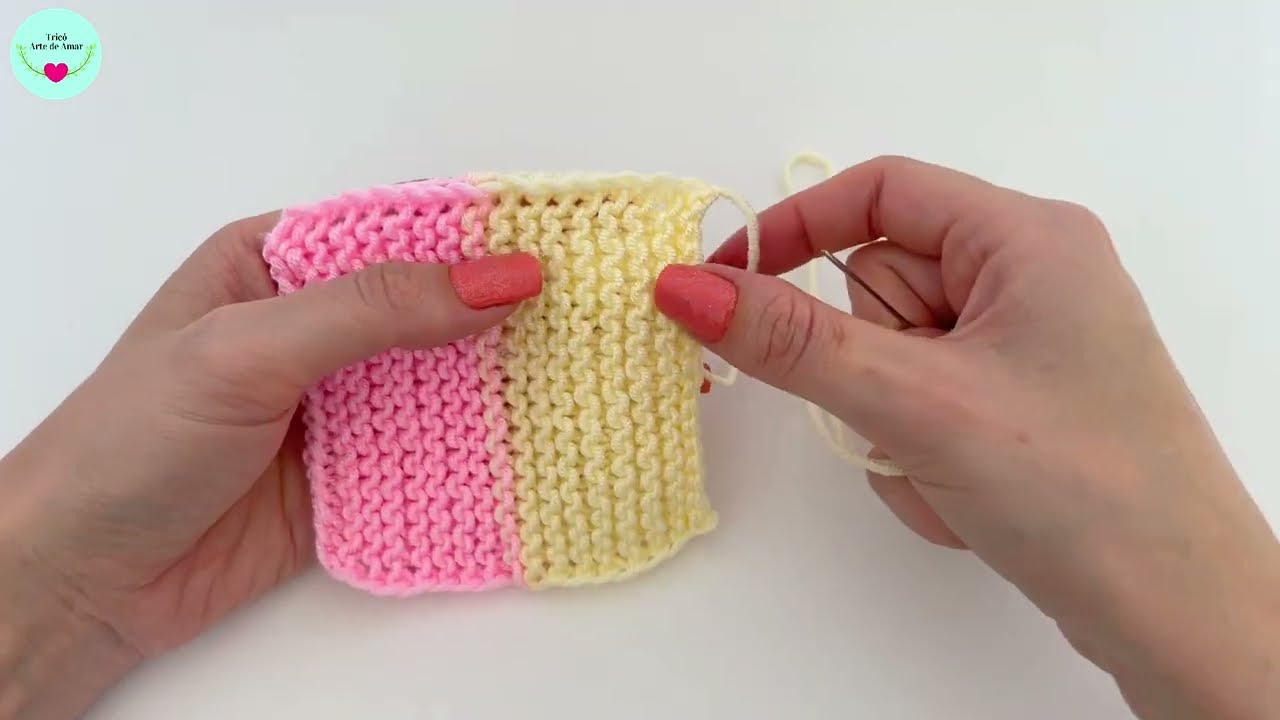
- Fold and Prepare: Lay your knitted piece flat with the RS facing up. Fold the piece in half lengthwise so the cast-on edge meets the bound-off edge.
- Close the Top of the Foot:
- Starting from the bound-off edge (the top of the bootie), use your tapestry needle and the yarn tail from the bind-off.
- Sew along the top edge for approximately 4-5 cm (about half the length of the top edge) using a mattress stitch or whip stitch. This forms the top of the baby’s foot.
- Sew the Back Seam:
- Continue sewing down the side seam from where you stopped, until you reach the color change point (where Color A meets Color B). This forms the back of the bootie.
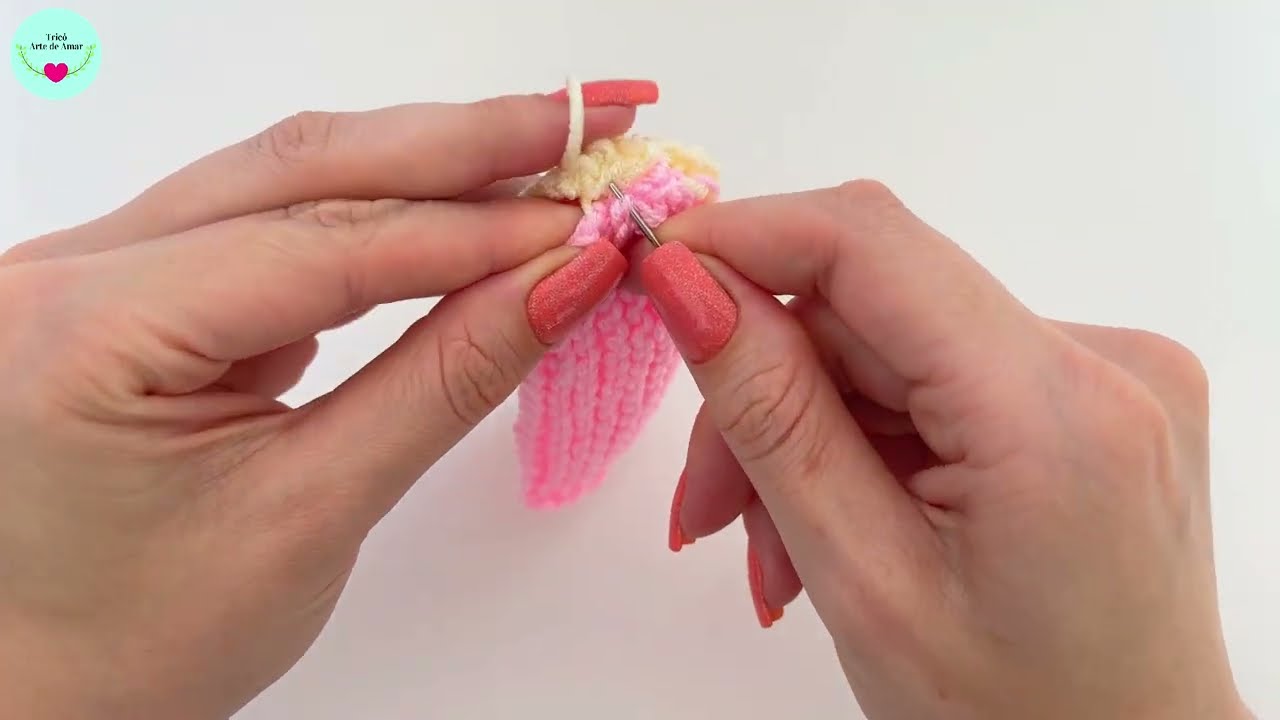
- Shape the Heel:
- Now, you’re at the bottom corner where the sole begins. The video suggests a simple way to shape the heel.
- Pinch the bottom corner together, forming a small triangle. Use your tapestry needle to stitch across this triangle, effectively closing the corner and creating a rounded heel. You can run your needle through the stitches on either side of the corner and pull tight to gather it, then secure.
- Sew the Sole:
- Continue seaming the remaining open edge of the sole, bringing the two long edges of the Color A section together. Use a mattress stitch for an invisible seam.
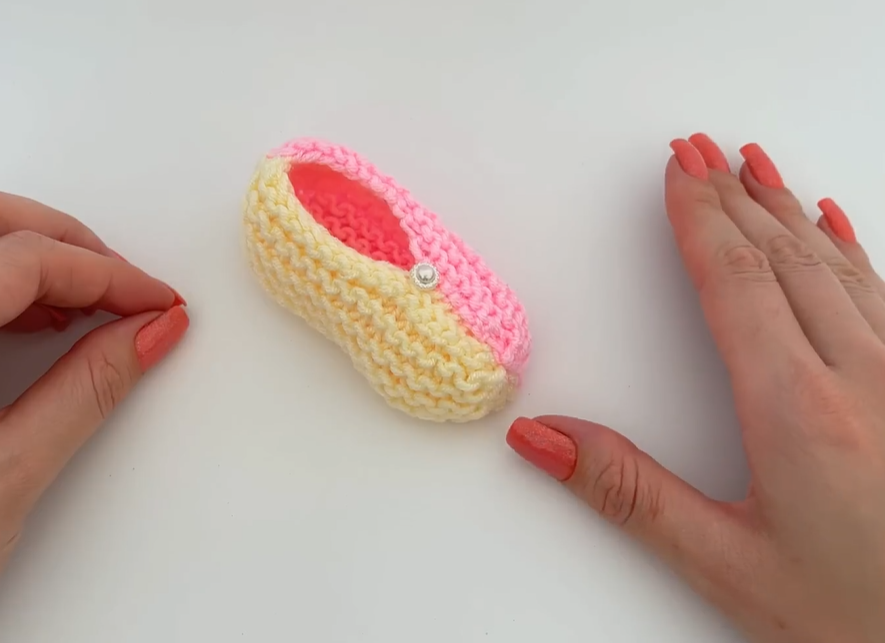
Part 5: Decorating Your Bootie (Optional Fun!)
Now for the creative part! As the video suggests, you can easily personalize your booties.
- Ribbon/Cord: Thread a thin ribbon or a knitted/crocheted cord through the garter stitch ridges of the Color B section, tying a bow at the front.
- Pearls or Buttons: Sew small pearl beads or cute buttons onto the front of the bootie for a classic look.
- Pompoms: Attach a tiny pompom to the top of the toe for a playful touch.
- Embroidery: Add a simple embroidered design, like a tiny heart or star.
Part 6: Final Touches
- Weave in all ends: Make sure all your yarn tails are neatly woven in for a professional finish.
- Make a second bootie: Repeat all steps to create a matching bootie for the other foot!
Video tutorial
Sizing Adjustments:
The video mentions adjusting the size by changing the initial cast-on stitches based on foot length.
- To change length:
- For smaller (Newborn): CO 16 stitches. Adjust the total height of the Color A and Color B sections accordingly (e.g., 4 cm for Color A, 8 cm total height).
- For larger (3-6 Months): CO 20 stitches. Adjust the total height of the Color A and Color B sections accordingly (e.g., 6 cm for Color A, 10-11 cm total height).
- Gauge is Key: Remember, changing your needle size to meet gauge is the most effective way to ensure the bootie fits the intended size!
Enjoy knitting these super easy and adorable two-tone baby booties! They make wonderful gifts and are a joy to create.