by
by 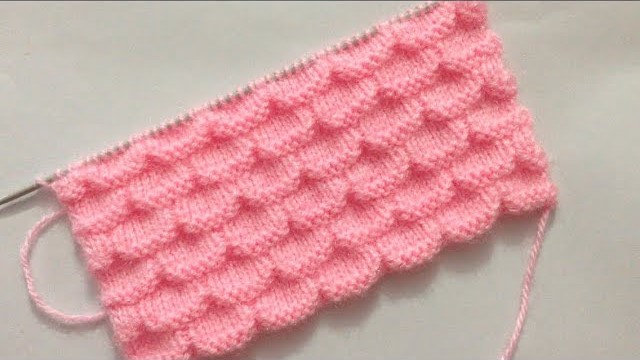
Are you looking to add a touch of individuality to your projects without wrestling with complex stitch patterns? You’ve come to the right place! Today, we’re exploring the magic of a single, fundamental knitting stitch and how clever manipulations can transform it into eye-catching and unique textures.
Often, we think intricate patterns require learning a whole new repertoire of cables, lace, or colorwork techniques. But what if I told you that by simply playing with the humble knit stitch, you can achieve stunning and distinctive results?
Let’s dive into how we can unlock the potential of this basic stitch and create fabrics that are anything but ordinary!
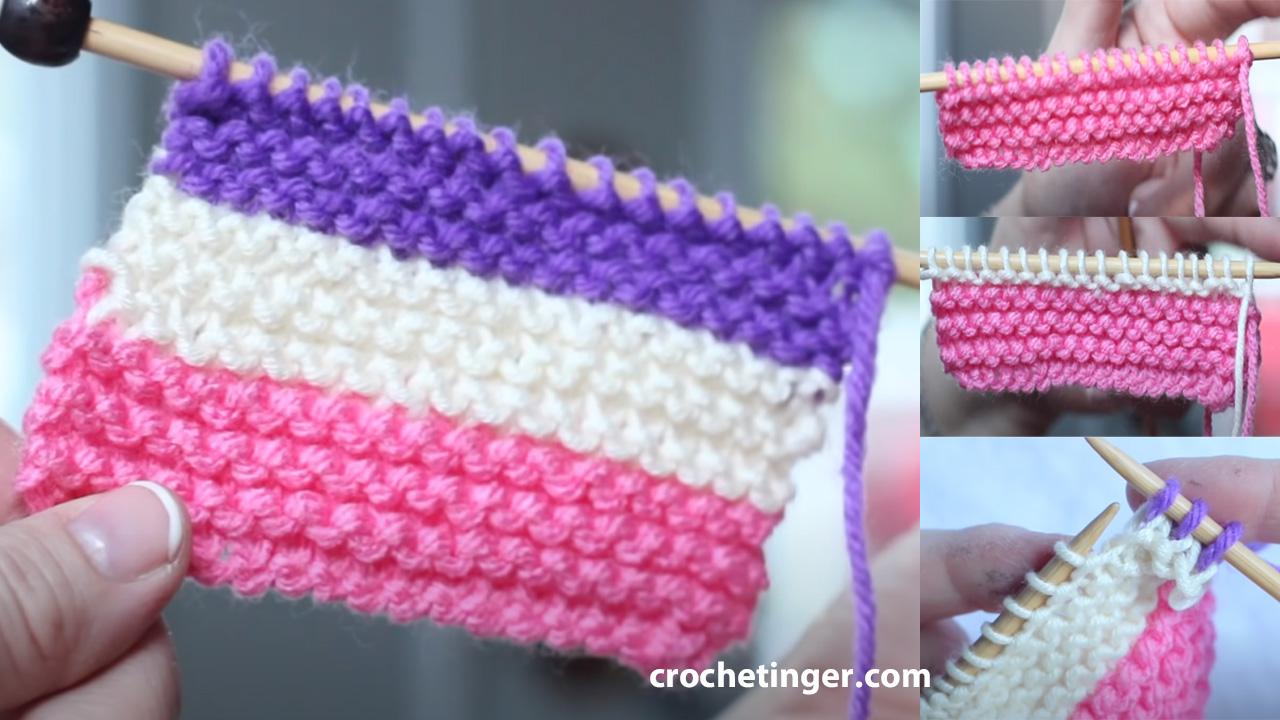
The Star of the Show: The Garter Stitch (and its Variations)
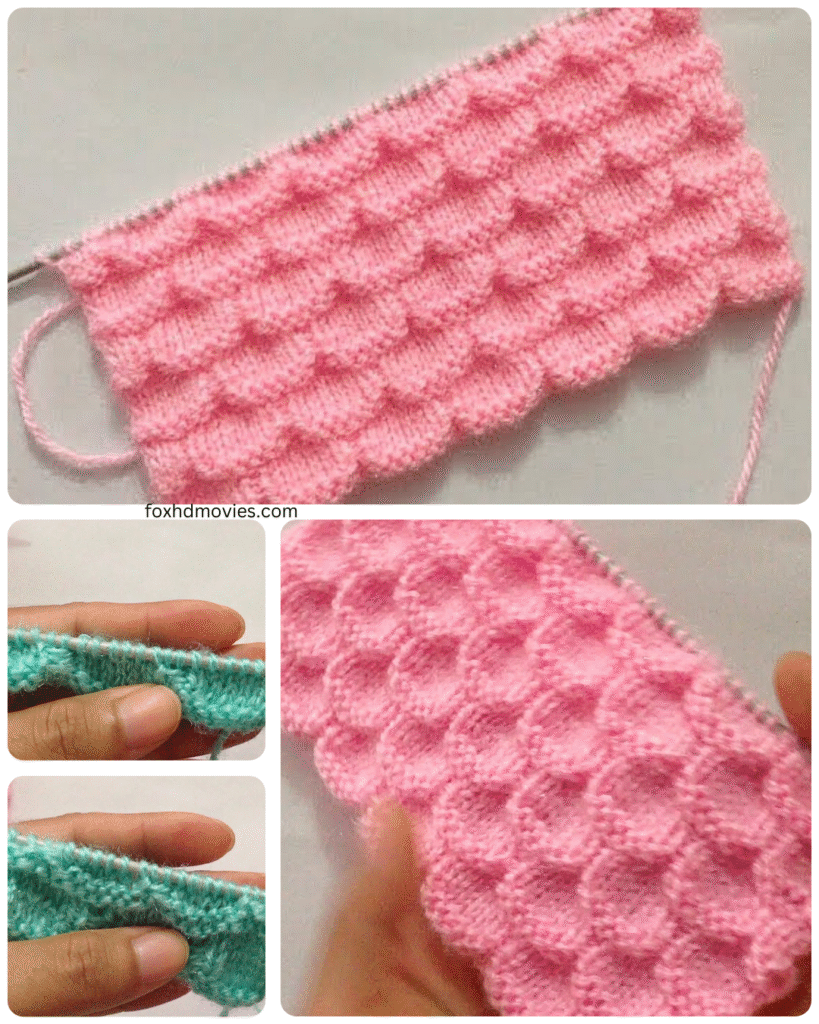
Our hero stitch today is the garter stitch. For those new to knitting, the garter stitch is created by knitting every single row. This results in a reversible fabric with horizontal ridges, known for its squishy texture and beginner-friendliness.
But don’t let its simplicity fool you! By strategically altering how we work these knit stitches, we can create a surprising array of unique patterns.
Video tutorial
Technique 1: Playing with Row Lengths – The Wavy Wonder
One of the easiest ways to introduce visual interest is by knitting different numbers of stitches in consecutive rows. This creates a wavy or rippled effect.
How to do it:
- Cast on an even number of stitches (e.g., 30 stitches).
- Row 1: Knit across all stitches.
- Row 2: Knit a smaller number of stitches (e.g., 15 stitches). Turn your work before reaching the end of the row.
- Row 3: Knit back across the stitches you just worked.
- Row 4: Knit across all stitches.
- Row 5: Knit a different smaller number of stitches (e.g., 20 stitches). Turn your work.
- Row 6: Knit back across those stitches.
- Repeat steps 1-7, varying the number of stitches you knit in the shorter rows and their placement.
The Result: This technique creates organic, flowing lines and a textured surface. It’s fantastic for scarves, shawls, and even adding interest to the edges of blankets.
Technique 2: The Diagonal Delight – Short Rows for a Slant
Building on the idea of varying row lengths, we can strategically use short rows to create diagonal lines and shapes within our garter stitch fabric. Short rows involve turning your work before the end of a row, creating a wedge shape.

How to do it (using the “wrap and turn” method):
- Cast on your desired number of stitches.
- Row 1 (RS): Knit across all stitches.
- Row 2 (WS): Knit a certain number of stitches (e.g., knit 20). Place your yarn to the front, slip the next stitch purlwise onto the right needle, bring the yarn to the back, slip the stitch back onto the left needle (you’ve “wrapped” a stitch). Turn your work.
- Row 3 (RS): Knit back across the stitches until you reach the wrapped stitch. Pick up the wrap by inserting your right needle under the wrap and onto the left needle, then knit the wrap together with the stitch.
- Row 4 (WS): Knit across all stitches.
- Repeat steps 2-5, varying the number of stitches you knit before wrapping and the frequency of the short rows. You can create gradual or sharp diagonal lines.
The Result: This technique allows for the creation of triangles, chevrons, and other geometric patterns within the simple garter stitch. It’s excellent for creating visually interesting blankets, scarves with angled edges, or even shaping garments.
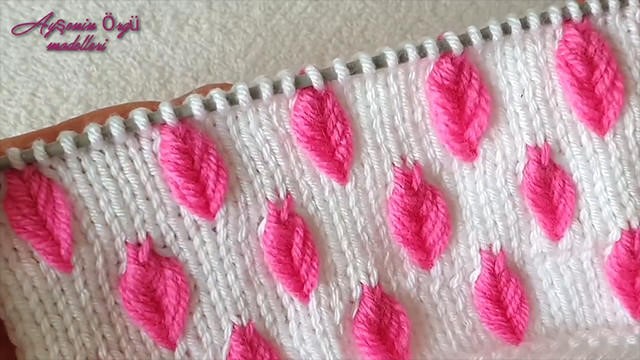
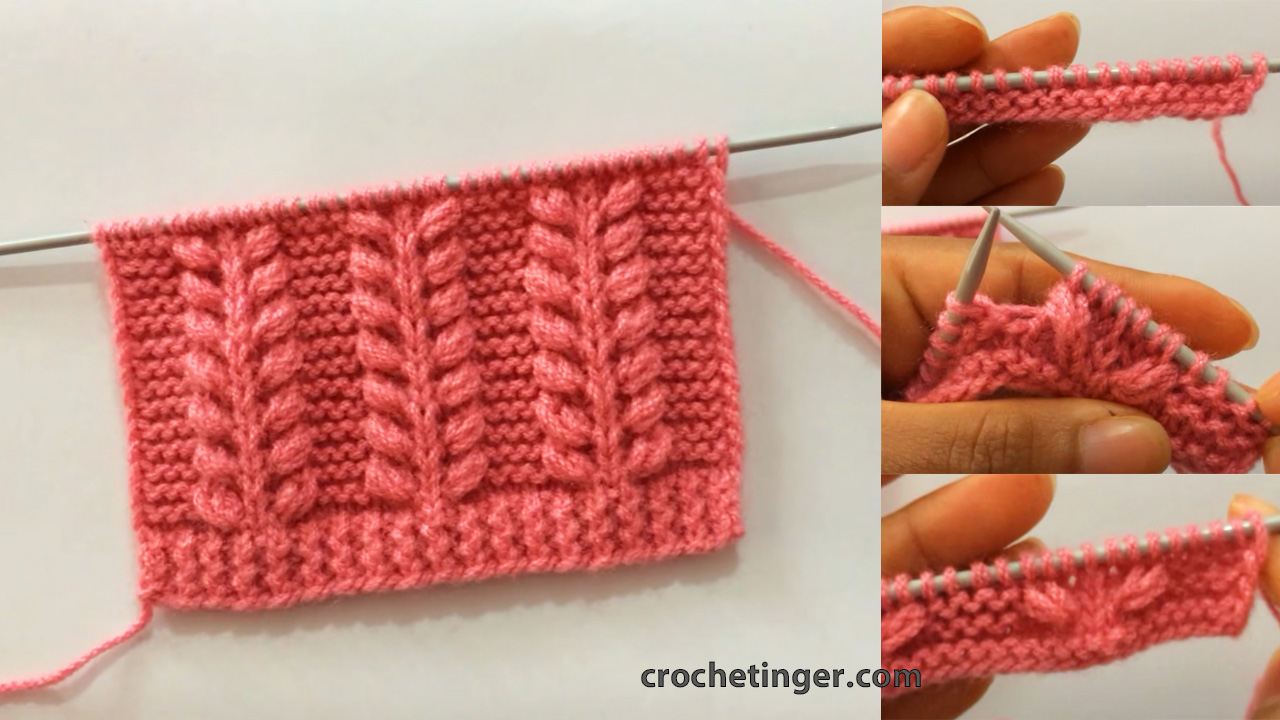
Technique 3: The Raised Ridges – Manipulating Stitch Placement
While the garter stitch naturally creates horizontal ridges, we can create vertical or diagonal “corded” lines by strategically slipping stitches. When you slip a stitch without knitting it, it creates a longer, unworked loop that stands out.

How to do it:
- Cast on an odd number of stitches (for a symmetrical vertical line).
- Row 1: Knit across all stitches.
- Row 2: Knit 1, slip 1 purlwise with yarn in back, knit 1, repeat to the end.
- Row 3: Knit across all stitches.
- Repeat rows 2 and 3.
For diagonal lines, you would slip the stitch in a different position in each “slipped stitch” row.
The Result: This technique creates distinct raised lines running through your garter stitch fabric. It adds a subtle yet effective textural element and can be used to create stripes or more complex geometric designs by varying the slipped stitch placement.
Beyond the Basics: Experimentation is Key!
These are just a few starting points to ignite your creativity. Don’t be afraid to experiment by:
- Combining these techniques.
- Varying the number of rows between pattern repeats.
- Using different yarn weights to see how the texture changes.
- Introducing simple color changes within these techniques.

Unleash Your Inner Designer:
The beauty of focusing on a single stitch like the knit stitch is that it simplifies the process while opening up a world of possibilities through manipulation. You don’t need to memorize complex charts or learn intricate new stitches to create something truly unique and handmade.
So, grab your needles and some yarn, and start playing with the humble knit stitch. You might be surprised at the stunning and individual patterns you can create!
Share Your Simple Stitch Creations!