 by
by 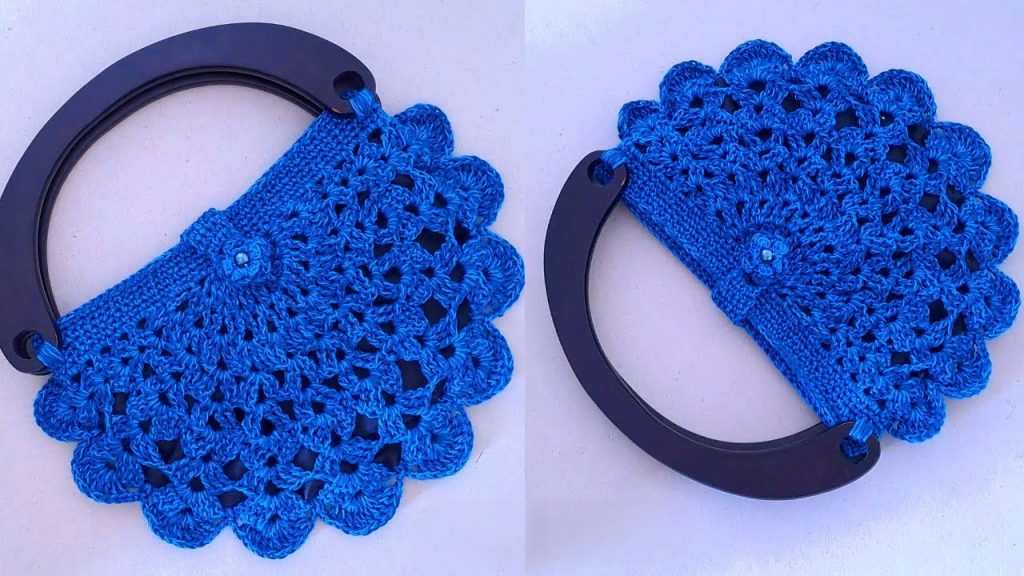
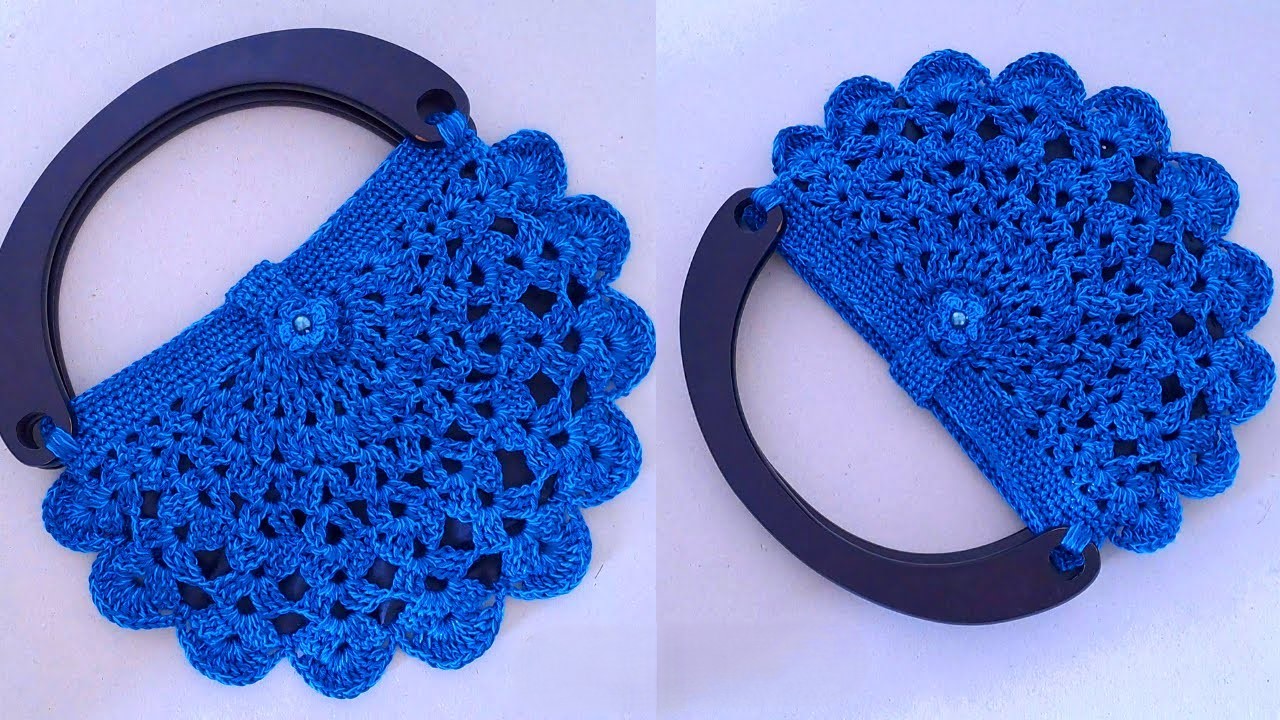
Looking for a stylish, unique, and surprisingly quick crochet project? This half-circle bag is just what you need! Inspired by a fantastic tutorial, this pattern is designed to be beginner-friendly while creating a sophisticated accessory. It’s perfect for carrying your essentials and adds a touch of handmade charm to any outfit.
Skill Level: Easy to Intermediate
Finished Size (Approximate):
- Width: 10.5 inches (27 cm)
- Length (Height): 7 inches (18 cm)
- Bag Weight: Approximately 65 grams
Materials You’ll Need:
- Yarn:
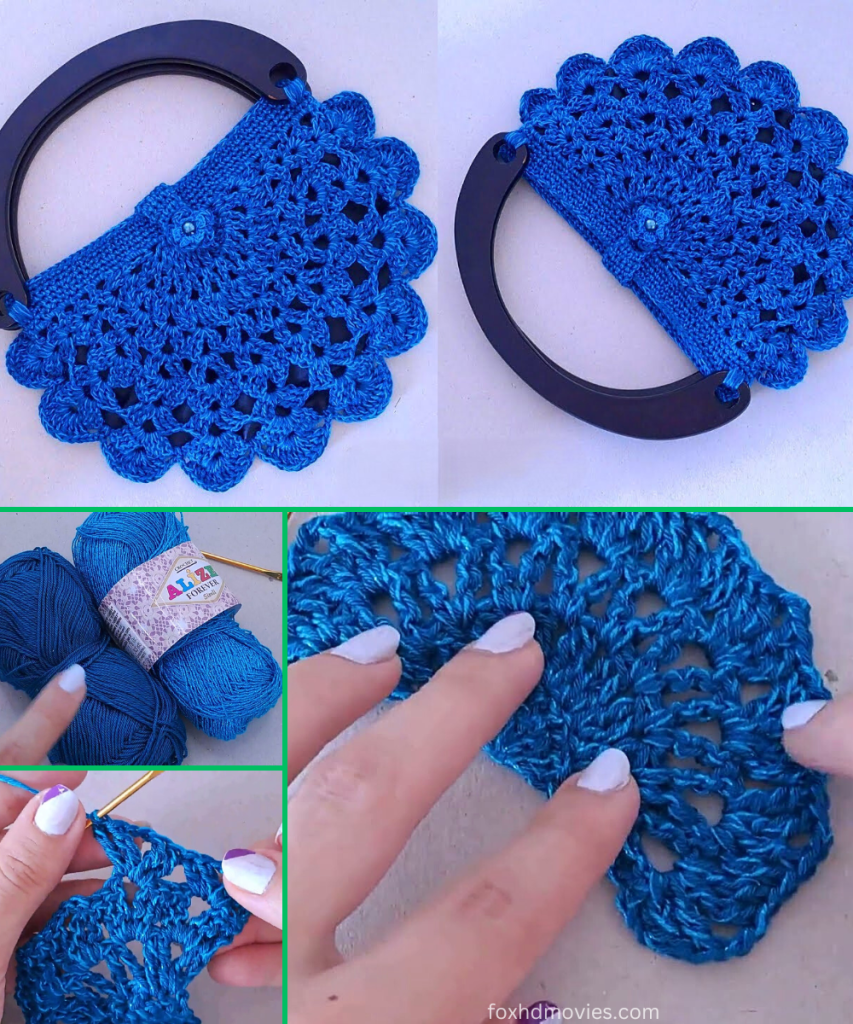
- Main Yarn: Fine (Sport) or Light Worsted (DK) weight yarn. (The video mentions Alize Diva, which is a microfibre acrylic, often a fine weight). Approximately 50-60 grams.
- Accent Yarn (Optional, for sparkle): A thin metallic or glitter yarn to be held together with the main yarn (the video uses Alize Forever Simli). Small amount.
- You can use a single strand of DK weight yarn if you prefer no sparkle.
- Crochet Hook: C/2 (2.5 mm) or size needed to obtain gauge.
- Using a smaller hook for the yarn weight helps create a denser fabric suitable for a bag.
- Tapestry Needle: For weaving in ends and seaming.
- Scissors
- Stitch Markers (optional): Helpful for marking stitches or rounds.
- Wooden Bag Handles: Two half-circle or D-shaped wooden handles (approx. 5-6 inches / 13-15 cm wide).
- Fabric for Lining (optional but recommended): A piece of fabric slightly larger than your finished bag for a neat interior.
- Sewing Needle and Thread (for lining and handles): Matching thread for your fabric and bag color.
Gauge (Important!):
Working in double crochet (dc) with both yarns held together: 20 dc and 10 rows = 4 inches (10 cm)
- Why Gauge Matters: Achieving the correct gauge is crucial for your bag to turn out the intended size and have the right drape. If your gauge is off, your bag might be too big, too small, or too floppy!
- How to Swatch: Chain 22. Work 20 dc into the chain (starting in 4th ch from hook). Work in dc for 12 rows. Measure a 4-inch square in the middle of your swatch. Adjust your hook size if necessary.
Abbreviations (US Crochet Terms):
- ch: chain
- sl st: slip stitch
- sc: single crochet
- hdc: half double crochet
- dc: double crochet
- tr: treble crochet (yarn over twice, insert hook, yo, pull through 2 loops, yo, pull through 2 loops, yo, pull through last 2 loops)
- sk: skip
- sp: space
- ch-sp: chain space
- MR: Magic Ring
- FO: Fasten off
- RS: Right Side
- WS: Wrong Side
- Picot: Ch 3, sl st into 3rd ch from hook.
Special Stitches:
- Cluster (Cl): [Yo, insert hook into st/sp, yo, pull up loop, yo, pull through 2 loops] 3 times in the same st/sp. Yo, pull through all 4 loops on hook.
- V-stitch (V-st): (Dc, ch 1, dc) in specified stitch or space.
- Shell: (2 dc, ch 1, 2 dc) in specified stitch or space.
- Fan Stitch: (3 dc, ch 1, 3 dc) in specified stitch or space.
Let’s Crochet Your Half-Circle Bag!
The bag is made by crocheting two identical half-circle panels, joining them, adding a border, and then attaching the handles and lining.

Hold Main Yarn and Accent Yarn (if using) together throughout the pattern.
Part 1: Half-Circle Panel (Make 2)
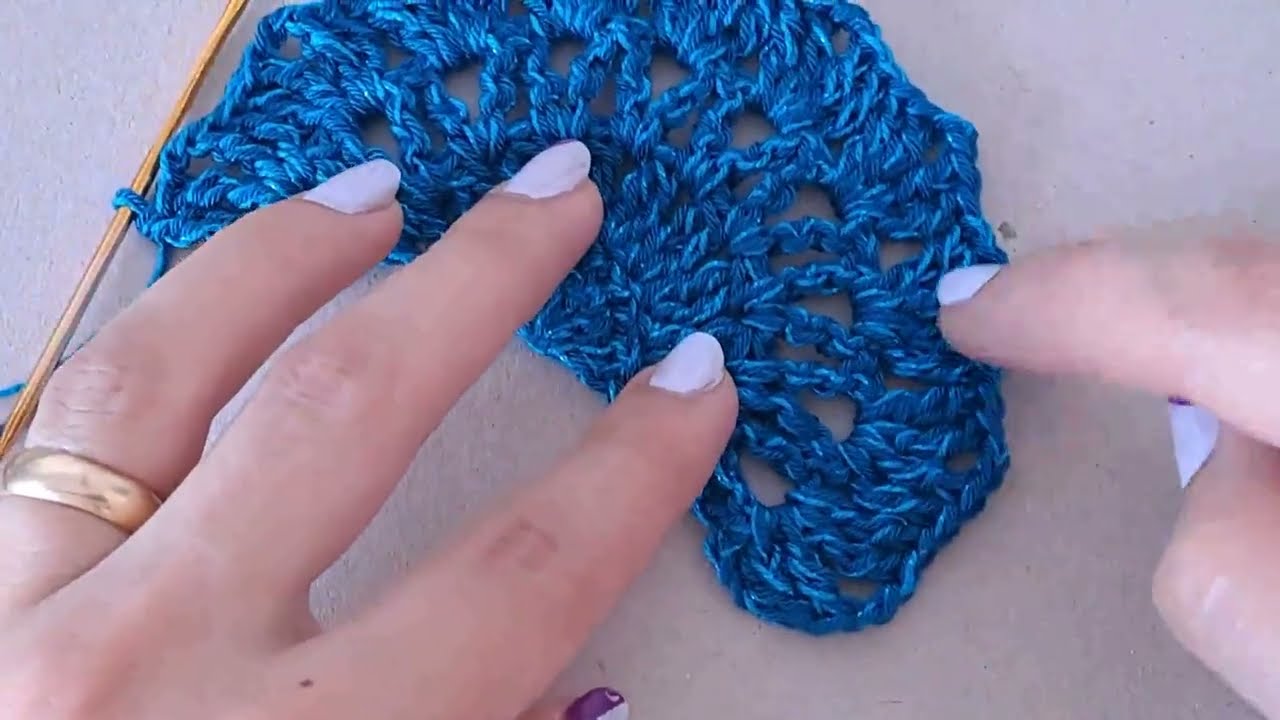
We’ll start with a magic ring and work in rows to create the half-circle.
Row 1: Ch 3 (counts as first dc). Work 9 dc into MR. Ch 3, turn. (10 dc)
- Pull MR tight to close.
Row 2: 2 dc in first dc. Dc in next 8 dc. 2 dc in last dc. Ch 3, turn. (12 dc)
Row 3: 2 dc in first dc. Dc in next 10 dc. 2 dc in last dc. Ch 3, turn. (14 dc)
Row 4: 2 dc in first dc. Dc in next 12 dc. 2 dc in last dc. Ch 3, turn. (16 dc)
Row 5: 2 dc in first dc. Dc in next 14 dc. 2 dc in last dc. Ch 3, turn. (18 dc)
Row 6: 2 dc in first dc. Dc in next 16 dc. 2 dc in last dc. Ch 3, turn. (20 dc)
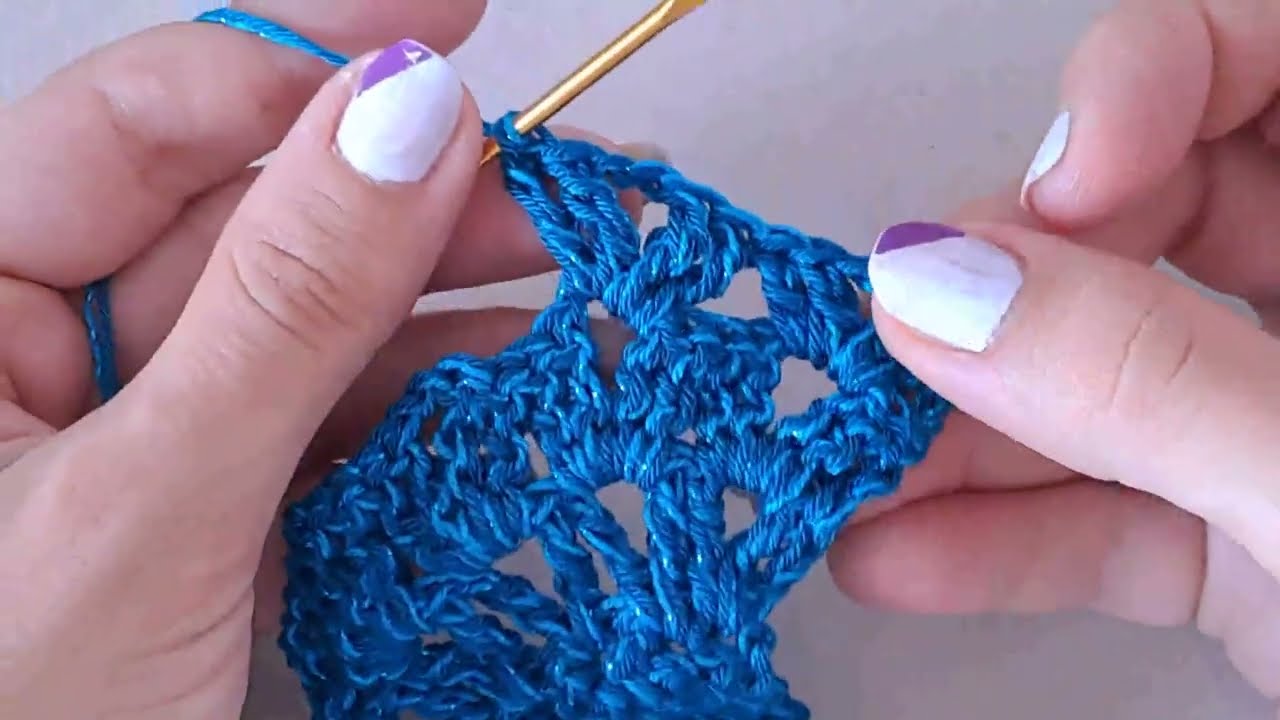
Row 7 (Cluster Row): 2 dc in first st. Ch 1, sk 1 st. Cl in next st, ch 1, sk 1 st. Repeat from * to * across until 1 st remains. 2 dc in last st. Ch 3, turn.
- This row introduces texture. Count your clusters carefully!
Row 8: 2 dc in first st. Dc in each Cl and ch-1 sp across. 2 dc in last st. Ch 3, turn.
Row 9 (V-stitch Row): 2 dc in first st. Sk 1 st. V-st in next st, sk 1 st. Repeat from * to * across until 1 st remains. 2 dc in last st. Ch 3, turn.
- The V-stitches create an open, airy section.
Row 10: 2 dc in first st. Dc in each dc and ch-1 sp of V-sts across. 2 dc in last st. Ch 3, turn.
Row 11 (Shell Row): 2 dc in first st. Sk 1 st. Shell in next st, sk 1 st. Repeat from * to * across until 1 st remains. 2 dc in last st. Ch 3, turn.
- This adds a decorative edge to the top of the half-circle.
Row 12: 2 dc in first st. Dc in each dc and ch-1 sp of shells across. 2 dc in last st. Ch 1, turn.
Row 13 (SC Edging Row): Sc evenly across the top curved edge of the half-circle. Work 2 sc in the first and last dc of the previous row.
- This creates a neat edge for joining the two panels.
FO, leaving a long tail (approx. 20 inches / 50 cm) on one panel for seaming. Weave in ends on the other panel.
Part 2: Joining the Panels
- Place the two half-circle panels together, WS facing. Align all edges.
- Using the long tail from one panel and your tapestry needle, seam the curved edges of the two panels together using a whip stitch or mattress stitch. Start from one bottom corner and sew all the way around the curved edge to the other bottom corner.
- Leave the straight top edges open for the bag opening.
Part 3: Decorative Border (Around Bag Opening)
Now we’ll work a border around the open top edge of the bag.
- Attach Yarn: Attach yarn with a sl st to one of the top corners of the bag opening.
- Rnd 1 (SC Base): Ch 1, sc evenly around the entire opening of the bag. Work 3 sc in each corner to allow for turning. Join with a sl st to the first sc.
- This creates a solid base for the decorative fan stitches.
- Rnd 2 (Fan Stitch Border): Ch 3 (counts as 1st dc). Sk 2 sts. Fan Stitch (3 dc, ch 1, 3 dc) in next st. Sk 5 sts. Repeat from * to * around. Adjust skips at the end if necessary to make the pattern work. Join with a sl st to the top of the beginning ch 3.
- This creates a beautiful, lacy border around the opening.
- Rnd 3 (Picot Edge): Ch 1. Sc in first dc of the fan. Sc in next 2 dc. (Sc, Picot, sc) in ch-1 sp of fan. Sc in next 3 dc. Sc in the space between fans. Repeat from * to * around. Join with a sl st to the first sc.
- The picot stitches add a delicate, finished edge.
FO, weave in ends.
Part 4: Simple Crochet Flower Embellishment (Optional)
This flower is similar to the one seen in the video.
- Magic Ring: Create a MR.
- Rnd 1: Ch 1, 5 sc into MR. Join with sl st to first sc. (5 sc)
- Rnd 2 (Petals): [Ch 2, 2 dc in same st, ch 2, sl st in same st]. Repeat from * to * in each of the next 4 sc. You should have 5 petals. Sl st to join. FO, leaving a long tail for sewing.
Part 5: Adding a Fabric Lining (Optional but Recommended)
A fabric lining gives your bag a professional finish and prevents stretching.
- Cut Fabric: Lay your finished crochet bag flat. Cut two pieces of fabric slightly larger than your bag panels (e.g., 1 inch / 2.5 cm extra on all sides).
- Sew Fabric: Place the two fabric pieces RS together. Sew around the curved edge, leaving the top straight edge open. Trim seam allowance and clip curves.
- Insert Lining: Turn the fabric lining RS out. Insert it into your crochet bag.
- Hand Sew: Fold under the raw edges of the fabric lining and hand-sew it neatly to the inside of the crochet bag, just below the crocheted border. Use a matching thread.
Part 6: Attaching Wooden Handles
- Position Handles: Place the wooden handles on either side of the bag opening, aligning them with the top edge.
- Sew Handles: Using your tapestry needle and a strong matching thread (or a finer strand of your bag yarn), securely sew the crochet fabric directly to the wooden handles. Pass the needle around the wooden handle and through the top edge of the bag multiple times for a secure attachment. Repeat for both handles.
Final Touches:
- Weave in all remaining ends.
- Attach Flower (Optional): Sew the crochet flower securely to one side of the bag, near the top, as a charming embellishment.
- Steam Block (Optional): Gently steam your finished bag to help the stitches relax and the bag hold its shape. Be careful not to flatten the texture.
Video tutorial
Customization & Tips:
- Size Adjustment: To make a larger or smaller bag, you can adjust the initial number of stitches in Row 1 of the half-circle panel and add/subtract rows. Remember to adjust your gauge swatch accordingly.
- Yarn Choice: Experiment with different yarn fibers and colors! A solid color will highlight the stitch patterns, while a variegated yarn will create a unique look.
- Handle Alternatives: If you don’t want wooden handles, you can crochet a sturdy strap or a chain strap.
- Closure: Add a magnetic snap closure or a zipper to the lining for added security.
Enjoy your beautiful, handmade half-circle bag! It’s a fantastic way to showcase your crochet skills.