by
by 
Welcome, aspiring knitters and seasoned crafters alike! Today, we’re diving into the very foundation of knitting – the Garter Stitch. If you’ve ever been curious about the rhythmic click of needles and the satisfying creation of fabric, the garter stitch is your perfect starting point. It’s so simple to learn, yet incredibly versatile, forming the basis for countless beautiful projects.
Forget complicated patterns and confusing jargon. This guide will walk you through the garter stitch step-by-step, making it accessible to absolutely anyone. By the end of this post, you’ll not only know how to knit the garter stitch but also understand why it’s such a beloved technique.
What is the Garter Stitch?
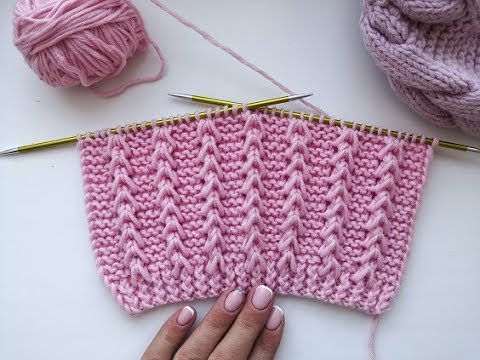
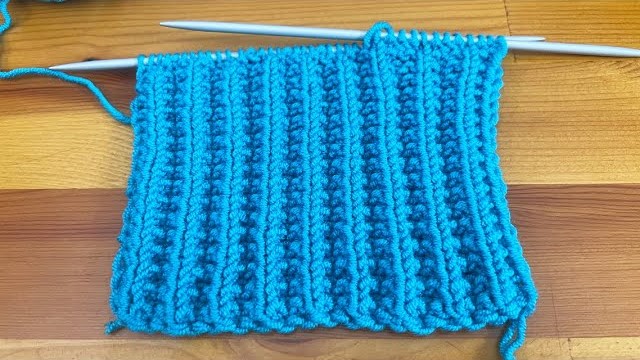
In its simplest form, the garter stitch is created by knitting every single stitch, on every single row. That’s it! No purling involved. This consistent action creates a fabric with horizontal ridges on both sides, making it reversible and beautifully textured. It lies flat, doesn’t curl at the edges (a huge win for beginners!), and has a lovely squishy feel.
What You’ll Need:
- Yarn: Choose a smooth, worsted weight yarn in a color you love. For your first project, a lighter color might make it easier to see your stitches.
- Knitting Needles: Pick a pair of straight needles in a size that corresponds to your yarn weight (usually size US 7 or 8). Check your yarn label for recommendations.
- Scissors: For snipping your yarn.
Video tutorial
Let’s Get Started: Step-by-Step to Garter Stitch Glory!

- Making a Slip Knot: This is the first loop on your needle that starts your knitting.
- Make a loop with your yarn, leaving a tail of about 6 inches.
- Insert your fingers into the loop and grab the yarn coming from the ball.
- Pull this yarn through the loop to create another smaller loop.
- Slip this new loop onto your knitting needle and gently tighten it by pulling the tail and the working yarn (the yarn coming from the ball).
- Casting On: This is how you get stitches onto your needle. We’ll use the simple “knit cast-on” method.
- Hold the needle with the slip knot in your right hand. The working yarn should be coming from behind your work.
- Insert the right needle tip into the slip knot from front to back.
- Wrap the working yarn counter-clockwise around the tip of the right needle.
- Using the right needle tip, draw the wrapped yarn through the loop on the left needle.
- Slip the newly formed loop onto the left needle.
- Repeat steps 2b-2e until you have the desired number of stitches on your left needle. For practice, try casting on around 15-20 stitches.
- Knitting the First Row (and Every Row After!): This is where the magic of the garter stitch happens.
- Hold the needle with the cast-on stitches in your left hand and the empty needle in your right hand.
- Insert the tip of the right needle into the first stitch on the left needle, going from front to back.
- Wrap the working yarn counter-clockwise around the tip of the right needle.
- Using the right needle tip, draw the wrapped yarn through the loop on the left needle.
- Slip the old stitch off the left needle. You’ve now completed one knit stitch!
- Repeat steps 3b-3e for every stitch on the left needle. All your stitches should now be on the right needle.
- Now, switch the needles so the needle with the stitches is in your left hand and the empty needle is in your right hand.
- Repeat steps 3b-3f for every subsequent row. Remember, in the garter stitch, you knit every stitch on every row.
- Binding Off (Casting Off): This is how you finish your knitting and prevent it from unraveling.
- Knit the first two stitches on your left needle as usual. You will now have two stitches on your right needle.
- Using the tip of your left needle, lift the first stitch on the right needle over the second stitch and off the needle. You now have one stitch on your right needle.
- Knit one more stitch onto your right needle (so you have two stitches again).
- Lift the first stitch on the right needle over the second stitch and off the needle.
- Repeat steps 4c-4e until only one stitch remains on your right needle.
- Cut the working yarn, leaving a tail of about 6 inches.
- Pull the tail through the last loop on your needle and tighten the knot to secure it.
- Weaving in Ends: This makes your project look neat and prevents the yarn ends from coming undone.
- Thread your yarn needle with one of the yarn tails.
- Weave the needle through the stitches on the wrong side of your work, going in different directions to secure the end.
- Trim any excess yarn. Repeat this process for the other yarn tail.

Congratulations! You’ve knitted the garter stitch!
Take a moment to admire your textured fabric. Feel the squishiness and notice the horizontal ridges. You’ve just unlocked a fundamental skill in the world of knitting!
Why the Garter Stitch is So Great for Beginners:
- Simplicity: It involves only one basic stitch – the knit stitch. This makes it easy to learn and remember.
- No Curling: Unlike stockinette stitch (alternating knit and purl rows), the garter stitch lies completely flat, which is perfect for scarves, blankets, and other flat projects.
- Reversible: Both sides of the garter stitch fabric look the same, so there’s no “wrong side.”
- Forgiving: Minor tension inconsistencies are less noticeable in the garter stitch compared to more complex patterns.
- Versatile: Despite its simplicity, the garter stitch can be used to create a wide range of projects, from cozy scarves and baby blankets to textured dishcloths and even parts of more intricate designs.
Your First Garter Stitch Project Ideas:
Now that you know the garter stitch, here are a few easy projects to get you started:
- Simple Scarf: Cast on your desired width (around 20-30 stitches) and knit every row until it’s the length you want. Bind off and weave in the ends.
- Cozy Washcloth: Cast on around 30-40 stitches and knit every row until you have a square. Bind off and weave in the ends.
- Beginner Baby Blanket: Cast on a larger number of stitches (depending on your desired size) and knit every row until it’s the desired length. Bind off and weave in the ends.
Beyond the Basics: Exploring Further
Once you feel comfortable with the garter stitch, you can start exploring other exciting knitting techniques, such as the purl stitch, which, when combined with the knit stitch, opens up a whole new world of patterns and textures.
Knitting is a journey of continuous learning and creativity. The garter stitch is your first step on this wonderful path. So, grab your needles and yarn, embrace the rhythm, and enjoy the satisfying process of creating something beautiful with your own two hands!
Share Your Progress!