 by
by 
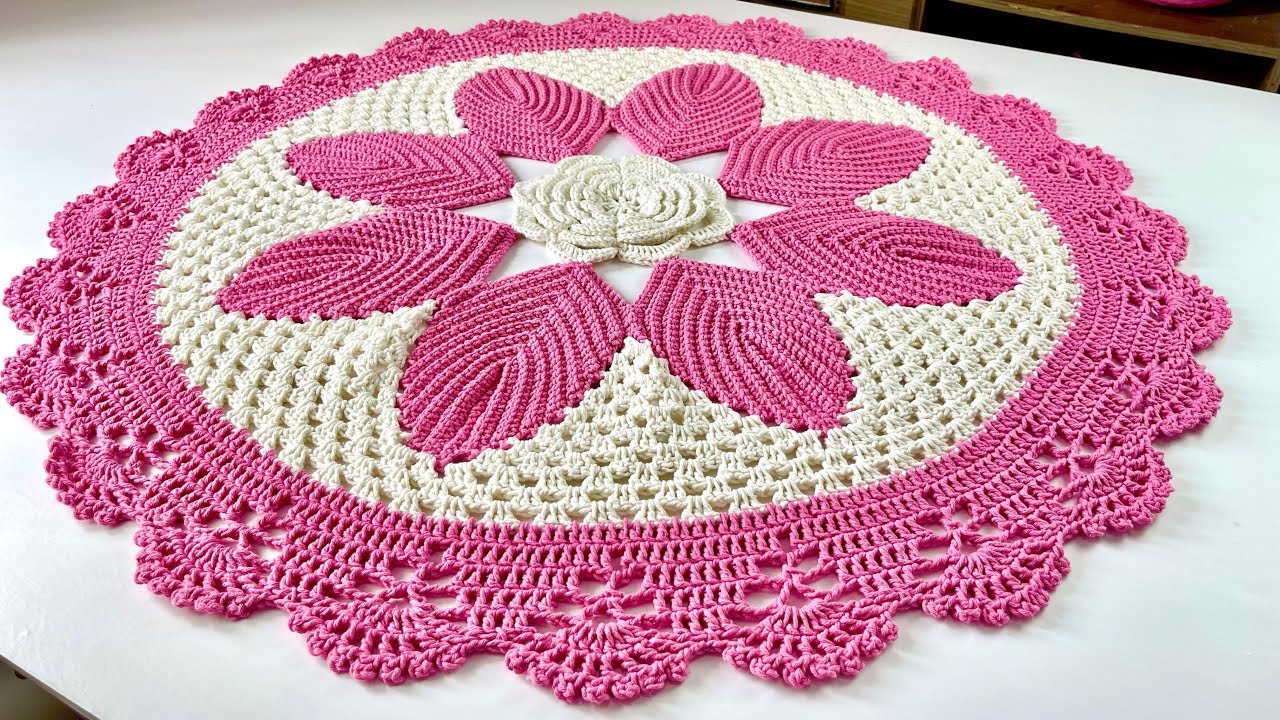
let’s get this daisy blooming under your crochet hook! This pattern will guide you through creating a cheerful Crochet Daisy Rug. It’s designed to be relatively straightforward, but with enough detail to ensure a lovely finished piece.
Finished Size: Approximately 30 inches in diameter (can be adjusted by adding more rounds to the center or petals).
Materials:
- Worsted weight yarn in the following colors:
- Yellow (Y): For the center of the daisy.
- White (W): For the petals.
- Green (G): For the leaves and potentially a border.
- Crochet hook size H/8 (5.0 mm) or size needed to obtain gauge.
- Stitch markers (optional, but helpful).
- Tapestry needle for weaving in ends.
- Scissors.
Gauge: While not critical for a rug, aim for approximately 4 single crochet (sc) stitches and 4 rows per inch using your chosen yarn and hook.
Abbreviations (US Crochet Terms):
- ch: chain
- sl st: slip stitch
- sc: single crochet
- hdc: half double crochet
- dc: double crochet
- tr: treble crochet
- st(s): stitch(es) 1
- sp(s): space(s)
- rep: repeat
- beg: beginning
- inc: increase (work 2 stitches in the same stitch)
- dec: decrease (crochet two stitches together)

Pattern:
Part 1: The Yellow Center
With Yarn Y, create a magic ring.
- Round 1: Ch 1 (does not count as a st), 6 sc into the magic ring. Pull the tail tight to close the ring. Sl st to the first sc to join. (6 sts)
- Round 2: Ch 1, 2 sc in each st around. Sl st to the first sc to join. (12 sts)
- Round 3: Ch 1, *sc in the next st, 2 sc in the next st; rep from * around. Sl st to the first sc to join. (18 sts)
- Round 4: Ch 1, *sc in the next 2 sts, 2 sc in the next st; rep from * around. Sl st to the first sc to join. (24 sts)
- Round 5: Ch 1, *sc in the next 3 sts, 2 sc in the next st; rep from * around. Sl st to the first sc to join. (30 sts)
- Round 6: Ch 1, *sc in the next 4 sts, 2 sc in the next st; rep from * around. Sl st to the first sc to join. (36 sts)
- Continue increasing in this manner: For each subsequent round, increase the number of single crochet stitches between the increases by one. For example, Round 7 will be *sc in the next 5 sts, 2 sc in the next st*, Round 8 will be *sc in the next 6 sts, 2 sc in the next st*, and so on.
- Work a total of approximately 10-12 rounds (or until your center reaches your desired size, roughly 6-8 inches in diameter). The final stitch count will depend on how many rounds you work.
- Fasten off Yarn Y and weave in the ends.

Part 2: The White Petals
- Join Yarn W with a sl st in any stitch of the yellow center.
- Round 1 (Petal Base): Ch 1, sc in the same st, *ch 3, skip the next st, sc in the next st; rep from * around. Sl st to the first sc to join. The number of ch-3 spaces should be a multiple of your desired number of petals (e.g., for 12 petals, you’ll have 12 ch-3 spaces). Adjust the number of skipped stitches if needed to achieve this.
- Round 2 (Creating the Petals): Sl st into the first ch-3 sp. Ch 1, in the same ch-3 sp work: (sc, hdc, 2 dc, hdc, sc). Sl st into the next ch-3 sp.
- Repeat Round 2 in each ch-3 sp around. This will create the individual petals.
- After the last petal, sl st to the first sl st of the round to join.
- Fasten off Yarn W and weave in the ends.

Part 3: The Green Leaves (Optional)
You can add leaves around the petals for an extra touch.
- Join Yarn G with a sl st in any stitch between two petals on the yellow center.
- Leaf 1: Ch 5, sl st in the second ch from the hook, sc in the next ch, hdc in the next ch, dc in the last ch. Sl st in the next stitch on the yellow center.
- Repeat “Leaf 1” around the rug, placing leaves between each set of two petals (or as desired).
- Fasten off Yarn G and weave in the ends.
Part 4: The Green Border (Optional)
You can add a green border to frame your daisy rug.
- Join Yarn G with a sl st in any stitch on the outer edge of the white petals.
- Round 1 (Border Base): Ch 1, sc evenly around the entire edge of the rug. When you reach the points between the petals, you can work a sc in the sl st that joins the petals. Adjust the number of stitches as needed to keep the border relatively flat. Sl st to the first sc to join.
- Round 2 (Optional Border Detail): You can work a simple round of sl st, or get creative with picots (ch 3, sl st in the first ch) or other decorative stitches.
- Fasten off Yarn G and weave in the ends.
Video tutorial
Tips and Variations:
- Adjusting Size: To make a larger rug, continue increasing the yellow center for more rounds. You may also need to add more petals. Ensure the number of chain spaces in the petal base round is a multiple of your desired petal count.
- Petal Shape: You can experiment with the stitches used in the petals to create different shapes. For a pointier petal, you could use more double and treble crochets in the center.
- Color Variations: Get creative with your colors! You could make a multi-colored daisy or use different shades of white for the petals.
- Adding Texture: Consider using textured stitches in the yellow center or the green border for added visual interest.
- Blocking: Gently block your finished rug to help it lay flat and even out the stitches.