by
by 
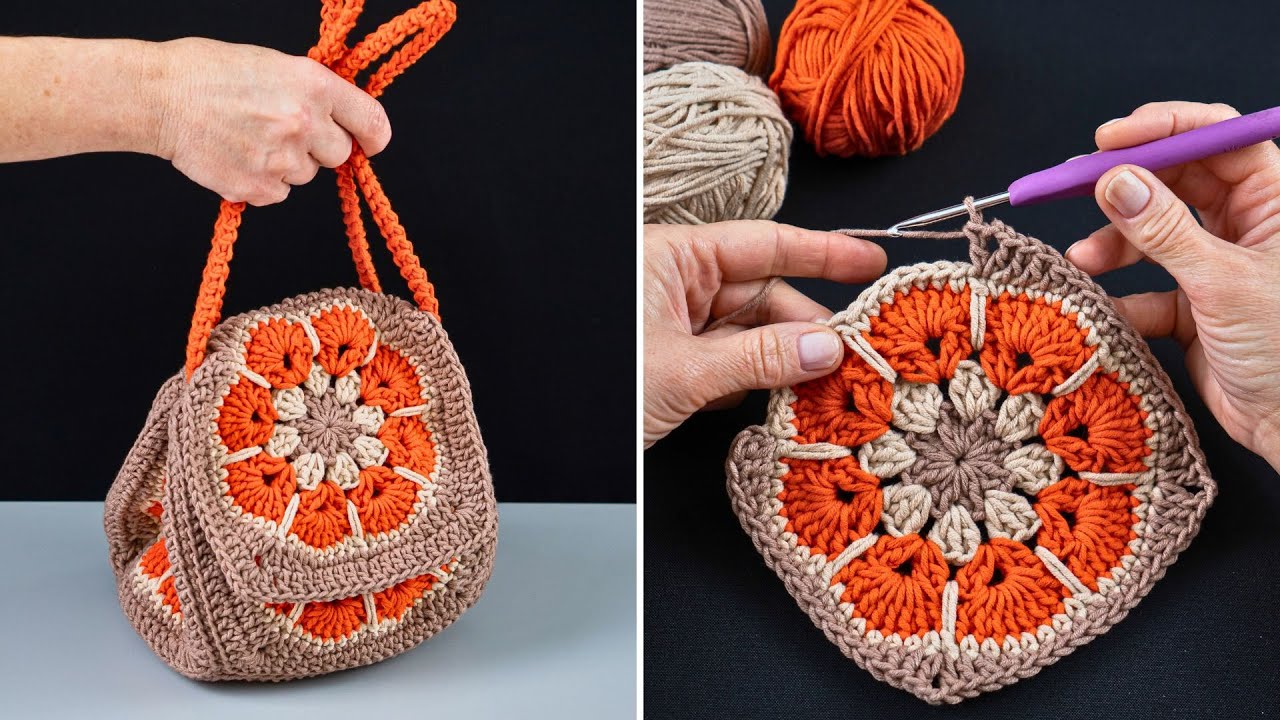
let’s get this classy bag crocheted! This pattern will guide you through creating a structured and stylish bag. We’ll cover the base, body, flap, handle, and finishing touches.
Skill Level: Intermediate
Materials:
- Worsted weight yarn (approximately 300-400 yards, depending on size). Choose a sturdy yarn that holds its shape well.
- Crochet hook size H/8 (5.0 mm) or size needed to obtain gauge.
- Stitch markers
- Yarn needle
- Scissors
- Optional: Magnetic snap or other closure
- Optional: Fabric lining
- Optional: Purse feet
Gauge: 14 single crochet (sc) stitches and 16 rows = 4 inches in single crochet. Adjust hook size if necessary to achieve gauge.
Finished Size: Approximately 10 inches wide, 8 inches tall, and 3 inches deep (adjustable).
Abbreviations (US Crochet Terms):
- ch: chain
- sl st: slip stitch
- sc: single crochet
- hdc: half double crochet
- dc: double crochet
- inc: increase (2 sc in the same stitch)
- dec: decrease 1 (sc2tog – single crochet two stitches together)
- BLO: back loop only
- FLO: front loop only
- rep: repeat
- rnd(s): round(s)
- st(s): stitch(es)
Pattern:
Part 1: Base
The base is worked in a rectangle.
- Foundation Chain: Ch 31 (this determines the width of your base; adjust as desired).
- Row 1: Sc in the second ch from the hook and in each ch across (30 sc). Turn.
- Row 2: Ch 1, sc in each st across (30 sc). Turn.
- Rows 3-16: Rep Row 2 (this determines the length of your base; adjust as desired).
Fasten off and weave in ends.

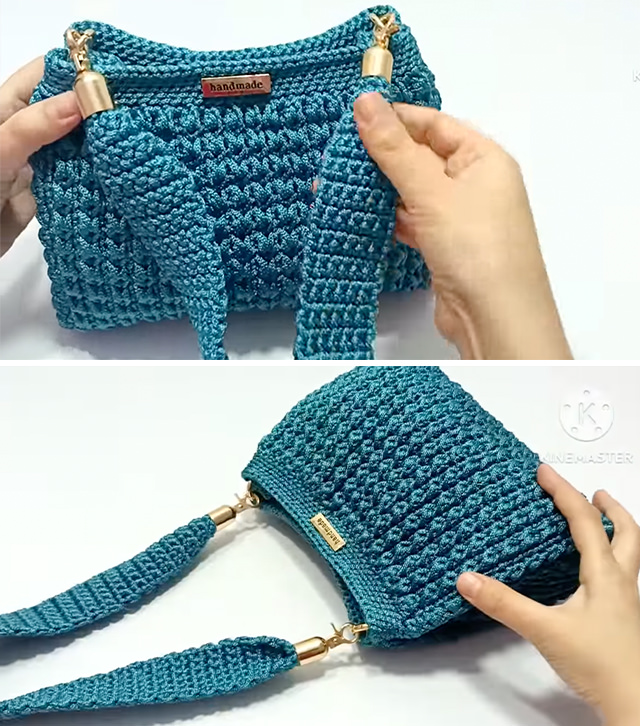
Part 2: Body
The body is worked in the round, attached to the base.
- With the right side of the base facing you, join yarn in any corner.
- Round 1: Ch 1, sc evenly around the edge of the base. You should have approximately 72-76 sc (adjust as needed to maintain a consistent stitch count on all sides, especially at the corners where you might work 2-3 sc in the corner stitch). Place a stitch marker to indicate the beginning of the round. Do not turn; work in a continuous spiral (or join with a sl st at the end of each round if you prefer a more defined seam).
- Round 2: Sc in each st around (72-76 sc).
- Rounds 3-10: Rep Round 2.
- Optional Shaping: For a slightly tapered look, you can incorporate decreases in these rounds. For example, in Round 5, you could work a few evenly spaced decreases.
- Round 11 (Creating the fold line): Ch 1, hdc in BLO of each st around (72-76 hdc). This row will create a subtle line for folding the flap later.
- Rounds 12-20: Ch 1, sc in each st around (72-76 sc).

Fasten off and weave in ends.
Part 3: Flap
The flap is worked flat, attached to the back of the bag body.
- With the wrong side of the bag body facing you, locate the center back. Count approximately 1/3 of the total stitches from one side to the other. Join yarn.
- Row 1: Ch 1, sc in the next 24-26 sts (adjust based on your bag width to create a flap that comfortably covers the opening). Turn.
- Row 2: Ch 1, sc in each st across (24-26 sc). Turn.
- Rows 3-12: Rep Row 2.
- Optional Shaping (Tapered Flap):
- Row 7: Ch 1, sc, sc2tog, sc across to last 3 sts, sc2tog, sc (22-24 sc). Turn.
- Row 8: Ch 1, sc in each st across. Turn.
- Row 9: Ch 1, sc, sc2tog, sc across to last 3 sts, sc2tog, sc (20-22 sc). Turn.
- Row 10: Ch 1, sc in each st across. Turn.
- Rows 11-12: Rep Row 10.
- Optional Shaping (Tapered Flap):
- Edging (Optional): To create a cleaner edge for the flap, you can work a round of slip stitches or single crochet around the entire flap.
Fasten off and weave in ends.
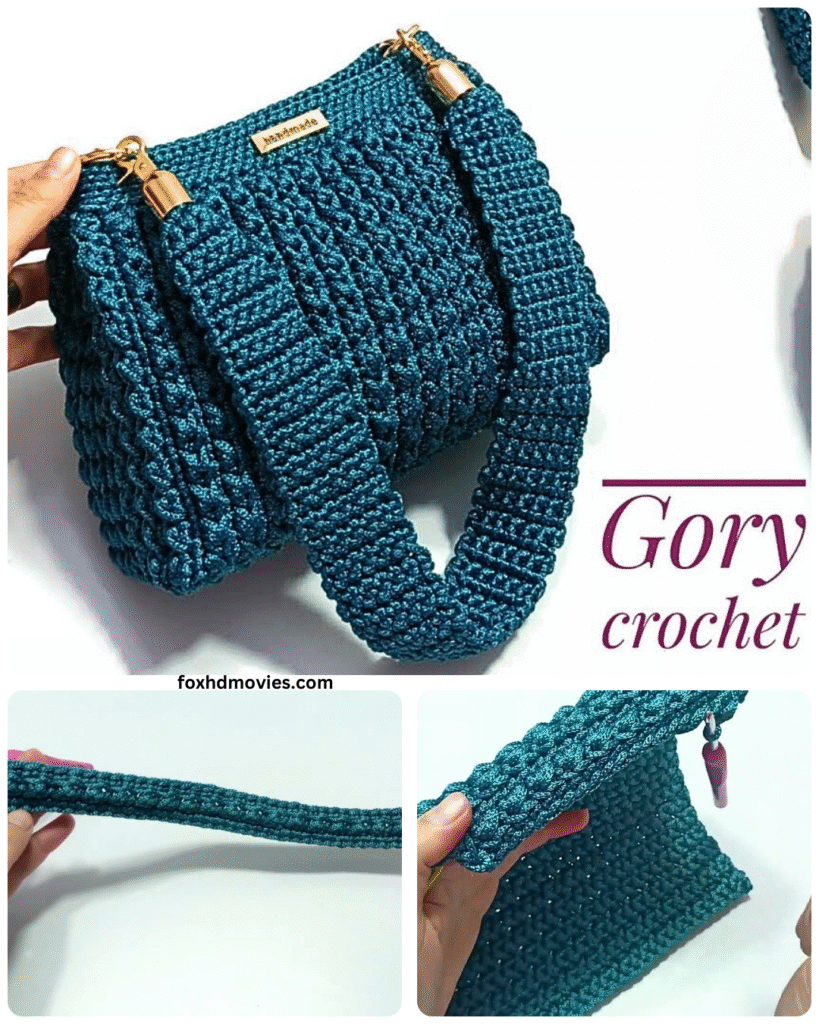
Part 4: Handle
There are a few options for the handle. Choose the one you prefer:

Option 1: Crocheted Strap
- Ch 5 (or desired width of strap).
- Row 1: Sc in the second ch from the hook and in each ch across (4 sc). Turn.
- Rows 2-Desired Length: Ch 1, sc in each st across (4 sc). Turn. Continue until the strap reaches your desired length.
- Fasten off, leaving long tails for attaching.
Option 2: I-Cord Handle (More Structured)
- Chain 3.
- Drop the loop from your hook.
- Insert your hook into the first chain, yarn over, and pull through a loop. (2 loops on hook)
- Insert your hook into the next chain, yarn over, and pull through a loop. (3 loops on hook)
- Without turning, drop the last two loops from your hook, keeping the first loop on.
- Yarn over and pull through the first loop. (1 loop on hook)
- Pick up the dropped loops. Yarn over and pull through the first loop on your hook and one of the dropped loops. (1 loop on hook)
- Yarn over and pull through the loop on your hook and the next dropped loop. (1 loop on hook)
- Repeat steps 7-8 until your i-cord reaches the desired length.
- To finish, yarn over and pull through the remaining loops on your hook. Fasten off, leaving long tails for attaching.
Option 3: Purchased Handle
You can also purchase a ready-made purse handle and attach it to your bag.
Part 5: Assembly and Finishing
- Attach the Handle: Position the ends of your crocheted strap or i-cord evenly on the sides of the bag opening. Securely sew them in place using your yarn needle. If using a purchased handle, follow the manufacturer’s instructions for attaching.
- Attach Closure (Optional): If using a magnetic snap, determine the placement on the flap and the body of the bag. Install according to the snap’s instructions. You could also use a button and loop closure, or simply leave the bag open.
- Optional Lining: If you choose to add a fabric lining, measure the inside of your bag and cut fabric pieces accordingly. Sew the lining together and hand-stitch or carefully glue it inside the crocheted bag.
- Optional Purse Feet: If desired, attach purse feet to the bottom of the base for added protection and structure.
Video tutorial
Tips and Variations:
- Stitch Patterns: Experiment with different stitch patterns for the body of the bag, such as half double crochet, double crochet, or textured stitches.
- Colorwork: Incorporate stripes or other colorwork designs for a unique look.
- Texture: Use different yarn weights or textures to add interest.
- Size Adjustments: To make the bag larger or smaller, adjust the number of starting chains for the base and the number of rounds/rows for the body and flap.
- Embellishments: Add decorative elements like appliques, beads, or tassels.