by
by 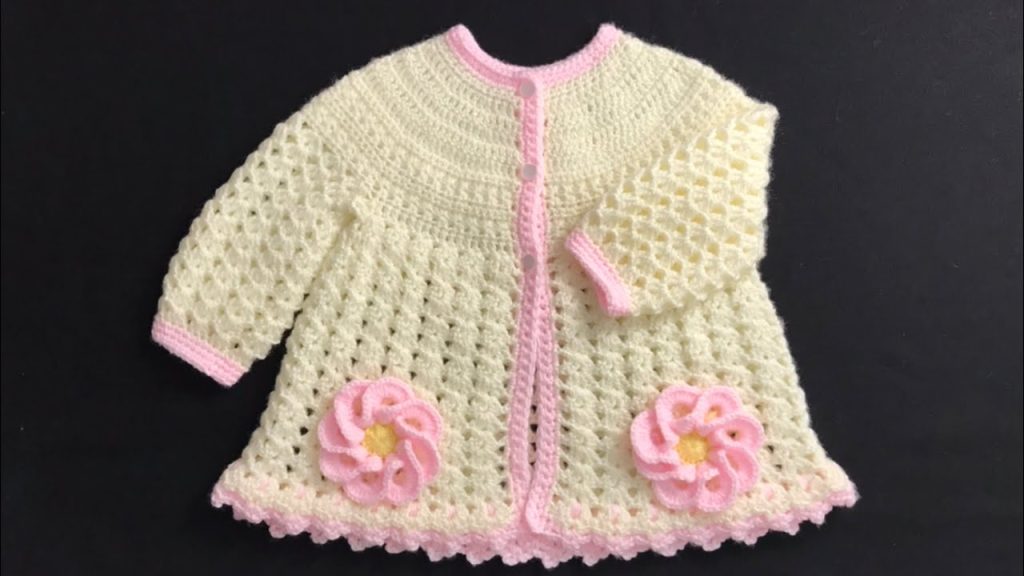
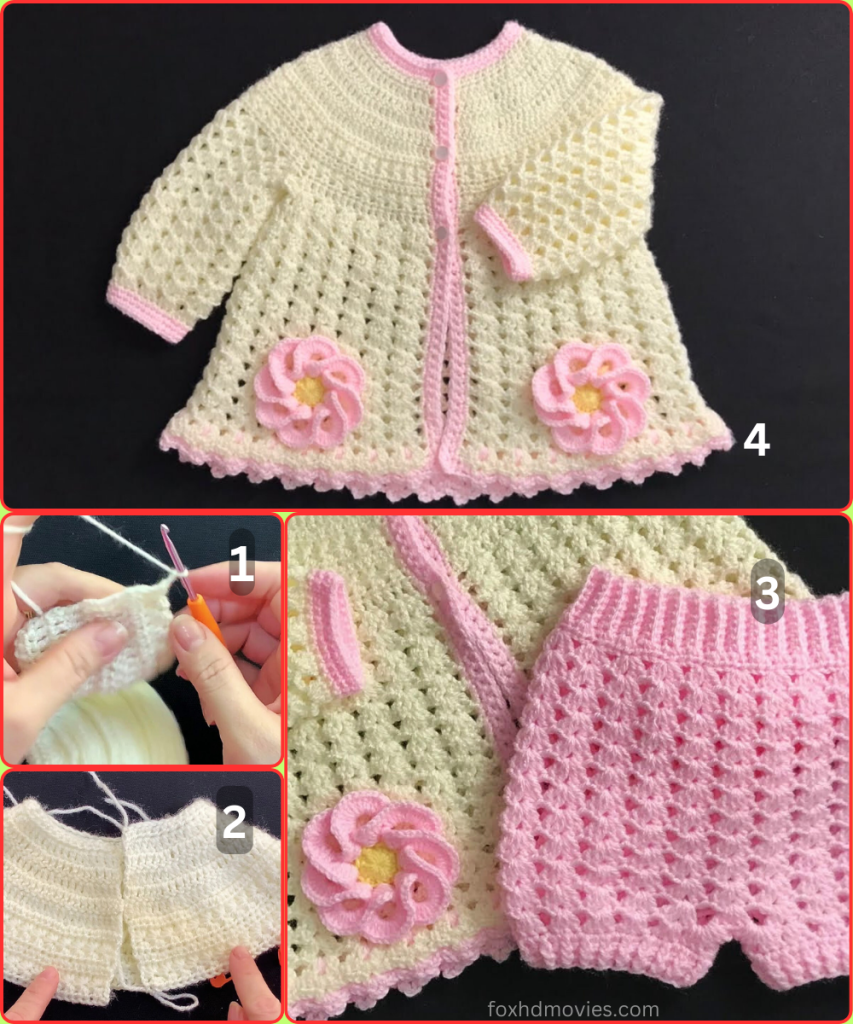
Welcome to our crochet blog, where we’re creating beautiful things for the little ones we love! Today’s project is a charming Darling Petals Baby Coat, a delightful, top-down crochet coat with a lacy texture and an adorable floral accent. This pattern is designed to be detailed and long, making it perfect for an intermediate beginner looking to create a special, heirloom-quality piece. The coat features a circular yoke, a textured body, and sweet 3D flower appliqués.
Materials Needed
- Approximately 150-180g of DK weight (or light worsted weight) yarn in a main color (MC). The image shows a soft cream or off-white.
- Approximately 30-40g of DK weight yarn in a contrasting color (CC) for the trim and flower details (pink in the image).
- A 4.0mm (G-6) crochet hook.
- Two to three small buttons (about 1.5 cm or ⅝ inch).
- Tapestry needle for weaving in ends and sewing on the flowers.
- Scissors.
- Stitch markers (optional but helpful).
Gauge
To ensure the coat fits correctly, please check your gauge.
- 18 double crochets (dc) and 10 rows = 4 inches (10 cm).
Adjust your hook size as needed to meet this gauge.
Stitches and Abbreviations
- ch: chain
- sl st: slip stitch
- sc: single crochet
- dc: double crochet
- hdc: half double crochet
- v-st: V-Stitch (dc, ch 1, dc in the same stitch or space)
- sk: skip
- dc2tog: double crochet two together (a decrease)
- […]: repeat instructions within brackets
- (…): number of stitches at the end of the round or row
Construction Overview
This coat is worked from the top down, starting with the round yoke. We’ll then divide for the sleeves and body, and finish with a decorative border and sweet flower appliqués. The main body of the coat uses a simple V-Stitch pattern to create a beautiful, lacy texture.
The Yoke (Worked in Rounds)
We’ll start with a circular yoke, which is then split for the front opening.
Round 1: Using MC, ch 56. Sl st to the first ch to form a ring. Ch 3 (counts as your first dc). Dc in the same ch as the sl st. [Dc in the next ch, ch 1, sk 1 ch] around. The round should end with a ch 1, sk 1 ch, and a sl st to the top of the beginning ch-3. (28 dc, 28 ch-1 sps)

Round 2: Ch 3 (counts as dc). Dc in the ch-1 sp from the previous round. [Dc in the next dc, dc in the next ch-1 sp] around. Join with a sl st to the top of the beginning ch-3. (56 dc)
Round 3: Ch 3. Dc in the same st. Dc in the next 2 dc. [2 dc in the next dc, dc in the next 3 dc] around. Sl st to join. (70 dc)
Round 4: Ch 3. Dc in the same st. Dc in the next 3 dc. [2 dc in the next dc, dc in the next 4 dc] around. Sl st to join. (84 dc)
Round 5: Ch 3. Dc in the same st. Dc in the next 4 dc. [2 dc in the next dc, dc in the next 5 dc] around. Sl st to join. (98 dc)
Round 6: Ch 3. Dc in the same st. Dc in the next 5 dc. [2 dc in the next dc, dc in the next 6 dc] around. Sl st to join. (112 dc)
Round 7: Ch 3. Dc in the same st. Dc in the next 6 dc. [2 dc in the next dc, dc in the next 7 dc] around. Sl st to join. (126 dc)
Round 8: Ch 3. Dc in the same st. Dc in the next 7 dc. [2 dc in the next dc, dc in the next 8 dc] around. Sl st to join. (140 dc)
Splitting the Yoke and Beginning the Body
Now, we will divide the work to create the armholes and begin working in rows.
Row 1 (Separation): Ch 3. Dc in the next 24 dc (Right Front). Ch 3, sk the next 20 dc for the sleeve. Dc in the next 50 dc (Back). Ch 3, sk the next 20 dc for the sleeve. Dc in the last 25 dc (Left Front). (100 dc, 2 ch-3 spaces for armholes)

The Main Body of the Coat
You will now work back and forth in rows.
Row 2: Ch 3. Turn. Dc in the first dc. Work a V-Stitch (dc, ch 1, dc) in the next dc. Sk 2 dc. Repeat from * to * across to the end of the row. Work 2 dc in the last dc. (This row will be slightly adjusted depending on your final stitch count after the separation. The main goal is to establish the V-stitch pattern.)
Row 3: Ch 3. Turn. Work a V-Stitch in each ch-1 space of the V-stitches from the previous row. Repeat across the row.
Continue repeating Row 3 for the body of the coat until you reach your desired length, or about 20-25 rows from the separation. The image shows a longer, coat-like length.
Last Row of Body: Ch 1. Turn. Sc in each stitch and ch-1 sp across the row. Fasten off MC.
Sleeves (Make 2)
Join MC to the center of one of the ch-3 spaces at the underarm.
Round 1: Ch 3. Work 2 dc in the same ch-3 sp. Dc in the next 20 dc of the sleeve. Work 3 dc in the other ch-3 sp. Join with a sl st to the top of the beginning ch-3. (26 dc)
Round 2: Ch 3. Work a V-Stitch in the next dc. Sk 1 dc. [V-Stitch in the next dc, sk 1 dc] around. Join with a sl st to the top of the beginning ch-3. (13 V-stitches)
Round 3: Ch 3. Work a V-Stitch in each ch-1 space of the V-stitches from the previous round. Join with a sl st.
Repeat Round 3 until the sleeve reaches the desired length. For a tapered sleeve, you can dc2tog at the beginning and end of a round every 3rd or 4th round.
Last Round of Sleeve: Ch 1. Sc in each stitch and ch-1 sp around. Fasten off MC.
Finishing Touches
Bottom Border and Cuffs (Using CC):
- Join CC at the bottom right corner of the coat. Ch 1. Scallop Stitch: Sc in the next st, sk 1 st, 5 dc in the next st, sk 1 st. Repeat from * to * across the entire bottom edge of the coat. Join with a sl st and fasten off.
- Repeat the Scallop Stitch around the end of each sleeve.
Front Border (Using CC):
- Join CC at the bottom right front corner. Ch 1. Work sc evenly up the entire right front edge, around the neckline, and down the left front edge. Make a sc in each row end.
- Buttonholes (Left Front): When you’re working down the left front edge, decide where you want your buttons. For each buttonhole, work [ch 2, sk 2 sc, sc in the next 5 sc]. Continue sc down the rest of the front.
- Fasten off. Sew on your buttons opposite the buttonholes.
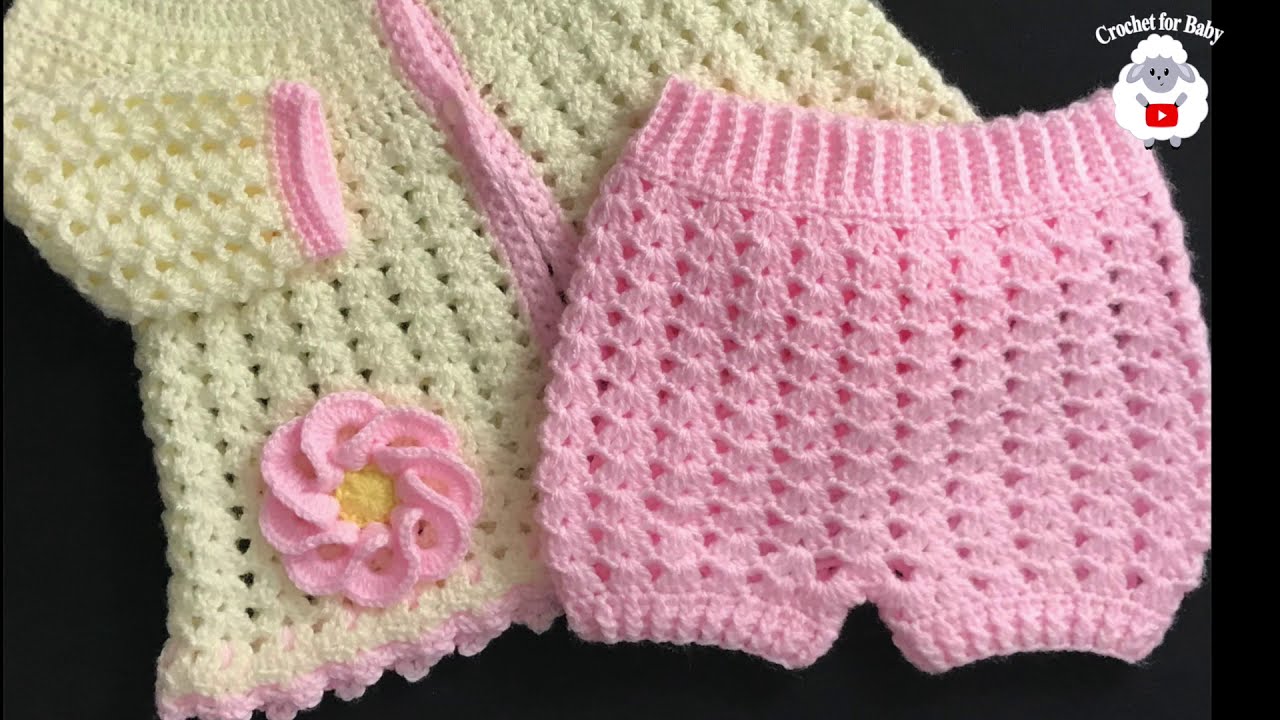
3D Flower Appliqué (Make 2)
Using CC and MC:
- Center: Using CC, ch 5, sl st to first ch to form a ring. Ch 1. Work 10 sc into the ring. Sl st to join. Fasten off and leave a long tail for sewing.
- Petals: Join MC in any sc from the previous round. [Ch 3, dc in the same st, hdc in the next st, dc in the same st as the hdc, ch 3, sl st in the next st]. Repeat from * to * five times for a total of 5 petals. Sl st to the first ch-3 space to join. Fasten off and leave a long tail for sewing.
Video tutorial
Sew the flower centers onto the petals, and then sew the completed flowers onto the bottom front of the coat, one on each side.
Weave in all remaining ends. Now, your beautiful, handmade creation is ready to be worn and cherished. The combination of the classic crochet stitches with the charming floral details makes this coat a truly special piece.