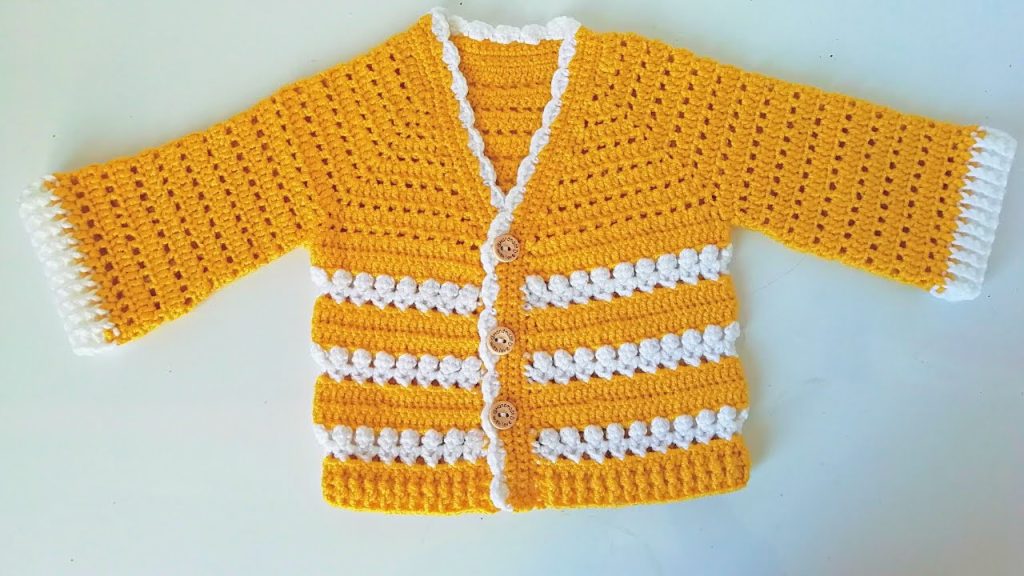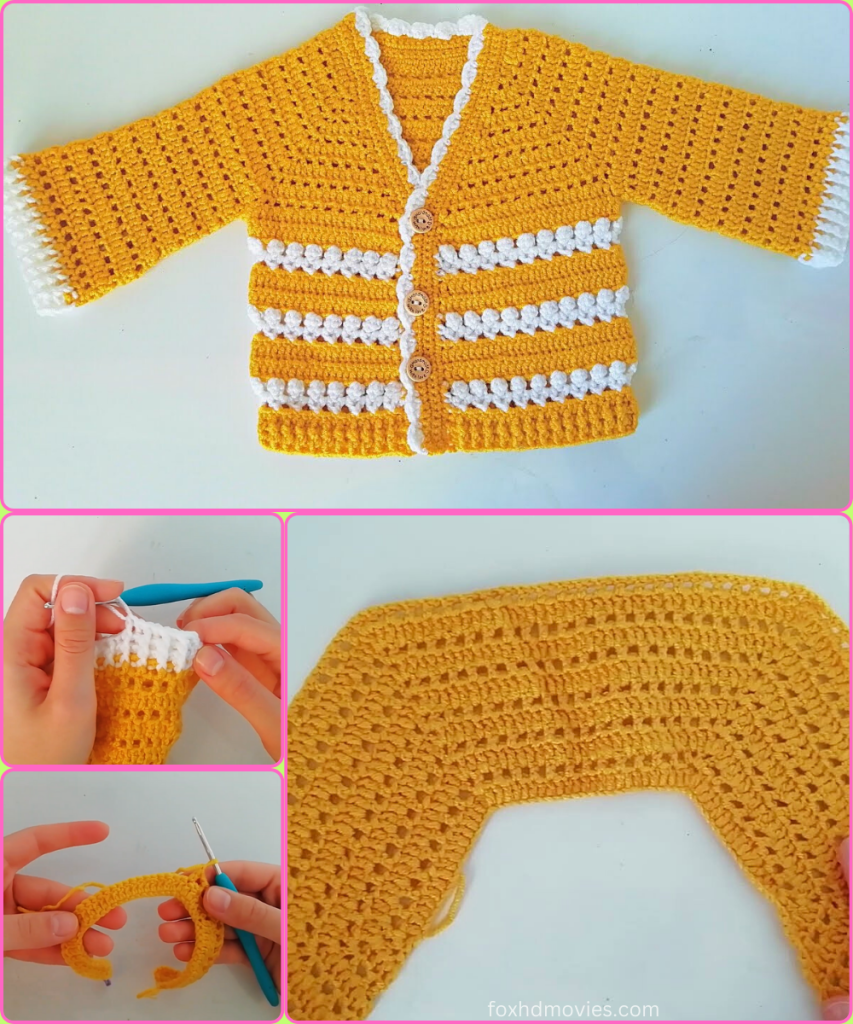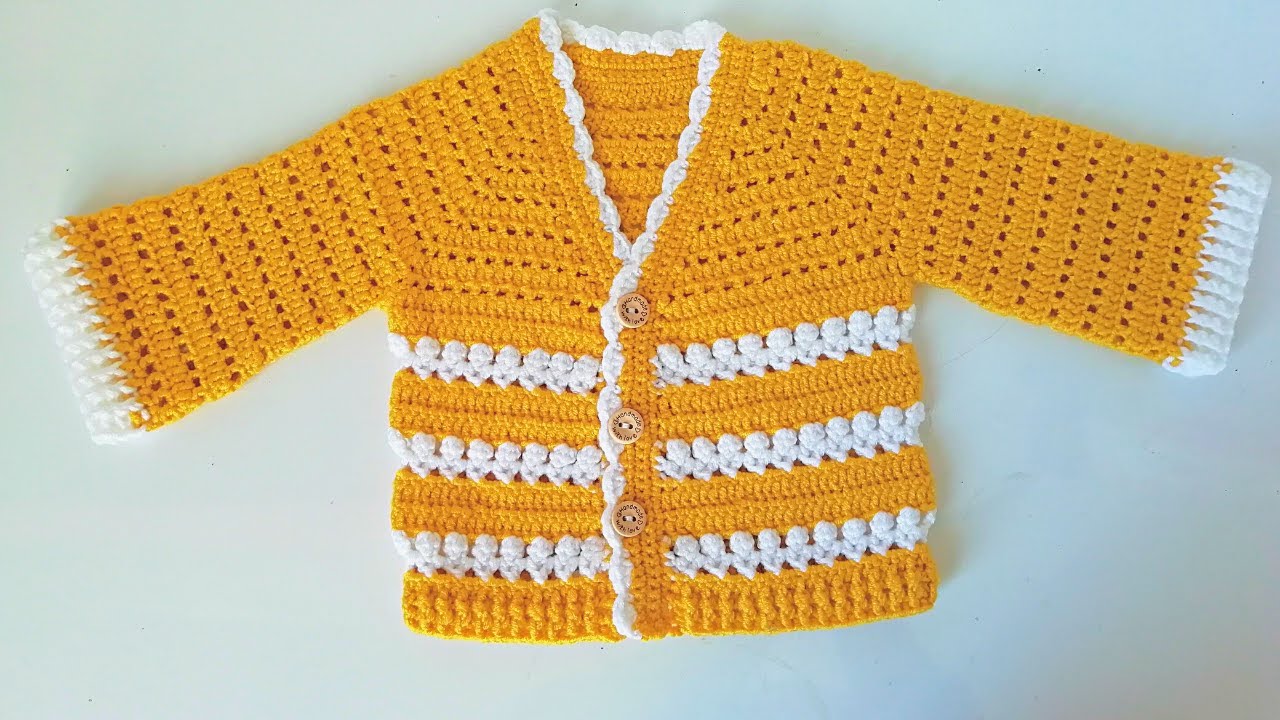
Create a cozy and cheerful “Sunshine & Cloud Cardigan” with this long and detailed crochet pattern. This top-down, seamless design features a textured stitch, classic stripes, and charming scalloped edges. It’s the perfect layering piece for any little one. This pattern is written for a standard baby size (approximately 6-12 months), but notes on how to adjust for a custom fit are included.
Skill Level: Intermediate – The pattern is written for those familiar with basic stitches, working in the round, and creating a top-down yoke.

Materials You’ll Need:
- Yarn: Approximately 300-400 yards of DK (size 3) or Worsted (size 4) weight yarn.
- Main Color (MC): The yellow yarn shown in the image.
- Contrasting Color (CC): The white yarn for the stripes and trim.
- Crochet Hook: A size H/8 (5.0mm) hook is recommended. You can adjust the hook size to make the cardigan smaller or larger.
- Scissors
- Yarn Needle for weaving in all ends.
- Stitch Markers (at least 4)
- 3 Buttons (approximately 1 inch in diameter).
Key Stitches and Abbreviations:
- ch: chain
- st(s): stitch(es)
- sl st: slip stitch
- sc: single crochet
- hdc: half double crochet
- dc: double crochet
- V-st: V-stitch (dc, ch 1, dc) in the same stitch
- inc: increase (2 stitches in the same stitch)
- rnd: round
- sk: skip
- blo: back loop only
Detailed Pattern Instructions
The cardigan is worked in one piece, from the neck down, so there’s no sewing required.
Part 1: The Yoke (Top-Down Construction)
The yoke is the most crucial part of the cardigan. It’s worked in rows, back and forth, to create the open front. We will place markers to indicate where increases will be made to form the shoulders and sleeves.

- Starting Chain: With your Main Color (MC), chain 60. This is a general size, you can add or subtract chains for a different size.
- Row 1 (Set-up Row): In the 4th chain from your hook, work 1 dc. Work 1 dc in each of the next 6 chains (this is your first front panel). Place a stitch marker in the next stitch to mark the first increase point.
- Work 1 dc in each of the next 10 chains (first sleeve).
- Place a stitch marker in the next stitch.
- Work 1 dc in each of the next 20 chains (back panel).
- Place a stitch marker in the next stitch.
- Work 1 dc in each of the next 10 chains (second sleeve).
- Place a stitch marker in the next stitch.
- Work 1 dc in each of the last 7 chains (second front panel).
- Total stitches: 58 dc. Turn your work.
- Row 2 (Increase Row):ch 3 (counts as dc). Work 1 dc in each stitch until you reach your first stitch marker. In the stitch with the marker, work (dc, ch 2, dc).
- Work 1 dc in each stitch until you reach your next marker. In the marked stitch, work (dc, ch 2, dc).
- Work 1 dc in each stitch until you reach your next marker. In the marked stitch, work (dc, ch 2, dc).
- Work 1 dc in each stitch until you reach your last marker. In the marked stitch, work (dc, ch 2, dc).
- Work 1 dc in each of the remaining stitches. Turn your work.
- Rows 3-6: Repeat Row 2, making sure to work the (dc, ch 2, dc) increase in the ch-2 space from the previous row. Your yoke will naturally expand as you work each row. Continue this pattern, making the yoke as deep as you need it (approximately 4-5 inches from the neckline).
Part 2: Separating the Sleeves & Body
This step will create the armholes and transition the work to the main body of the cardigan.
- Row 7 (Separation Row): With Main Color (MC), ch 3 (counts as dc). Work 1 dc in each stitch across the first front panel until you reach the first ch-2 space.
- Chain 2 and skip the stitches for the first sleeve (all stitches between the first and second ch-2 space).
- Work 1 dc in each stitch across the back panel (the stitches between the second and third ch-2 space).
- Chain 2 and skip the stitches for the second sleeve.
- Work 1 dc in each of the remaining stitches across the second front panel. Turn your work.
- You will now have a continuous opening for the body of the cardigan.
Part 3: The Body & Stripes
The body of the cardigan is worked in rows, back and forth, with alternating colors to create the striped pattern.

- Row 8: With Main Color (MC), ch 3 (counts as dc). Work 1 dc in each stitch across the row, including working 2 dc in each of the ch-2 spaces under the arms. Turn your work.
- Switch to Contrasting Color (CC).
- Row 9: With Contrasting Color (CC), ch 3. Work 1 dc in each stitch across the row. Turn your work.
- Switch to Main Color (MC).
- Rows 10-15: Continue alternating colors, working 2 rows in Main Color (MC) and then 1 row in Contrasting Color (CC). Repeat this pattern for the length of the cardigan. The rows in MC can be either a solid dc row or you can introduce a texture with a pattern of your choice, such as skipping stitches to create small holes, which is what is shown in the image. For example:
- Main Color (MC) Row: ch 3, sk 1 st, dc in next st. Repeat from * across.
- Contrasting Color (CC) Row: ch 3, dc in each stitch across.
- Continue this pattern until the cardigan reaches your desired length (or approximately 8 inches from the armpits to the hem).
Part 4: The Finishing Edges (Contrasting Color)
The scalloped edging on the collar, button placket, and cuffs adds a polished look.

- Hemline: Join your Contrasting Color (CC) to the bottom corner of the cardigan. Work a round of sc evenly around the entire bottom edge. Then, work a round of edging: sk 1 st, [2 dc, ch 1, 2 dc] in next st, sk 1 st, sc in next st. Repeat from * around.
- Button Placket & Collar: Join your Contrasting Color (CC) to the bottom of the front opening. Work sc evenly up the front edge, around the neckline, and down the other front edge. On the second front edge, you can create buttonholes by chaining 2 and skipping 2 stitches at regular intervals. Work a final round of the scalloped edging pattern from the hemline.
- Sleeves: Join your Main Color (MC) to the bottom of the sleeve opening. Work a few rounds of dc to complete the sleeves. Switch to Contrasting Color (CC) and work a final round of sc, followed by the scalloped edging pattern.
Part 5: Finalizing
- Weaving in All Ends: Weave in all loose ends securely with your yarn needle.
- Attaching Buttons: Sew the three wooden buttons onto the front placket of the cardigan, aligning them with the buttonholes you created.
- Gently Block: Gently block the finished cardigan to help the stitches lay flat and the fabric to drape beautifully.
Video tutorial
You’re Done!
Congratulations! You have just completed the warm and wonderful “Sunshine & Cloud Cardigan.” This is a project that is both a labor of love and a cherished keepsake. I hope you enjoyed this detailed journey in crochet! Happy crocheting!


