by
by 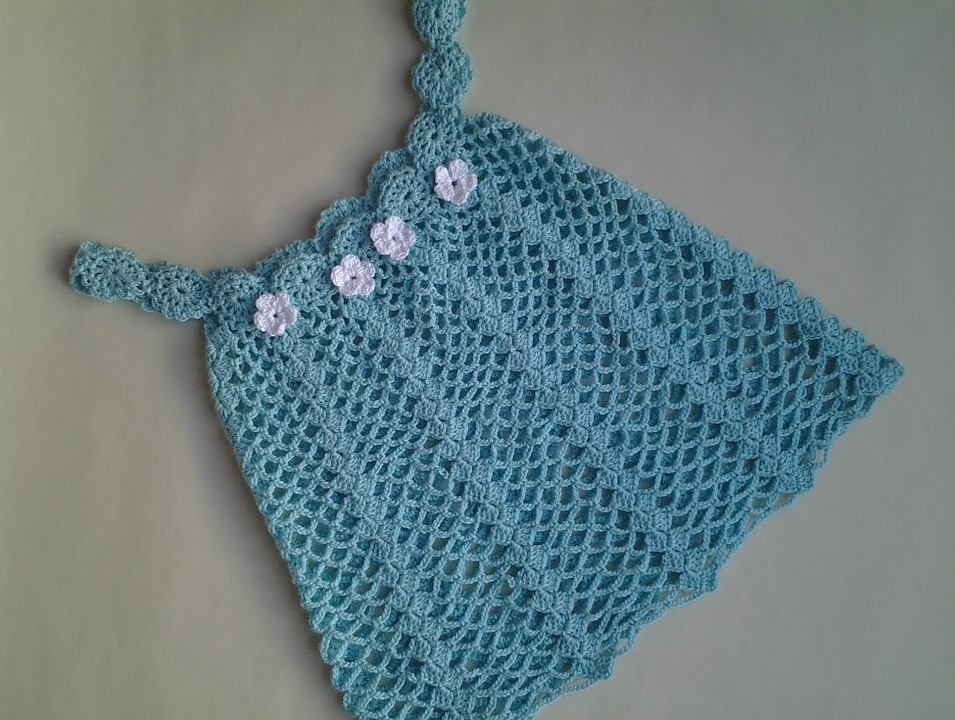
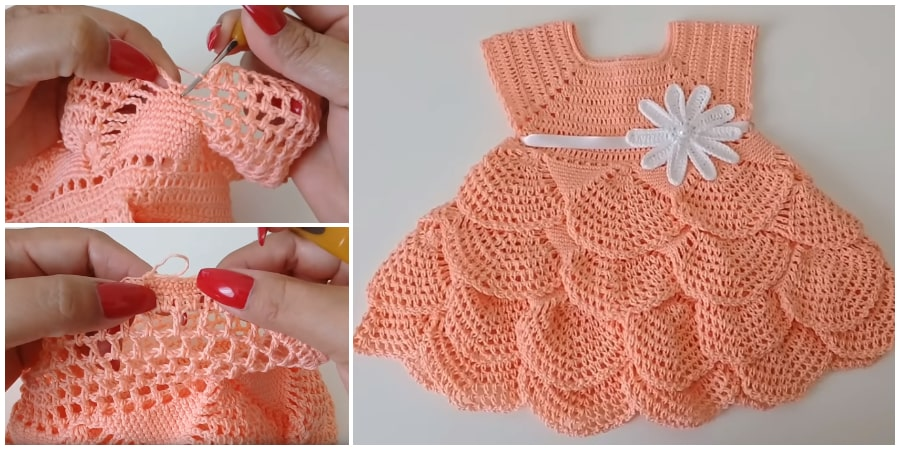
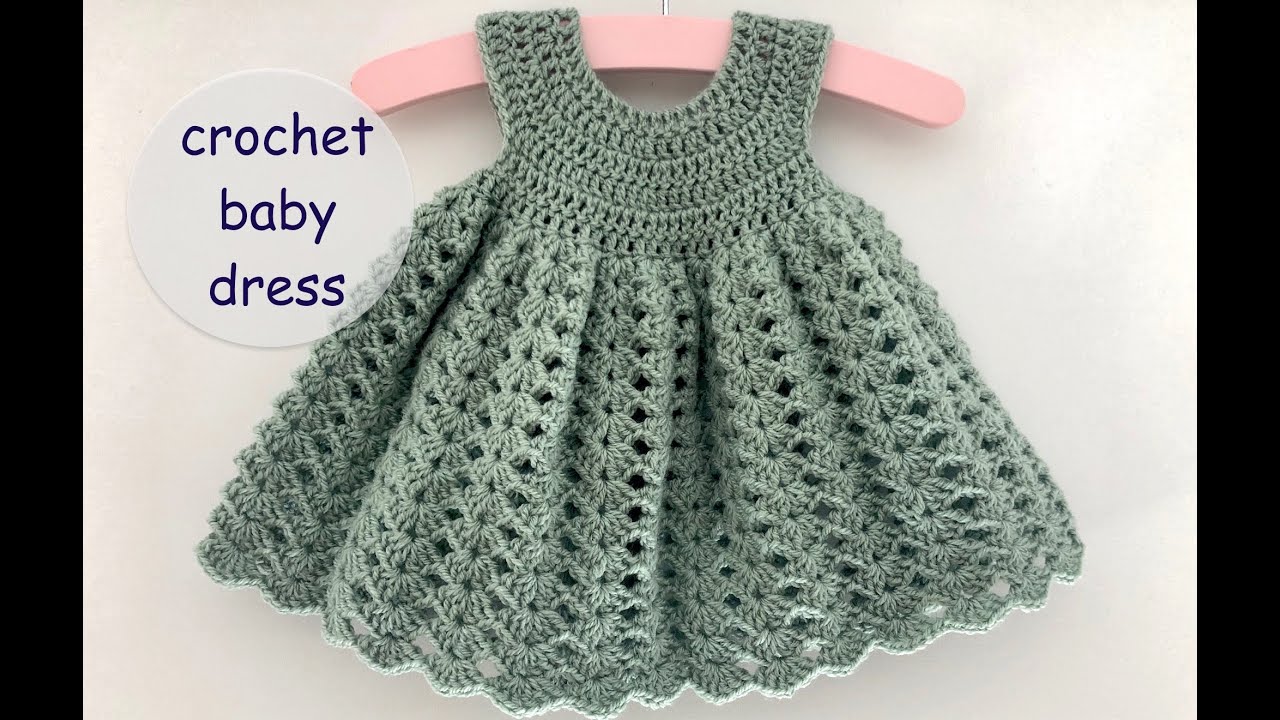
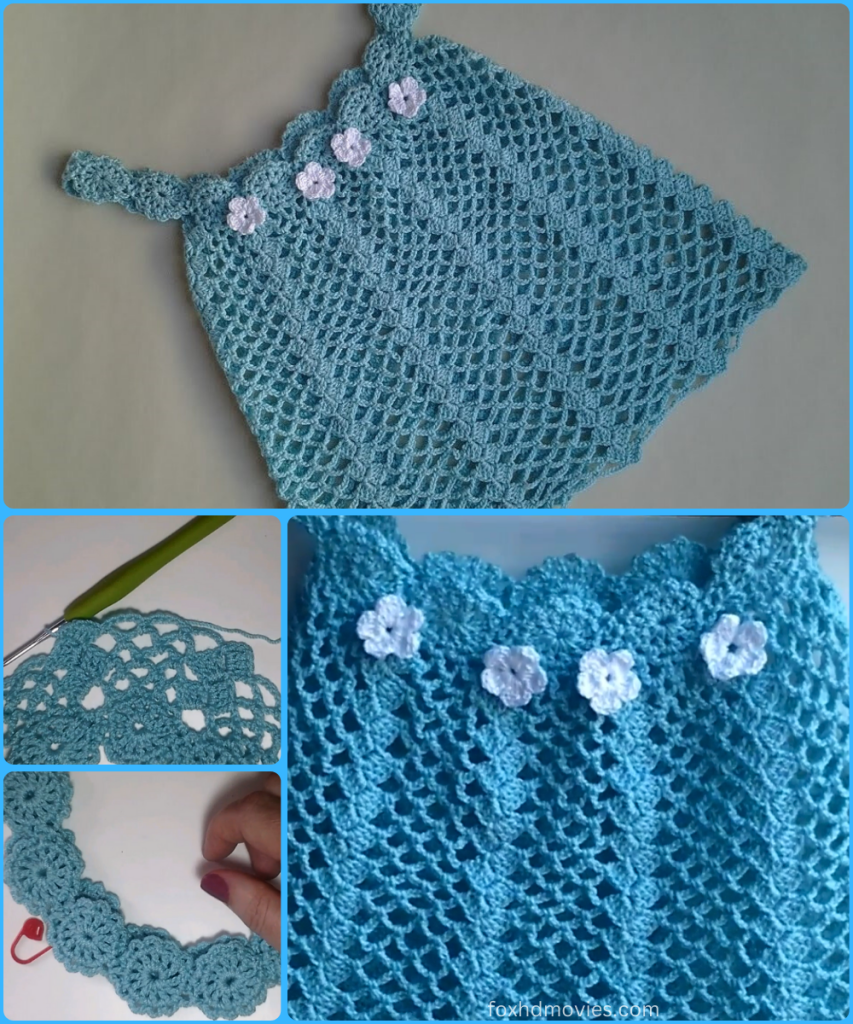
Crocheting a baby dress is a rewarding project, creating a beautiful and cherished garment that can be passed down for generations. This detailed tutorial will walk you through the process of crocheting a sweet and summery dress designed with a beautiful motif-based yoke and a delicate skirt. This is a great project for a crocheter with some experience who wants to create a unique and special item for a baby girl. The finished result is a stunning dress with a net-like stitch and fan-like details, perfect for a baby shower gift or a beautiful photoshoot.
Materials You’ll Need
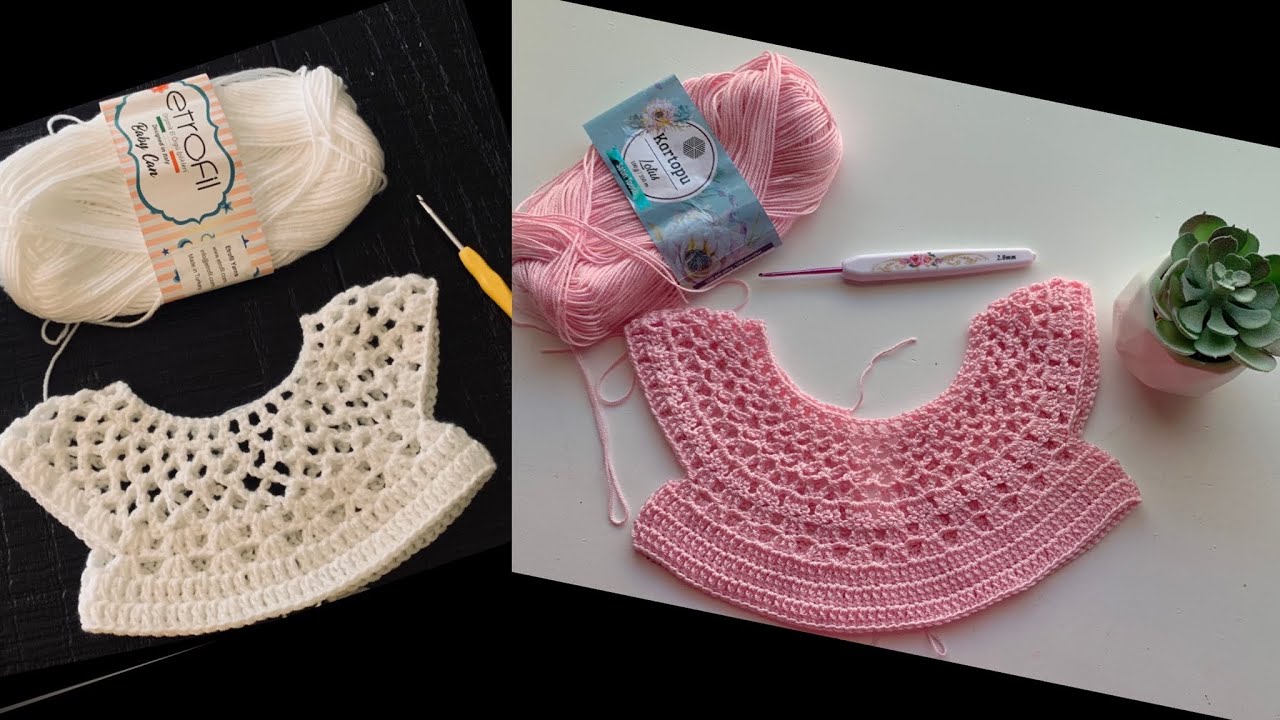
- Yarn: A lightweight, baby-friendly yarn. The video uses one and a half skeins of 80g yarn.
- Crochet Hook: A size 2 crochet hook. The creator mentions using a smaller hook because she crochets loosely, so adjust your hook size to your own tension.
- Stitch Markers: Four stitch markers.
- Scissors
- Tapestry Needle: For weaving in ends.
Part 1: The Circular Motifs
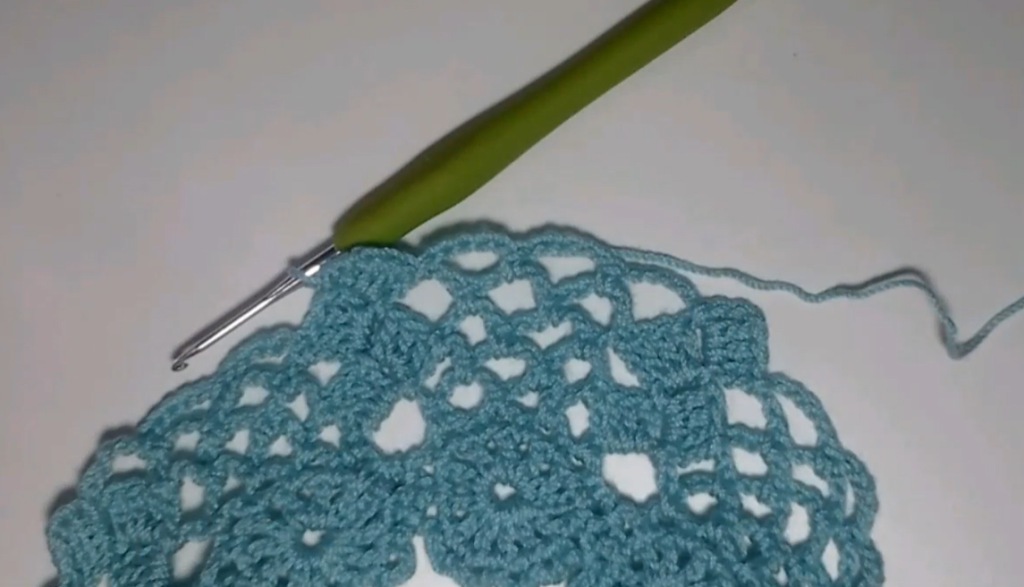
The top part of the dress is made from circular motifs that are joined together to form the bodice.
- Start the Ring: Begin with five chain stitches, then join them with a slip stitch to the first chain to form a ring.
- First Round: Chain 4 (the first three chains count as a double crochet, and the fourth is a chain space). Work a double crochet into the ring, followed by a chain stitch. Repeat this 11 more times until you have 12 double crochet stitches in the ring, each separated by one chain. Finish the round with a slip stitch in the third chain of your initial chain-4.
- Second Round: Chain 1 (this counts as your first stitch). Work a single crochet in the first chain space. Chain 3, then work a single crochet into the next chain space. Repeat this process around the entire motif, creating a series of arches.
Part 2: Joining the Motifs
Once you have crocheted all the necessary motifs, you will join them together to form the bodice.
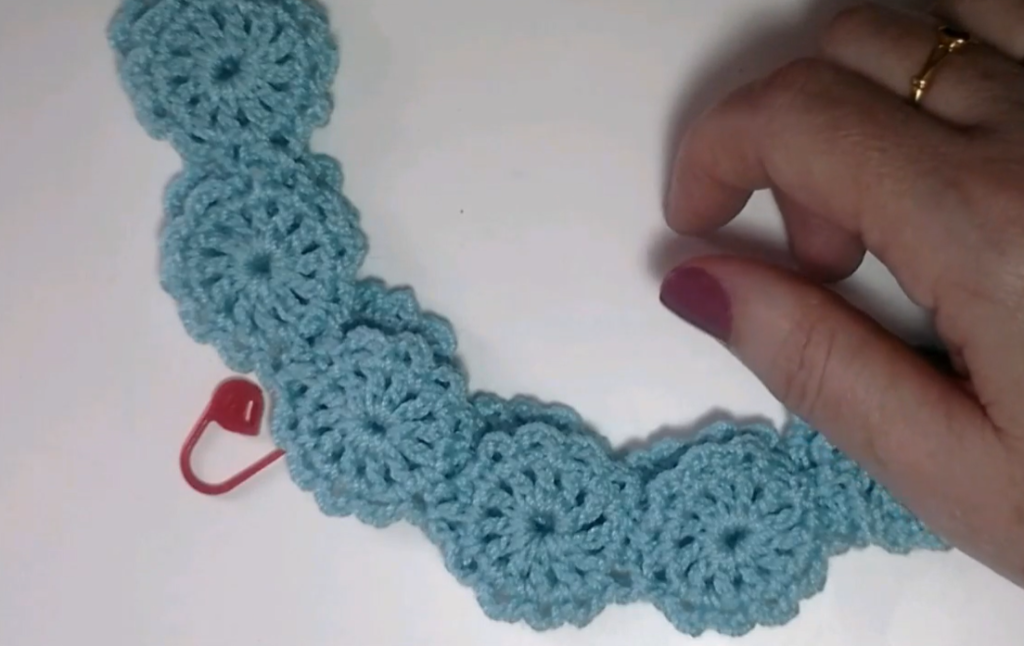
- Lay Out Your Motifs: Lay your motifs in a line on a flat surface. You will be joining them side-by-side to create a long strip.
- Joining: You will use a tapestry needle and a length of yarn to sew the motifs together. The video demonstrates how to join them by counting the arches from Part 1. You will insert your needle through the top of one arch on the first motif and then through the top of a corresponding arch on the second motif, and so on. Continue to join the motifs along one side until you have created a long strip.
- Form the Bodice: Once you have a long strip of joined motifs, you will join the two ends of the strip together to form a ring. This ring will become the bodice of the dress.
Part 3: The Skirt
Once the bodice is complete, you will begin working on the skirt section of the dress.
- Mark the Sections: Use your four stitch markers to mark off the sections for the straps, the front, and the back of the dress. This will help you keep track of where to work your stitches.
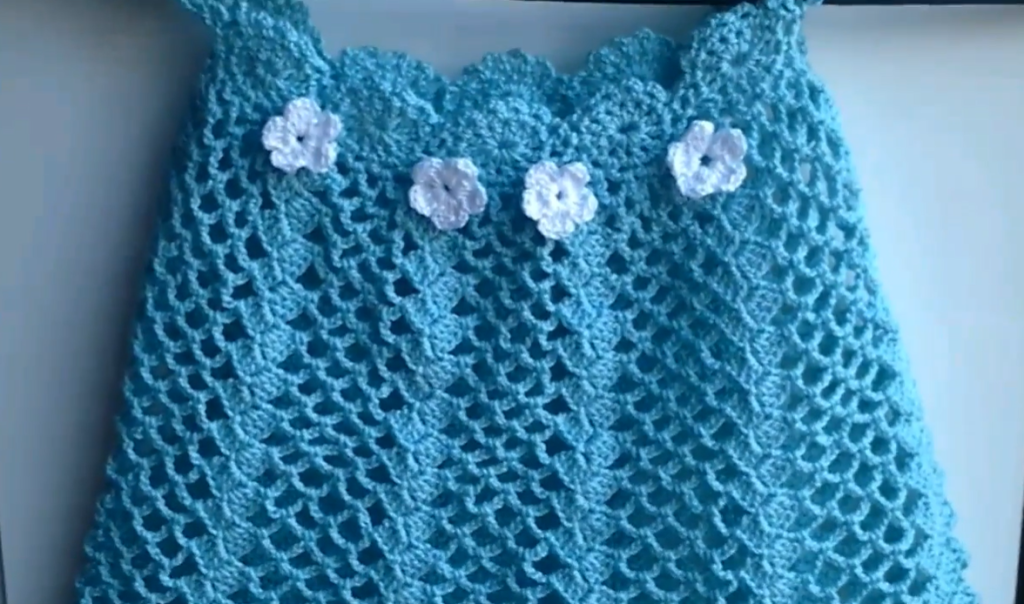
- First Round of the Skirt: Begin with a slip stitch in one of the arches of the bodice. Chain 5 (this counts as a double crochet and a chain of 2). Work a double crochet in the same arch to create a V-stitch. Skip the next arch and repeat the V-stitch in the next. Continue this process all the way around the bodice, skipping over the sections you marked for the straps.
- Continue the Pattern: The video demonstrates a pattern of alternating stitches to create a gentle flare and a net-like texture. You will continue to work rounds of these stitches, increasing the number of stitches in each fan or V-stitch in subsequent rows to cause the skirt to flare out. Continue working in rounds until the skirt reaches the desired total length.
Part 4: Finishing Touches
The final steps involve a neat finish and adding any finishing embellishments.
- Weave in Ends: Use your tapestry needle to carefully weave in all the loose ends of your yarn. This is a crucial step for a clean and professional finish.
- Decorate: This is your chance to get creative! Add a ribbon to the waistline, sew on some flower appliques, or add any other embellishments you desire to make the dress truly unique.
Your new baby girl’s summer crochet dress is now complete! Enjoy the satisfaction of having created a custom and stylish garment all by yourself.