by
by 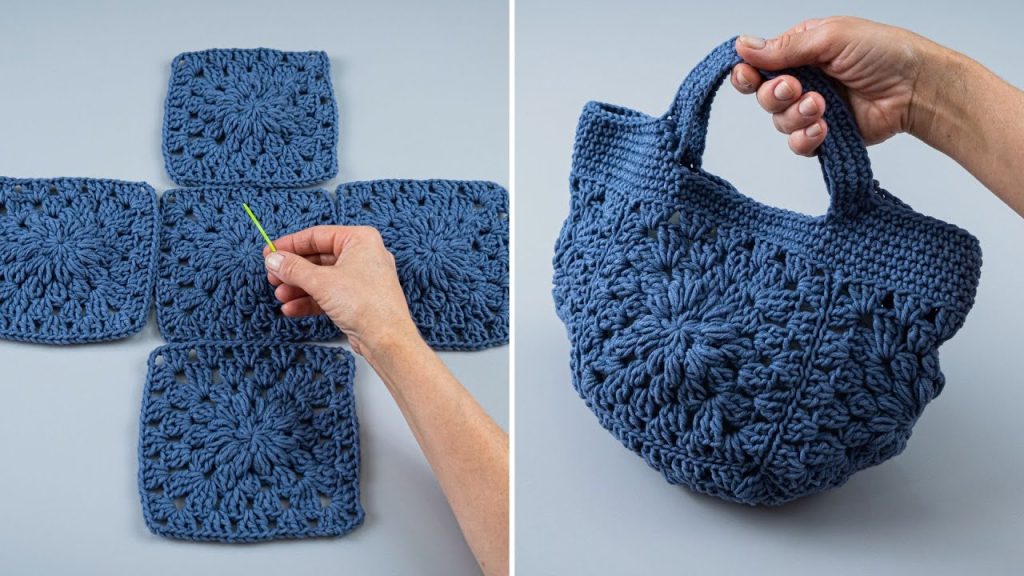
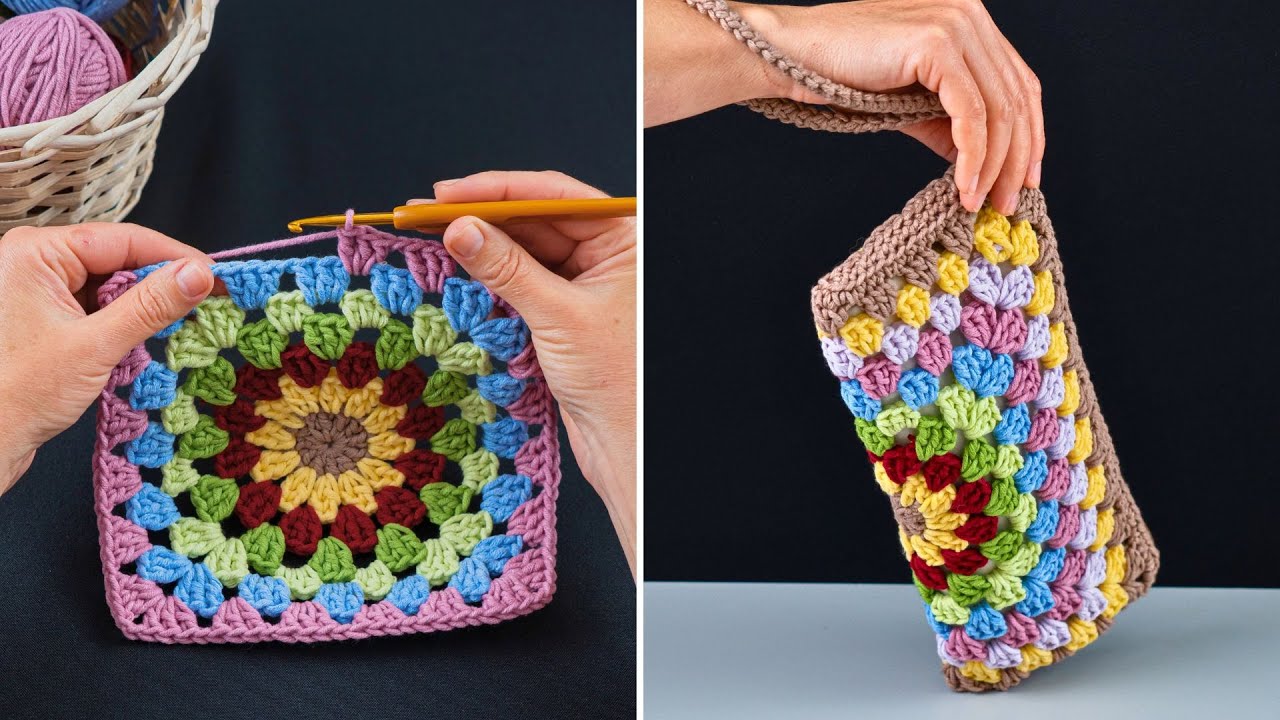
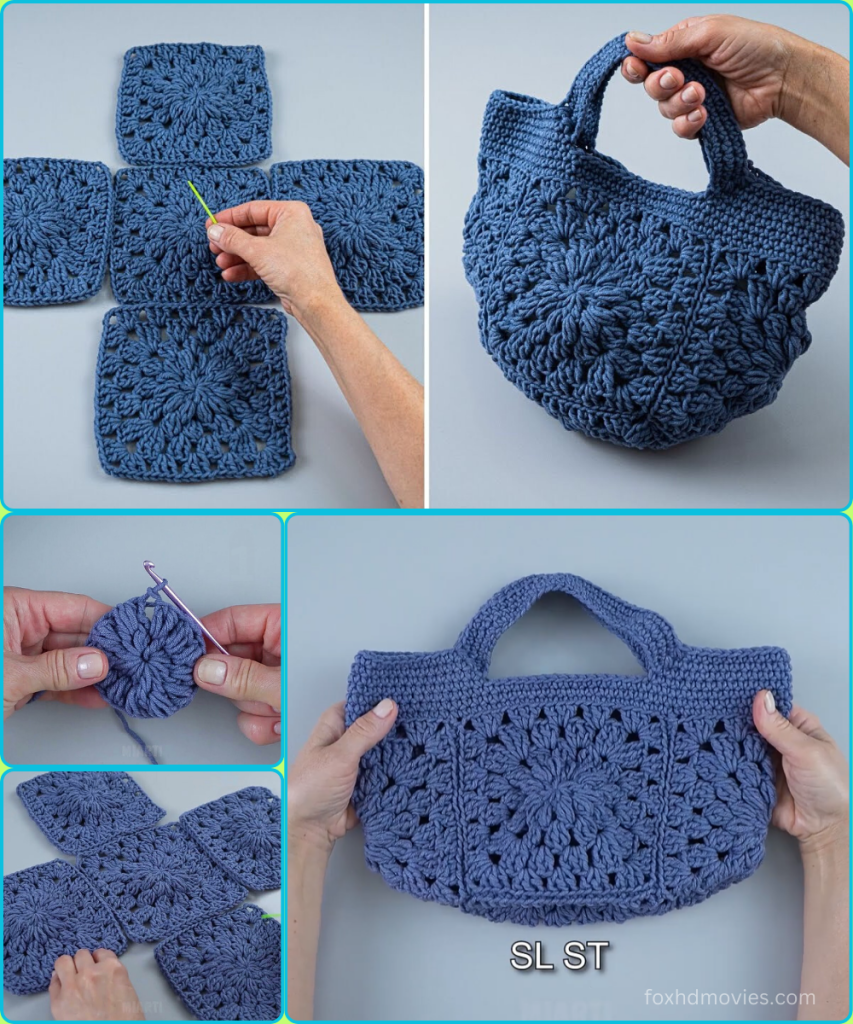
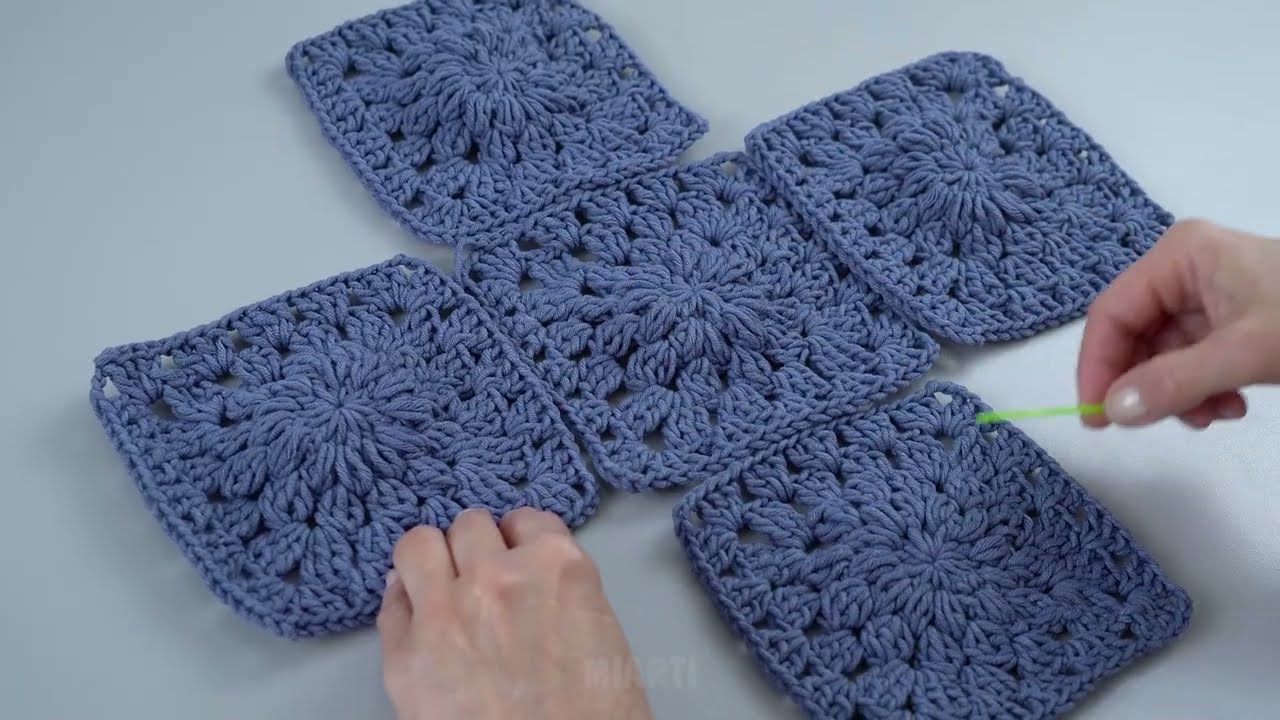
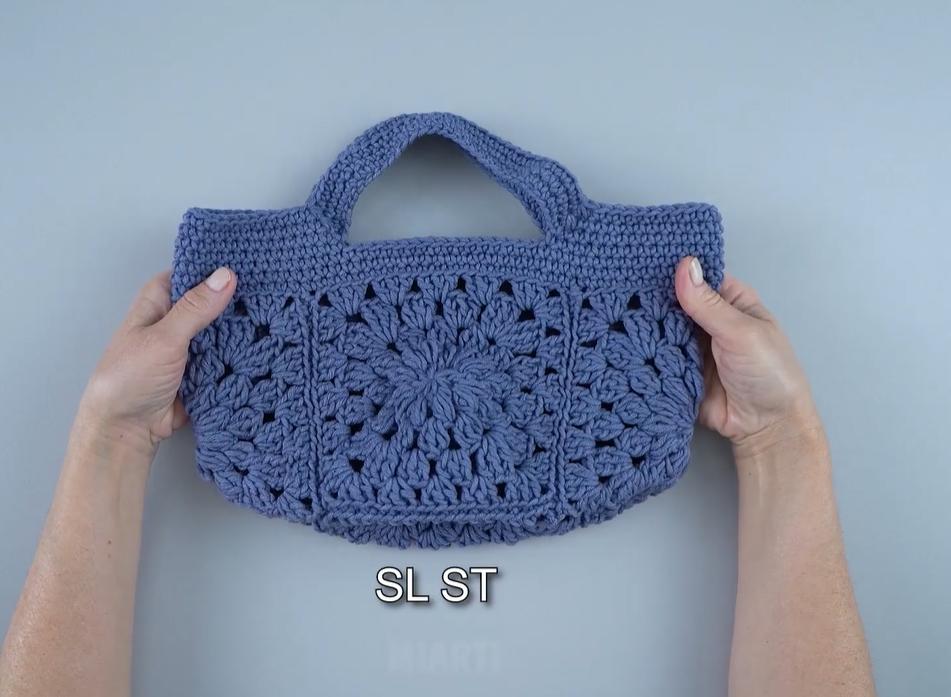
Looking for a crochet project that’s both stylish and functional? This market tote is a great choice. The open-mesh stitch makes the bag lightweight and flexible, perfect for carrying a variety of items, while the sturdy base and contrasting color scheme give it a polished, finished look.
This pattern is worked from the bottom up, starting with a flat, rectangular base. The body is worked in continuous rounds, with the handles being a seamless extension of the bag’s body.
What You’ll Need:
- Yarn: Worsted weight (Aran/10 ply) cotton yarn is highly recommended for its durability and excellent drape.
- Color A (Main): The light green color in the example. Approximately 200-250 yards.
- Color B (Stripe/Handles): The orange color in the example. Approximately 100-150 yards.
- Crochet Hook: Size H/5.0mm (or hook size needed to achieve a fabric with a nice drape without being too loose).
- Yarn Needle: For weaving in ends.
- Scissors
- Stitch Marker (optional): To mark the beginning of each round.
Abbreviations Used:
- ch: chain
- sl st: slip stitch
- sc: single crochet
- hdc: half double crochet
- dc: double crochet
- V-st: V-stitch: (dc, ch 1, dc) in the same stitch or space
- st(s): stitch(es)
- rnd: round
- FO: fasten off
- [ ]: repeat instructions in brackets
- ( ): stitch count at the end of the round
Gauge:
For the base, a firm stitch is desired. The finished rectangle should be approximately 28 cm x 10 cm (11 inches x 4 inches).
Part 1: The Base (in Color B)
We will create a flat, rectangular base by working in the round.
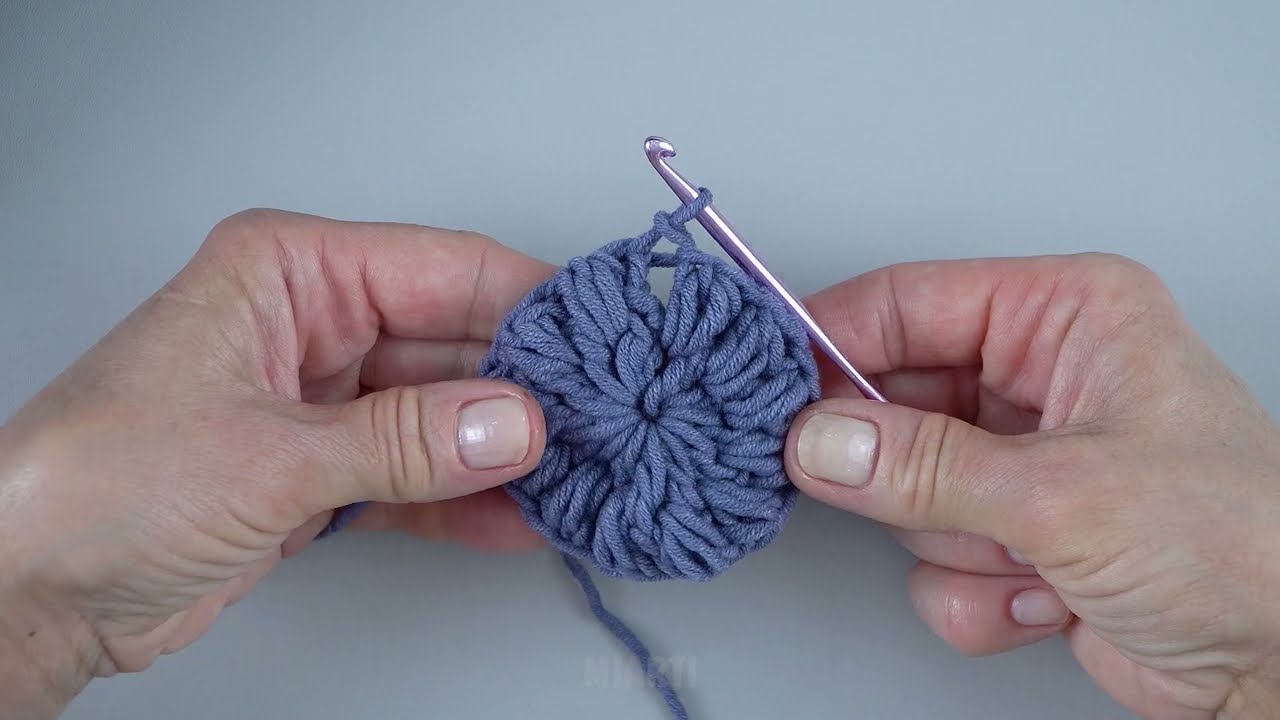
- Using Color B, ch 25.
- Rnd 1: 3 hdc in the 2nd ch from the hook. Hdc in the next 22 ch. 3 hdc in the last ch. Working along the other side of the foundation chain, hdc in the next 22 ch. Join with a sl st to the first hdc. (50 hdc)
- Rnd 2: Ch 1, 2 hdc in the first st. Hdc in the next st, 2 hdc in the next st. Hdc in the next 22 sts. 2 hdc in the next st. Hdc in the next st, 2 hdc in the next st. Hdc in the next 22 sts. Join with a sl st to the first hdc. (56 hdc)
- Rnd 3: Ch 1, hdc in each st around. Join with a sl st. (56 hdc)
- Repeat Rnd 3 for 2 more rounds, for a total of 5 rounds of half double crochet, or until your base measures approximately 28 cm x 10 cm.
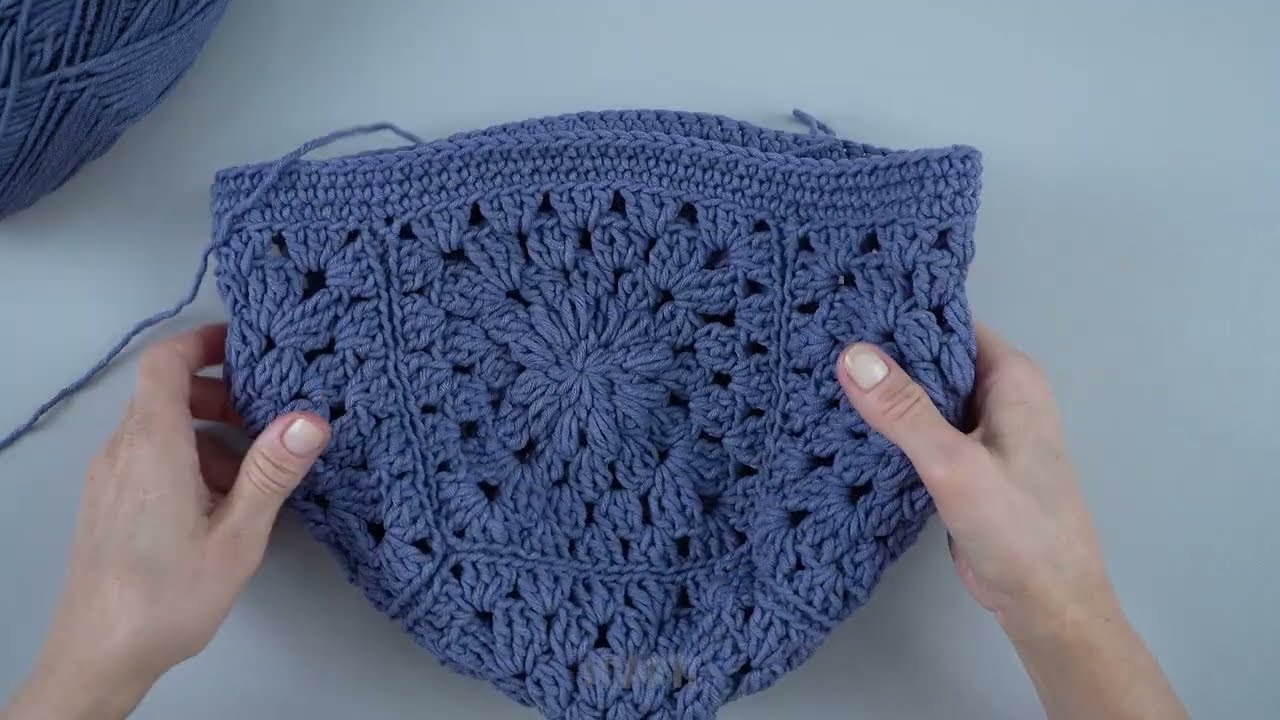
Part 2: The Body (Mesh & Stripes)
We will now build the sides of the bag using the V-stitch pattern and change colors. You will work in continuous rounds, without joining at the end of each. Use a stitch marker to mark the beginning of each round.
- Rnds 1-2 (Stripe – in Color B): Ch 1, hdc in each st around for 2 rounds.
- Change Color: At the end of Rnd 2, switch to Color A.
- Rnd 3 (Mesh): Ch 2 (does not count as a stitch). Skip the first st. [V-st in the next st, skip 1 st] around. (28 V-sts).
- Rnds 4-15 (Main Body – in Color A): Work V-st in each V-st’s ch-1 sp around. (28 V-sts). Continue for 12 more rounds, or until your bag is the desired height.
Part 3: The Top Edge & Handles (in Color B)
We will now create a sturdy top edge and the wide, comfortable handles.
- Change Color: At the end of Rnd 15, switch to Color B.
- Top Edge: Ch 1, hdc in each st around. (Work 1 hdc in each dc and 1 hdc in each ch-1 sp). Join with a sl st to the first hdc.
- Rnd 2: Ch 1, hdc in each st around. Join with a sl st to the first hdc.
- Rnd 3 (Handles): You will now create the wide handles. Ch 1, hdc in the first 8 stitches. Ch 20 (or to your desired handle length). Skip the next 12 stitches. Hdc in the next 16 stitches (this is the back of the bag). Ch 20. Skip the last 12 stitches. Join with a sl st to the first hdc.
- Rnd 4 (Securing Handles): Ch 1, hdc in each of the 8 hdc. Hdc in each of the 20 chains. Hdc in the next 16 hdc. Hdc in each of the 20 chains. Join with a sl st to the first hdc.
- FO and weave in all ends.
Video tutorial
Finishing Touches:
- Weave in all remaining ends securely.
- Blocking (optional): To help your bag hold its shape and drape correctly, gently steam or spritz it with water, then stuff it with a towel and shape it as it air dries.
You’ve now created a beautiful and unique bag that’s perfect for your next outing! Enjoy it.