 by
by 
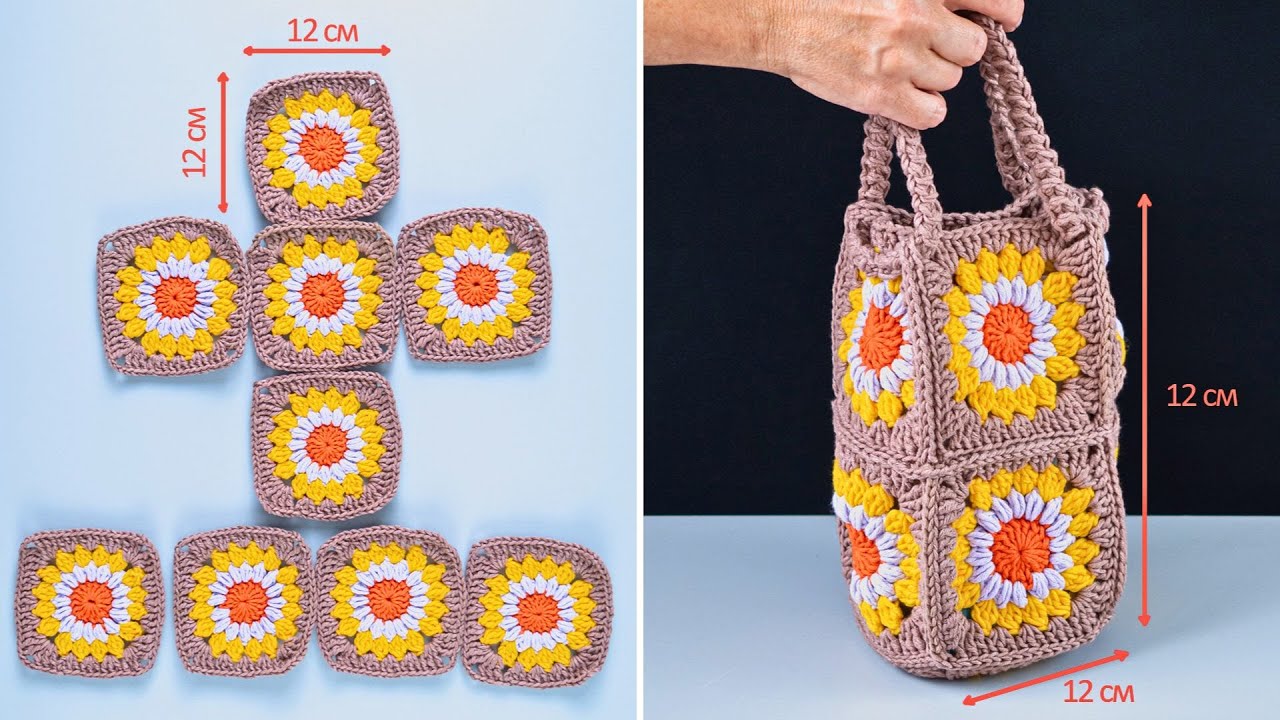
Create your own trendy and versatile bag with this easy granny square crochet pattern! Inspired by a detailed tutorial, this design guides you through making a unique bag that starts with a beautiful central motif and builds into a functional and fashionable accessory. Perfect for a casual outing or a statement piece, this bag is a wonderful way to showcase your crochet skills with a modern twist.
Skill Level: Intermediate (familiarity with basic stitches and reading patterns recommended)

Finished Size (Approximate):
- Varies based on yarn, hook, and tension, but designed to be a medium-sized shoulder bag.
- The video focuses on the square construction and then builds the bag from there.
Materials You’ll Need:
- Yarn: Approximately 300-500 grams of sturdy yarn (e.g., cotton blend, acrylic, or T-shirt yarn/trapillo for a firmer bag) in at least two colors.
- Color A: For the center of the granny square (e.g., white in the video).
- Color B: For the first layer of petals/stitches (e.g., contrasting color in the video).
- Color C: For the main body of the bag (can be the same as Color A or B, or a new color).
- The video uses a yarn that creates a nice, structured fabric. Choose a yarn that will hold its shape well.
- Crochet Hook: A hook size appropriate for your chosen yarn, typically 4.0 mm (G/6) to 6.0 mm (J/10).
- Choose a hook size that creates a firm, dense fabric with no gaps when working with your chosen yarn.
- Tapestry Needle: For weaving in ends and seaming (if applicable).
- Scissors
- Stitch Marker (Optional): To mark the beginning of rounds or specific stitches.
Gauge (Crucial for Bag Structure!):
Achieving a firm, dense fabric is crucial for this bag to hold its elegant shape. Work a swatch to ensure your stitches are tight with no visible gaps. If your fabric is too loose, go down a hook size.
Abbreviations (US Crochet Terms):
- ch: chain
- sl st: slip stitch
- sc: single crochet
- hdc: half double crochet
- dc: double crochet
- tr: treble crochet (or triple crochet)
- st(s): stitch(es)
- MR: Magic Ring
- FO: Fasten off
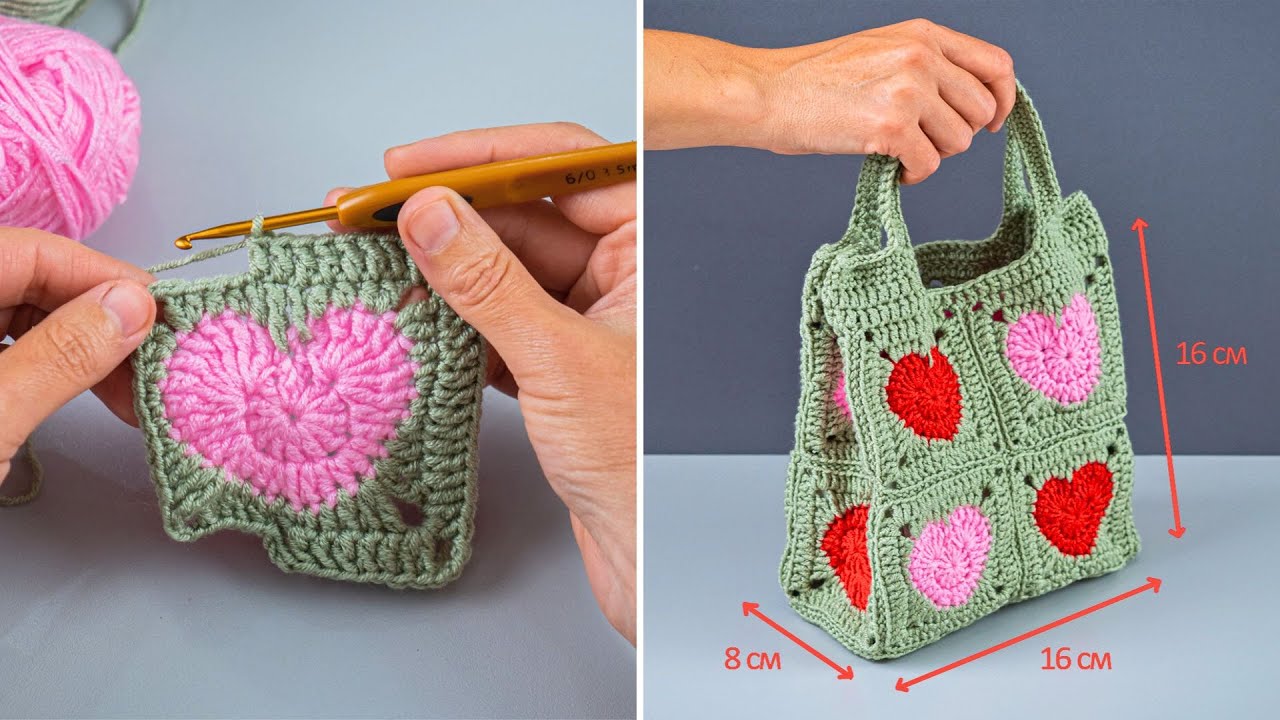
Let’s Crochet Your Easy & Stylish Granny Square Bag!
This bag starts with a unique granny square motif and then expands to form the bag’s body and handles.
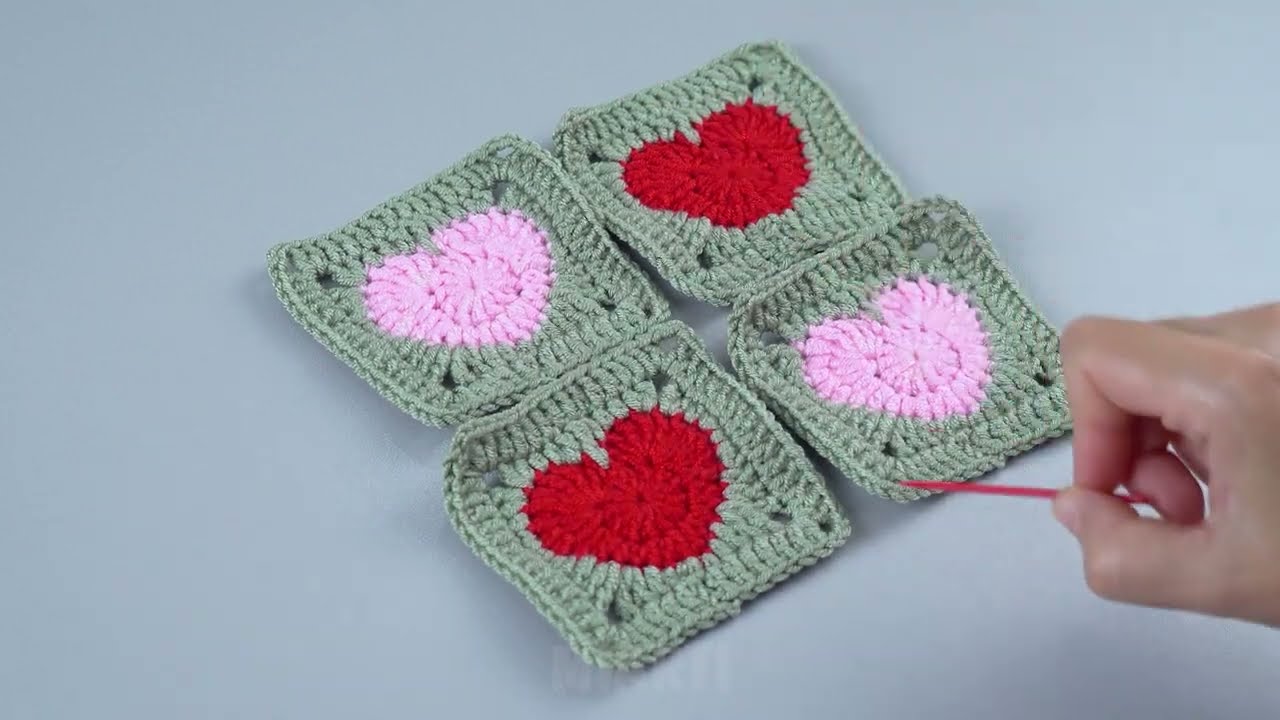
Part 1: The Granny Square Motif (Front & Back – Make 2)
You will create two identical square motifs that will form the front and back of your bag.
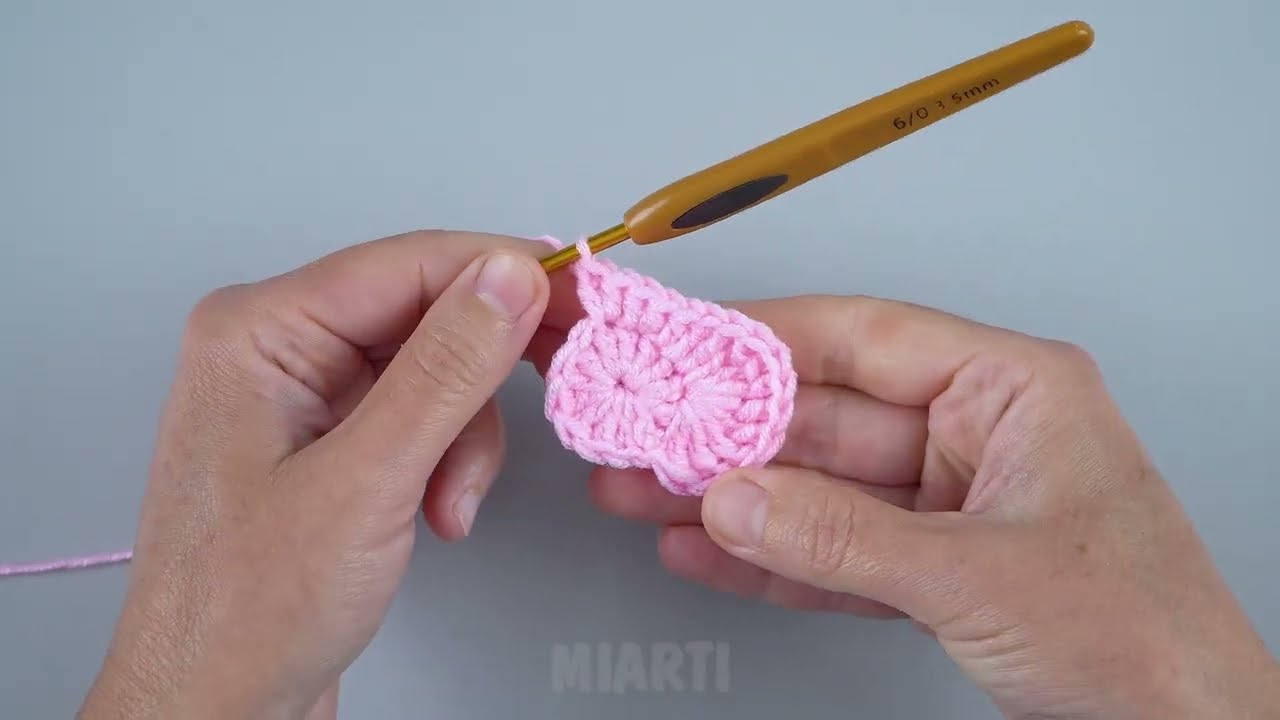
Start with Color A (e.g., White)
- Row 1: Create a Magic Ring (MR). Ch 3 (counts as 1 dc). Work 11 dc into the MR. Join with a sl st to the top of the initial ch 3. (12 dc)
- Pull the MR tight to close.
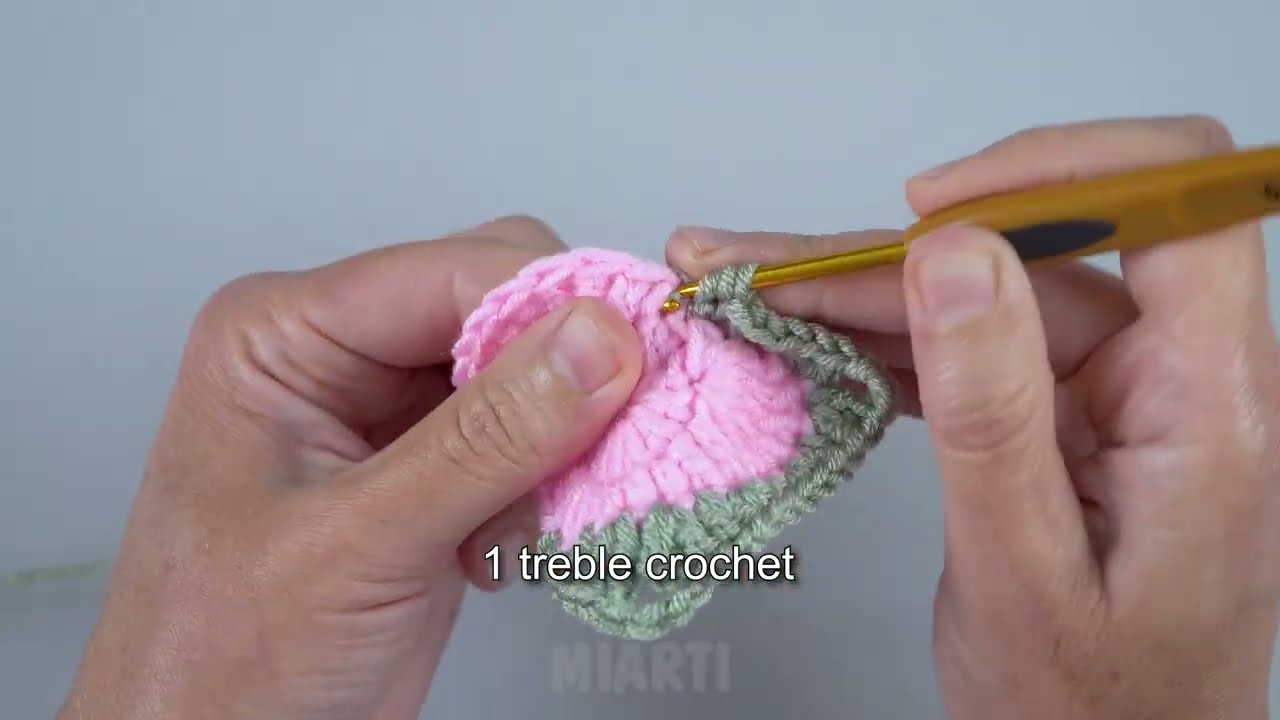
Switch to Color B (e.g., Contrasting Color)
- Row 2: Attach Color B to any stitch with a sl st. Ch 1 (does not count as a stitch).
- Work the following into the same stitch where you joined: (1 tr, 1 dc, 1 hdc, 1 sc).
- Work the following into the next stitch: (1 sc, 1 hdc, 1 dc, 1 tr).
- Repeat this pattern around: (1 tr, 1 dc, 1 hdc, 1 sc) in next st, (1 sc, 1 hdc, 1 dc, 1 tr) in next st. Repeat 5 more times.
- Join with a sl st to the first tr. (This row creates the petal-like effect and starts shaping the square).
- Note: The video’s Row 2 description is a bit ambiguous with “various combinations of treble, double, and half double crochets in single stitches.” This interpretation aims to create a similar petal effect.
Switch to Color C (e.g., Main Bag Color, or continue with Color A)
- Row 3: Attach Color C to a stitch with a sl st (preferably a sc from the previous row to create a corner). Ch 1.
- Work the following corner sequence: (1 sc, ch 3, 1 sc) in the same stitch.
- Then work along the side: Sc in next 2 sts. Hdc in next 2 sts. Dc in next 2 sts. Tr in next 2 sts.
- Repeat the side and corner sequence around. Join with a sl st to the first sc.
- Note: The video’s Row 3 description is very specific: “chain stitches, single crochets, half double crochets, and treble crochets, including a repeated pattern.” This interpretation aims to create a square shape with the specified stitches.
- Row 4: Ch 3 (counts as 1 dc). Work 5 dc in the first corner space (ch-3 space).
- Work along the side: (2 dc, ch 3, 11 dc) repeated three times.
- Work 2 dc in the next space, then 3 ch, then 11 dc. (This seems to be a continuation of the side pattern from the video’s description).
- Join with a sl st to the top of the initial ch 3.
- Note: The video’s Row 4 description is quite specific: “three chain stitches and five double crochets, then a pattern of two double crochets, three chain stitches, and 11 double crochets, repeated three times.” This implies a larger square being formed.
- Row 5: Ch 3 (counts as 1 dc). Work 90 dc evenly around the entire square. Join with a sl st to the top of the initial ch 3. (90 dc)
- This row creates a solid edge around the square.
FO, leaving a long tail for weaving in. Repeat to make a second identical square.
Part 2: Connecting the Squares & Building the Bag Body (Color C)
Now you will join the two squares and begin to form the bag’s main body.
- Take your two finished square motifs. Place them with wrong sides together.
- Seaming: Using Color C and your tapestry needle (or a sl st seam), sew three sides of the squares together. Leave one side open for the bag’s top opening.
- The video does not explicitly show seaming, but a bag requires joining.
- Row 6 (Bag Opening & Handle Foundation):
- Attach Color C to one corner of the open side of the bag. Ch 3 (counts as 1 dc).
- Work 8 dc along the top edge of the first square.
- Create First Handle Loop: Ch 50 (or desired length for your handle loop).
- Work 36 dc along the top edge of the second square.
- Create Second Handle Loop: Ch 50 (or desired length for your handle loop).
- Work 28 dc along the remaining part of the top edge. Join with a sl st to the top of the initial ch 3.
- Note: The video’s Row 6 description is very specific: “three chain stitches, eight double crochets, 50 chain stitches, 36 double crochets, 50 chain stitches, and 28 double crochets.” This forms the handle loops directly from the top edge.
- Row 7: Ch 1 (does not count as a stitch). Work 170-22 sc evenly around the entire top opening, including around the chain spaces for the handles. Join with a sl st to the first sc.
- Work sc stitches around the dc stitches and evenly around the ch-50 spaces for the handles. The “170-22” likely refers to the total stitch count after working around the handles.
- Rows 8-9: Ch 1. Sc in each sc around. Join with a sl st to the first sc.
- These rows create a sturdy, finished edge for the bag opening and handles.
FO, leaving a long tail for weaving in.
Part 3: Finishing Touches
- Weave in all ends: Use your tapestry needle to neatly weave in any remaining loose yarn tails.
- Shape: Gently shape your bag, ensuring the seams are neat and the handles are evenly formed.
Video tutorial
Versatile Uses for Your Easy & Stylish Granny Square Bag:
- Everyday Tote: Perfect for carrying your essentials, a small book, or a tablet.
- Project Bag: A unique way to carry your current crochet or knitting project.
- Beach/Market Bag: Lightweight and durable for casual outings.
- Gift: A thoughtful and impressive handmade gift.
Customization & Tips:
- Color Play: Experiment with different color combinations for your granny square and bag body to match your style.
- Size Adjustment:
- Larger Bag: Add more rows to your granny square motifs. Increase the initial chain count for the handle loops in Row 6 if you want longer handles.
- Smaller Bag: Reduce the number of rows in your granny square motifs.
- Lining (Optional): For extra durability and to prevent small items from slipping through stitches, you can sew a fabric lining inside the bag.
- Closure (Optional): Add a magnetic snap or a button and loop closure to the top opening of the bag if desired.
Enjoy crocheting your own beautiful, easy, and stylish granny square bag! It’s a fantastic way to create a unique and functional accessory that’s sure to become a favorite.