by
by 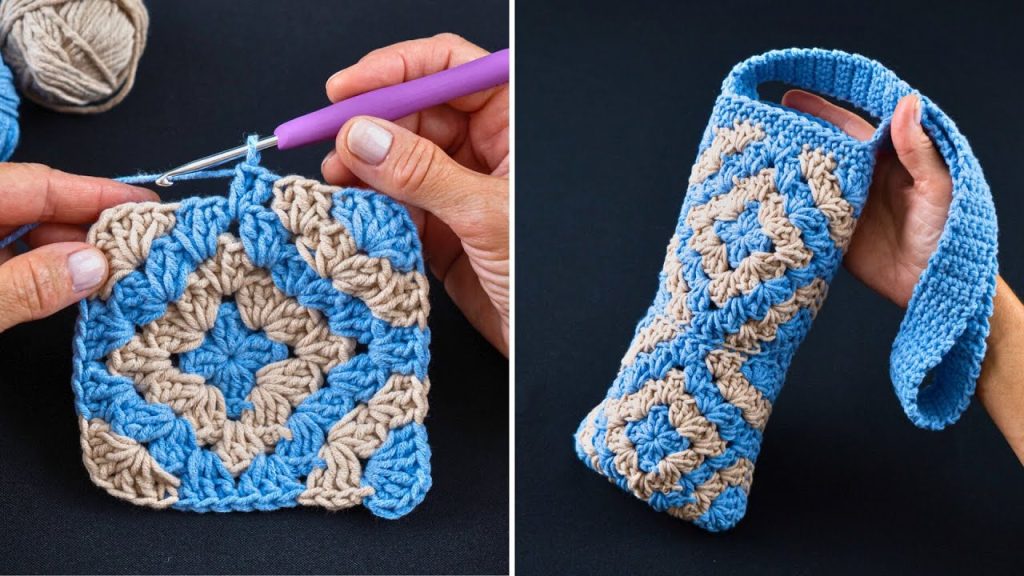
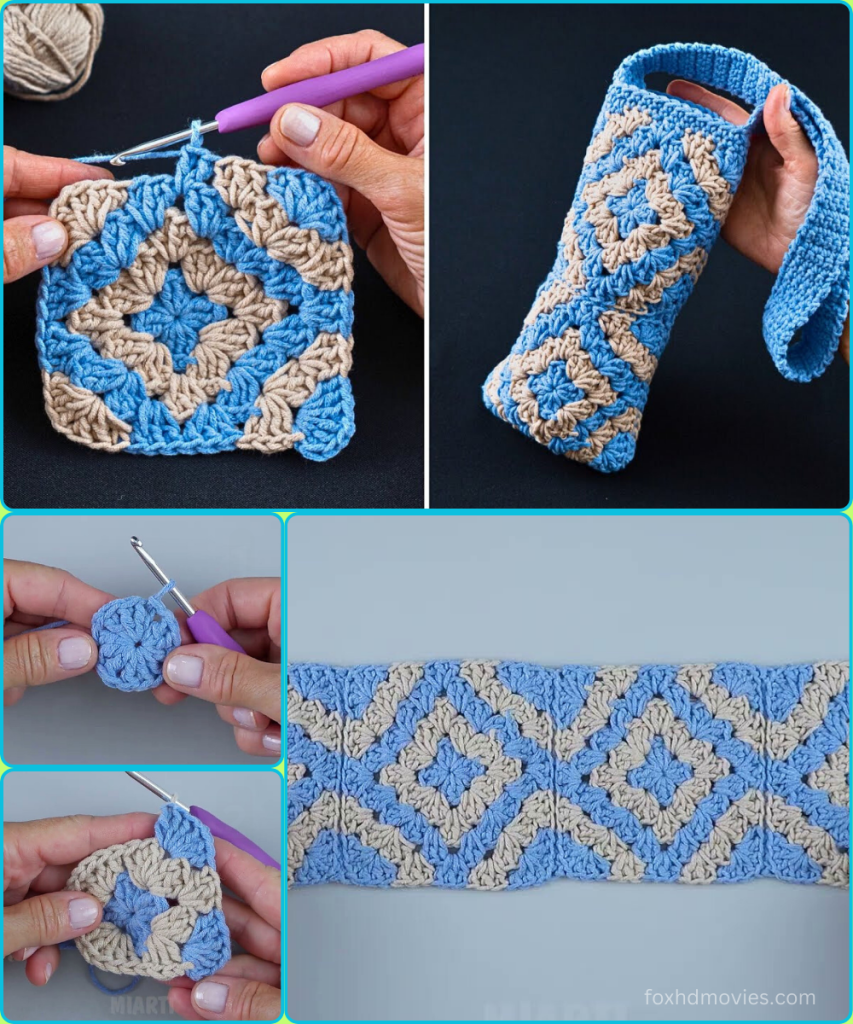
Staying hydrated is always important, and what better way to carry your water bottle than in a handmade, stylish holder? This gorgeous granny square bottle holder, featuring a captivating two-color design, is not only practical but also a fantastic way to showcase your crochet skills. Whether you’re heading to the gym, taking a walk, or just want to keep your bottle handy at home, this holder adds a touch of handmade charm to your day.
The design utilizes a classic granny square motif, but with a clever twist that creates a stunning diagonal striped effect. Don’t be intimidated if you’re new to granny squares; I’ll walk you through each step with clear instructions. Experienced crocheters will also enjoy how quickly this project works up!
What You’ll Need:
- Yarn: Worsted weight (Aran/10 ply) cotton yarn in two contrasting colors. Cotton is ideal for bottle holders as it’s durable and washable.
- Color A: Approximately 80-100 yards (e.g., the light blue in the example)
- Color B: Approximately 80-100 yards (e.g., the beige/tan in the example)
- Pro-tip: If you’re unsure about yarn amounts, always get a little extra!
- Crochet Hook: Size H/5.0mm (or hook size recommended for your yarn, to achieve a firm fabric)
- Yarn Needle: For weaving in ends.
- Scissors
- Stitch Markers (optional but recommended): Especially helpful for marking chain spaces or the beginning of rounds.
- Your favorite water bottle: To help gauge the size and fit!
Abbreviations Used:
- ch: chain
- sl st: slip stitch
- sc: single crochet
- dc: double crochet
- sp: space
- st(s): stitch(es)
- rnd: round
- FO: fasten off
- [ ]: repeat instructions in brackets
- ( ): stitch count at the end of the round
Gauge:
Getting the right gauge isn’t critical for this project, as long as your finished granny square is roughly the size you desire for your bottle. However, a tight fabric is generally better for a holder to keep the bottle secure. If your square seems too loose, go down a hook size. If it’s too stiff, go up a hook size.
Pattern Notes:
- This pattern is worked in the round, creating individual granny squares that are then joined.
- The “granny stitch” refers to a cluster of 3 double crochet stitches worked into the same space.
- We’ll be changing colors at the end of each round to achieve the striking striped effect.
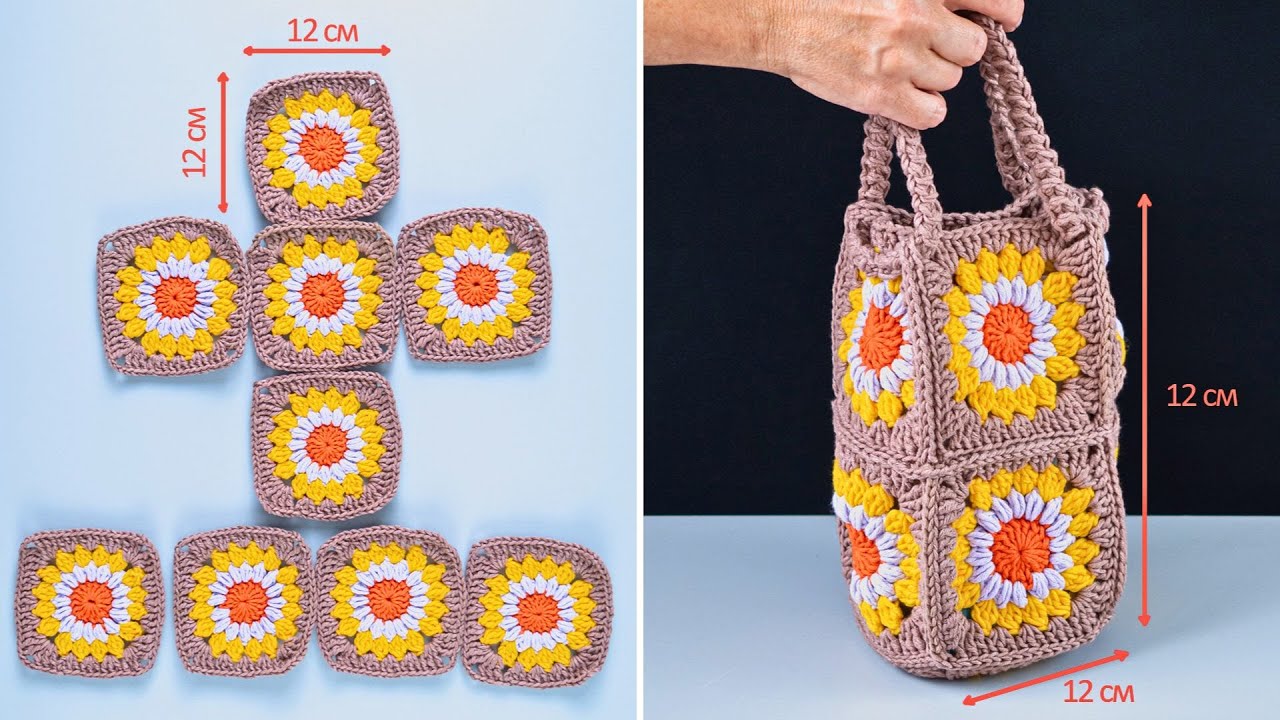
- The number of granny squares needed will depend on the size of your bottle. The example likely uses 4-5 squares for the main body.
- Ch 3 at the beginning of a round counts as one double crochet.
Part 1: The Granny Squares (Make 4-5, or as needed for your bottle)
We’ll start by making the iconic granny squares. The key to the diagonal stripe effect is the two-color approach, changing colors after each round.
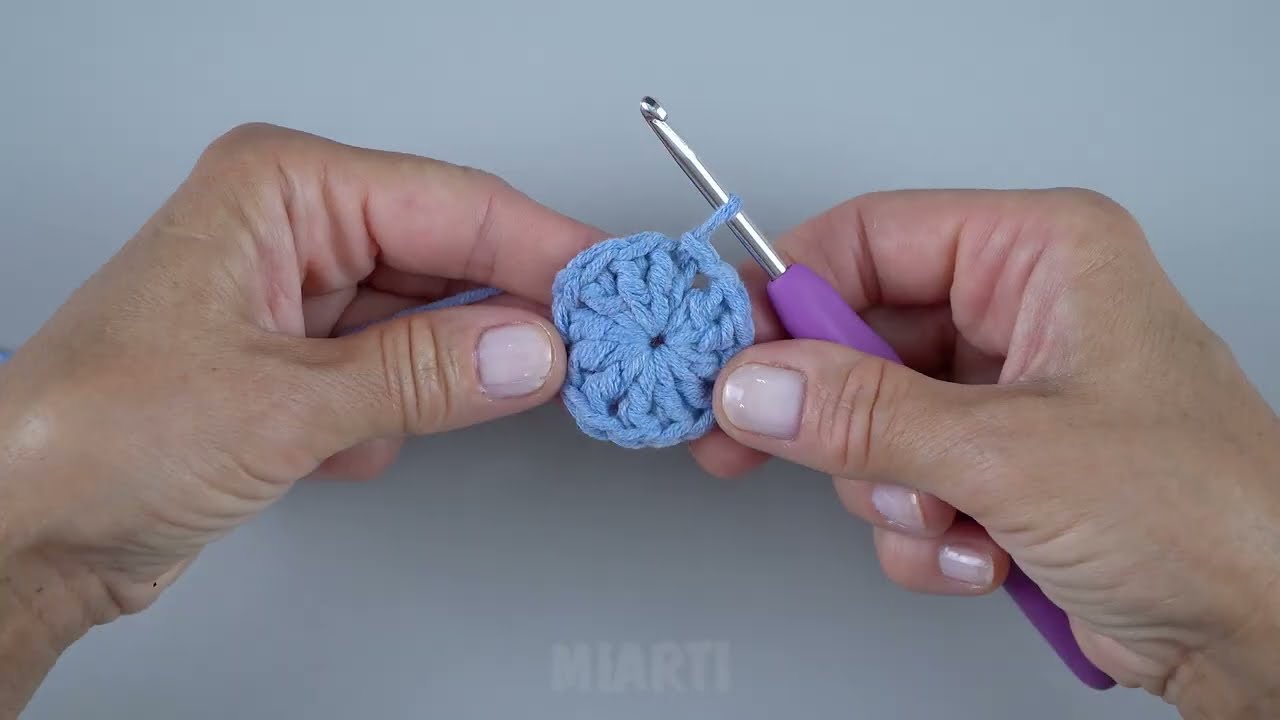
Using Color A (e.g., Blue)
Magic Ring Method (recommended for a tight center):
- Make a magic ring.
- Ch 3 (counts as 1st dc), 2 dc into the ring, [ch 2, 3 dc into the ring] 3 times, ch 2.
- Join with a sl st to the top of the initial ch 3. Pull the magic ring closed tightly. (4 granny clusters, 4 ch-2 spaces)
OR Ch 4 Method (alternative):
- Ch 4, join with a sl st to the first ch to form a ring.
- Ch 3 (counts as 1st dc), 2 dc into the ring, [ch 2, 3 dc into the ring] 3 times, ch 2.
- Join with a sl st to the top of the initial ch 3. (4 granny clusters, 4 ch-2 spaces)
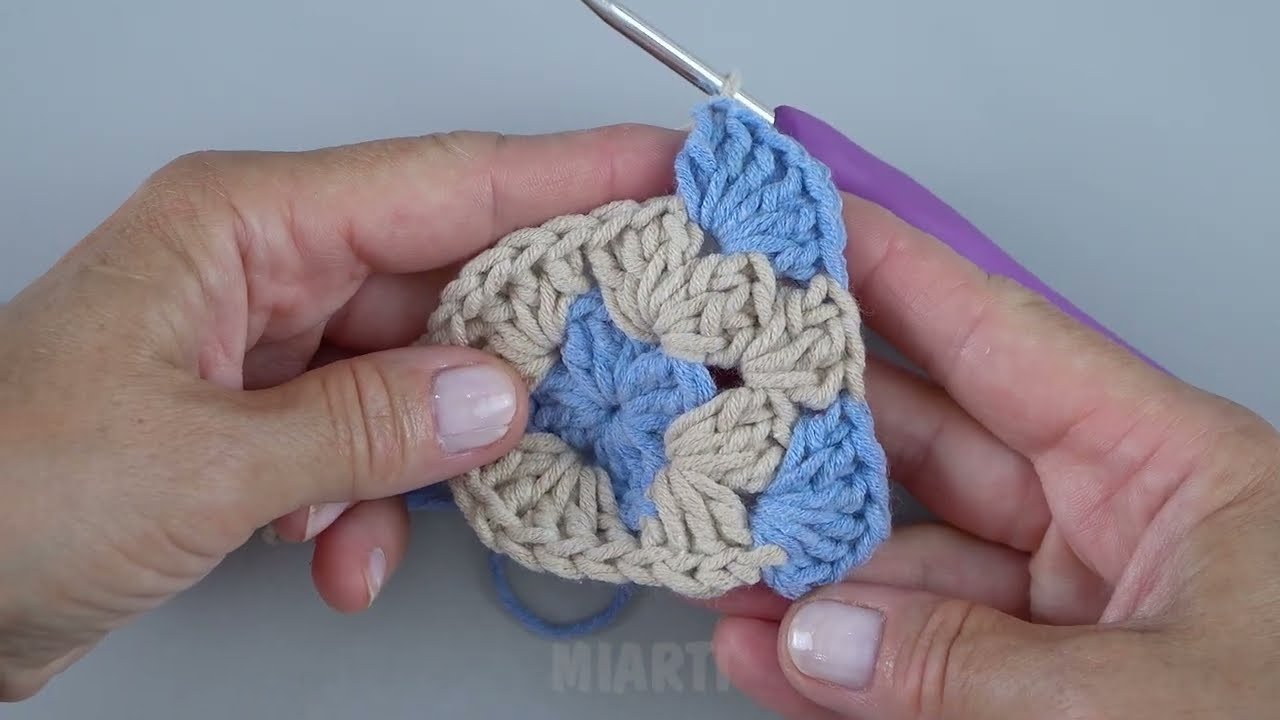
Fasten off Color A. Join Color B.
Using Color B (e.g., Beige)
Rnd 2:
- Join Color B in any ch-2 corner space.
- Ch 3 (counts as 1st dc), 2 dc in the same ch-2 sp, ch 2, 3 dc in the same ch-2 sp (this creates your first corner).
- [Ch 1, (3 dc, ch 2, 3 dc) in the next ch-2 corner sp] 3 times.
- Ch 1, join with a sl st to the top of the initial ch 3. (8 granny clusters, 4 ch-2 spaces, 4 ch-1 spaces)
Fasten off Color B. Join Color A.
Using Color A (e.g., Blue)
Rnd 3:
- Join Color A in any ch-2 corner space.
- Ch 3 (counts as 1st dc), 2 dc in the same ch-2 sp, ch 2, 3 dc in the same ch-2 sp (first corner).
- Ch 1, 3 dc in the next ch-1 space (this is the side space).
- [Ch 1, (3 dc, ch 2, 3 dc) in the next ch-2 corner sp (corner made), ch 1, 3 dc in the next ch-1 sp (side made)] 3 times.
- Ch 1, join with a sl st to the top of the initial ch 3. (12 granny clusters, 4 ch-2 spaces, 8 ch-1 spaces)
Fasten off Color A. Join Color B.
Using Color B (e.g., Beige)
Rnd 4:
- Join Color B in any ch-2 corner space.
- Ch 3 (counts as 1st dc), 2 dc in the same ch-2 sp, ch 2, 3 dc in the same ch-2 sp (first corner).
- [Ch 1, 3 dc in the next ch-1 sp] 2 times (these are the side spaces).
- [Ch 1, (3 dc, ch 2, 3 dc) in the next ch-2 corner sp (corner made), ch 1, [3 dc in the next ch-1 sp] 2 times (sides made)] 3 times.
- Ch 1, join with a sl st to the top of the initial ch 3. (16 granny clusters, 4 ch-2 spaces, 12 ch-1 spaces)
Fasten off Color B.
Continue in this manner, adding one more “3 dc in ch-1 sp” to each side per round, alternating colors, until your squares reach the desired width for your bottle.
- Tip: Hold a finished square against the side of your bottle. You’ll want the width of the square to be roughly 1/2 to 2/3 of the bottle’s circumference. For a standard water bottle, 4-5 rounds are usually sufficient. The squares in the image appear to be 4 or 5 rounds.
Once you have crocheted all your squares, weave in all the ends securely. This makes the joining process much neater!
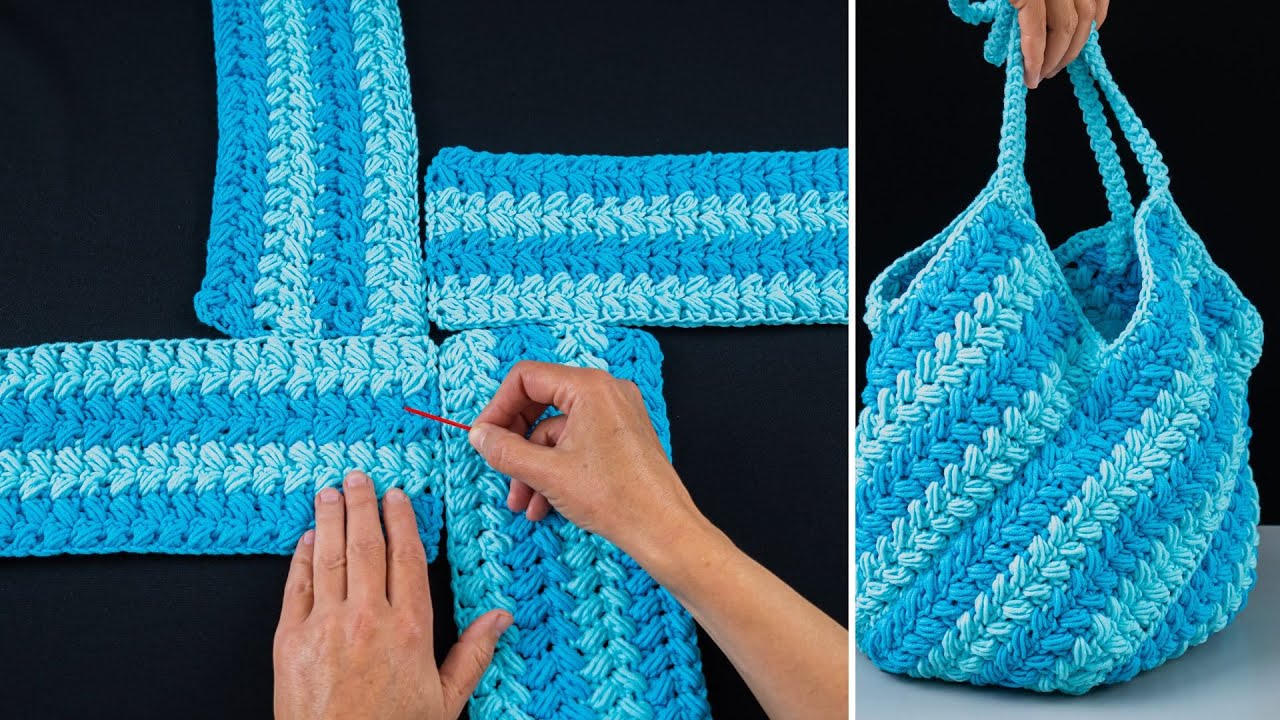
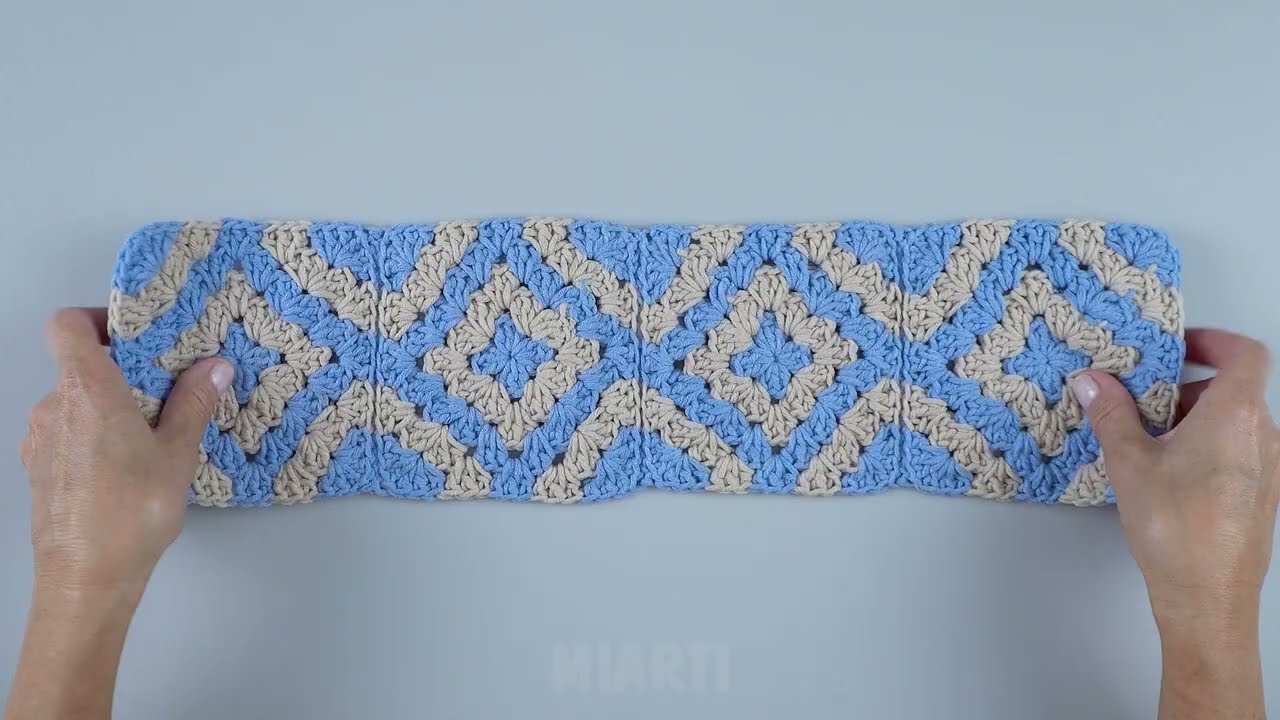
Part 2: Joining the Granny Squares
Now, let’s assemble the body of the bottle holder. We’ll join the squares into a tube.
Arrangement: Lay your squares out in a row. The number of squares will determine the height of your holder. For a standard water bottle, 4-5 squares are typical.
Joining Method: Slip Stitch (Invisible Seam) This method creates a flat, almost invisible seam.
- Take two squares and place them with wrong sides together (right sides facing out).
- Using Color A (or whichever color you prefer for a joining seam), insert your hook into the outer loop of the corresponding stitch on both squares.
- Sl st along one edge to join them together.
- Continue this for all the vertical seams, forming a flat strip of squares.
- Once all the squares are joined into a long strip, bring the two ends of the strip together and sl st them to form a tube.
- Alternative Joining Method: Single Crochet (More Pronounced Seam)
- If you prefer a more defined seam, place squares with wrong sides together and single crochet through both loops of corresponding stitches along the edges.
Try it on your bottle! Gently stretch the tube you’ve created over your water bottle. It should fit snugly, but not be so tight it distorts the squares. If it’s too loose, you might need to make smaller squares or add an extra square for a wider bottle.
Part 3: Creating the Base
Now we need to close off the bottom of the tube to form the base.
Using Color A
- Turn your tube of squares inside out (wrong side facing out).
- Lay the bottom edges of your squares together.
- We’re going to use single crochet to join the bottom edges. Starting at one corner, insert your hook through both layers of the square edges (going through the actual stitches/chain spaces, not just the “holes”).
- Sc across the entire bottom opening, joining the two sides together. Aim for 1 sc per dc and 1 sc per ch-1 space (or adjust to make it flat and even).
- When you reach a corner, ensure it’s securely joined.
- Once you’ve single crocheted across the entire bottom, FO and weave in the end.
- Alternatively, for a rounder base:
- With the right side of the bottle holder facing out, join Color A to the bottom corner of one square.
- Ch 1, and sc evenly around the entire bottom opening. You’ll need to eyeball this, aiming for roughly 2-3 sc per granny cluster along the edges, and 1 sc in each ch-1 space.
- Join with a sl st to the first sc.
- Rnd 2 (and subsequent rounds if needed): Ch 1, sc in each sc around. Join with a sl st. Continue for 2-3 rounds, then begin decreasing.
- Decreasing Rounds: Ch 1, [sc in next 2 sc, sc2tog] repeat around. Join.
- Continue decreasing by varying sc2tog placement until the hole is small enough to pull closed with a yarn needle.
- This method creates a more tailored, round bottom.
Part 4: Adding the Top Edge
Let’s clean up the top edge and prepare for the strap.
Using Color A
- With the right side of your bottle holder facing out, join Color A to any stitch at the top edge of your holder.
- Ch 1, and sc evenly around the entire top opening. Aim for about 2-3 sc per granny cluster along the edges, and 1 sc in each ch-1 space.
- Join with a sl st to the first sc.
- Rnd 2: Ch 1, sc in each sc around. Join with a sl st.
- Rnd 3: Ch 1, sc in each sc around. Join with a sl st. (You can do more or fewer rounds here depending on how thick you want the top edge).
Part 5: The Strap
The strap will be created directly from the top edge. The example shows a simple, sturdy single crochet strap.
Using Color A
- Do NOT fasten off after your last sc round for the top edge.
- Decide where you want the strap to be positioned. It should be centered over two adjacent granny squares, or evenly distributed.
- Ch 1, sc in the next 8-10 stitches (or however wide you want your strap to be).
- Turn your work.
- Row 1 of Strap: Ch 1, sc in each of the 8-10 sc across.
- Turn your work.
- Repeat Row 1 until your strap reaches the desired length. Hold it up and measure against your body or preferred carrying style. For a shoulder strap, you might need 60-80 rows or more. For a simple hand-carry strap, 20-30 rows might be enough.
- Once your strap is the desired length, position it over the opposite side of your bottle holder, ensuring it’s not twisted and lines up with where you started.
- Using sc, attach the end of the strap to the top edge of the holder, working through both the strap’s last row and the top edge stitches of the holder. Secure with several sc, ensuring a strong join.
- FO and weave in all remaining ends.
Video tutorial
Finishing Touches:
- Weave in all remaining ends securely. A well-woven end prevents unraveling and gives your project a professional look.
- Block (optional but recommended for cotton): Gently wash your bottle holder according to yarn instructions, then reshape it and let it air dry. This can help even out stitches and give it a polished finish.
- Add Embellishments (optional): You could add a small button, a wooden bead, or even a tassel to personalize your holder further!
And there you have it! Your very own stylish and functional granny square bottle holder. This project is not only satisfying to make but also incredibly practical for everyday use. It also makes a wonderful handmade gift for friends and family.
Don’t forget to share your finished project! Happy crocheting!