by
by 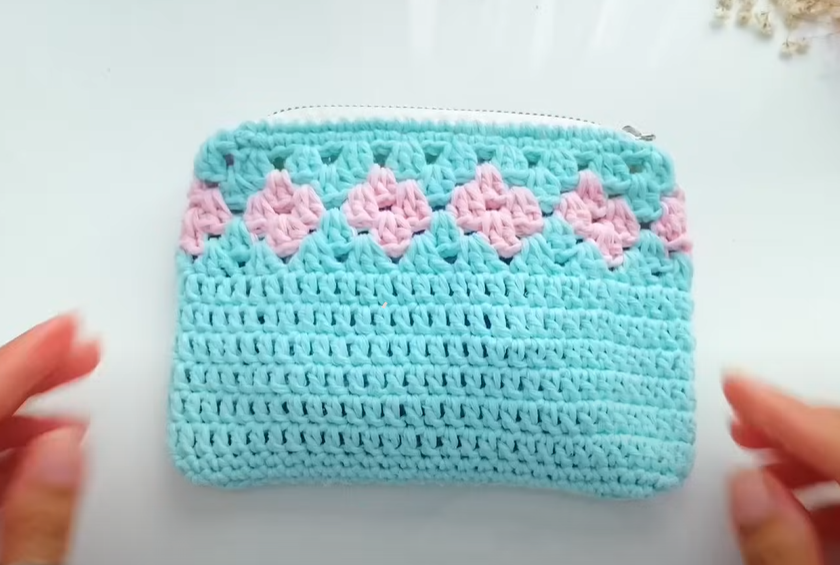
This pattern uses US crochet terms.
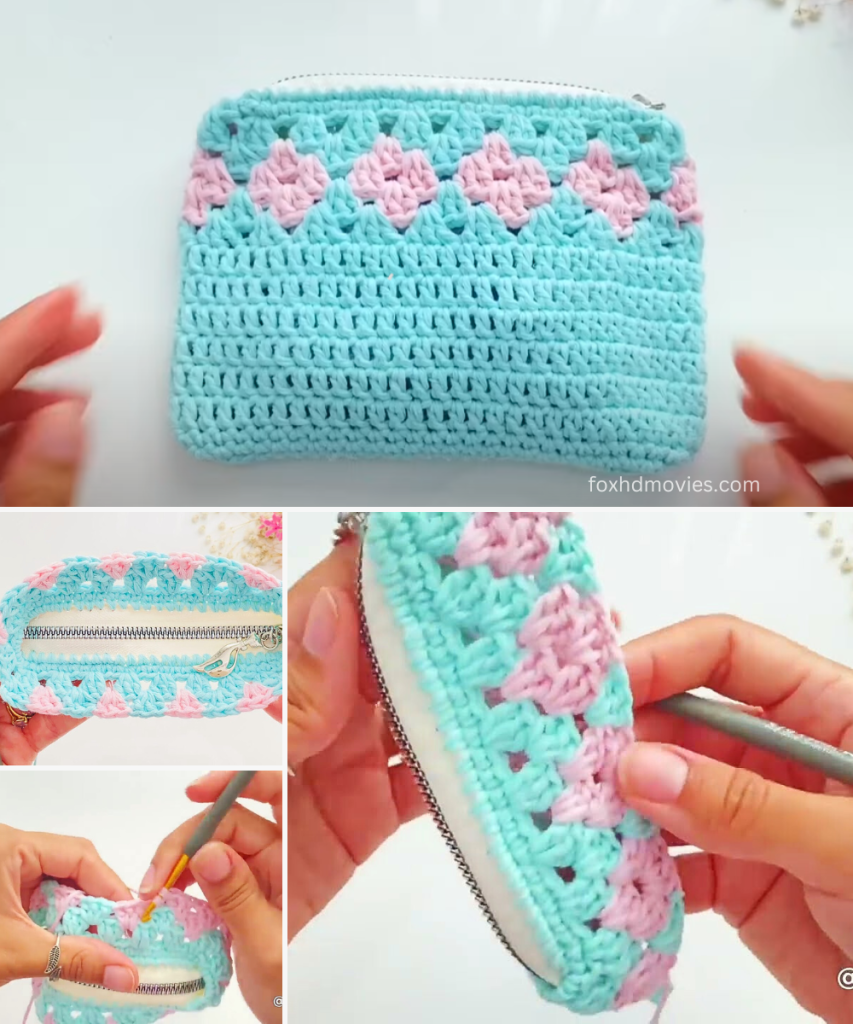
Finished Size (Approximate): 5 inches wide x 4 inches tall (adjust by adding/subtracting stitches and rows)
Materials:
- Yarn:
- Worsted weight cotton or cotton blend yarn in Color A (main color – light blue in image)
- Worsted weight cotton or cotton blend yarn in Color B (accent color – light pink in image)
- Crochet Hook: G/6 (4.0 mm) or size needed to obtain gauge
- Zipper: 5-inch zipper (or size to match your pouch width)
- Tapestry Needle: For weaving in ends and sewing in zipper
- Scissors
- Stitch Markers (optional)
Gauge (Important!): 18 single crochet stitches and 20 rows = 4 inches (10 cm) Always check your gauge and adjust your hook size if necessary to ensure your pouch turns out the correct size.
Abbreviations:
- ch: chain
- sc: single crochet
- dc: double crochet
- sk: skip
- st(s): stitch(es)
- sl st: slip stitch
- sp: space
- ch-sp: chain space
- FO: Fasten off
- R: Row
Pattern Notes:
- The pouch is worked in continuous rounds for the base, then in rows for the sides, joined with a slip stitch at the end of each row.
- The diamond pattern is created using a combination of chain spaces and double crochet stitches.
- Color changes are made by dropping the old color and picking up the new color on the last yarn over of the previous stitch.
- Ch 1 at the beginning of a row does not count as a stitch.
- Ch 3 at the beginning of a row counts as a dc.
Part 1: Pouch Base (Color A)
The base is worked in continuous rounds to create an oval.

R1: Ch 21. Sc in 2nd ch from hook and in next 18 chs. (19 sc) 3 sc in last ch. (This turns the corner) Working down the other side of the starting chain, sc in next 18 chs. 2 sc in the last ch (same ch as first sc of the row). (This completes the oval) (Total 42 sc for the first round)
R2: 2 sc in first sc. Sc in next 18 sc. 2 sc in next 3 sc. Sc in next 18 sc. 2 sc in next 2 sc. (Total 49 sc)
R3: 2 sc in first sc. Sc in next 21 sc. 2 sc in next 2 sc. Sc in next 22 sc. 2 sc in next 2 sc. (Total 55 sc)
R4: Sc in each sc around. Join with a sl st to the first sc. (Total 55 sc)
You now have a flat oval base.
Part 2: Pouch Body – Solid Section (Color A)
From this point, you will be working in rows, joining at the end of each row.
R5-R16 (or desired height for solid section): Ch 1, sc in each st around. Join with a sl st to the first sc. (Still 55 sc per row) Repeat this row until the solid bottom portion of your pouch is the desired height. The image suggests about 12 rows of solid single crochet.
Part 3: Diamond Pattern Section
This section uses both Color A and Color B.
Set Up Row (Color A): R17: Ch 3 (counts as 1 dc), dc in next st. Ch 1, sk 1 st, dc in next 2 sts. Repeat from * to * around. Ch 1, sk 1 st, dc in last st. Join with a sl st to the top of the beginning ch 3. (Approx. 37 dc and 18 ch-1 spaces)
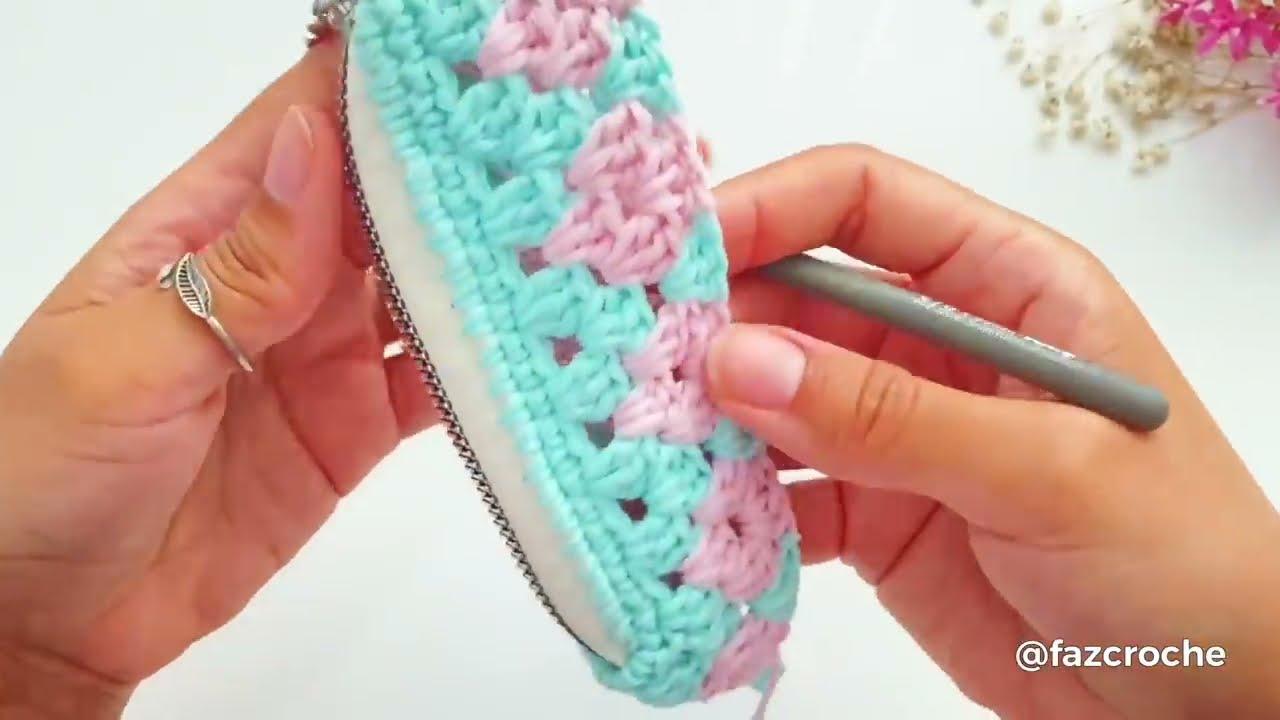
Diamond Pattern Row 1 (Color B): R18: With Color B, ch 3 (counts as 1 dc). Dc in the first dc of the previous row. (The first dc is the top of the ch 3 from the previous row). Sk next dc. Work 3 dc into the ch-1 space. Sk next dc. Repeat from * to * around. You should end with 3 dc into the last ch-1 space. Sk last dc. Join with a sl st to the top of the beginning ch 3. (You will have groups of 3 dc, creating the solid part of the diamonds.)
Diamond Pattern Row 2 (Color A): R19: With Color A, ch 3 (counts as 1 dc). Dc in next st (this is the 2nd dc of the 3-dc group from the previous row). Ch 1, sk next st (the 3rd dc of the group). Dc in next 2 sts (these are the 1st and 2nd dc of the next 3-dc group). Repeat from * to * around. Ch 1, sk last st (the 3rd dc of the last 3-dc group). Dc in last st (this will be the top of the ch 3 from R18). Join with a sl st to the top of the beginning ch 3. (This row creates the “V” shape on top of the diamonds and prepares for the next color.)
Diamond Pattern Row 3 (Color B): R20: With Color B, ch 3 (counts as 1 dc). Dc in the first dc of the previous row. Sk next dc. Work 3 dc into the ch-1 space. Sk next dc. Repeat from * to * around. You should end with 3 dc into the last ch-1 space. Sk last dc. Join with a sl st to the top of the beginning ch 3. (This is a repeat of R18, creating the next row of solid diamonds.)
Repeat R19 and R20 until your Diamond Pattern section is the desired height (the image shows two full rows of pink diamonds).
Example Sequence for the image:
- R17 (Color A – Set Up Row)
- R18 (Color B – Diamond 1st row)
- R19 (Color A – Diamond 2nd row)
- R20 (Color B – Diamond 3rd row / 2nd full diamond row)
- R21 (Color A – Diamond 4th row / preparing for next color, or top edge)
Part 4: Top Edge (Color A)
After your last Diamond Pattern row, change back to Color A if you ended on Color B.

Final Row (Color A): Ch 1, sc in each dc and in each ch-1 space around. Join with a sl st to the first sc. (This creates a neat, solid edge for the zipper.)
FO, leaving a long tail for sewing if desired, or weave in all ends.
Part 5: Finishing
- Weave in all ends: Use your tapestry needle to neatly weave in any loose yarn tails.
- Attach Zipper:
- Lay your pouch flat.
- Pin the zipper along the top edge of the pouch, making sure it’s centered.
- Using your tapestry needle and matching thread (or the same yarn if it’s fine enough, splitting it if necessary), carefully hand-sew the zipper to the top edge of the pouch. Stitch through the fabric of the zipper tape and the top single crochet row of your pouch. Take small, even stitches for a clean finish.
- Steam Block (Optional but Recommended): Gently steam your pouch to help it hold its shape and for a more polished look. Be careful not to flatten the stitches too much.
Video tutorial
Variations & Tips:
- Size Adjustment: To make the pouch wider, increase your starting chain (keep it an odd number if you want to maintain the diamond pattern repeat easily). To make it taller, add more rows to the solid section and/or the diamond section.
- Stripe Variations: You can add more rows of the solid color between diamond rows, or change the color sequence of the diamonds.
- Lining: For a more durable and finished pouch, consider adding a fabric lining.
- Strap/Handle: Attach a small loop or a wrist strap to one side if desired.
- Yarn Weight: Using a finer weight yarn (e.g., sport weight) will result in a smaller pouch, while a bulkier yarn will make a larger one. Adjust hook size accordingly.
Enjoy creating your beautiful crochet diamond pouch!