 by
by 
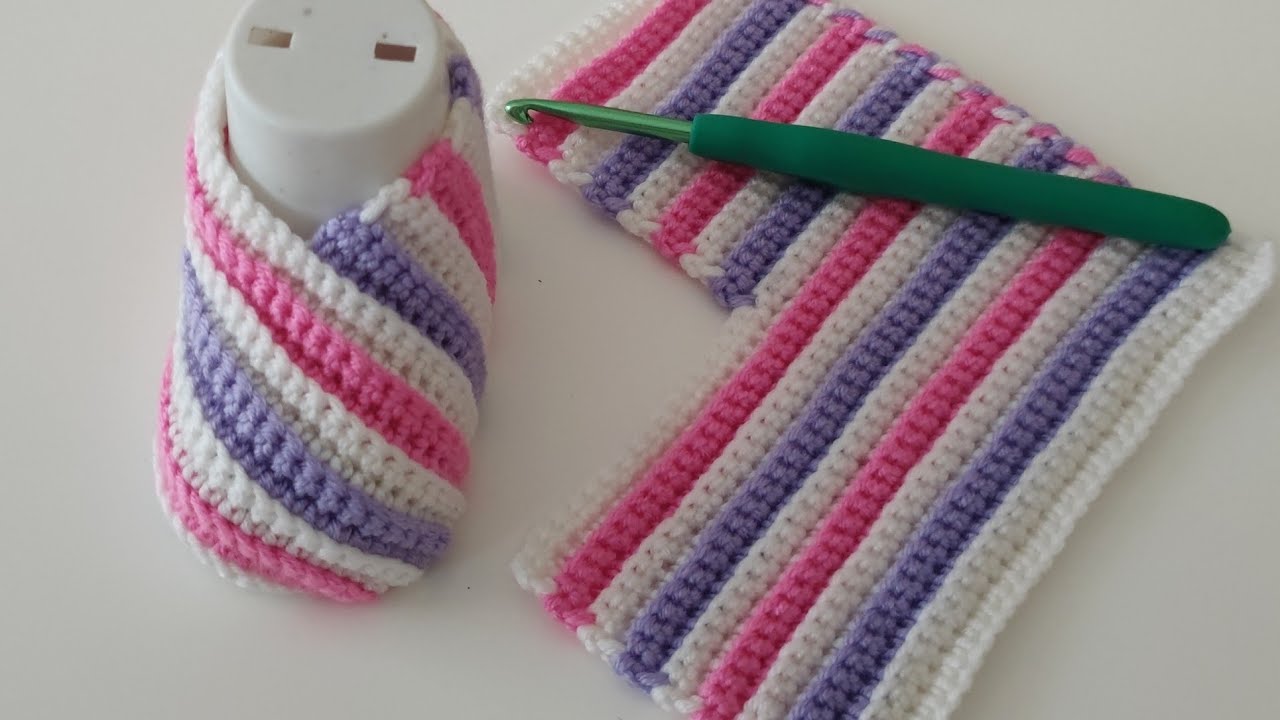
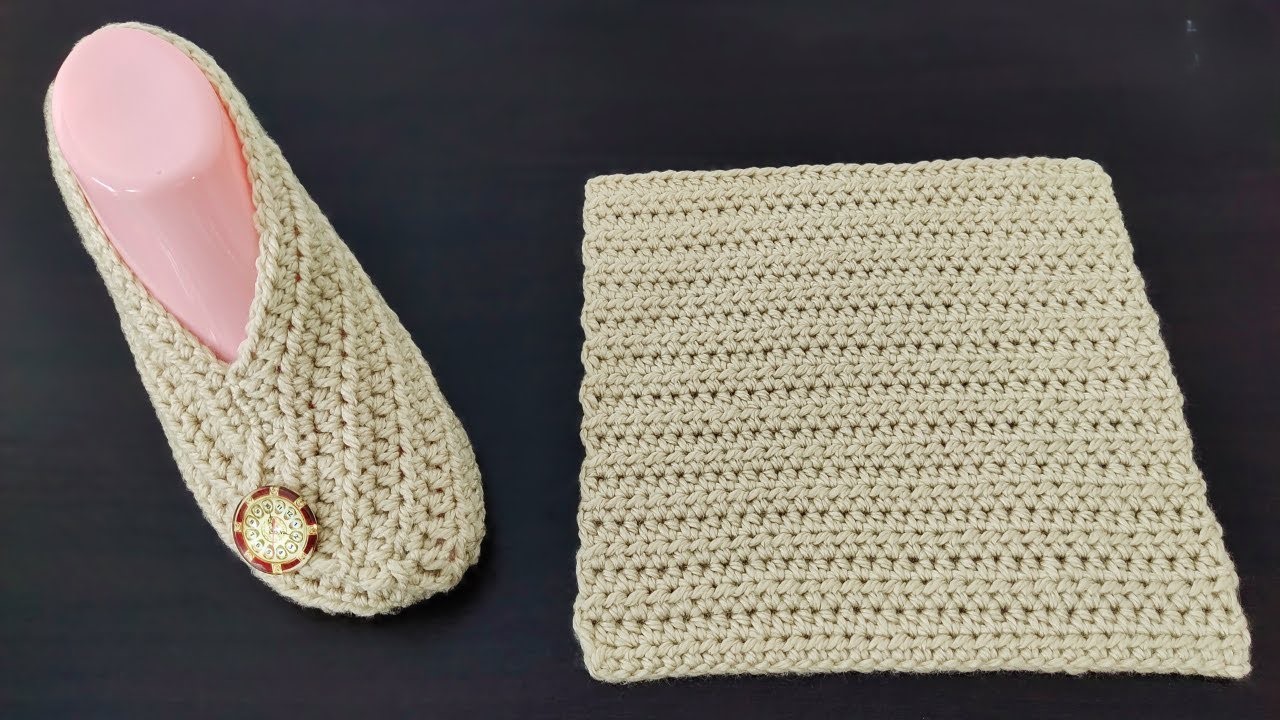
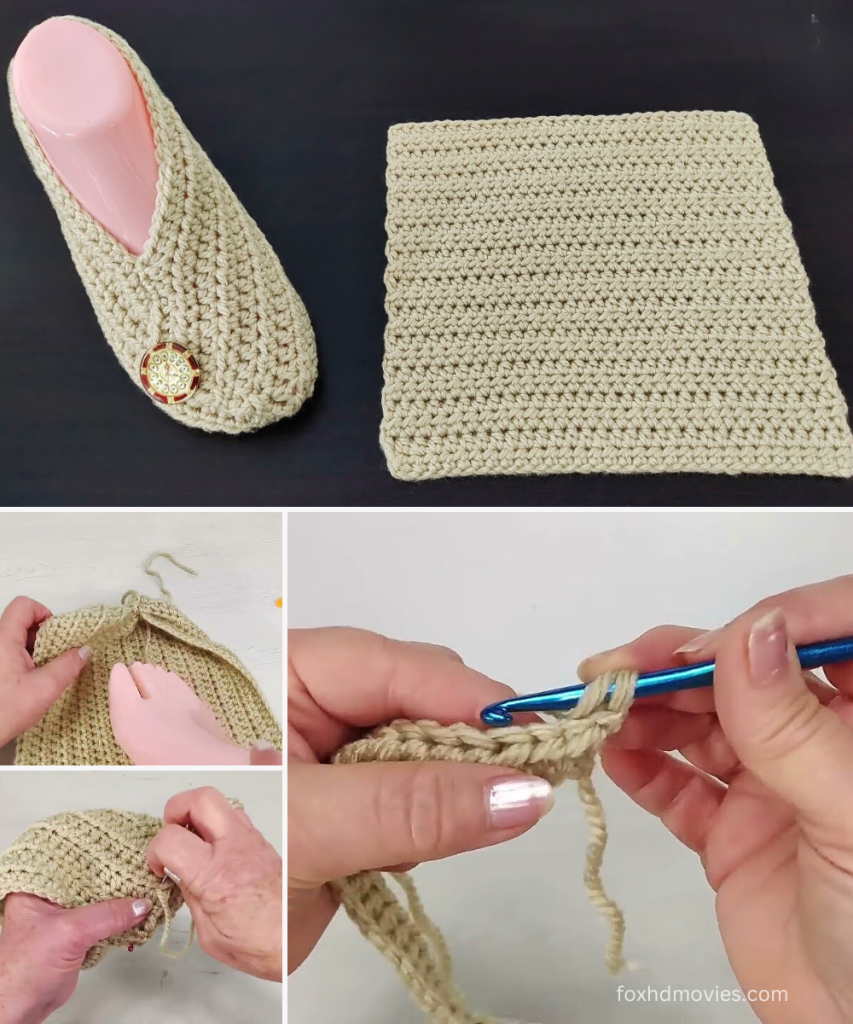
This pattern creates a comfortable, flat-bottomed slipper that is sewn up the back and across the toe. The stitch used is single crochet, creating a dense and sturdy fabric.
Skill Level: Beginner-Intermediate
Materials:
- Worsted Weight Yarn (Acrylic or a blend is recommended for slippers) – approximately 150-250 yards, depending on size.
- Crochet Hook: US G/6 (4.0 mm) or H/8 (5.0 mm) – choose based on your desired fabric density and yarn. (A tighter stitch will make a sturdier slipper).
- Yarn Needle (for weaving in ends and seaming)
- Scissors
- Optional: Non-slip fabric paint or sole pads for the bottom of the slippers.
- Optional: Button or other embellishment for decoration.
Gauge: Gauge is not strictly crucial for this pattern, but for a women’s average size 7-8, a good starting point might be: Using H/8 (5.0 mm) hook: 14 single crochet stitches = 4 inches (10 cm) 16 rows of single crochet = 4 inches (10 cm)
Measurements: Before you start, you’ll need two measurements from the person who will wear the slippers:
- Foot Length: From the tip of the longest toe to the back of the heel.
- Foot Circumference (widest part): Measure around the widest part of the foot, typically across the ball of the foot.
Pattern Notes:
- This slipper is worked flat as a rectangle, then folded and sewn.
- Ch 1 at the beginning of rows does NOT count as a stitch.
- Work into the top of the previous row’s single crochet stitches.
Instructions:
Make 2 (one for each foot)
Step 1: Determine your Starting Chain Length (Width of Slipper)
- Your starting chain will determine the “width” of your slipper, which will become the circumference around the top of your foot.
- Multiply the Foot Circumference measurement by your gauge. For example, if your foot circumference is 9 inches and your gauge is 14 sc per 4 inches (3.5 sc per inch), then you’d need approximately 9 inches×3.5 sc/inch=31.5 single crochet stitches. Round this to the nearest even number for symmetry, e.g., 32 stitches.
- Alternatively, measure around the widest part of your foot (or the recipient’s foot) and loosely chain until the chain wraps comfortably around that part of the foot. Make sure the chain is slightly stretchy and not too tight.
- Let’s assume for this example, our starting chain will be 32 chains. (Adjust this number based on your measurements).
Starting Chain: Chain (CH) the determined number of stitches (e.g., CH 32).
Row 1 (Right Side): Single crochet (SC) in the 2nd chain from the hook and in each chain across. (You will have one less SC than your starting chain. For example, if you chained 32, you will have 31 SC). Ch 1, turn.
Rows 2 – End of Rectangle: SC in each stitch across. Ch 1, turn.
Continue crocheting rows until your rectangle reaches the correct length.
- The length of your rectangle should be approximately (Foot Length + 2 inches).
- For example, if your foot length is 9 inches, you would crochet until your rectangle measures approximately 11 inches long. This extra length accounts for the toe and heel shaping when sewn.
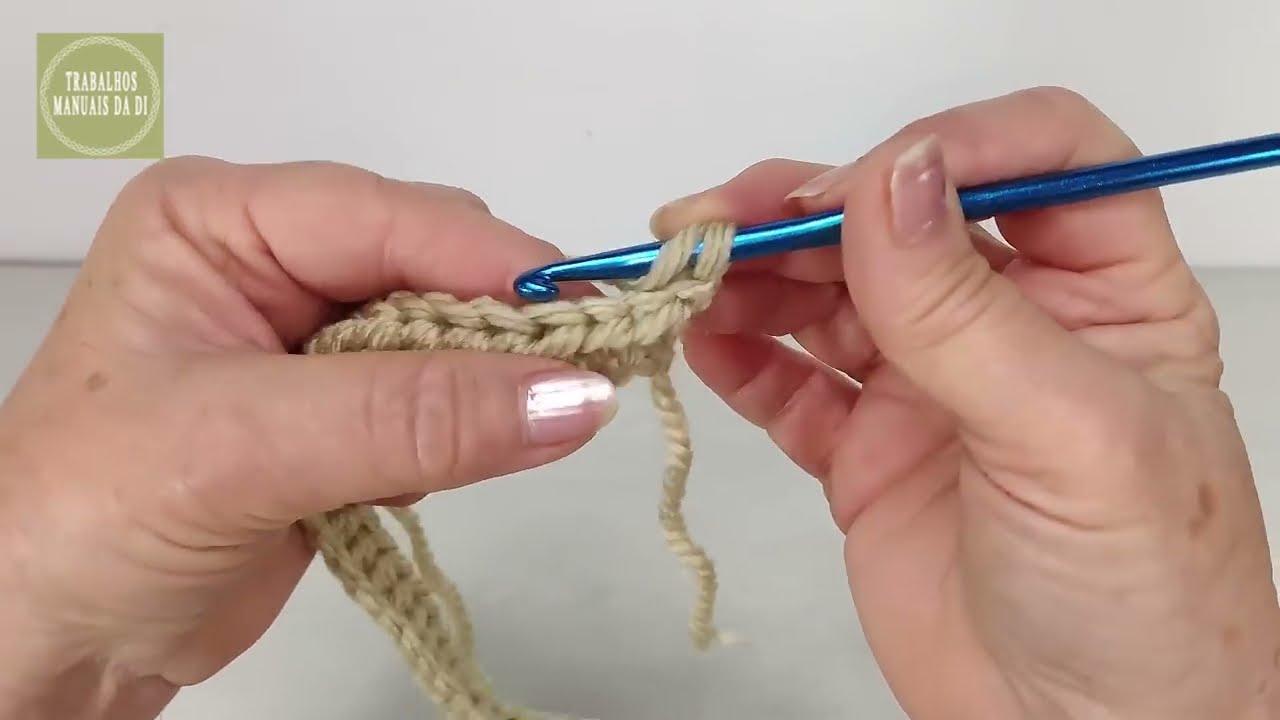
Fasten off, leaving a very long tail for seaming (at least 24-30 inches).
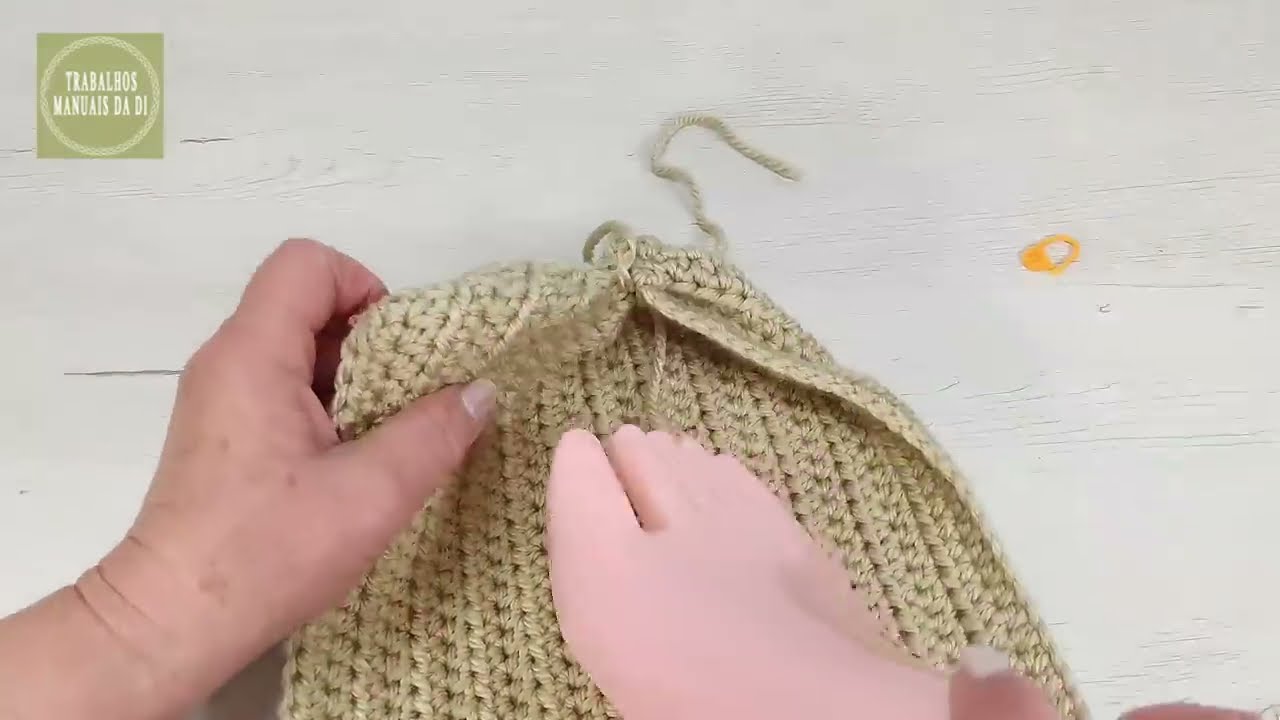
Assembly:
- Fold the Rectangle: Lay your crocheted rectangle flat. Fold it in half lengthwise, bringing the two long edges together.
- The starting chain edge will be one short end, and the last row you crocheted will be the other short end.
- The long edges (the “sides” of your rows) will now be aligned.
- Seam the Heel (Back of Slipper):
- Thread your long yarn tail onto your yarn needle.
- Starting from the folded edge (the top of the slipper opening), whip stitch or mattress stitch the short ends together, working downwards towards where the heel would be.
- Seam for about 2-3 inches, creating the back seam of the slipper. This will form the heel cup. You want this seam to be about half the length of your foot length.
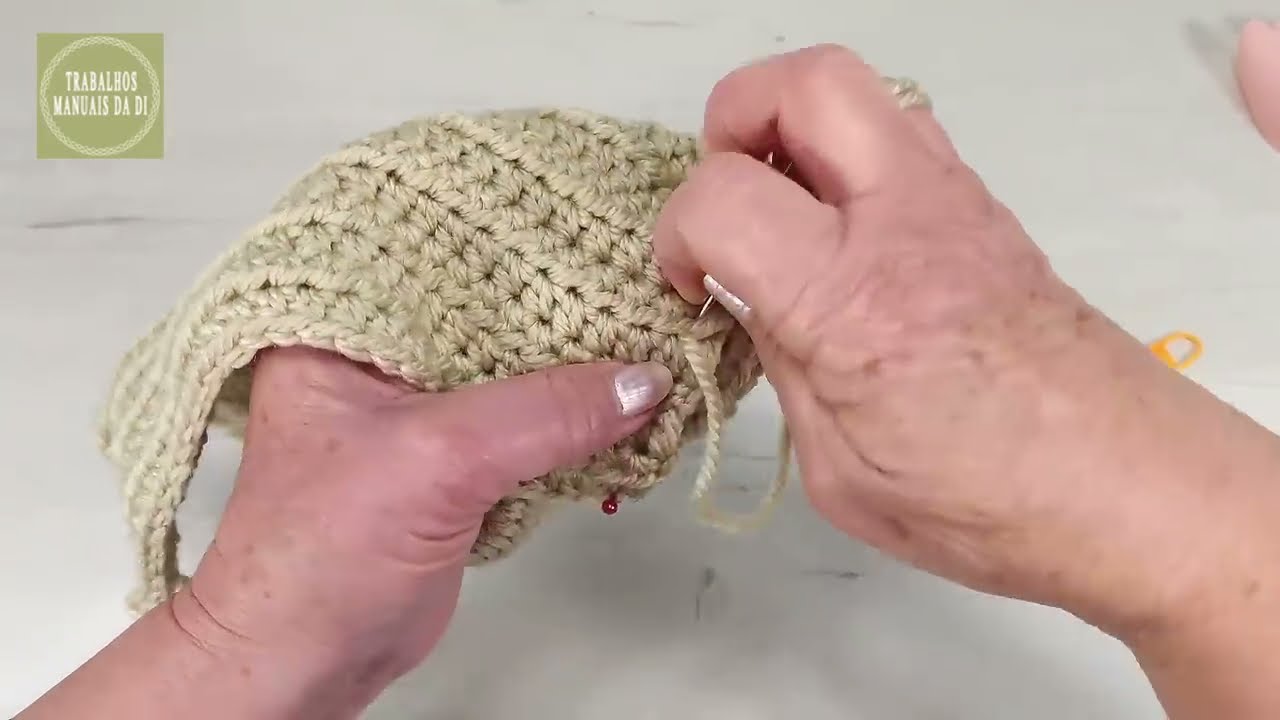
- Seam the Toe:
- Now, look at the other end of the folded rectangle (the “toe” end).
- Continue with your yarn needle and tail.
- Starting from one corner of the folded rectangle’s toe end, whip stitch or mattress stitch across the raw edge, gathering it slightly as you go to form a rounded toe. You want to close this opening completely. Pull the seam tight to create a neat, rounded toe.
- Weave in Remaining Ends: Securely weave in any remaining yarn tails.
Finishing:
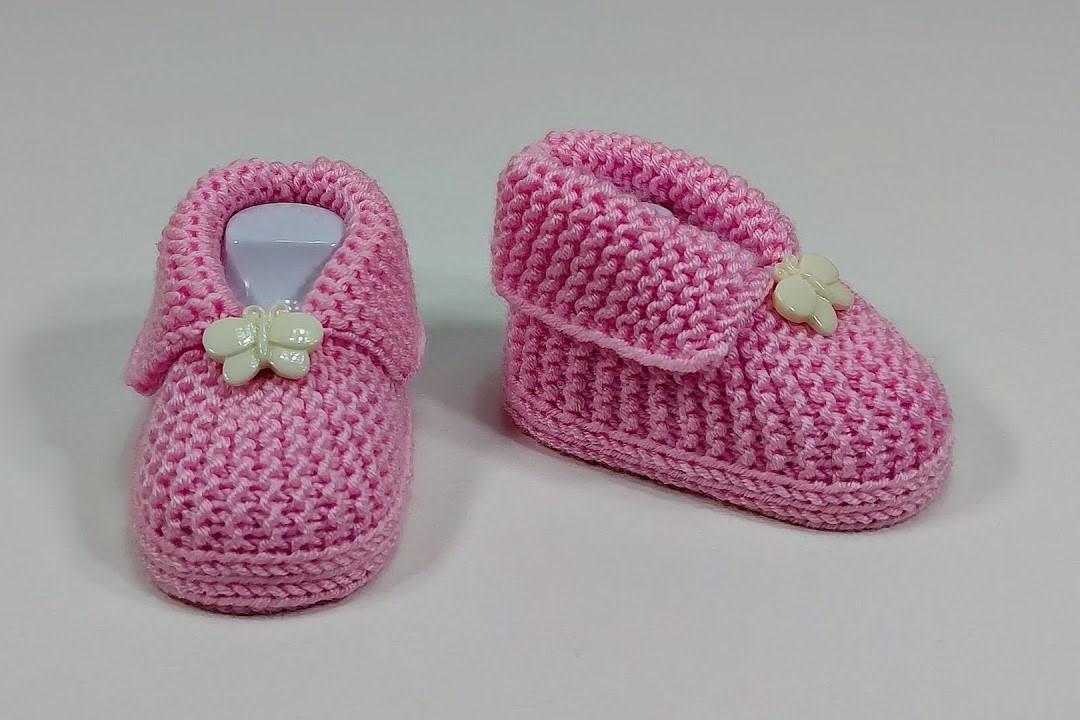
- Embellishment (Optional): If you have a button or other embellishment, sew it onto the top front of the slipper.
- Non-Slip Sole (Highly Recommended): Apply non-slip fabric paint to the bottom of the slippers or sew on non-slip sole pads to prevent slipping. Follow the manufacturer’s instructions for the paint or pads.
Repeat all steps for the second slipper.
Video tutorial
This pattern provides a good starting point for a simple, comfortable crochet slipper. Enjoy your new slippers!