by
by 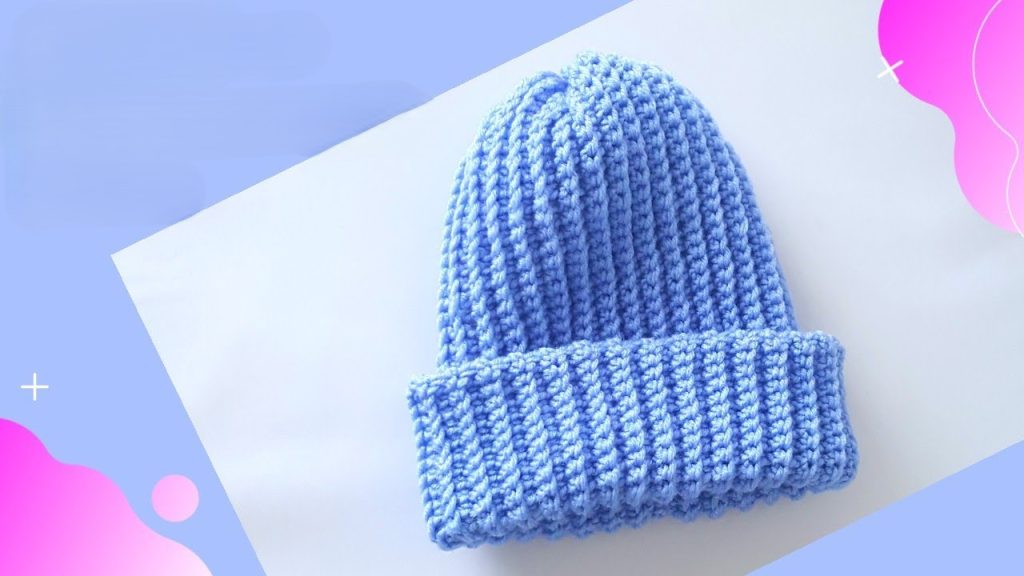
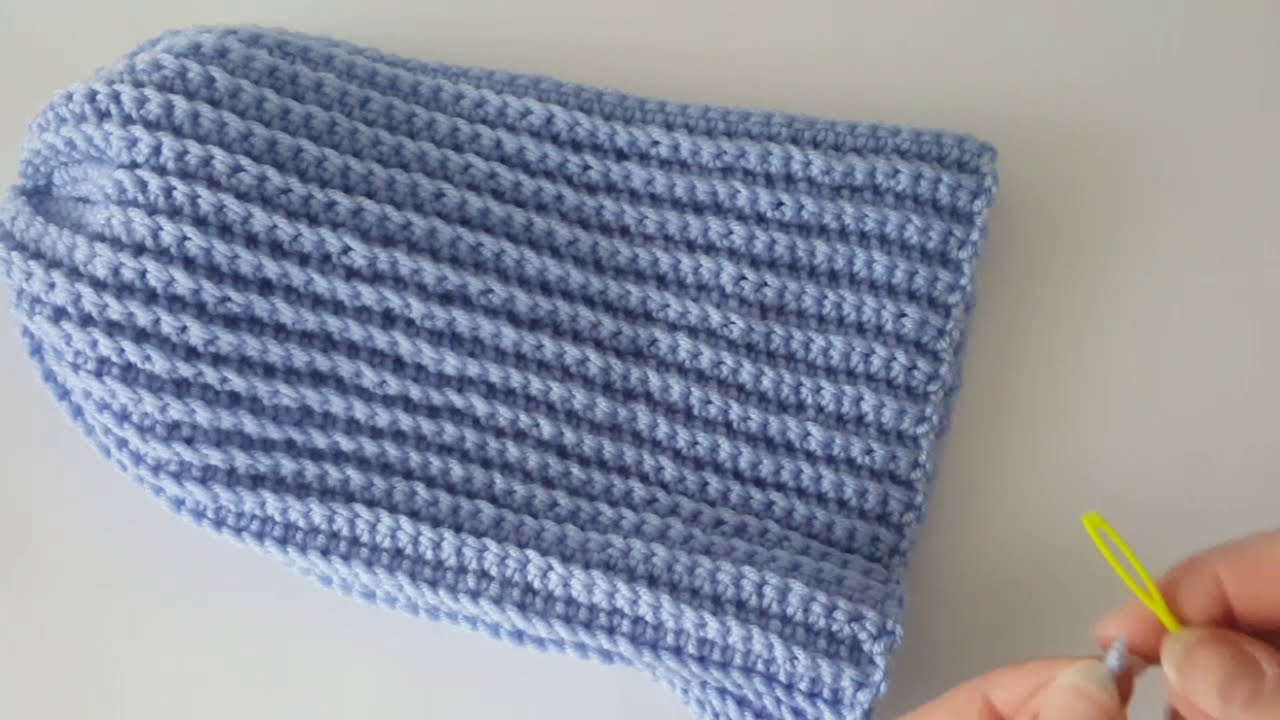
This pattern creates a classic, stretchy ribbed beanie perfect for beginners and experienced crocheters alike. The ribbing is achieved by working into the back loop only, giving it a knit-like appearance and excellent stretch.
Skill Level: Easy Yarn: Worsted Weight (Category 4) yarn (approx. 200-250 yards for an adult beanie) Hook: 5.5 mm (I/9) crochet hook (or hook size needed to achieve desired ribbing) Notions: Yarn needle, scissors, stitch marker (optional)

Gauge: Not critical, as long as your fabric is stretchy. Approximately 13 stitches x 10 rows (in sc BLO) = 4 inches, un-stretched.
Finished Size: Adult Medium (approx. 20-22 inch head circumference, 10.5 inches tall before folding brim). Instructions for adjusting size are included.
Abbreviations (US Terms):
- ch: chain
- sc: single crochet
- sl st: slip stitch
- BLO: back loop only
- st(s): stitch(es)
- fo: fasten off
Pattern Notes:
- This beanie is worked flat in rows to create the ribbed fabric, then seamed.
- The number of chains at the beginning determines the height of your beanie (including the brim).
- The number of rows determines the circumference of your beanie.
- Always work into the Back Loop Only (BLO) for the entire beanie to achieve the ribbed effect.
- Always chain 1 at the beginning of each row; this chain does NOT count as a stitch.
Part 1: The Main Body of the Beanie (Worked Flat)
Step 1: Determine Beanie Height The height of your starting chain will determine the total height of your beanie, including the folded brim.

- For an adult beanie with a generous fold-up brim (like the one pictured): Ch 45
- For an adult beanie with a smaller fold-up brim: Ch 40
- For a slouchy beanie: Ch 50+
- For a child’s beanie: Ch 35-40
Step 2: Create the Ribbed Fabric
Row 1: Sc in 2nd ch from hook and in each ch across. (e.g., if you chained 45, you will have 44 sc). Ch 1, turn.
Row 2: Sc in BLO in each st across. Ch 1, turn.
Repeat Row 2: Continue repeating Row 2 until your piece, when slightly stretched, measures approximately 18-20 inches long for an adult medium. This typically takes 65-75 rows, but it’s best to measure against your head (or the head it’s for) as you go. You want it to be stretchy enough to fit snugly but not too tight.
- Tip for sizing: Once you have a good length, hold the ends of your rectangle together and stretch it gently around the widest part of the head. It should fit without being overly stretched or loose. Remember, it will stretch more once seamed.
Do NOT fasten off.

Part 2: Seaming the Beanie
Now you will seam the two short ends of your rectangle together to form a tube.
- Fold your rectangle in half, bringing the first row and the last row together.
- With your hook still in the loop from your last stitch, insert your hook through the BLO of the stitch on your current row AND the corresponding loop of the first chain (or stitch) of your very first row.
- Sl st through both loops across the entire seam. This creates an invisible seam that blends with the ribbing.
- Once you reach the end of the seam, ch 1. Do not cut yarn.
Part 3: Shaping the Crown (Gathering)
You now have a tube. We will gather the top of the tube to form the crown of the beanie.
- Turn your tube so the seam is on the inside.
- Ch 1. Working around the top edge of the tube (where your final row was), sc evenly around the top. Aim for approximately 1 stitch for every row end. (e.g., if you had 70 rows, try for around 70 sc). Sl st to first sc.
- You can also use your yarn needle for this part if you prefer. See alternate method below.
- Leave a long tail (approx. 15-20 inches) and cut the yarn.
Alternate Crown Gathering Method (using yarn needle):
- After seaming the short ends, leave a very long tail (approx. 20-24 inches) and cut the yarn.
- Thread the tail onto your yarn needle.
- Weave the yarn needle in and out through the top “loops” of each row end around the entire circumference of the top opening of your beanie.
- Once you have woven through all the stitches, pull the yarn tail tightly to gather the top closed.
- Secure the opening by making a few strong stitches back and forth across the gathered hole, pulling tightly to ensure it’s closed and secure.
- Weave in any remaining ends on the inside of the beanie.
Video tutorial
Part 4: Finishing
- Weave in any remaining loose ends securely.
- Fold up the brim of your beanie to your desired height. The ribbing naturally allows for a nice, clean fold.
Your Ultra Simple Ribbed Beanie is complete!