 by
by 
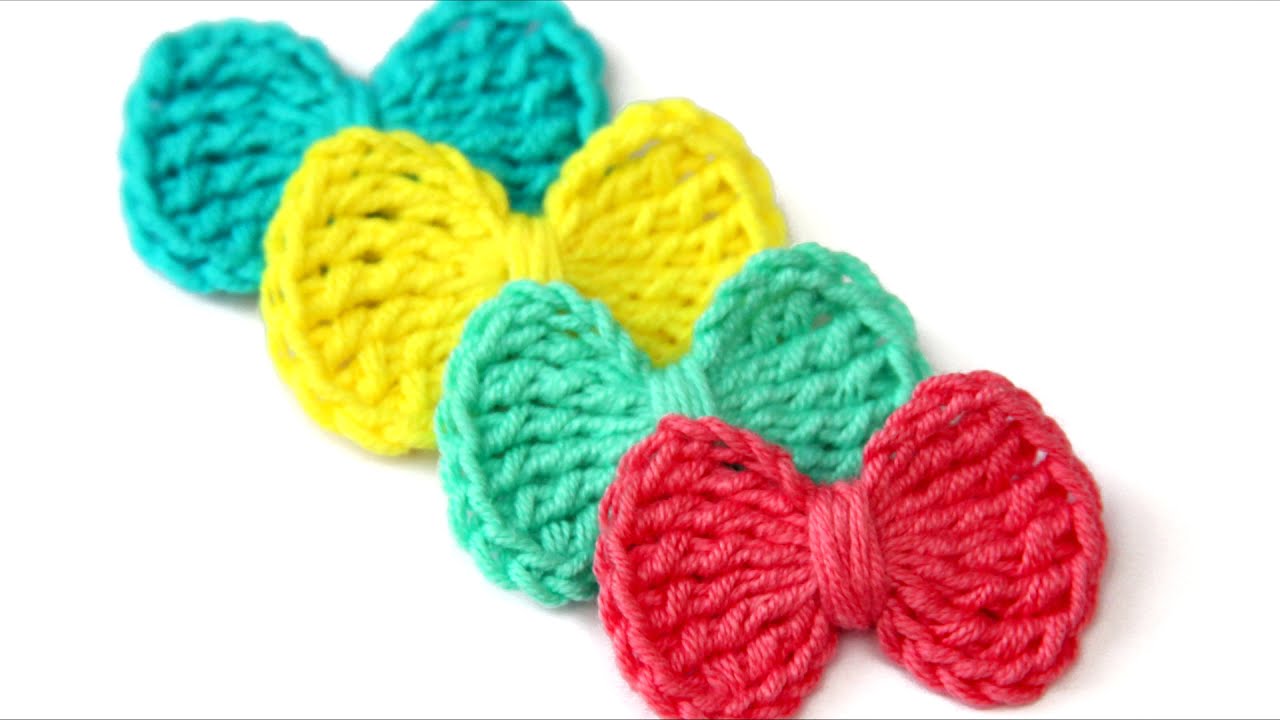
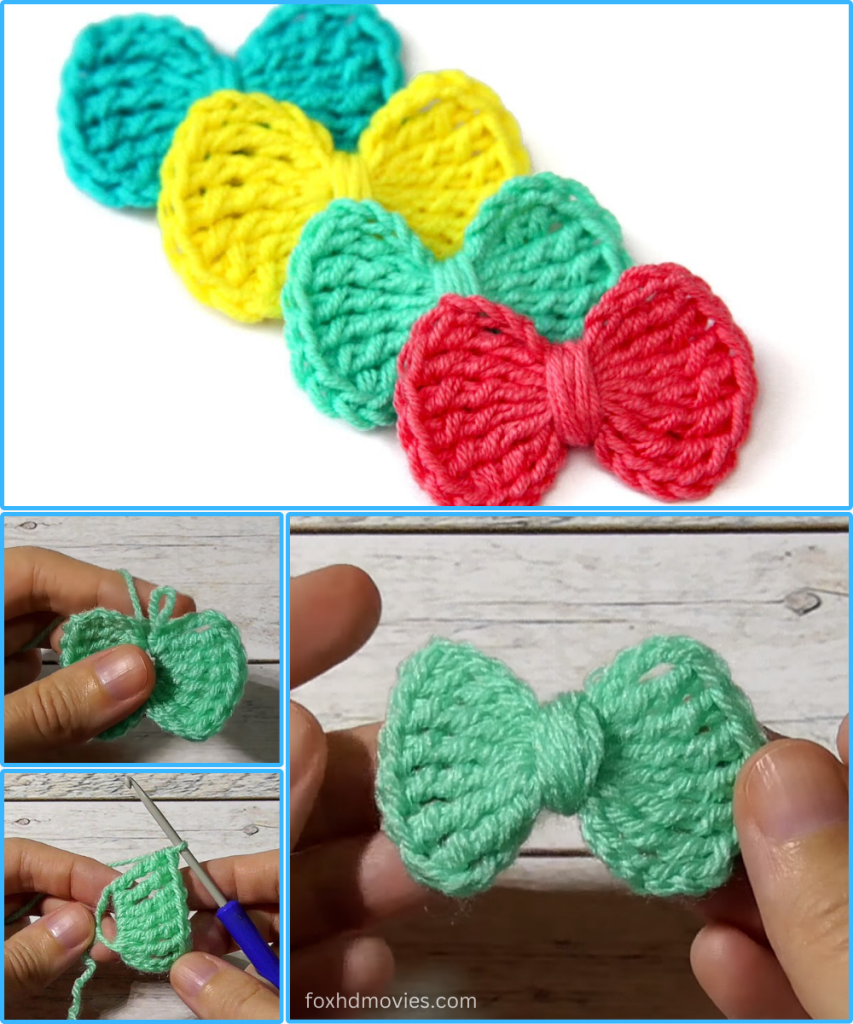
There’s something so satisfying about a simple, versatile pattern that can be used for almost anything. These adorable crocheted bows are exactly that! Whether you’re looking for the perfect hair accessory, a charming embellishment for a baby blanket, a topper for a gift wrap, or just a fun way to use up those yarn scraps, these bows are a fantastic, fast project.
The texture of these bows, achieved with simple stitches, gives them a lovely, sturdy look, and they come together in just a few minutes. They are perfect for beginners and a great project for using up small amounts of yarn in vibrant colors.
Let’s get hooking and create a rainbow of bows!
Materials You’ll Need:
- Worsted Weight (Aran/10-ply) Yarn: Small amounts of your desired colors (e.g., Red, Yellow, Mint Green, Teal Blue).
- Crochet Hook: Size H/5.0mm (or size needed to obtain gauge).
- Yarn Needle: For weaving in ends and assembly.
- Scissors
Gauge (Not Critical, but helpful for size)
Gauge is less important for this project, as the final size of the bow is adjustable based on your yarn weight and the number of rows/stitches.
- If using Worsted Weight yarn: Approximately 14 single crochet stitches per 4 inches (10 cm).
Finished Size (Approximate):
Approximately 3 inches (7.5 cm) wide x 1.5 inches (4 cm) tall.
Abbreviations (US Terms):
- ch: chain
- sc: single crochet
- sl st: slip stitch
- fo: fasten off
- st(s): stitch(es)
Let’s Get Crocheting!
We will create a simple rectangle and then cinch it in the center.
Part 1: The Bow Body
We’ll start by chaining the height of the bow, then working back and forth in rows to create the width.
Ch 7.
Row 1: Sc in 2nd ch from hook and in each ch across. Ch 1, turn. (6 sc)
Row 2: Sc in each sc across. Ch 1, turn. (6 sc)
Rows 3 – 15: Repeat Row 2. (6 sc per row)

- The number of rows determines the width of your bow. If you want a wider, fuller bow, add more rows. For a smaller bow, stop sooner.
Fasten off, leaving a long tail (about 12-15 inches) for assembly and weaving in.
Part 2: The Center Wrap
This small strip will be wrapped around the center of the bow to cinch it and hold the shape.
Ch 5.
Row 1: Sc in 2nd ch from hook and in each ch across. Ch 1, turn. (4 sc)
Rows 2 – 5: Sc in each sc across. Ch 1, turn. (4 sc)
Fasten off, leaving a tail of about 8 inches for sewing.
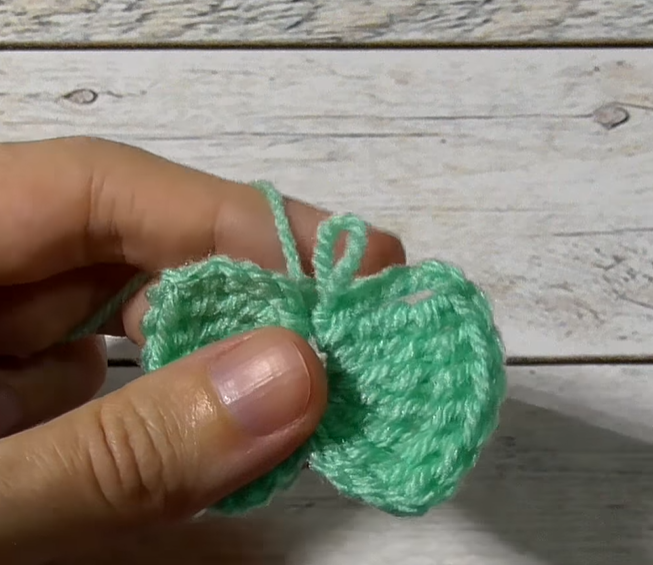
Part 3: Assembling the Bow
This is where the magic happens!
- Fold the Bow Body: Lay the rectangular bow body flat.
- Cinch the Center: Pinch the center of the rectangle together horizontally (where Rows 7 and 8 would meet). You want to create a pleated, accordion-like fold in the center.
- Secure the Center (Optional but Recommended): You can use a yarn needle and the long tail from the bow body to wrap around the center a couple of times and secure the cinch, but the center wrap will also do this.
- Wrap the Center Strip: Take the small center wrap strip. Place it over the front center of the cinched bow.
- Sew the Wrap: Wrap the small strip around the cinched center and bring the ends to the back. Use the yarn needle and the tail from the center wrap strip to overlap the ends and securely stitch the wrap strip to the back of the bow. Ensure the wrap is tight enough to hold the bow’s shape.
- Weave in Ends: Weave in all remaining tails neatly on the back of the bow.
Video tutorial
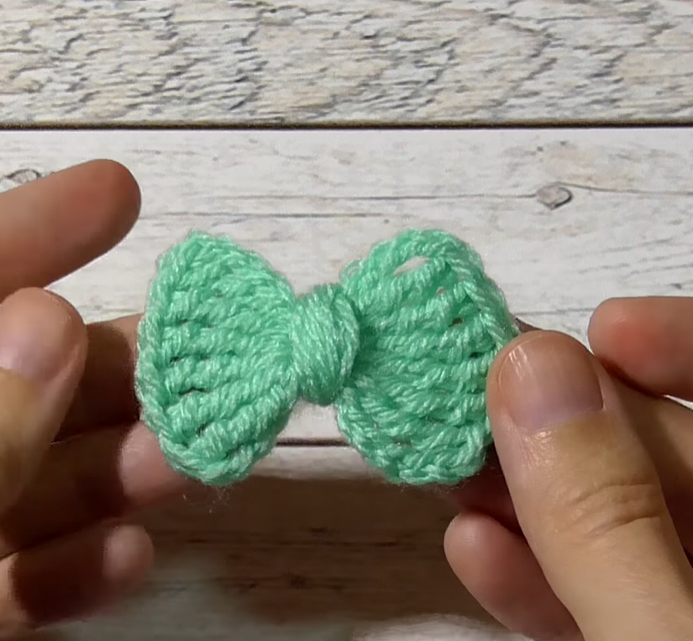
Your Crocheted Bow is Complete!
Isn’t it amazing how quickly these come together? Now you can make them in every color! They are perfect for:
- Hair Accessories: Attach a hair clip or a small elastic band to the back.
- Gift Toppers: A lovely, reusable alternative to traditional bows.
- Embellishments: Sew them onto hats, bags, headbands, or blankets for an instant upgrade.
I hope you enjoyed this quick and satisfying project! If you create these bows, I would love to see how you use them. Share your photos on social media and tag me (if you have an associated platform)!
Happy hooking!