 by
by 
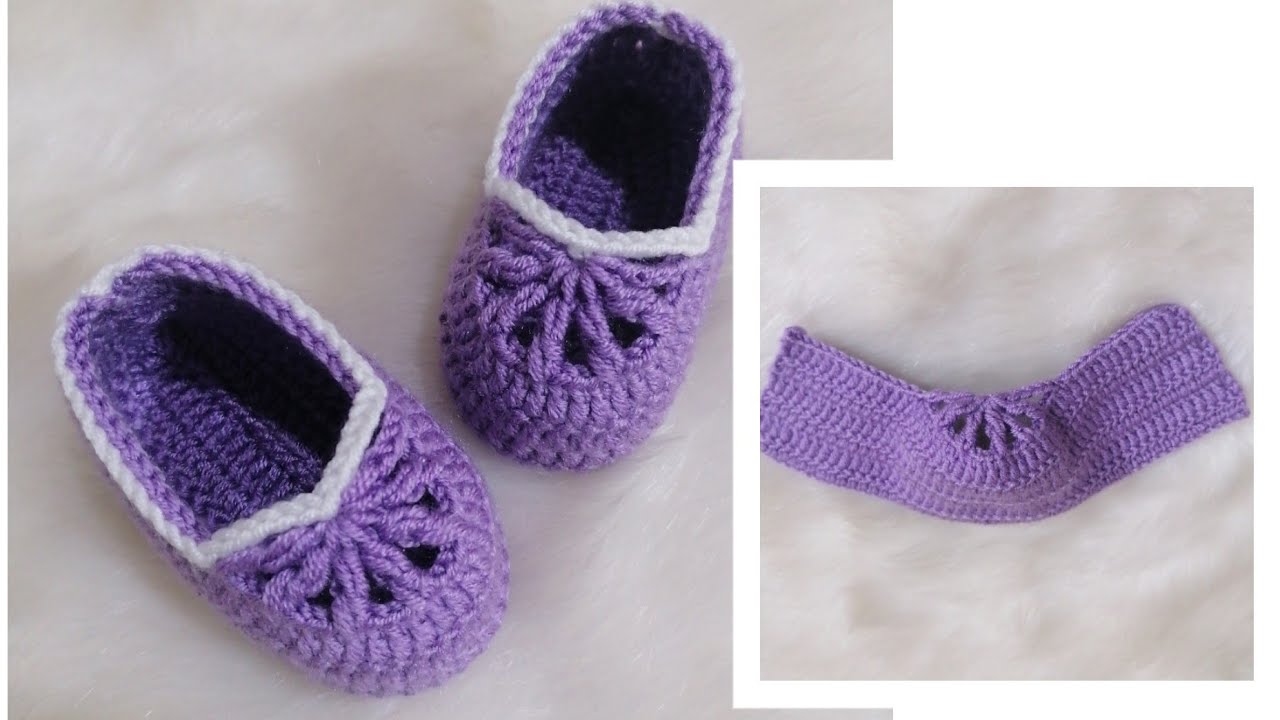
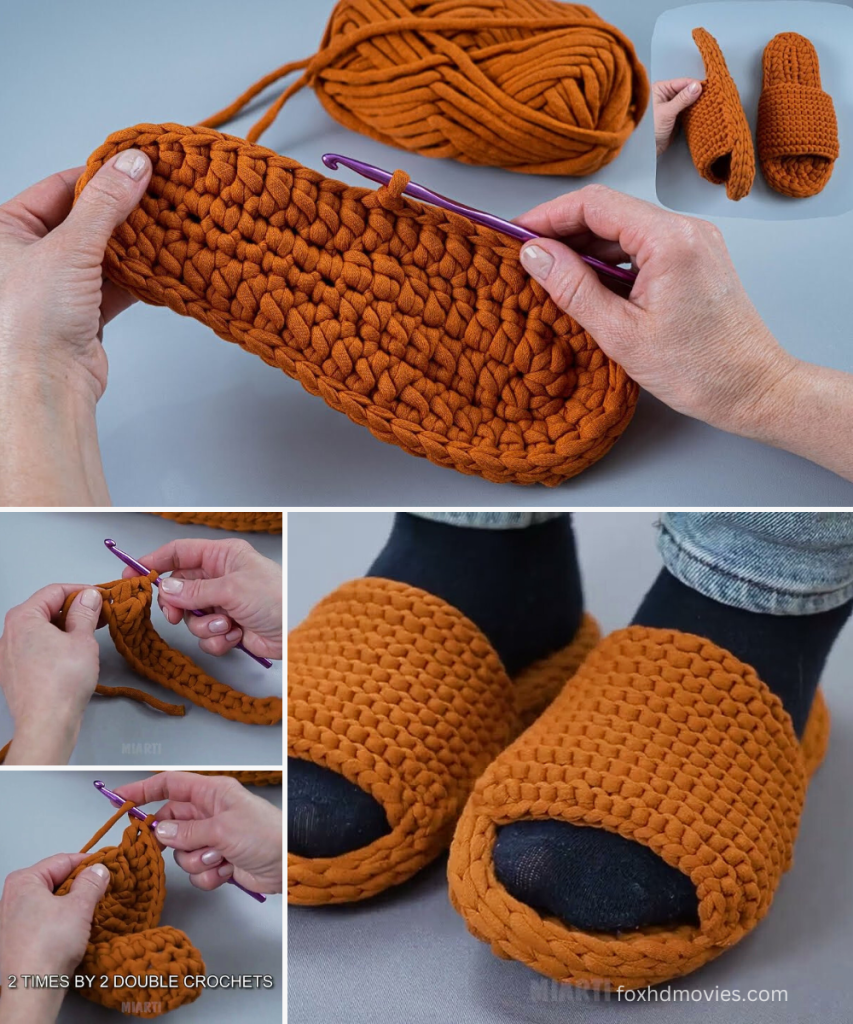
This pattern will create a cozy and structured slipper. The size can be adjusted by changing your starting chain and the number of increase rounds.
Skill Level: Intermediate Yarn: Super Bulky (Category 6) yarn or T-shirt Yarn (approximately 200-300 yards for an adult pair, depending on size) Hook: 9.0 mm (M/N) or 10.0 mm (N/P) crochet hook (or hook size needed to achieve desired fabric density) Notions: Stitch marker, yarn needle, scissors
Gauge: Not critical, but aim for a dense fabric that holds its shape. Approximately 4 sc x 4 rows = 2 inches.
Finished Size: Adult Medium (US Women’s 7-9, Men’s 6-8). Instructions for adjusting size are included.
Abbreviations (US Terms):
- ch: chain
- sl st: slip stitch
- sc: single crochet
- hdc: half double crochet
- dc: double crochet
- inc: increase (2 sc in the same stitch)
- dec: decrease (sc2tog – single crochet 2 together)
- BLO: back loop only
- st(s): stitch(es)
- fo: fasten off
Pattern Notes:
- This pattern is worked in continuous rounds unless otherwise stated. Use a stitch marker to keep track of the beginning of each round.
- The sole is built up in multiple layers to create thickness and structure.
- The textured look is achieved by working into the Back Loop Only (BLO) for most stitches.
- Adjust the initial chain length for the sole to fit your foot. A good rule of thumb is to chain about 2 inches shorter than your foot length.
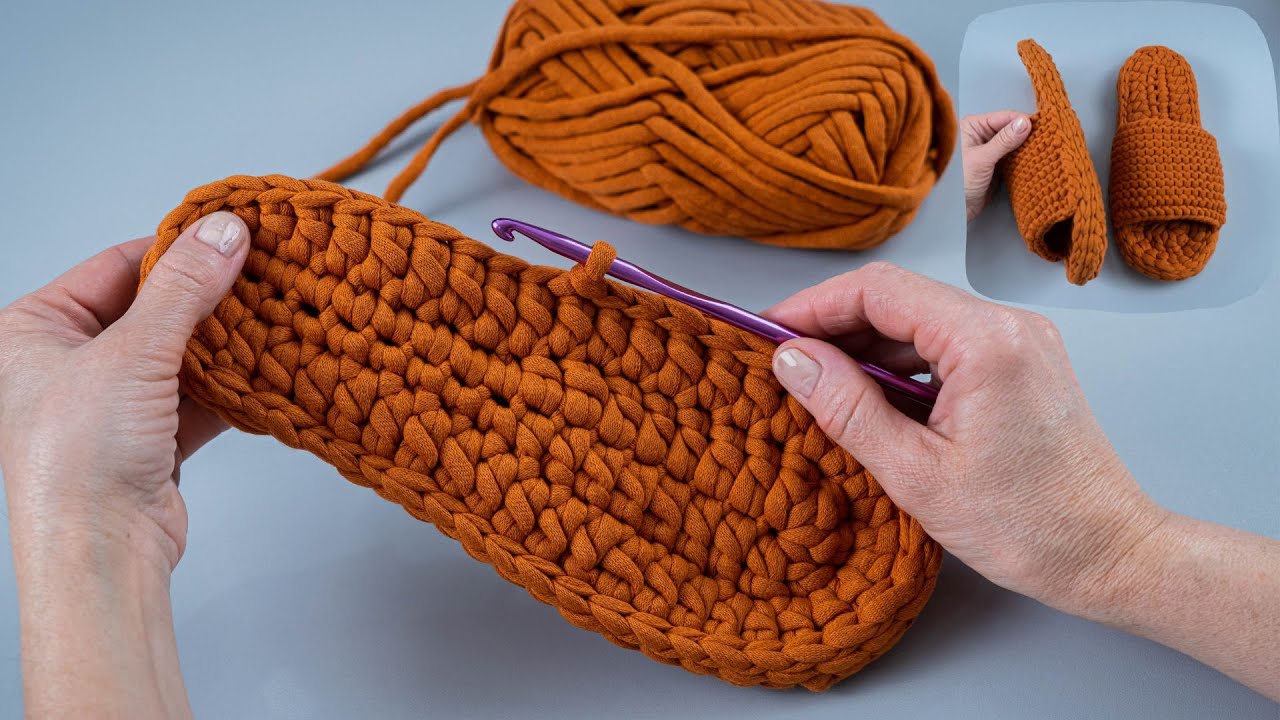
Part 1: The Sole (Make 2)
The sole is worked in oval rounds.

Starting Chain: Ch 18 (this should create a sole roughly 9-10 inches long before increases. Adjust chain length for different sizes: longer for larger feet, shorter for smaller feet).
Round 1: Sc in 2nd ch from hook. Sc in next 15 ch. 3 sc in last ch. Working down the other side of the chain: Sc in next 15 ch. 2 sc in last ch (this completes the oval). (36 sts)
Round 2: Inc in next st. Sc in next 15 sts. Inc in next 3 sts. Sc in next 15 sts. Inc in next 2 sts. (42 sts)
Round 3: (Sc in next st, inc) x 1. Sc in next 15 sts. (Sc in next st, inc) x 3. Sc in next 15 sts. (Sc in next st, inc) x 2. (48 sts)
Round 4 (Optional for wider feet or larger sizes): (Sc in next 2 sts, inc) x 1. Sc in next 15 sts. (Sc in next 2 sts, inc) x 3. Sc in next 15 sts. (Sc in next 2 sts, inc) x 2. (54 sts)
- For a firmer, thicker sole, repeat your final sole round one or two more times without increases (just sc in each stitch around).
Working the Sole Sides: Now we’ll work a few rounds into the BLO to create a slight upward edge, making the sole look more substantial.
Round 5: Sc in BLO around. (Number of stitches from your last sole increase round)
Round 6: Sc in BLO around.
Round 7: Sc in BLO around.
- For an even thicker side sole, repeat Round 7 one or more times.
Sl st to first sc of the round. Ch 1. Do not cut yarn if you are continuing directly to the upper.
Part 2: The Toe/Upper (Continuing from Sole or Attach new yarn)
If you cut yarn after the sole, reattach yarn at the center back of the heel.

Preparing the Foundation for the Upper: This part will start shaping the slipper. We will work stitches for the toe portion first, leaving the heel part for later. Look at your sole: the wider, more rounded end is the toe.
Find the center of your toe end. Count back about 10-12 stitches from the center on both sides. This will be where you begin your rows for the upper. The exact number will depend on your sole size and desired slipper width. For a medium adult, aim for about 20-24 stitches for your initial toe row.
Row 1: Starting at your marked stitch on one side of the toe: Sc in BLO in the next 20-24 stitches across the toe. Ch 1, turn.
- Adjust the number of stitches based on your sole width. You want it to cover the width of the top of your foot.
Row 2: Sc in BLO in each st across. Ch 1, turn.
Rows 3-6 (or until desired length before arch): Repeat Row 2.
- Continue these rows until the piece covers the top of your foot to just before your arch. Try it on if possible.
Shaping the Top of the Foot/Arch: Now we’ll start increasing on the sides to create the wider opening for your foot.
Row 7: Inc in BLO in first st, sc in BLO until last st, inc in BLO in last st. Ch 1, turn.
Row 8: Sc in BLO in each st across. Ch 1, turn.
Repeat Rows 7 & 8: 2-4 more times, or until the upper piece is wide enough to comfortably fit around your foot, reaching towards the sides of your sole.
Connecting the Upper to the Sole: Now, we’ll start attaching the upper to the remaining stitches of the sole.
Round 1 (Joining Round): Do not turn after your last row of the upper. You will now work around the entire slipper, joining the sides of your upper to the sole.
- Working down the side of your upper: Sc down the side of the upper, placing 1 sc in the end of each row.
- When you reach the sole: Sc in BLO in the next available stitch of the sole. Continue sc in BLO around the entire remaining opening of the sole (this covers the heel and the sides where the upper doesn’t reach yet).
- When you reach the other side of your upper: Sc up the side of the upper, placing 1 sc in the end of each row.
- Sl st to the first sc you made in this round.
Round 2: Ch 1. Sc in BLO in each st around the entire slipper opening. Sl st to first sc.
Round 3: Ch 1. Sc in BLO in each st around. Sl st to first sc.
Round 4 (Optional): Ch 1. Sc in BLO in each st around. Sl st to first sc.
- Add more rounds here if you want a higher slipper opening.
Fo and weave in all ends.
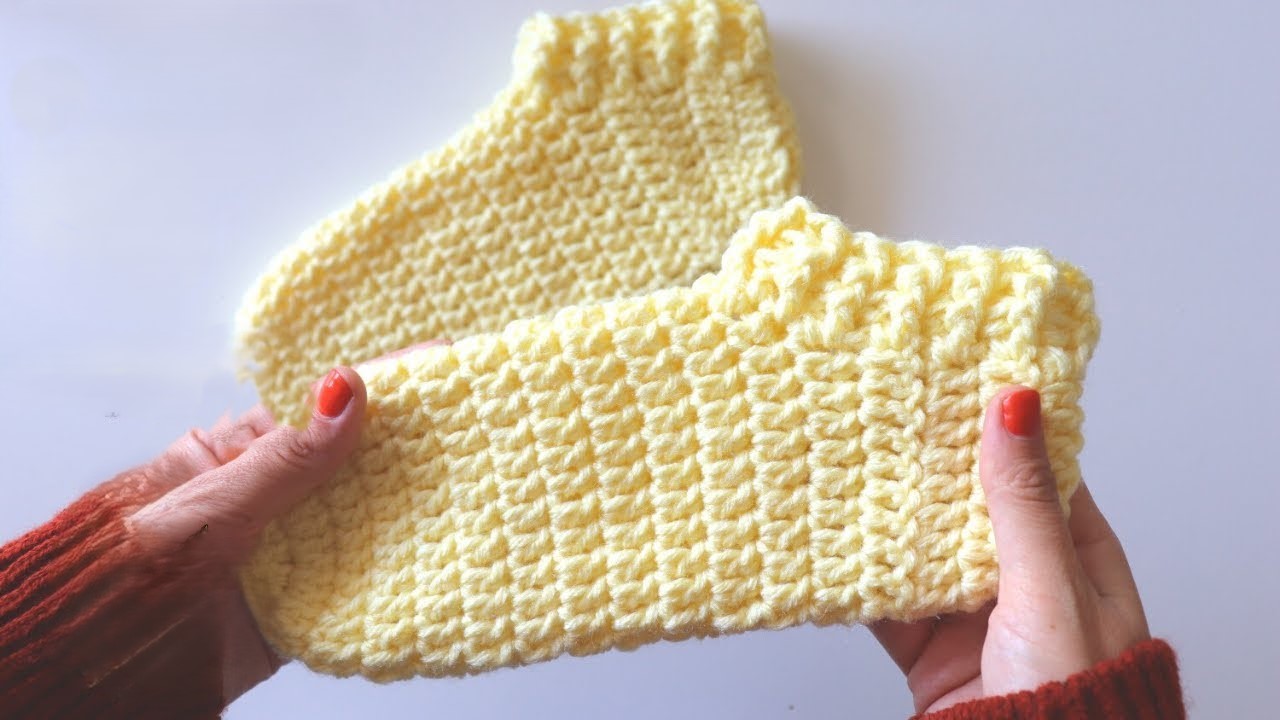
Part 3: The Top Strap (Make 2)
This strap is worked in rows and then joined. The image shows a very textured strap, which can be achieved with single crochet or half double crochet in the BLO.
Starting Chain: Ch 12-15 (or enough chains to create a strap approximately 5-6 inches long).
Row 1: Sc in 2nd ch from hook. Sc in each ch across. Ch 1, turn. (11-14 sts)
Row 2: Sc in BLO in each st across. Ch 1, turn.
Repeat Row 2: Until the strap is approximately 3-4 inches wide (or your desired width). The image shows a fairly wide strap. Aim for about 6-8 rows.
Fo, leaving a long tail for sewing.
Video tutorial
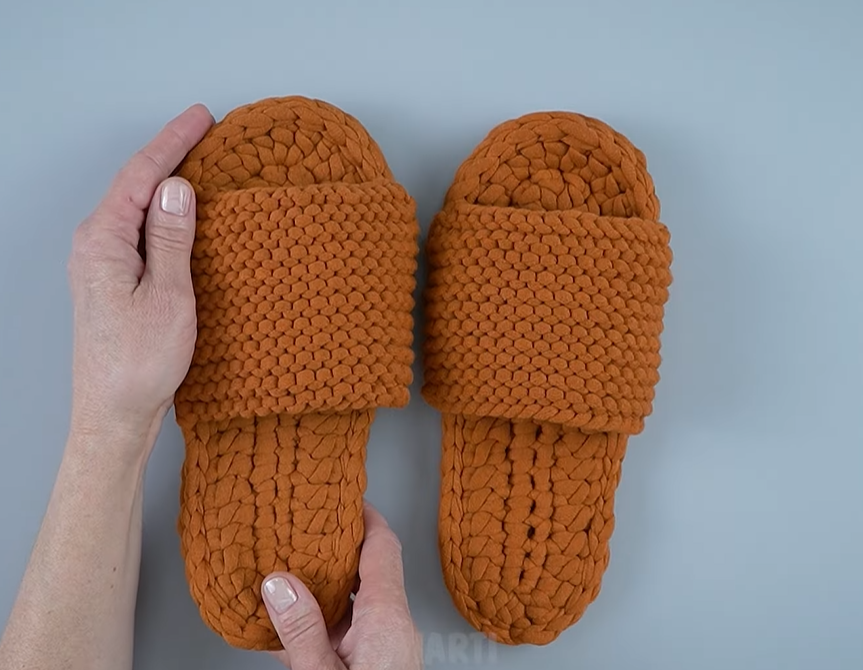
Part 4: Assembly
- Position the Strap: Place the finished strap across the top of the slipper, over the “toe” section. Center it both side-to-side and front-to-back. The front edge of the strap should be roughly 1-2 inches from the very front tip of the slipper.
- Sew the Strap: Using your yarn needle and the long tail, sew the strap securely to the slipper. You can use a whip stitch or mattress stitch, ensuring the stitches are hidden and strong. Stitch both sides of the strap down.
- Weave in any remaining ends.
Finishing: Try on your slippers! These should be snug but comfortable and mold to your feet with wear.
Enjoy your new cozy, handmade slippers!