 by
by 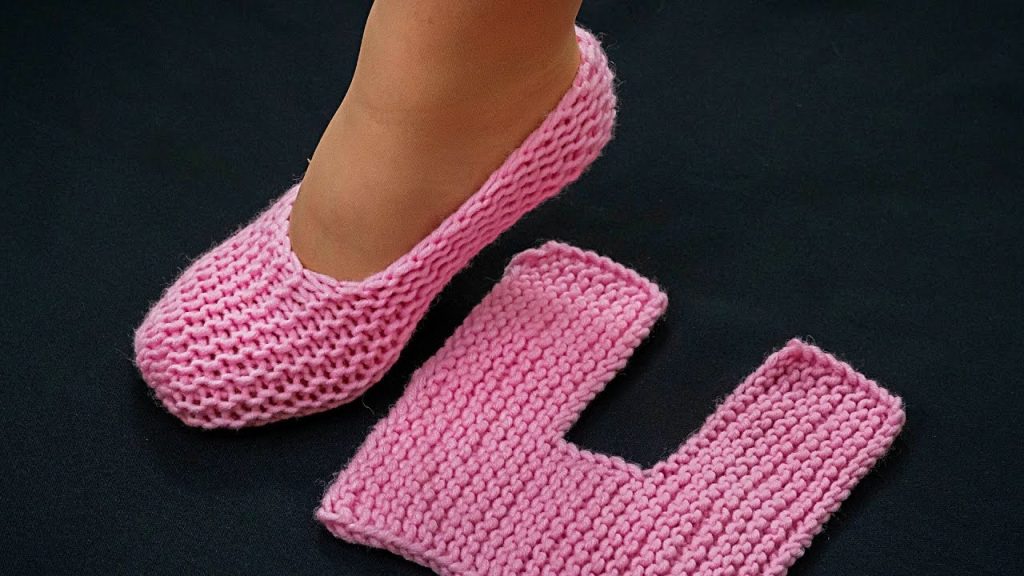
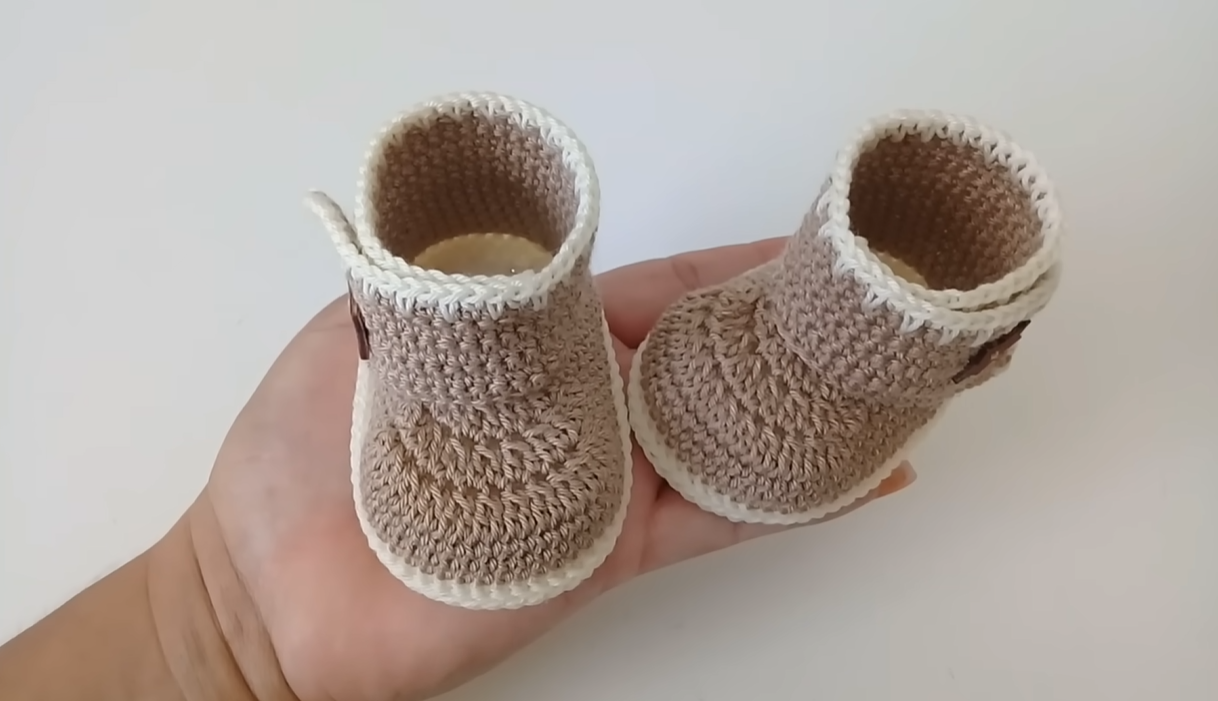
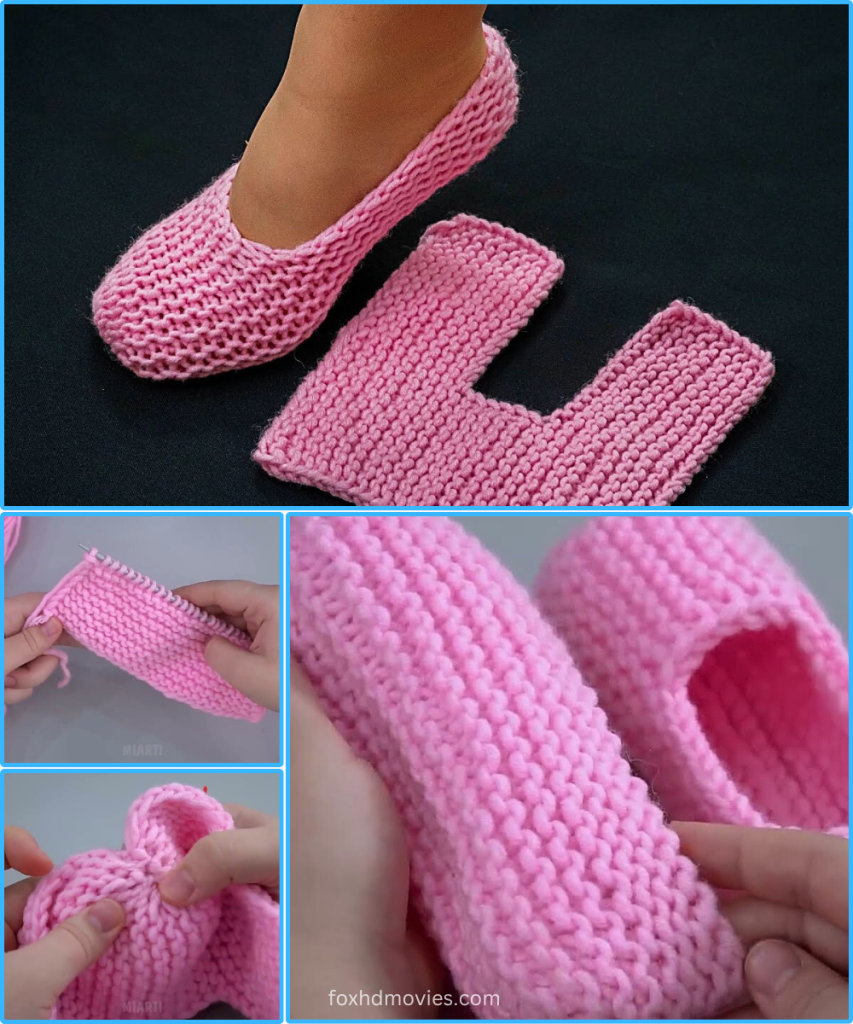
Who doesn’t love slipping into something warm and cozy after a long day? These adorable ballet-style slippers are not only incredibly comfortable but also surprisingly easy to knit, even if you’re a beginner! Made from a simple rectangle with a few clever folds and seams, you’ll have a pair ready for ultimate relaxation in no time.
Let’s get those needles clicking!
Skill Level: Beginner Yarn Weight: Worsted (Aran) Needle Size: 5.0 mm (US 8) straight or circular needles (or size needed to obtain gauge) Gauge: 18 stitches and 24 rows = 4 inches (10 cm) in Garter Stitch
Materials:
- Approx. 150-200 yards (135-180 meters) of worsted weight yarn (I used a lovely soft pink for mine!)
- 5.0 mm (US 8) knitting needles
- Tapestry needle for seaming
- Scissors
- Measuring tape
Finished Measurements (approximate, before seaming and blocking): Rectangle width: 8-9 inches (20-23 cm) Rectangle length: 14-16 inches (35-40 cm) (Note: These measurements will vary slightly depending on your foot size and desired fit. The pattern is easily adjustable!)
The Pattern
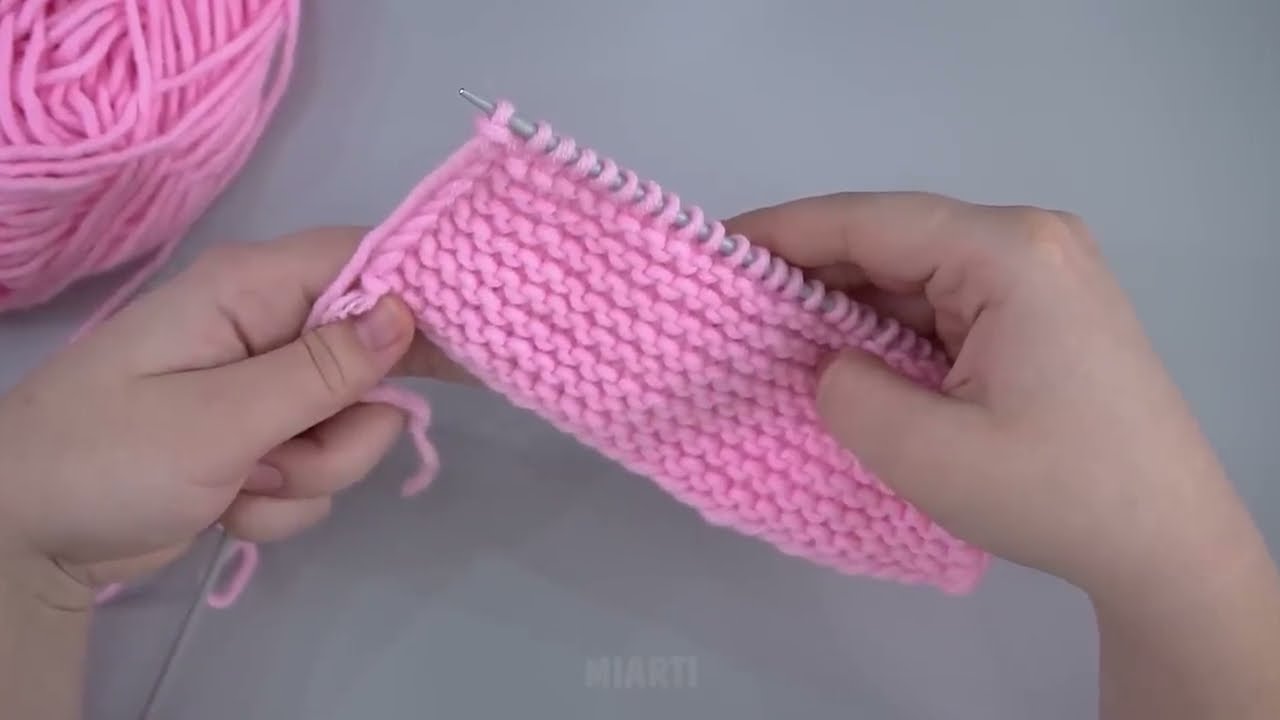
These slippers are worked flat in one piece using the simple and beautiful Garter Stitch (knit every row). This creates a lovely, squishy fabric perfect for comfy slippers.
Important Note on Sizing: This pattern is designed to be very flexible. You’ll want to knit a rectangle that is roughly the length of your foot (from heel to toe) plus an inch or two for the toe shaping, and wide enough to comfortably wrap around your instep. I’ve provided a general size, but feel free to adjust your cast-on and row counts!
Directions:
- Cast On: Cast on 38 (42, 46) stitches using the long-tail cast-on method, or your preferred stretchy cast-on.
- (Adjust cast-on: For smaller feet, cast on fewer stitches. For wider feet, cast on more stitches. The goal is to have enough width to cover your instep comfortably.)
- Work in Garter Stitch: Knit every row until your piece measures approximately 14 (15, 16) inches [35 (38, 40) cm] from the cast-on edge, or until the rectangle is roughly 2.5 to 3 times the length of your foot.
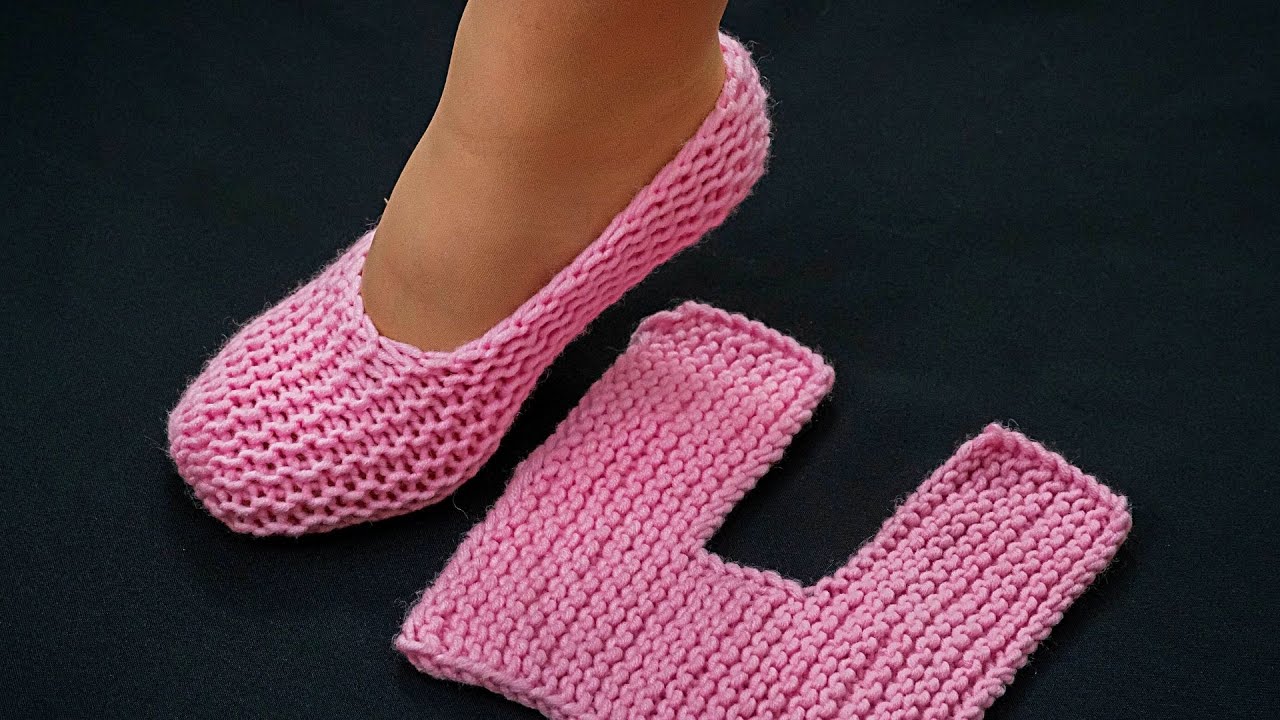
- Tip: Try folding the rectangle as shown in the image as you knit to estimate the size. You want the long sides to meet comfortably over your instep when folded.
- Bind Off: Bind off all stitches loosely.
Assembly Time!
This is where the magic happens and your knitted rectangle transforms into a slipper!

- Lay Flat: Lay your knitted rectangle flat with the right side facing up (garter stitch looks the same on both sides, so either side is fine!).
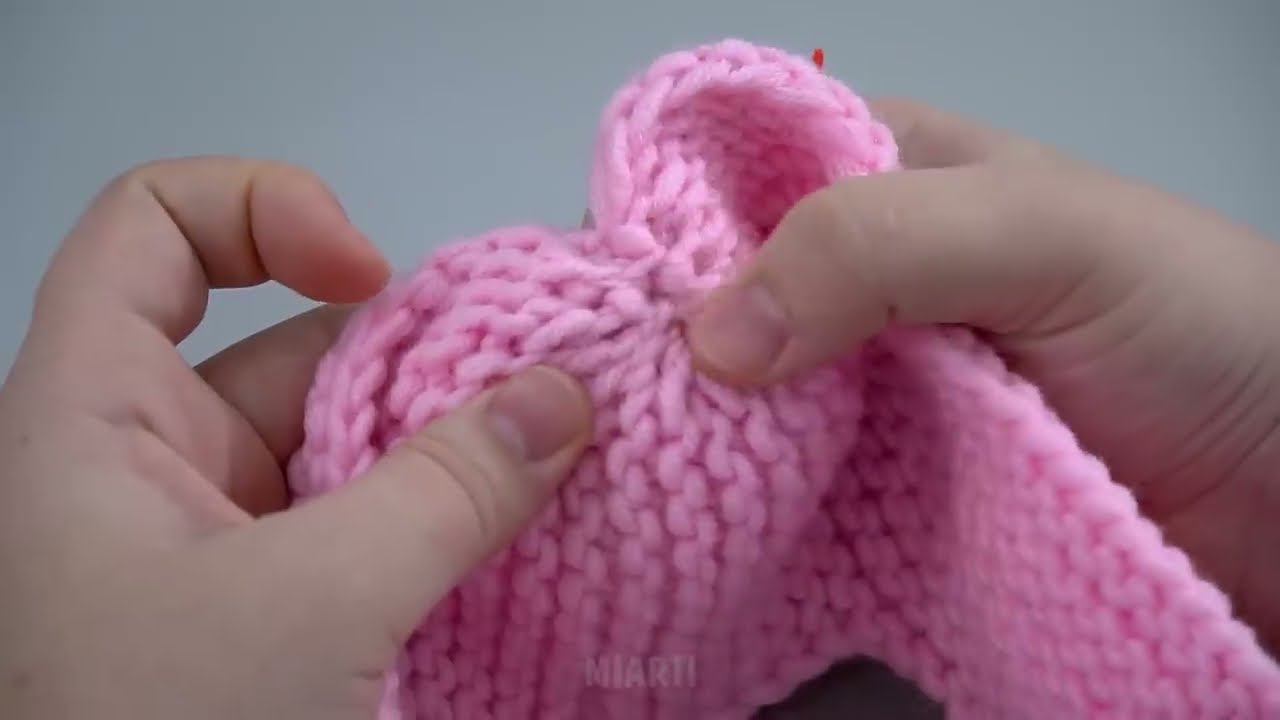
- Fold and Form the Toe:
- Take one of the short ends (this will be the toe end of your slipper).
- Fold this end over by about 3-4 inches (7.5-10 cm), creating a “pocket” for your toes. The fold line will be across the width of your rectangle. Pin this fold in place if needed. (See the “L” shape in the inspiration image – one part of the L is this folded toe section.)
- Seam the Toe:
- Using your tapestry needle and a length of yarn, seam along the side edges of this folded section. You’ll be seaming two layers of fabric together. Use a mattress stitch or a simple whip stitch to create a neat seam. This forms the rounded toe of your slipper. Stop seaming when you reach the folded edge.
- Form the Heel:
- Now, take the other short end of your rectangle (this will be the heel end).
- Fold this end up by about 2-3 inches (5-7.5 cm). This forms the back of the heel. Pin in place.
- Seam the Heel:
- Seam along the side edges of this folded heel section, similar to how you seamed the toe. Again, you’re seaming two layers together. Stop seaming when you reach the folded edge.
- Close the Foot Opening:
- You now have an opening in the middle of your slipper where your foot will go. This opening should look somewhat like a “U” shape, with the toe and heel sections folded and seamed.
- Try the slipper on. If the opening is too wide, you can gently seam a little further up from the heel and toe seams to narrow the opening until it fits snugly around your foot. Be careful not to make it too tight!
- Weave in Ends: Securely weave in all loose ends using your tapestry needle.
- Block (Optional but Recommended): Gently wet your slippers and squeeze out excess water. Lay them flat to dry, shaping them to the desired foot shape. This will help even out your stitches and give your slippers a polished look.
Video tutorial
Care:
Hand wash in cool water with a mild detergent. Reshape and lay flat to dry.
Enjoy your new, handmade cozy slippers! They make a fantastic gift too. Share your finished slippers with me on social media using #CozyKnitSlippers – I’d love to see them! Happy knitting!