by
by 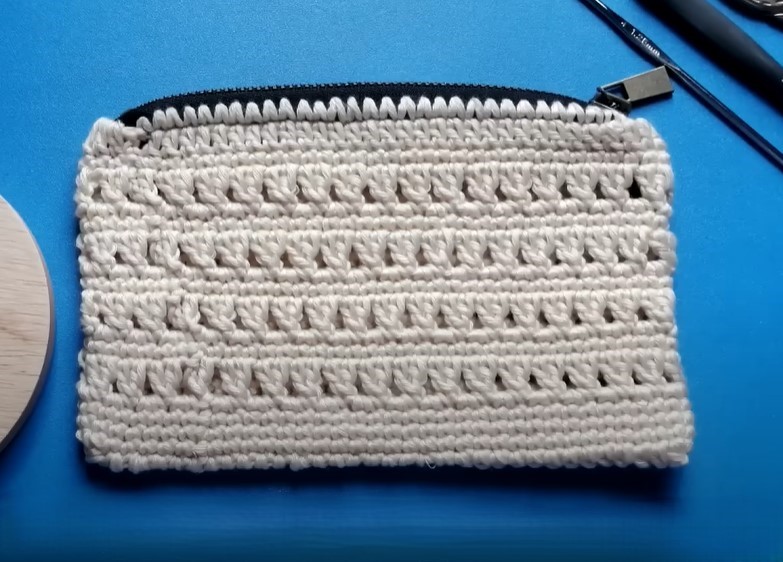
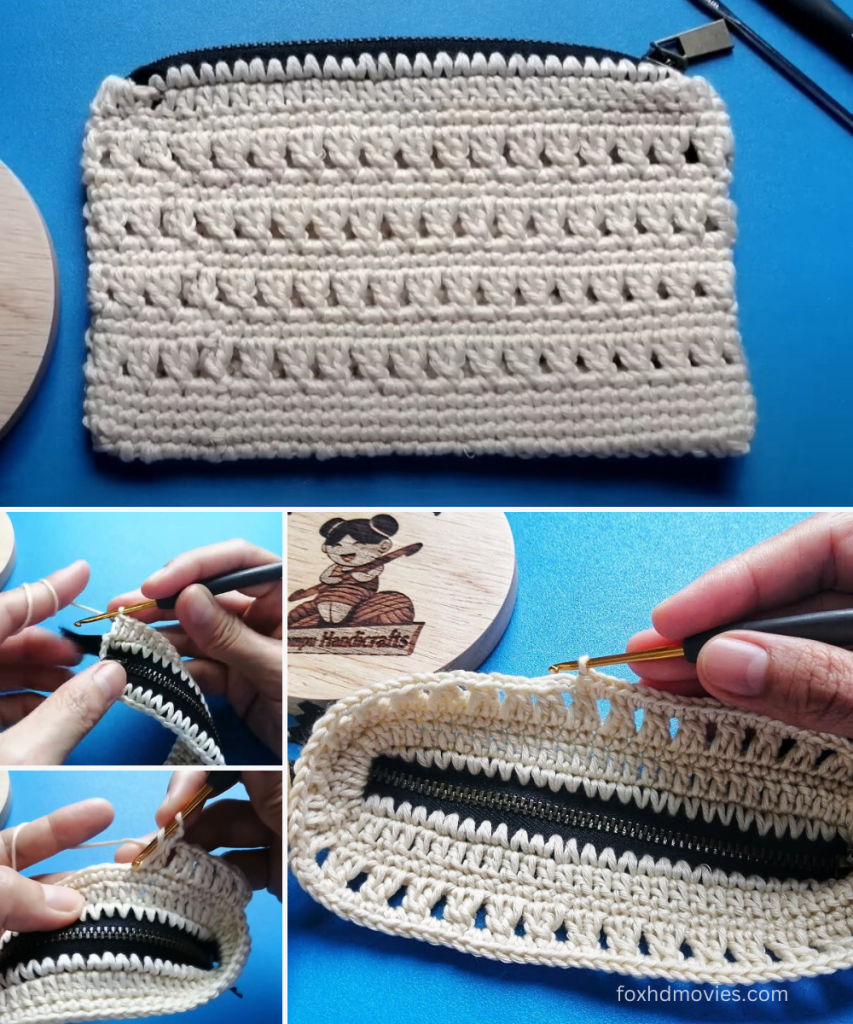
This pattern creates a sleek and practical pouch featuring a striking horizontal ribbed texture, perfect for organizing essentials like cosmetics, stationery, or tech accessories.
Approximate Finished Size:
- Width: 7.5-8 inches (19-20 cm)
- Height: 5-5.5 inches (12.5-14 cm)
Materials:
- Yarn: Worsted Weight (Category 4) cotton or cotton blend yarn in a light, neutral color (e.g., cream, beige, or light grey as in the image).
- Approx. 120-150 yards (110-137 meters)
- Crochet Hook: 4.0mm (G/6) hook (or hook size to achieve a dense fabric with good stitch definition).
- Zipper: One (1) 8-inch (20 cm) nylon or polyester zipper (black as in the image, or a contrasting color).
- Yarn Needle: For weaving in ends.
- Sewing Needle and Thread: Matching thread for sewing the zipper (recommended for a clean finish).
- Scissors
- Stitch Markers (optional but recommended)
Gauge: Working in hdc (specifically in BLO/3rd loop where applicable), 16 hdc stitches x 12 rows = 4 inches (10 cm).
- Gauge is important for the final dimensions and how well the zipper fits. Adjust your hook size if necessary.
Abbreviations (US Terms):
- ch: chain
- sl st: slip stitch
- sc: single crochet
- hdc: half double crochet
- BLO: back loop only (working into the back loop of the stitch only)
- 3rd Loop (of hdc): The horizontal bar behind the ‘V’ of the
hdcstitch. When workinghdc, this loop is often visible on the back of the stitch. - st(s): stitch(es)
- F.O.: Fasten Off
Pattern Instructions: The Pouch Body
The pouch is worked in joined rounds from the base up.
Part 1: Base of the Pouch (Oval)
Start with your main color yarn.
Foundation Chain: Ch 31.
Round 1: Sc in the 2nd ch from the hook. Sc in the next 28 chs. Work 3 sc in the last ch. (This turns the corner). Now working on the other side of the foundation chain, sc in the next 28 chs. Work 2 sc in the last ch (same ch as first sc). Sl st to the first sc to join. (62 sc total).
Round 2: Ch 1 (does not count as a stitch). Sc in the first sc. Sc in the next 28 sts. Inc in the next 3 sts. Sc in the next 28 sts. Inc in the next 2 sts. Sl st to the first sc. (68 sc total).
Round 3: Ch 1. Sc in BLO of each st around. Sl st to the first sc. (68 sc total).
- This round creates a defined edge for the base of the pouch to stand up.
Part 2: Body of the Pouch (Textured Ribbed Stitch)
The texture in the image appears to be created by alternating rows worked into the 3rd loop of hdc stitches. This pushes the regular ‘V’ of the stitch forward, creating a ridge.
Round 1 (Set up for Ribbing): Ch 2 (counts as first hdc). Hdc in each st around. Sl st to the top of the beginning ch 2. (68 hdc)
Round 2 (Ribbed Row): Ch 2 (counts as first hdc). Hdc in the 3rd loop of each hdc around. Sl st to the top of the beginning ch 2. (68 hdc) * To find the 3rd loop: Look at the back of your hdc stitch from the previous row. You’ll see a horizontal bar just below the usual ‘V’ loops on top. Insert your hook under this bar. * This is the row that creates the prominent horizontal ridge.
Round 3 (Non-Ribbed Row): Ch 2 (counts as first hdc). Hdc in each st around (working through both top loops as normal). Sl st to the top of the beginning ch 2. (68 hdc)
Repeat Rounds 2 and 3 for the body of the pouch until it reaches your desired height (approx. 5-5.5 inches / 12.5-14 cm). The image shows about 5 textured (ribbed) rows, meaning you’d repeat Round 2 five times, interspersed with Round 3s. So, approx. 10-11 rounds after the base.
- End with a Round 3 (non-ribbed
hdclayer) before moving to the top edge for zipper attachment.
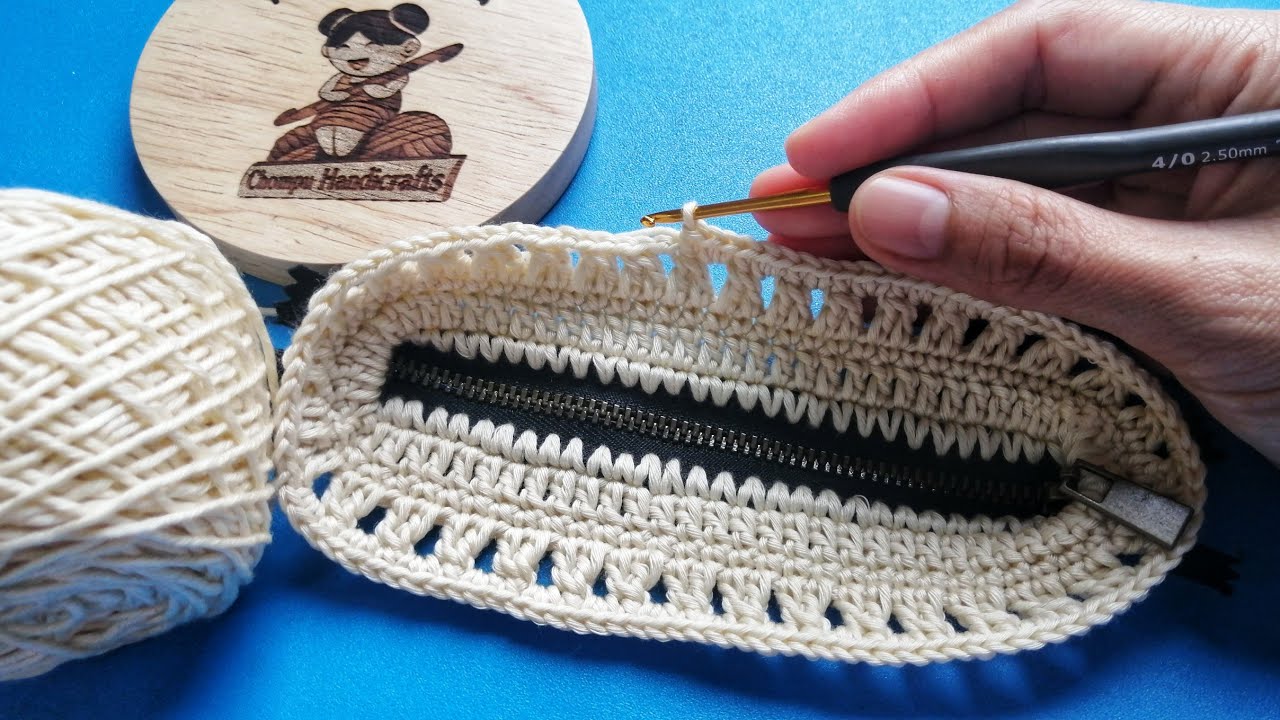
Part 3: Top Edge for Zipper
To create a clean and sturdy edge for sewing the zipper.
Round 1: Ch 1. Sc in each st around. Sl st to the first sc. (68 sc)
Round 2: Ch 1. Sc in each st around. Sl st to the first sc. (68 sc)
F.O. Weave in all loose ends securely.
Video tutorial
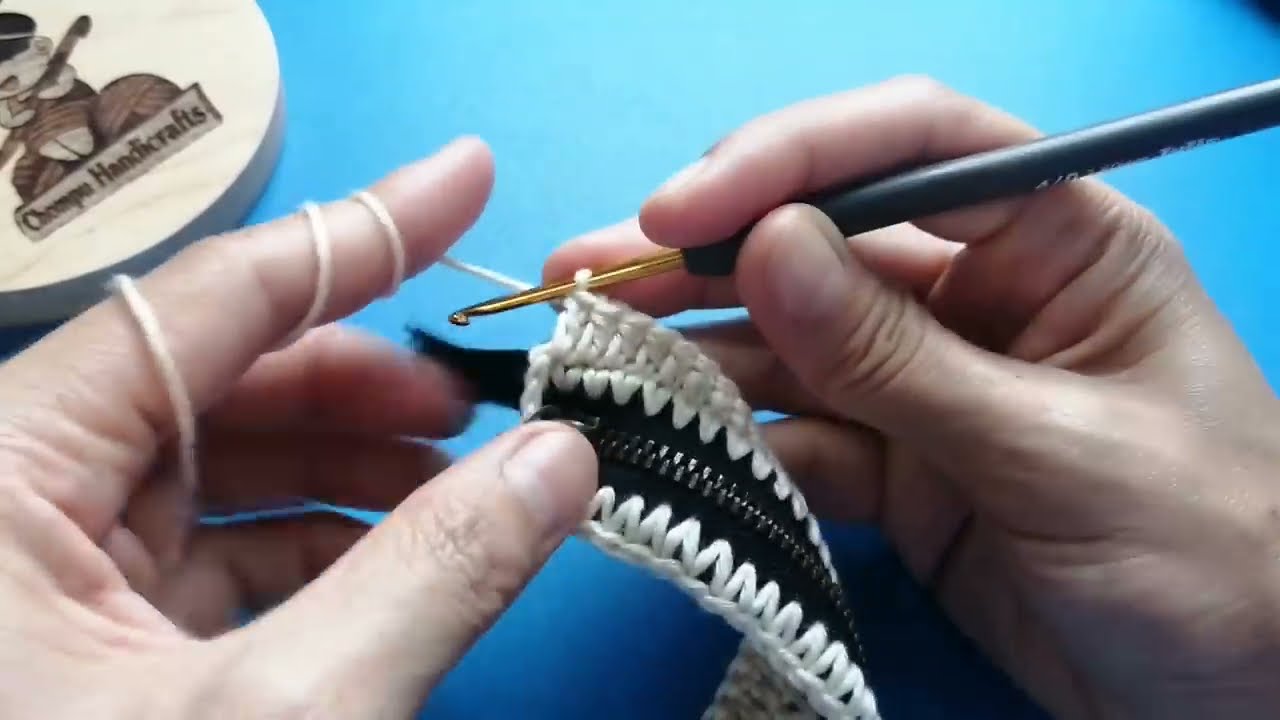
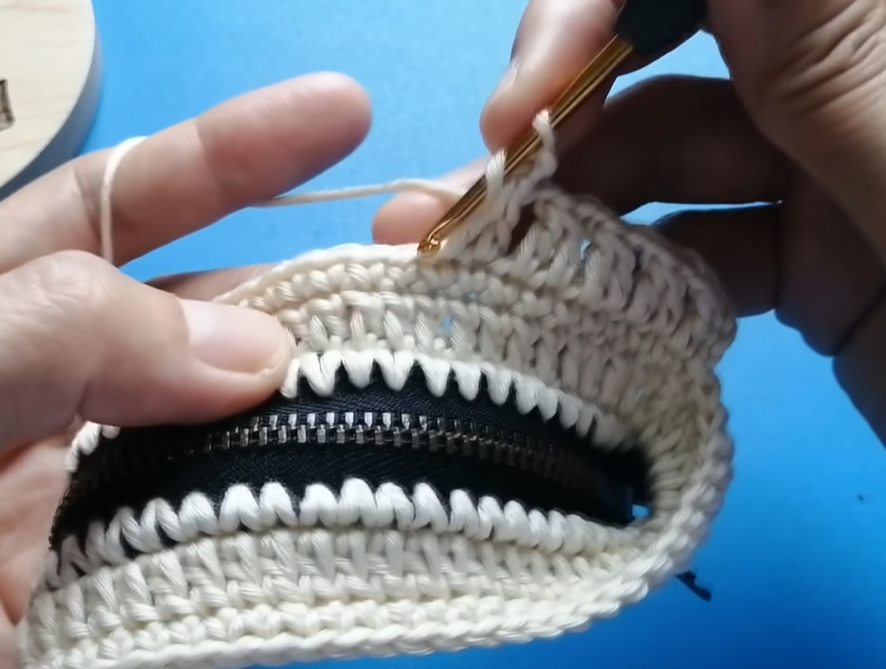
Assembly: Attaching the Zipper
This step requires precision for a professional-looking finish. For the best result, hand-sewing the zipper is recommended.
- Prepare the Zipper: Open the zipper halfway.
- Align the Zipper: Place one side of the open zipper along the inside top edge of your crocheted pouch. Make sure the zipper teeth are facing up towards the opening of the pouch. Align the ends of the zipper tape with the sides of the pouch. Use pins or stitch markers to hold the zipper in place along the top edge.
- Sew the First Side: Using a strong sewing needle and matching thread (or your yarn needle and a thin strand of yarn for durability), begin to sew the zipper tape to the very top edge of the crocheted pouch. Work small, even whip stitches or a backstitch, going through the zipper tape and catching the top loops of your last
scrow. Ensure your stitches are neat and don’t show excessively on the outside of the bag. The goal is to hide the stitching as much as possible. - Sew the Second Side: Once the first side is securely sewn, close the zipper to help align the second side perfectly. Pin the other side of the zipper tape to the opposite top edge of the pouch, ensuring it’s perfectly aligned across the opening. Sew this side in the same manner.
- Secure the Ends: At both ends of the zipper, fold any excess zipper tape inwards and stitch it down securely to prevent fraying and create a clean finish inside the pouch.
Your beautiful textured ribbed crochet pouch with a zipper is now complete!