 by
by 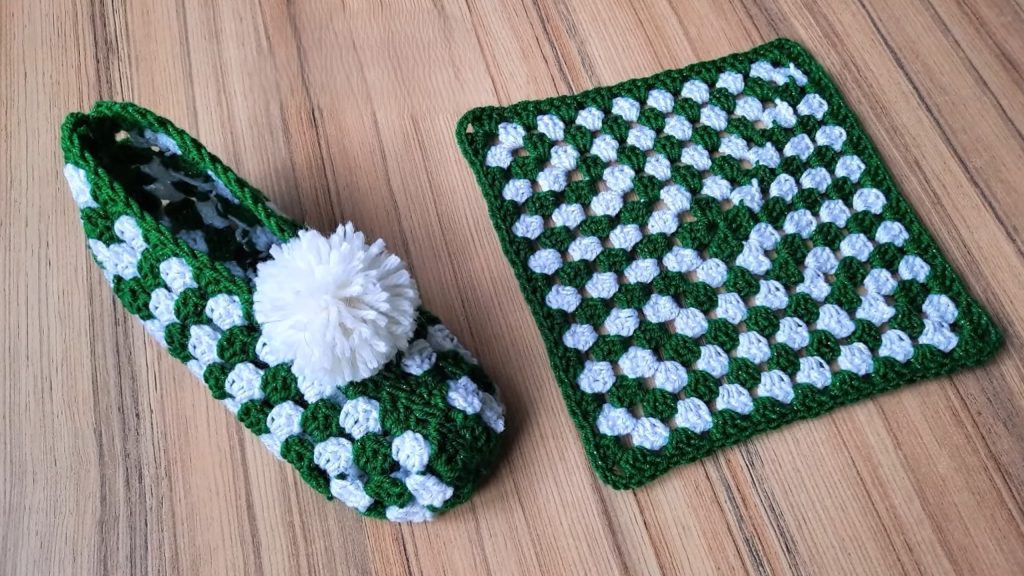
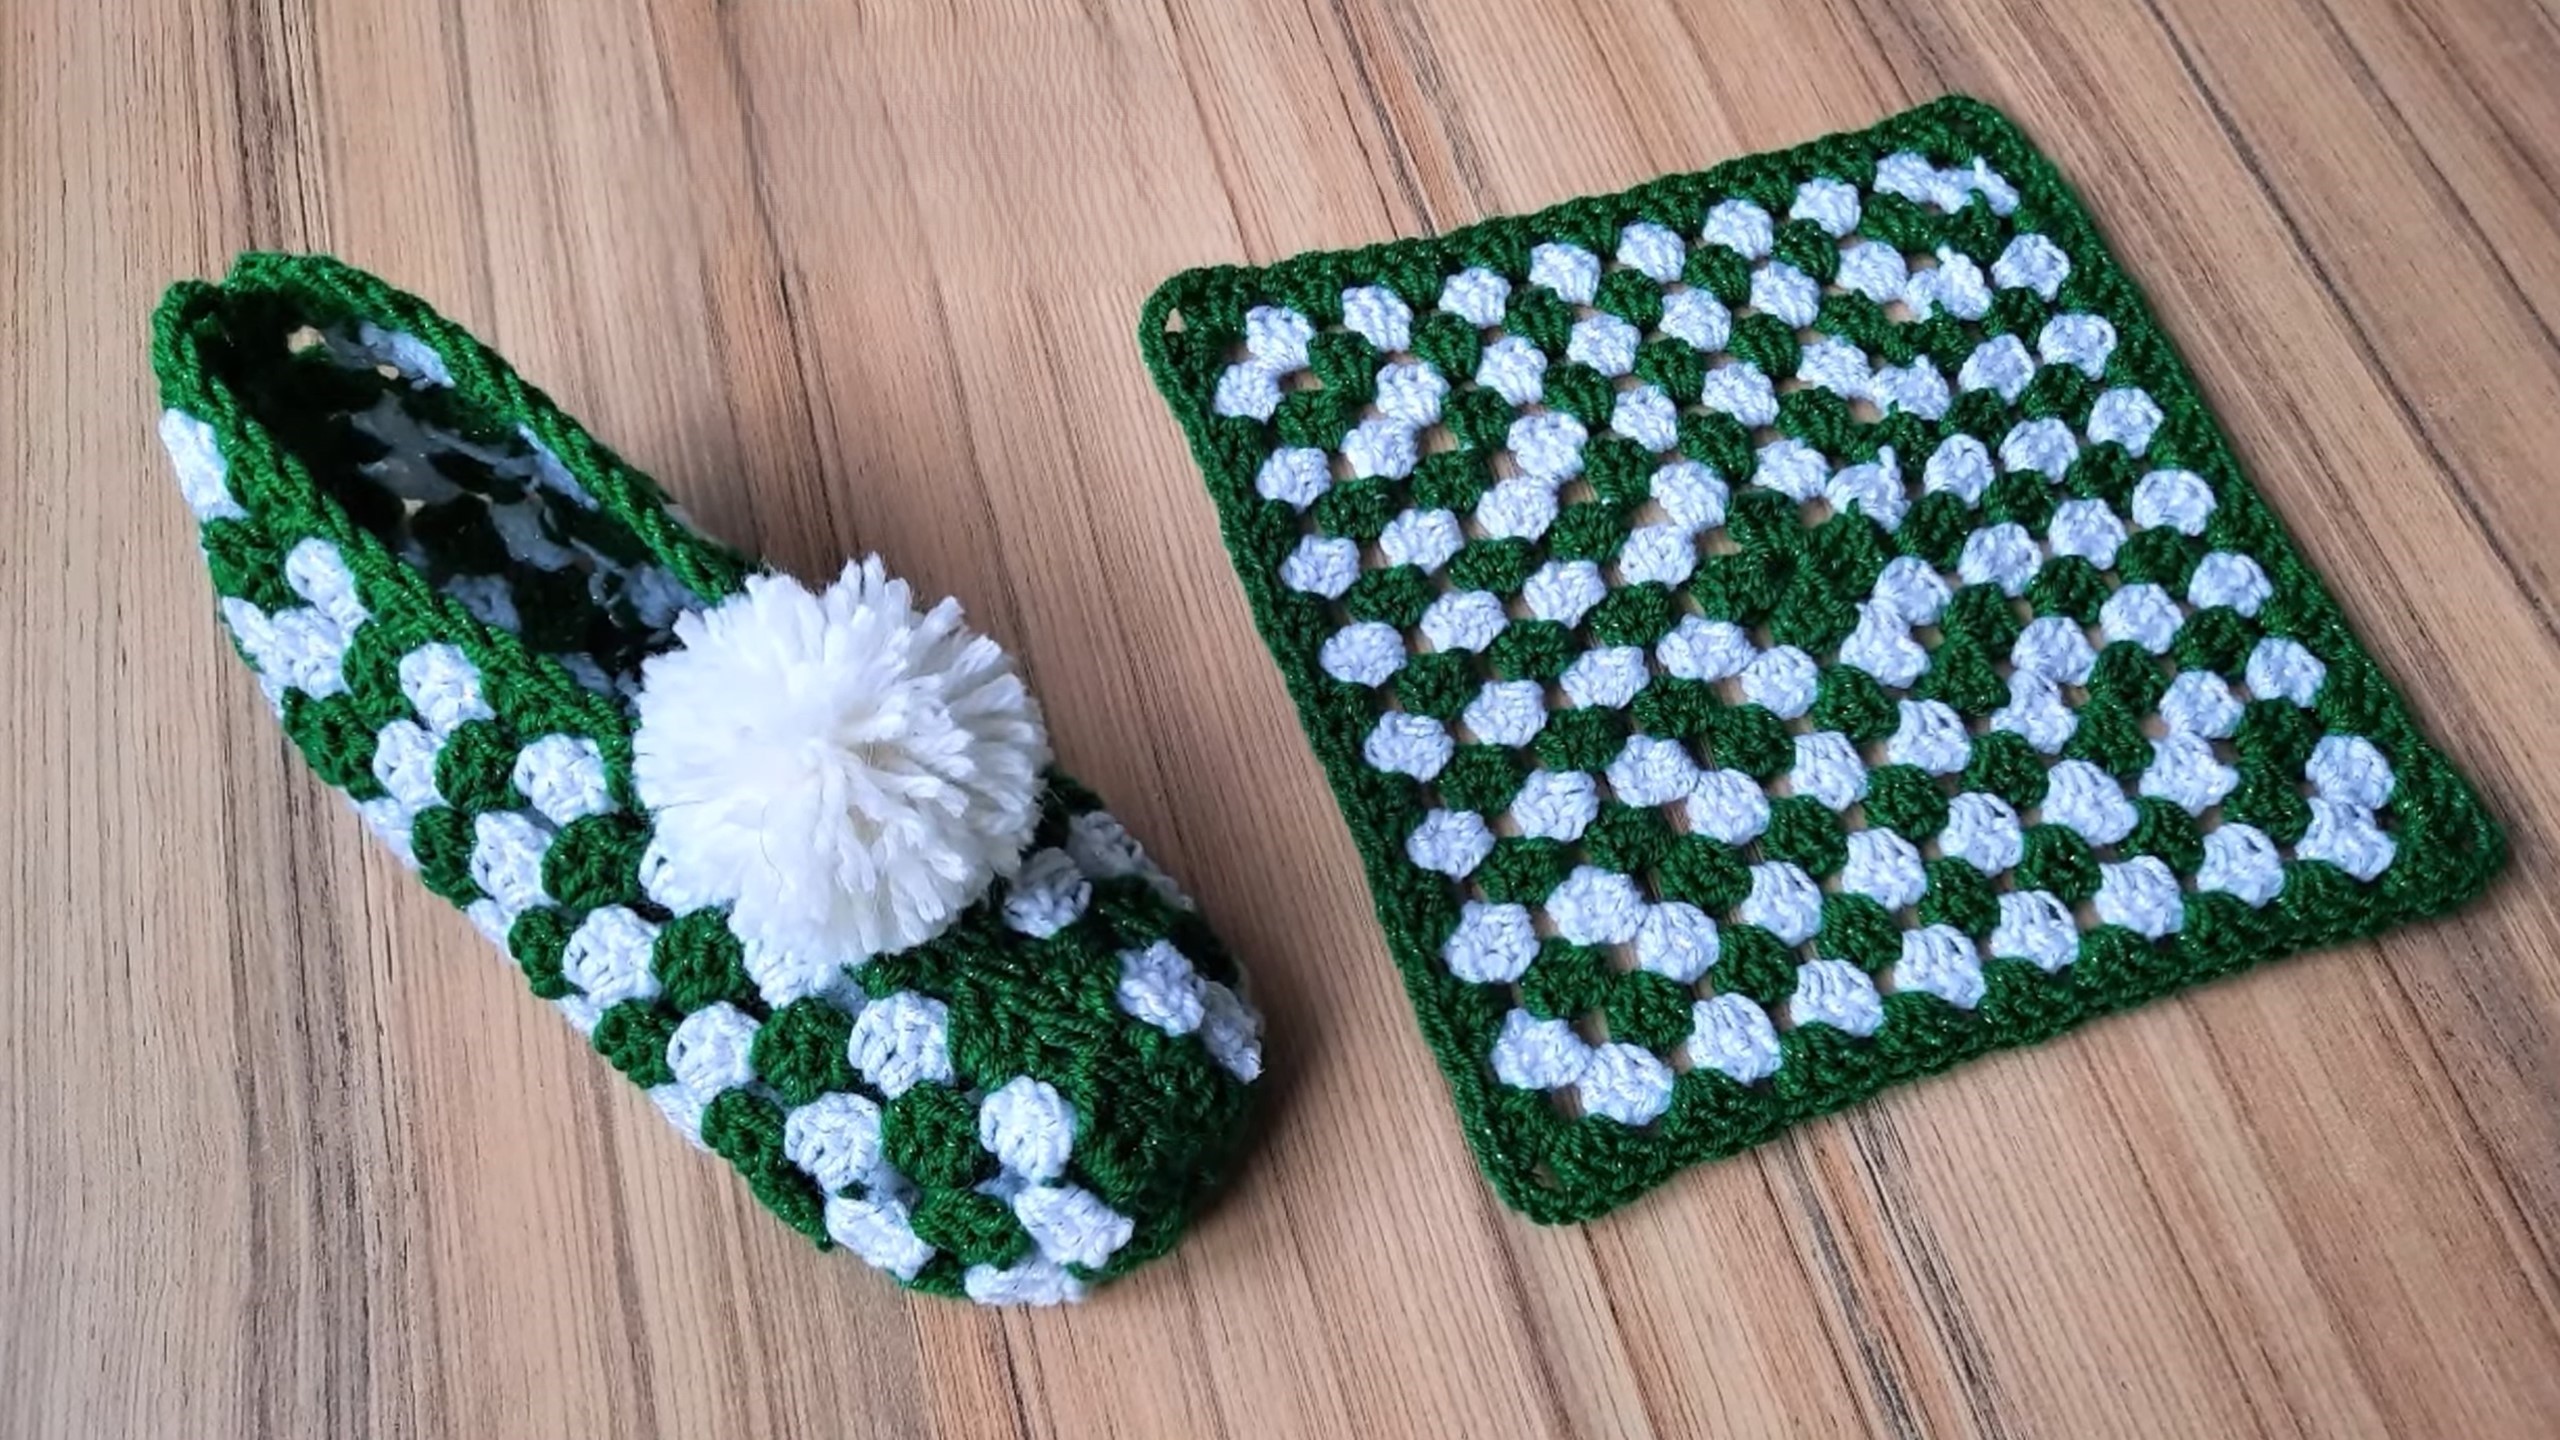
Hello, crochet enthusiasts! Are you ready to combine the classic charm of granny squares with the cozy comfort of slippers? Today, I’m absolutely thrilled to share a unique and detailed pattern for these Granny Square Comfort Slippers! They’re not only super comfy but also a fantastic way to use up those yarn scraps and add a touch of playful style with a fluffy pom-pom.
What makes these slippers special is their construction – starting with a granny square, then building up the sides to create a perfect fit. It’s a fun and engaging project that results in a truly unique pair of house shoes.
Skill Level: Intermediate (familiarity with granny squares, basic shaping and seaming)
Materials You’ll Need:
- Yarn: Worsted Weight (Aran/10-ply) yarn in two contrasting colors.
- Color A (Main/Border): Approximately 100-120 grams (e.g., Green in the sample)
- Color B (Inner Squares): Approximately 50-70 grams (e.g., White in the sample)
- Small amount of yarn for the pom-pom (could be Color B or another contrasting color).
- Crochet Hook: 5.0 mm (H/8) crochet hook. (Adjust hook size if needed to meet gauge.)
- Tapestry Needle: For weaving in ends and seaming.
- Scissors
- Stitch Markers: Helpful for marking corners and seams.
- Pom-Pom Maker: (Optional) for making a consistent pom-pom.
Gauge (for the granny square):
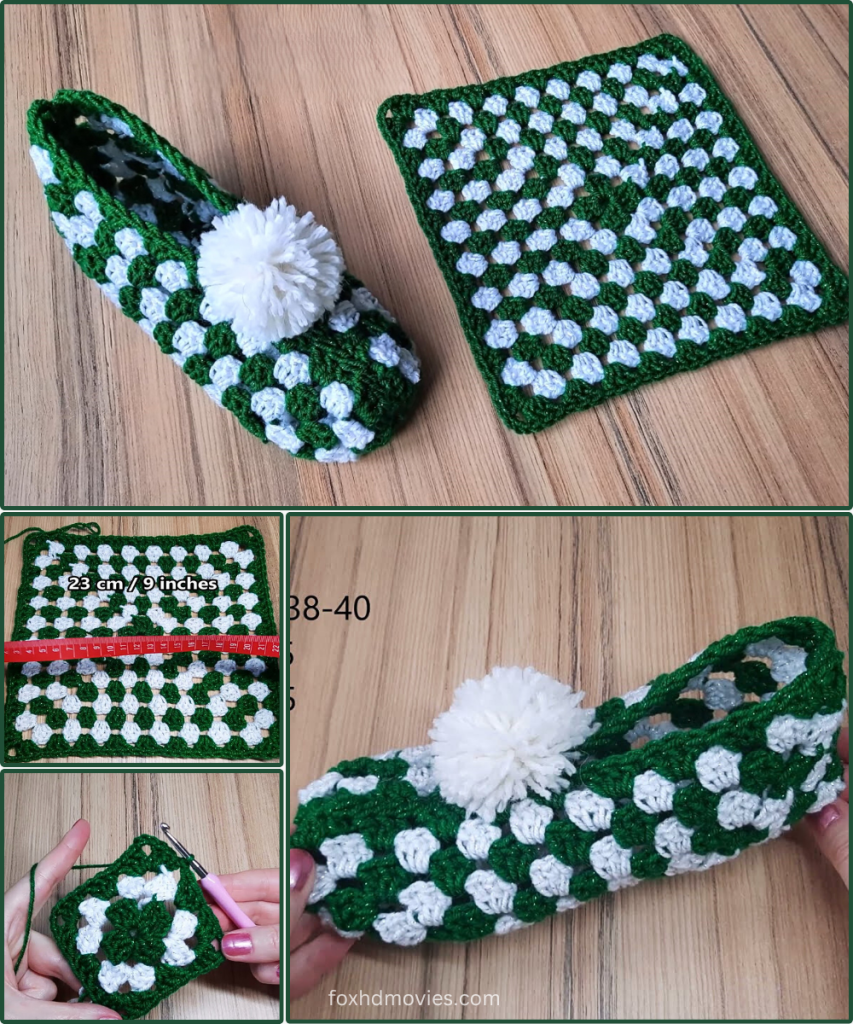
- After 4 rounds, your granny square should measure approximately 5.5 inches x 5.5 inches (14 cm x 14 cm). (Achieving correct gauge is vital here, as the slipper shape depends on the size of your base granny square!)
Abbreviations (US Terms):
- ch: chain
- sl st: slip stitch
- sc: single crochet
- dc: double crochet
- sp: space
- ch-sp: chain space
- [ ]: indicates a group of stitches to be worked into the same space
- st(s): stitch(es)
- fo: fasten off
Notes Before You Start:
- This pattern uses a traditional granny square base for the sole, with additional rows built up from the sides.
- Ch 3 at the beginning of DC rounds counts as 1 dc.
- Ch 1 at the beginning of SC rows does NOT count as a stitch.
- You will be making two identical slippers.
Part 1: The Granny Square Base (Sole of the Slipper)
We’ll start by creating one standard granny square. This will form the base of your slipper’s sole.

Using Color B (e.g., White):
- Round 1: Make a Magic Ring (or ch 4, sl st to first ch to form a ring). Ch 3 (counts as 1 dc), 2 dc into ring, [ch 2, 3 dc] 3 times into ring, ch 2, sl st to top of beg ch-3. (4 x 3-dc clusters, 4 ch-2 sps)
- If using ch 4 ring: Work all stitches into the center of the ring.
Using Color A (e.g., Green):
- Round 2: Sl st into the next 2 dc to reach the first ch-2 sp. Ch 3 (counts as 1 dc), (2 dc, ch 2, 3 dc) into same ch-2 sp. This is your first corner. [Ch 1, (3 dc, ch 2, 3 dc) into next ch-2 sp] 3 times. Ch 1, sl st to top of beg ch-3. (8 x 3-dc clusters, 4 ch-2 sps, 4 ch-1 sps)
Using Color B:
- Round 3: Sl st into the next 2 dc to reach the first ch-2 sp. Ch 3 (counts as 1 dc), (2 dc, ch 2, 3 dc) into same ch-2 sp. [Ch 1, 3 dc into next ch-1 sp, ch 1, (3 dc, ch 2, 3 dc) into next ch-2 sp] 3 times. Ch 1, 3 dc into next ch-1 sp, ch 1, sl st to top of beg ch-3. (12 x 3-dc clusters, 4 ch-2 sps, 8 ch-1 sps)
Using Color A:
- Round 4: Sl st into the next 2 dc to reach the first ch-2 sp. Ch 3 (counts as 1 dc), (2 dc, ch 2, 3 dc) into same ch-2 sp. [Ch 1, 3 dc into next ch-1 sp, ch 1, 3 dc into next ch-1 sp, ch 1, (3 dc, ch 2, 3 dc) into next ch-2 sp] 3 times. Ch 1, 3 dc into next ch-1 sp, ch 1, 3 dc into next ch-1 sp, ch 1, sl st to top of beg ch-3. (16 x 3-dc clusters, 4 ch-2 sps, 12 ch-1 sps)
Fo, and weave in ends. Make sure your square measures approximately 5.5 inches x 5.5 inches.
Part 2: Building the Slipper Sides
Now, we’ll build up the sides of the granny square to create the slipper shape.

Using Color A (e.g., Green):
- Identify the Heel and Toe: Lay your granny square flat. Choose one side to be the “heel” and the opposite side to be the “toe.” The other two sides will be the “sides” of the slipper.
- Attach Yarn for Heel: Join Color A with a sl st to the middle stitch of any 3-dc cluster on the side you designated as the HEEL.
- Row 1 (Heel Section): Ch 3 (counts as 1 dc), dc in the next 2 sts. (3 dc). Turn.
- This is the start of building up the heel. You’re working only into the stitches of the granny square along one edge.
- Row 2: Ch 3, dc in each of the 3 dc. (3 dc). Turn.
- Repeat Row 2 for 4-6 more rows, or until the heel section is tall enough to comfortably come up the back of your heel.
- Fo, leaving a long tail for seaming.
Attach Yarn for Toe:
- Now, rotate your granny square to the side you designated as the TOE.
- Join Color A with a sl st to the middle stitch of any 3-dc cluster on this TOE side.
- Row 1 (Toe Section): Ch 3 (counts as 1 dc), dc in the next 2 sts. (3 dc). Turn.
- Row 2: Ch 3, dc in each of the 3 dc. (3 dc). Turn.
- Repeat Row 2 for 4-6 more rows, or until the toe section is tall enough to cover the top of your toes.
- Fo, leaving a long tail for seaming.
Building the Side Walls (Important for Fit!):
This is where the slipper starts to take its shape.
- Attach Yarn to Side (Long Edge): With the right side of your granny square facing you, join Color A with a sl st into the first ch-1 space just after the corner on one of the long sides (not the heel or toe side).
- Row 1 (Side Wall): Ch 1, 2 sc into the ch-1 sp. Sc in each dc across the 3-dc clusters and 1 sc into each ch-1 sp along the side of the granny square. Continue placing sc stitches evenly up the side of the heel section (approx. 1 sc per dc row edge). Sc across the top edge of the heel section (3 sc). Sc evenly down the other side of the heel section. Continue placing sc stitches evenly along the side of the granny square (1 sc per ch-1 sp, sc into each dc cluster) until you reach the next corner.
- Essentially, you are single crocheting all around the perimeter of the granny square and up/over the heel section you just made. Do NOT include the toe section yet.
- The goal is to create a sturdy base for the side walls.
- Row 2: Ch 1, turn. Sc in each sc across until you reach the next corner of the granny square (where the toe section begins).
- This row forms the beginning of the “opening” for your foot.
- Repeat Row 2 for 3-5 more rows, or until the side walls are your desired height. Remember, the toe section will eventually be pulled up and sewn to the sides.
- Fo, leaving a very long tail for final seaming (at least 25 inches/60 cm).
Part 3: Assembly!
Now, for the magic that turns a flat piece into a slipper!
- Fold and Position: Lay your granny square flat. Take the toe section you crocheted (the 3-dc strip) and pull it up over the front of the granny square. This will be the top of your foot.
- Seam the Toe: Using your tapestry needle and the long tail from the toe section, align the sides of the toe strip with the edge of the side walls you just created. Whip stitch or mattress stitch them together neatly.
- Seam the Heel: Bring the two ends of the heel section together at the back. Using the long tail from the heel section, seam them together to form the back of the slipper.
- Final Side Seams: Using the very long tail from the side wall section, continue seaming any remaining open gaps along the side of the slipper where the side wall meets the granny square base, and where the toe and heel sections meet the side walls. Ensure all seams are tight and secure.
- Optional Top Edging (Using Color A): For a clean finish, join yarn with a sl st anywhere at the top opening of the slipper. Ch 1, sc evenly around the entire top opening. Sl st to first sc. Fo and weave in ends.
Part 4: The Pom-Pom!
- Using your pom-pom maker (or by hand), create a fluffy pom-pom about 2.5-3 inches (6-7.5 cm) in diameter. You can use Color B yarn, a mix of Color A and B, or a completely different accent color!
- Leave long tails when tying off your pom-pom.
- Position the pom-pom on the top center of the slipper, over the toe section.
- Using your tapestry needle, thread the pom-pom tails through the stitches of the slipper and tie them securely on the inside. Trim any excess.
Video tutorial
Make Your Second Slipper!
Repeat all the steps above to create your matching second slipper.
Care Instructions:
- Hand wash or machine wash on a delicate cycle in cold water.
- Lay flat to dry. Do not tumble dry, as it may cause shrinkage or damage.
You now have a unique and super comfy pair of Granny Square Comfort Slippers! These make fantastic personalized gifts or a cheerful addition to your own loungewear.
If you create your own pair, I’d love to see them! Share your photos on social media using the hashtag #GrannySquareSlippers and tag me!
Happy hooking!