by
by Hello, lovely crocheters!
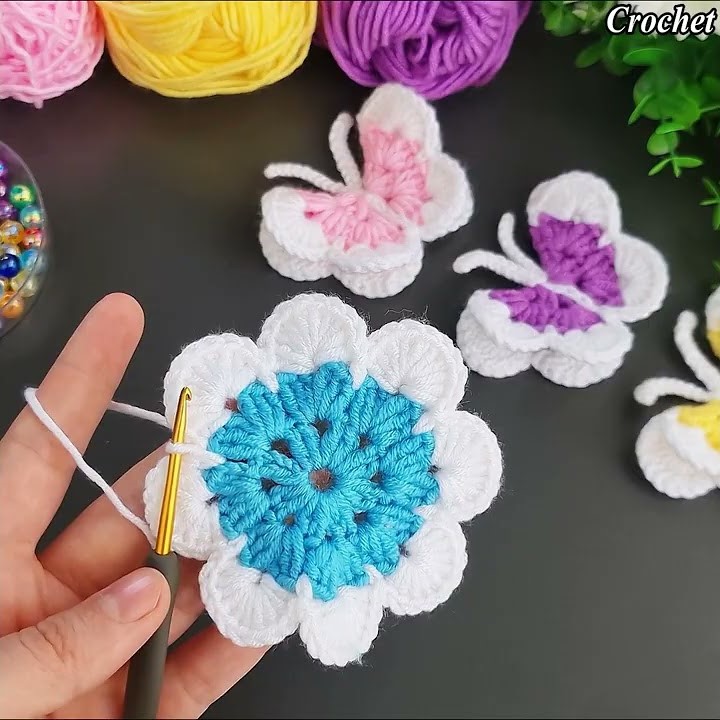
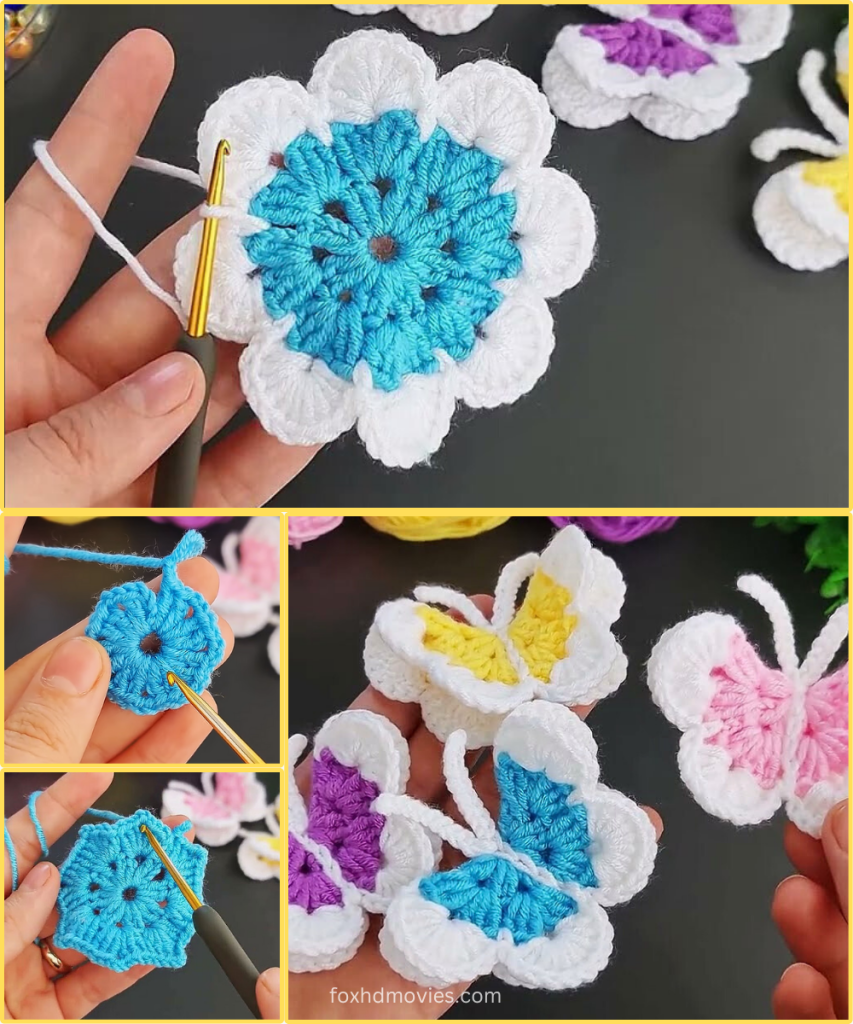
Today, we’re going to create something truly enchanting – a beautiful, multi-layered flower motif that pops! This design, with its distinct center and beautifully defined petals, is perfect for adding a touch of charm to any project. Think garlands, embellishments for hats or bags, or even joining them together to create a stunning blanket or scarf.
The magic of this flower lies in its construction, building up layers to give that lovely dimensional effect. It uses just a few basic stitches, so even if you’re relatively new to crochet, you’ll be able to master this in no time.
Ready to make your yarn bloom? Let’s get started!
What you’ll need:
- Yarn: I recommend using two contrasting colors for the best effect, just like in the image. A DK (light worsted) or worsted weight cotton or acrylic yarn works wonderfully for defined stitches.
- Color A: (Blue in the example image) For the center.
- Color B: (White in the example image) For the petals.
- Crochet Hook: A hook size appropriate for your chosen yarn. For DK yarn, a 3.5mm (E/4) or 4.0mm (G/6) hook would be suitable. For worsted, a 4.5mm (7) or 5.0mm (H/8) hook. (The image looks like a 4.0mm or 4.5mm hook is being used with DK weight yarn.)
- Scissors
- Tapestry Needle (for weaving in ends)
Abbreviations (US Terms):
- ch: chain
- st(s): stitch(es)
- sl st: slip stitch
- sc: single crochet
- dc: double crochet
- tr: treble crochet (or triple crochet) – (yo twice, insert hook into st, yo and pull up a loop, [yo and draw through 2 loops on hook] 3 times)
- sk: skip
- sp: space
- rep: repeat
- MR: Magic Ring (or Magic Circle)
The Pop-Up Petal Flower Motif Pattern
We’ll start with the center in Color A, and then switch to Color B for the delightful petals.
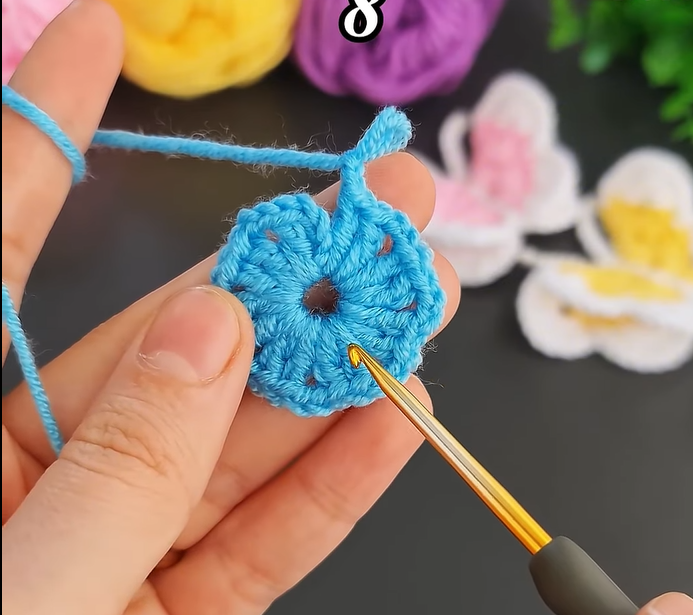
Part 1: The Center (Color A – Blue in example)
- Start with MR: Make a Magic Ring.
- Alternatively, ch 4 and sl st into the first ch to form a ring.
- Round 1: Ch 2 (does not count as a stitch). Work 12 dc into the MR. Sl st to the top of the first dc to join. (12 dc)
- Gently pull the tail of your MR tight to close the center hole.
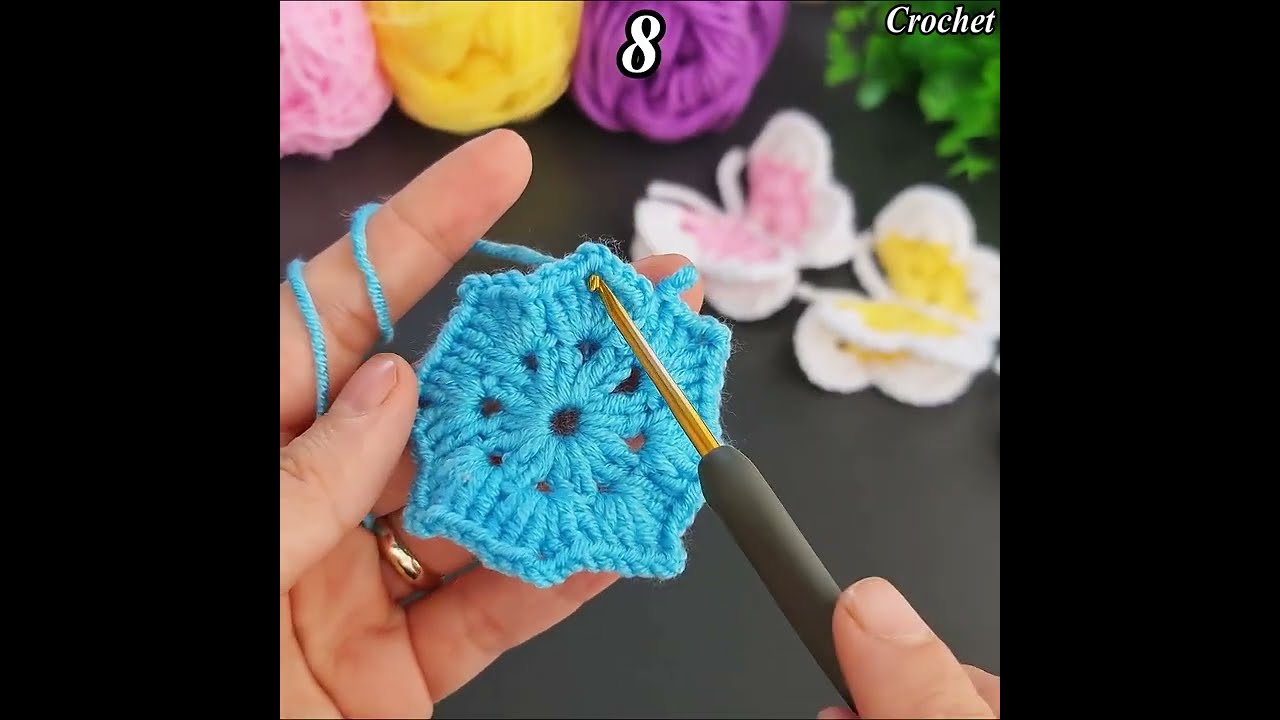
- Round 2: Ch 2 (does not count as a stitch). Work 2 dc in each st around. Sl st to the top of the first dc to join. (24 dc)
- This round creates a slightly larger base for our next set of stitches.
- Round 3: Ch 1 (does not count as a stitch). Sc in the same st as join. *Ch 2, sk next st, sc in next st*. Rep from * to * around. Ch 2, sl st to the first sc to join. (12 sc, 12 ch-2 spaces)
- This round creates the foundation for attaching our petals.
- Fasten off Color A.
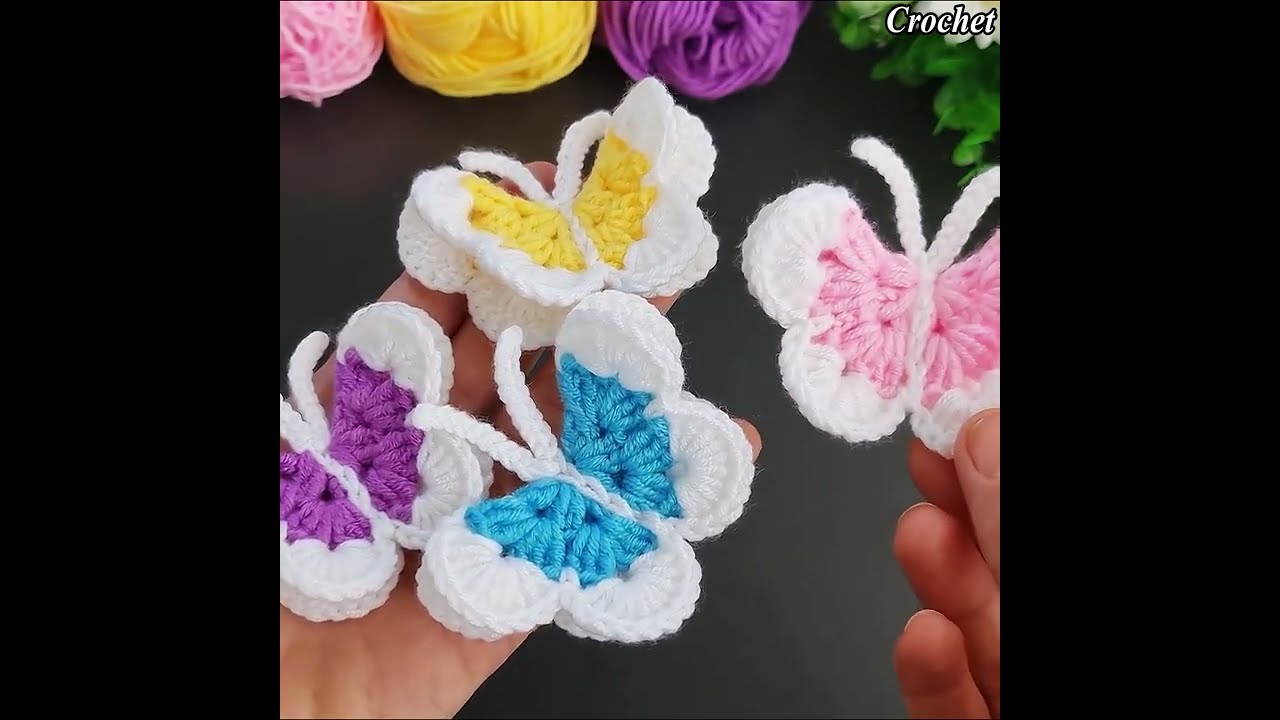
Part 2: The Petals (Color B – White in example)
Now, let’s bring in Color B to create those beautiful, puffy petals!
- Attach Color B: Join Color B with a sl st into any ch-2 space from Round 3 of the center.
- Round 4 (Petals):
- In the same ch-2 space where you joined: (Sc, hdc, dc, tr, dc, hdc, sc). This completes your first petal!
- To move to the next petal: Sl st into the next ch-2 space.
- Rep from * to * around: In the next ch-2 space, work (Sc, hdc, dc, tr, dc, hdc, sc). Sl st into the next ch-2 space.
- Continue this sequence until you have completed 12 petals, each worked into a separate ch-2 space.
- After your 12th petal, sl st into the first sc of the very first petal to seamlessly finish the round. (12 petals)
- Fasten off Color B.
Finishing:
- Weave in all your loose ends securely using your tapestry needle. Pay extra attention to the magic ring tail to ensure the center stays closed.
- Gently block your flower if desired, to help the petals lay flat and defined.
Video tutorial
Tips for a Perfect Pop-Up Petal Flower:
- Tension Matters: Keep your tension consistent, especially when working the petal stitches, to ensure uniformity in your petals.
- Yarn Choice: Cotton yarn often gives more defined stitches and holds shape well, making it excellent for motifs like this. Acrylic is also a great, versatile option.
- Experiment with Colors: Don’t be afraid to try different color combinations! A dark center with light petals, or vice versa, can create strikingly different effects. You could even use three colors for an extra layer of visual interest.
- Uses for your Flowers:
- Sew them onto hats, bags, or clothing as an embellishment.
- String them together for a lovely garland.
- Attach them to headbands or hair clips.
- Join multiple flowers together to create a vibrant blanket, table runner, or cushion cover.
I hope you have so much fun making these charming Pop-Up Petal Flowers! They’re quick to make and endlessly customizable. Don’t forget to share your creations – I love seeing your beautiful work!
Happy Crocheting!