 by
by 
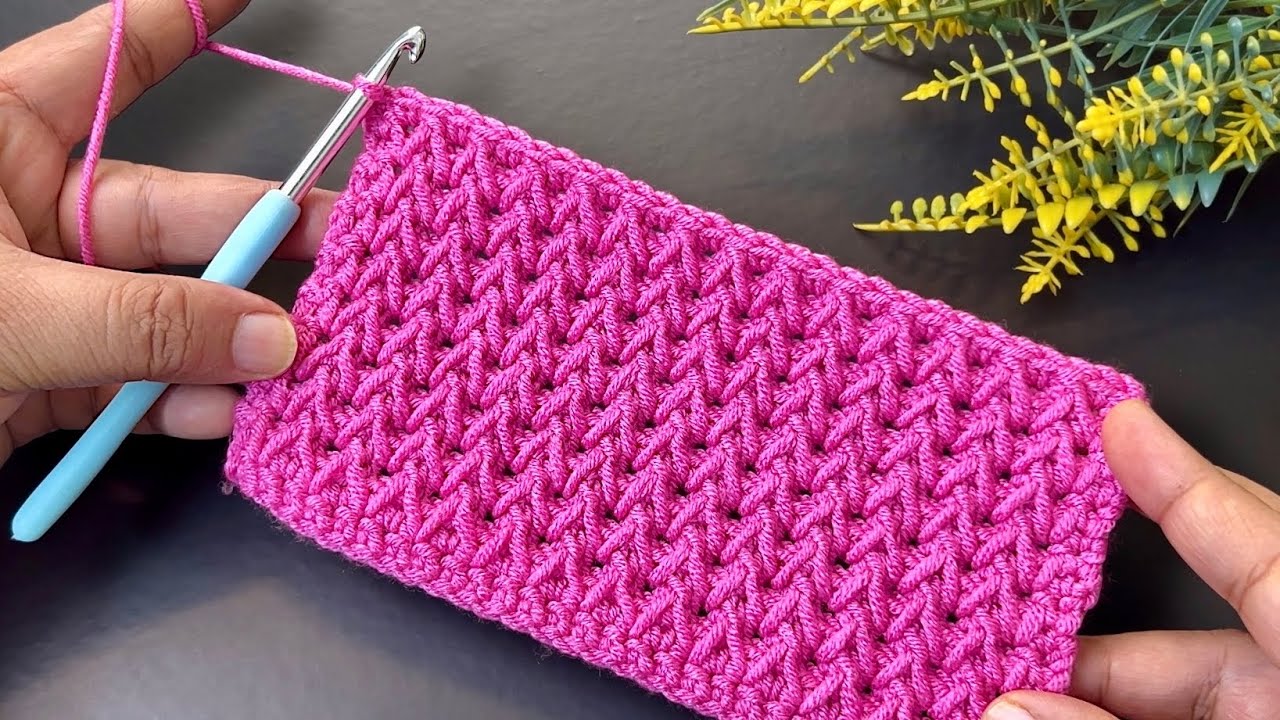
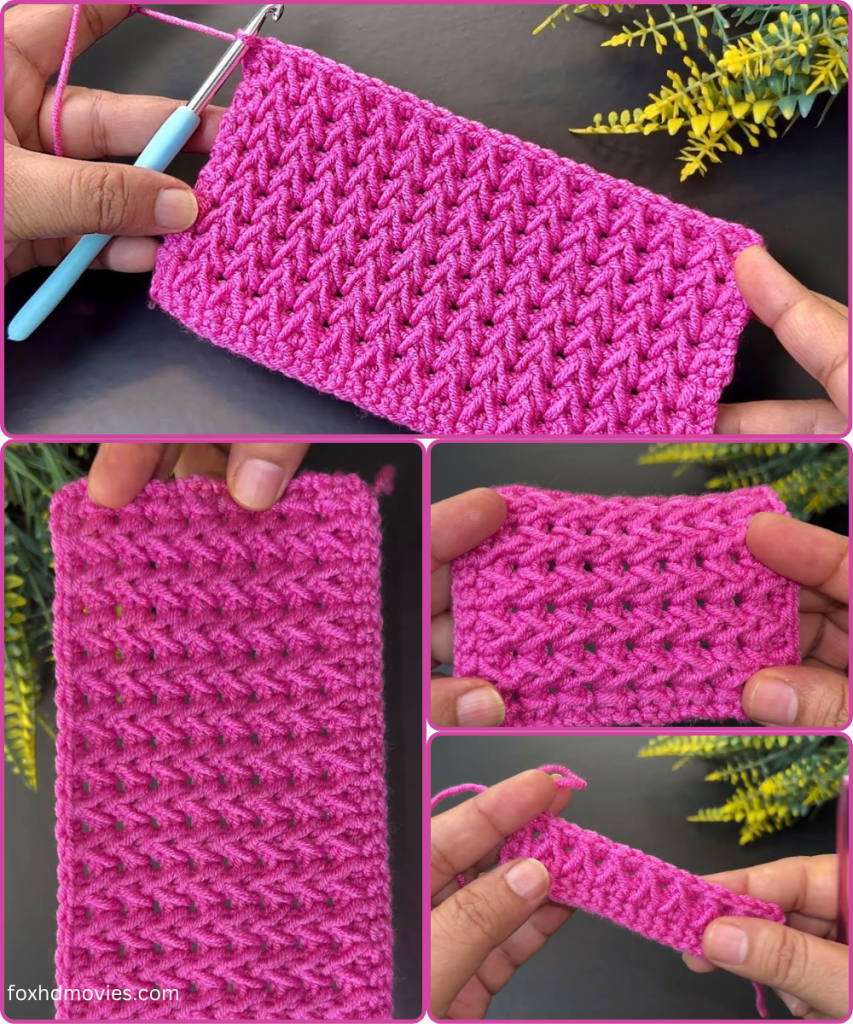
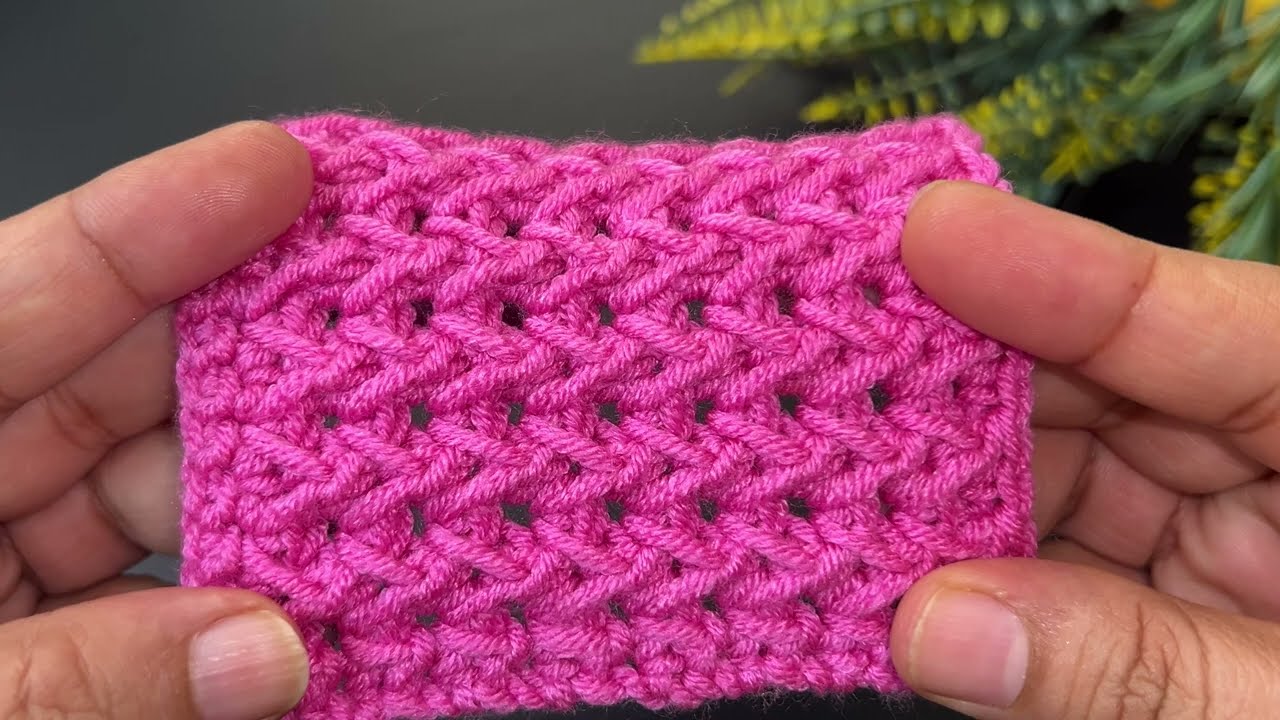
Hello, texture enthusiasts and stitch seekers! Have you ever seen a crochet fabric that just begs to be touched? The stitch featured in today’s blog, beautifully showcased in the bright pink swatch, is one such gem! It creates a dense, almost braided or woven look with incredible texture and warmth. It’s perfect for blankets, scarves, hats, and even the main body of garments where you want a substantial, interesting fabric.
While often called by various names, this stitch is essentially a variation of the Half Double Crochet (hdc), often achieved by working into a specific part of the stitch or combining regular hdc with a slight twist. Let’s call it the “Braided Half Double Crochet” for this tutorial due to its lovely intertwined appearance. It’s a fantastic stitch for intermediate crocheters or adventurous beginners ready to expand their repertoire!
Materials You’ll Need:
- Yarn: Any weight yarn will work for practicing this stitch. The sample uses a DK weight (Light Worsted / 8 ply) yarn in a vibrant pink.
- For a swatch: A small amount (approx. 20-30g).
- For a project: Refer to your project’s requirements.
- Crochet Hook: A hook size appropriate for your chosen yarn. For DK weight, a 3.5mm (E/4) or 4.0mm (G/6) would be suitable. The hook in the image appears to be a 2.5mm or 3.0mm, which might be used for a very dense fabric or finer yarn.
- Yarn Needle: For weaving in ends.
- Scissors
Abbreviations Used:
- ch: chain
- sl st: slip stitch
- hdc: half double crochet
- hdc-3rdLoop: half double crochet in the 3rd loop (also known as the “horizontal bar” or “camel stitch” loop)
- st(s): stitch(es)
- rep: repeat
- WS: wrong side
- RS: right side
Gauge (Approximate):
Your gauge will vary depending on your yarn, hook, and tension. For a reference, with DK weight yarn and a 4.0mm hook, you might achieve: 16 hdc-3rdLoop x 12 rows = 4 inches (10 cm)
Understanding the “3rd Loop” (or Horizontal Bar)
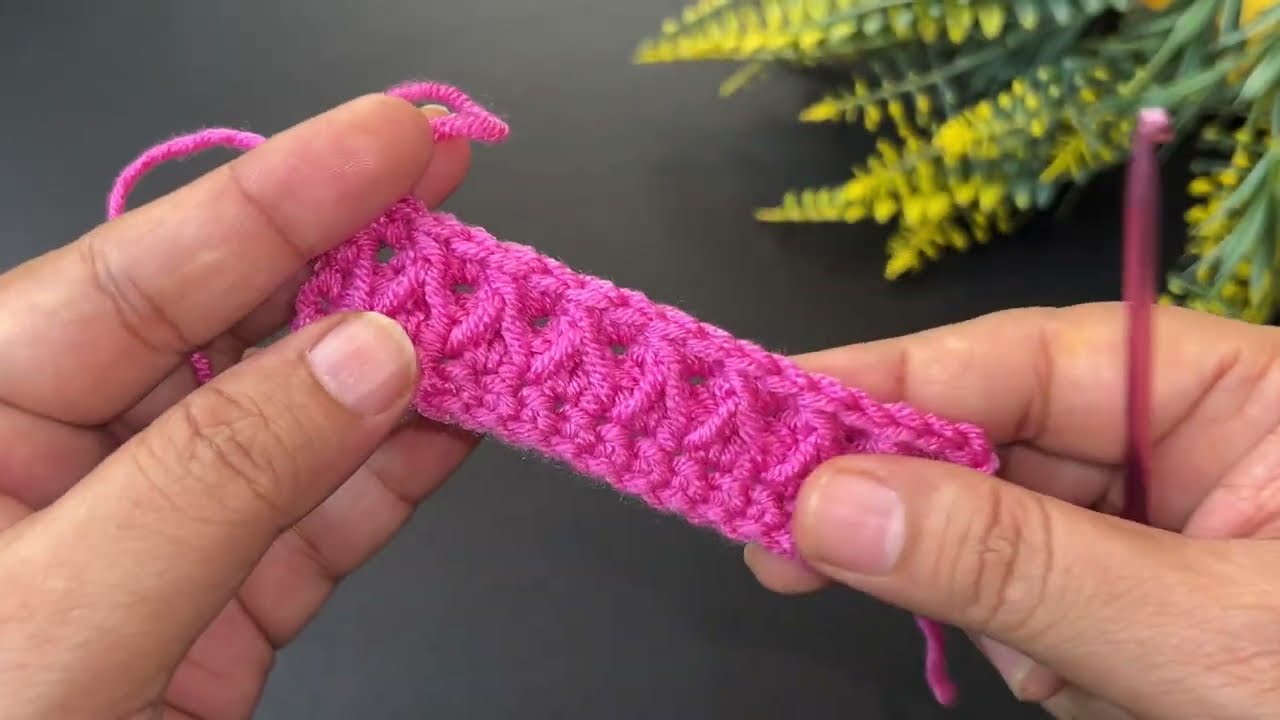
The magic of this stitch often lies in working into the “3rd loop” of the hdc. When you look at the top of a regular hdc stitch, you usually see two loops: the front loop (FLO) and the back loop (BLO). However, with an hdc, there’s often a third horizontal bar that runs behind the back loop, on the wrong side of your work. This is the loop we’ll be working into to push the typical “top” of the hdc forward, creating that beautiful raised texture.
Let’s assume we’re working in rows and turning our work.
Pattern: The “Braided Half Double Crochet” Swatch
To begin, create a foundation chain that is a multiple of 1. The sample swatch appears to be quite wide, perhaps 30-40 stitches.
Start with your chosen yarn and hook.
Row 1 (Foundation Row – RS): Ch any number of stitches (e.g., Ch 32 for a good-sized swatch). Hdc in 3rd ch from hook and in each ch across. Turn. (Your stitch count will be starting chain minus 2).
- This creates your base row of hdc.
Row 2 (WS): Ch 2 (does NOT count as a stitch here, or as a hdc. It just gives height). Hdc in BLO in each hdc across. Turn.
- Working in the BLO on the WS will push a ridge to the RS, but the primary texture comes from the 3rd loop.
Row 3 (RS): Ch 2 (does NOT count as a stitch). Hdc in the 3rd loop of each hdc across. Turn.
- This is the key row! You will insert your hook under the horizontal bar that sits behind the front and back loops of the stitch below. If you look at the back of your work from Row 2, you’ll see it clearly.
Row 4 (WS): Ch 2 (does NOT count as a stitch). Hdc in BLO in each hdc across. Turn.
- You will always work hdc in BLO on the wrong side rows to maintain the ridge pattern.
Repeat Rows 3 and 4 until your swatch reaches your desired height.

- The image shows many rows, demonstrating the consistent texture.
Video tutorial
Tips for Success:
- Finding the 3rd Loop: This can be tricky at first! Look at the back of your previous hdc row. You’ll see the two main loops on top (front and back), and then a little horizontal strand behind the back loop. That’s your 3rd loop! Practice makes perfect.
- Tension: Try to maintain consistent tension for an even, beautiful texture.
- Turning Chains: Pay attention to whether your turning chain counts as a stitch or not. For this pattern, it’s generally best to treat the Ch 2 as a turning chain only, not a stitch, to avoid gaps and keep edges neat.
- Experiment: Once you’re comfortable with this stitch, try using it for various projects! It makes wonderful blankets, scarves, and even the body of sweaters or cardigans.
Why I Love This Stitch:
- Rich Texture: It creates a truly beautiful, almost knitted appearance that adds depth to your projects.
- Warmth: The dense nature of the stitch makes for a warm fabric, ideal for cozy items.
- Reversible-ish: While there is a designated right and wrong side due to the 3rd loop placement, both sides have a lovely, textured appearance.
- Simple Variation: It’s essentially hdc, but with a slight modification, making it achievable for many crocheters.
I hope this detailed breakdown helps you master the beautiful “Braided Half Double Crochet” stitch, just like the one in the image! Practice it with your own yarn, and enjoy the lovely fabric it creates. Happy crocheting!