 by
by 
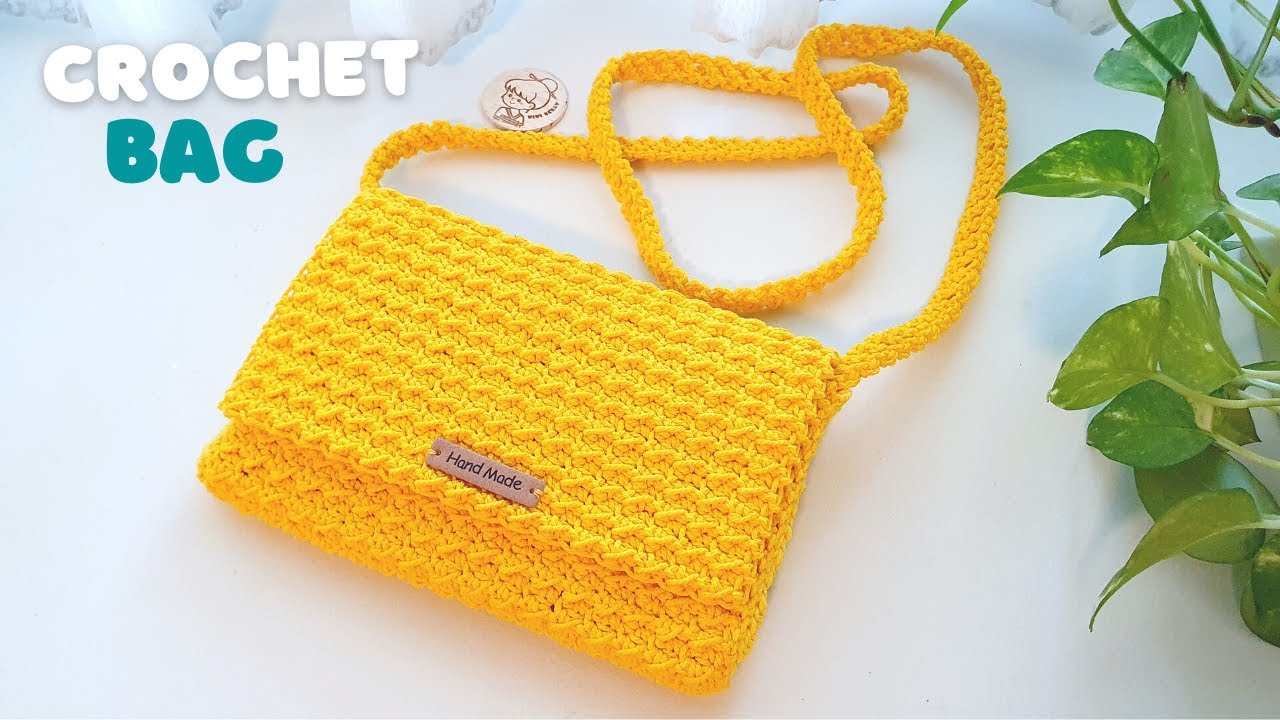
Hello, handmade fashionistas! Add a brilliant pop of color and delightful texture to your accessory collection with this stunning crochet crossbody bag! Crafted in a cheerful yellow with a beautifully dense, textured stitch, this bag is perfect for carrying your essentials while making a stylish statement.
This pattern is fantastic for those who enjoy creating rich textures in their crochet work. We’ll be using a combination of stitches to achieve that lovely, almost woven look. Let’s grab our hooks and a bright skein of yarn and create this charming bag!
Skill Level: Intermediate (familiarity with basic crochet stitches and working into stitch bases is helpful)
Materials You’ll Need:
- Yarn: Approximately 200-250 yards of sport, DK, or light worsted weight cotton or cotton blend yarn in Bright Yellow (or your preferred color). Cotton is excellent for bags due to its durability and how well it holds shape.
- Crochet Hook: 3.0mm – 3.5mm (or hook size appropriate for your chosen yarn to create a firm, dense fabric).
- Stitch Markers: Helpful for marking the beginning of rows/rounds and strap placement.
- Yarn Needle: For weaving in ends and sewing.
- Scissors
- (Optional but Recommended) Magnetic snap or button closure: For the flap.
- (Optional) Fabric lining: For a more polished interior and added durability.
Abbreviations Used:
- ch: chain
- sl st: slip stitch
- sc: single crochet
- hdc: half double crochet
- dc: double crochet
- st(s): stitch(es)
- BLO: back loop only
- FLO: front loop only
- FO: fasten off
- Invisible Join: A method to create a seamless finish when joining rounds.
Gauge: Not critical for this project, but aim for a firm fabric that will hold the bag’s shape without being too rigid or too floppy.
Pattern Notes:
- This bag is constructed in one piece, starting with a rectangular base, then building the sides, and finally adding the flap.
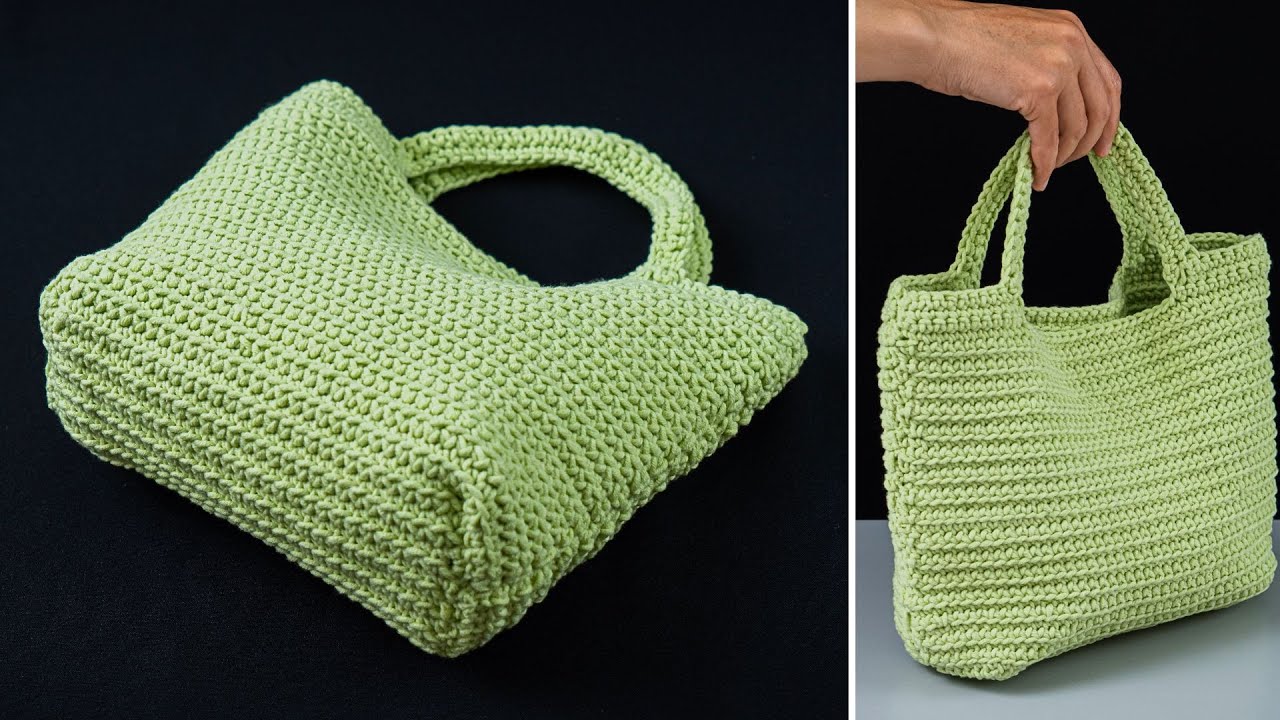
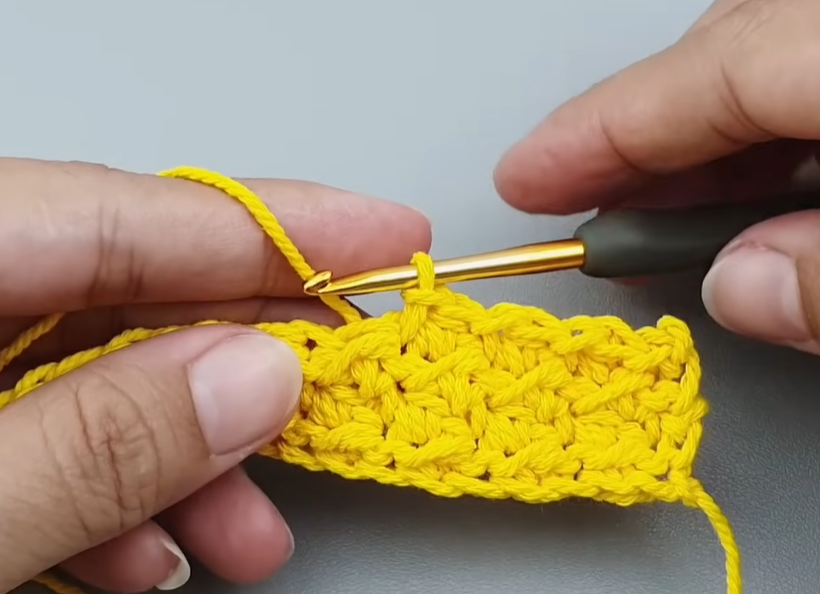
- The textured stitch is created by alternating between working into the front loop only (FLO) and back loop only (BLO) of single crochet stitches, or similar variations that create ridges. The specific stitch in the photo appears to be a textured half double crochet or similar. We will use a “waistcoat stitch” inspired texture for a dense, knit-like look, or a modified hdc row. Let’s go with a variation of Moss Stitch (alternating sc, ch 1) or a Half Double Crochet Texture. Given the image, the texture looks like very short, dense stitches. Let’s go with a dense Half Double Crochet.
Part 1: The Base (Work in Rows, then around, in Yellow)
We’ll start with a rectangular base worked in rows, then turn to work in the round to form the bag body.
With Yellow Yarn:
Row 1: Ch 41 (or your desired length for the base of the bag). Hdc in 2nd ch from hook and in each ch across. (40 hdc) Row 2: Ch 1, turn. Hdc in each st across. (40 hdc) Row 3 – Row 8 (or until desired base width): Repeat Row 2. (40 hdc per row) You should now have a flat rectangle for your base.
Part 2: Forming the Bag Body (Work in Rounds in Yellow)
Now we’ll turn the rectangle into a 3D shape by working around all four sides.
Round 1: Do not turn after the last Row 8. Ch 1. Now we’ll work around the entire rectangle: * Work sc evenly down the side of the rectangle (e.g., 8 sc for 8 rows). * Work 3 sc in the corner stitch. * Work sc across the bottom of your starting chain (40 sc). * Work 3 sc in the next corner stitch. * Work sc evenly up the other side of the rectangle (e.g., 8 sc). * Work 3 sc in the last corner stitch. * Work sc across the top of Row 8 (40 sc). Join with a sl st to the first sc. Count your stitches carefully here to ensure a good foundation for the sides. You should have 40 (top) + 40 (bottom) + 8 (side 1) + 8 (side 2) + 34 (corners) = 108 stitches if you did 8 rows of 40hdc. Adjust based on your row/stitch count.*
Round 2 (Texture Start): Ch 1. Sc in each st around, working into the back loop only (BLO). Join with a sl st to the first sc. (This creates a ridge for the texture to stand out).
Round 3 (Textured Row): Ch 1. Now, we’ll create the dense texture. This can be achieved in a few ways. * Option 1 (Dense Sc/Hdc): Work sc in the FLO of the current stitch, then hdc in the BLO of the next stitch. Repeat this pattern around. This creates a very tight, small texture. * Option 2 (Waistcoat Sc): Ch 1. Work a waistcoat stitch (sc where you insert your hook into the center of the ‘V’ of the stitch below) in each stitch around. This creates a knit-like fabric. * Option 3 (Alternating Half Double Crochet): Ch 1. In this round, we’ll alternate where we place our hdc. Hdc in the FLO of the current stitch. Hdc in the BLO of the next stitch. Repeat around. This creates a ridged texture.

The image appears to use something similar to Option 3 or a very dense sc/hdc combo. Let’s go with a consistent Half Double Crochet texture for simplicity and visual appeal.
Let’s refine Round 3 onwards for the texture shown:
Round 3: Ch 1. Hdc in each stitch around. Join with a sl st to the first hdc. Round 4 (Texture Round): Ch 1. Work hdc in the third loop (behind the back loop) of each hdc from the previous round. Join with a sl st. The third loop of an hdc is created when you make the hdc stitch. It’s the horizontal bar just below the front and back loops on the back of your work.
Repeat Round 3 and Round 4 until the bag body reaches your desired height before the flap begins. The bag in the image appears to have about 10-12 textured rows for the main body.

Part 3: The Flap (Work in Rows in Yellow)
Now we’ll create the top flap of the bag. The flap should be the width of your bag.
Row 1 (from the center back of your bag): Flatten your bag so the seams are on the sides. Locate the center back stitch. Ch 1. Work hdc across the top (the width of your bag, typically about 40-45 stitches, depending on your base size and stitch count). Turn. The image shows a flap that’s slightly narrower than the full bag opening, so adjust your stitch count here if you want it to taper slightly.
Row 2 – Row (until desired flap length): Ch 1, turn. Work hdc in each st across. Turn. Repeat this row until your flap reaches the desired length. The flap in the image looks to be about 8-10 rows deep.
Optional: Scalloped/Shaped Flap Edge: For a slightly rounded or decorative edge like some bags, you can modify the last row of the flap. For example, you could work a few sl sts, then sc, hdc, dc, hdc, sc, sl sts to create a gentle curve, or a simple single crochet border all around the flap. The image’s flap looks like a straight edge with simple hdc rows.
Final Flap Edge: Ch 1. Sc evenly around the entire edge of the flap (sides and bottom edge). This gives it a clean, finished look. FO, weave in ends.

Part 4: The Strap (Work in Rows in Yellow)
This is a simple, sturdy strap for your crossbody bag.
With Yellow Yarn:
Strap: Ch 150-180 (or your desired length for a crossbody strap). Sc in 2nd ch from hook and in each ch across. (149-179 sc) FO, leaving a long tail on each end for sewing.
Video tutorial
Assembly:
- Attach Strap: Lay your bag flat. Position each end of the strap securely to the side seams or corners of the bag’s main body, just below where the flap starts. Use your yarn needle to sew the strap ends firmly in place. Go through the stitches multiple times for durability.
- Add Closure (Optional): Sew a magnetic snap or button to the underside of the flap and the corresponding spot on the front of the bag body.
- Weave in all remaining ends: Take your time with this crucial step for a clean, professional finish.
Congratulations! You’ve just crocheted your own vibrant and beautifully textured Crossbody Bag! This bag is perfect for adding a pop of sunshine to your outfit and carrying your essentials in style.
Don’t forget to share your finished bag with me on social media! Tag me and use the hashtag #TexturedCrossbody. I can’t wait to see your sunny creations!
Happy Crocheting!