 by
by 
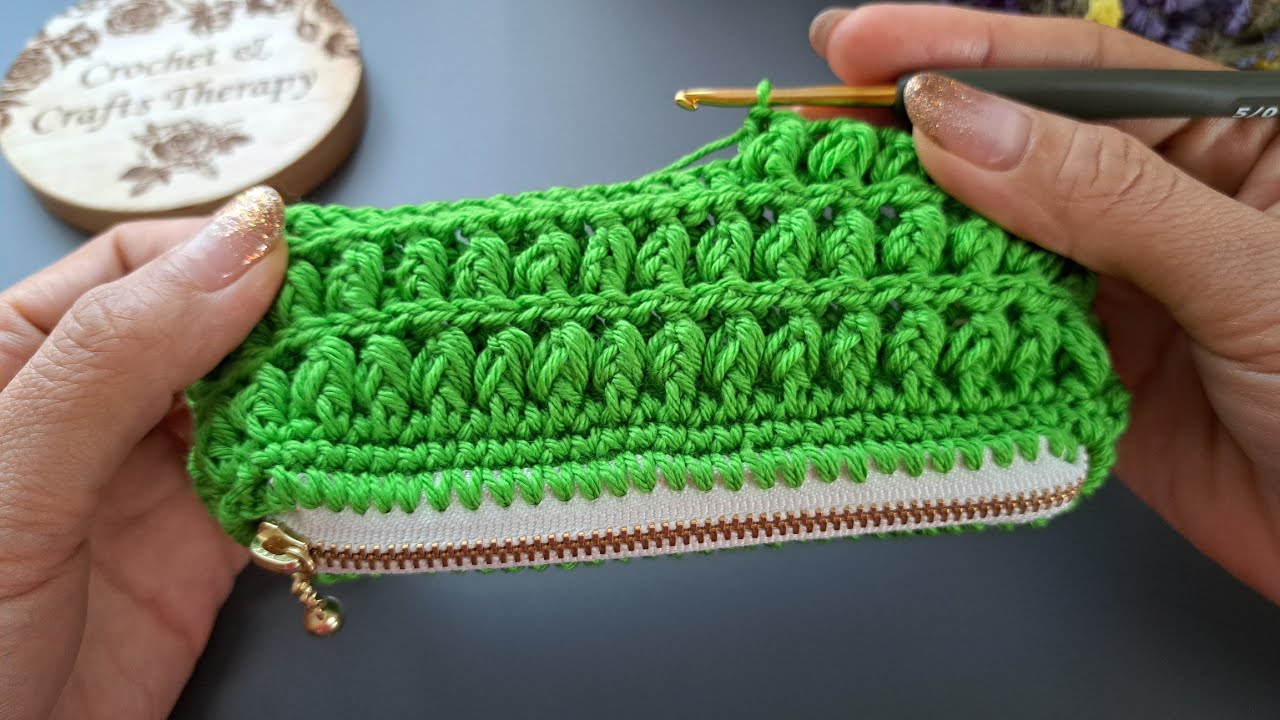
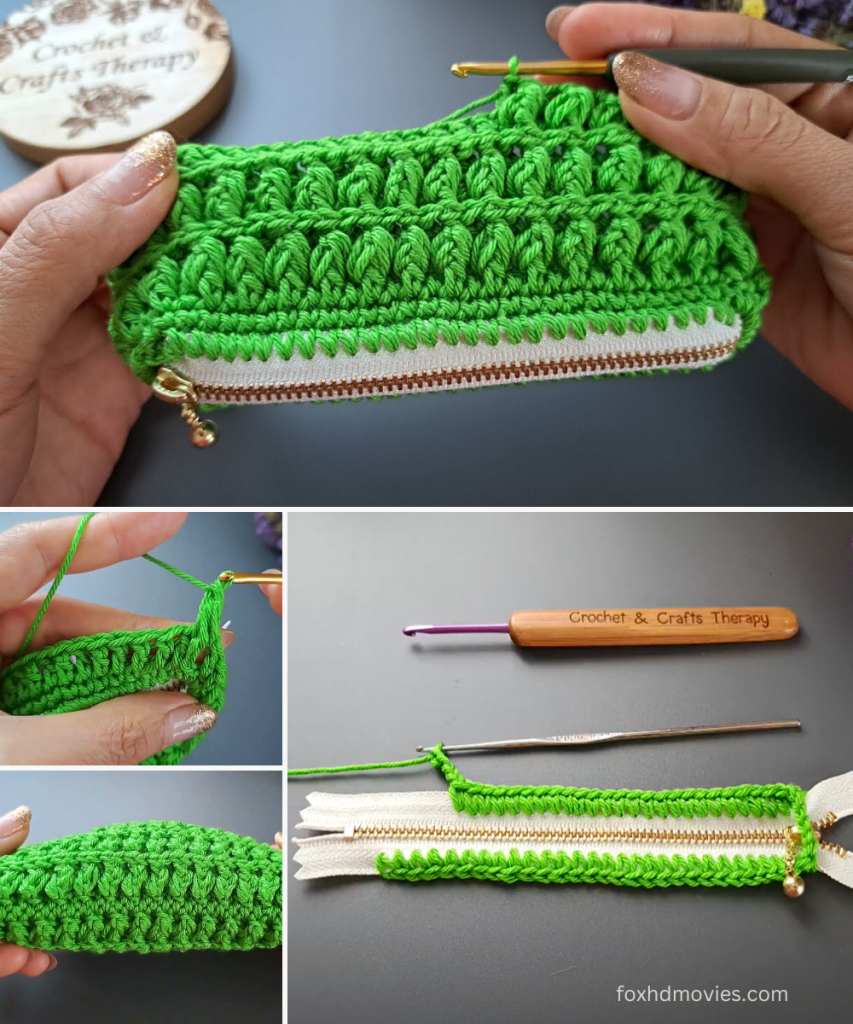
This pattern creates a compact and stylish pouch with a distinct textured stitch, ideal for small items, coins, or as a small clutch. The design incorporates the zipper during the initial rows.
Approximate Finished Size:
- Width: Approximately 7 inches (18 cm)
- Height: Approximately 4 inches (10 cm)
Materials:
- Yarn: Worsted Weight (Category 4) cotton or cotton blend yarn in a bright color (e.g., green as in the image).
- Approx. 80-100 yards (73-91 meters)
- Crochet Hook: 4.0mm (G/6) hook (or hook size to achieve a dense fabric with no gaps).
- Zipper: One (1) 7-inch (18 cm) nylon or polyester zipper (white as in the image, or a contrasting color).
- Yarn Needle: For weaving in ends.
- Scissors
- Stitch Markers (optional but recommended)
Gauge: Working in the textured stitch (explained below), approximately 16 stitches (based on dc count for a solid row) x 8 rows = 4 inches (10 cm).
- Gauge is crucial for the final dimensions and fit of the zipper. Adjust your hook size if necessary.
Abbreviations (US Terms):
- ch: chain
- sl st: slip stitch
- sc: single crochet
- dc: double crochet
- st(s): stitch(es)
- F.O.: Fasten Off
- Bobble Stitch (BO): [Yarn over, insert hook into stitch, yarn over, pull up a loop, yarn over, pull through 2 loops] 4 times in the same stitch (5 loops on hook). Yarn over, pull through all 5 loops on hook.
Pattern Instructions: The Pouch Body
This pouch is worked by first crocheting directly onto the zipper, then building up the sides in rows.
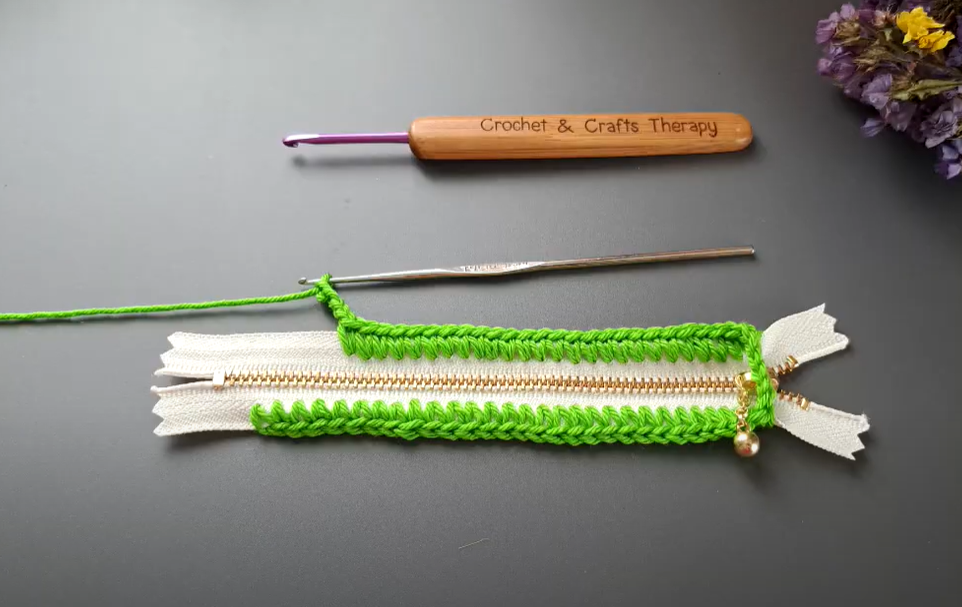
Part 1: Crocheting onto the Zipper
We will work sc stitches directly into the zipper tape.
- Prepare Zipper: Make sure your zipper is fully closed.
- Attach Yarn: Hold the zipper with the slider on the right (if right-handed). Insert your crochet hook into the zipper tape at the very end (where the zipper stops, not the pull tab side). Attach your yarn with a
sl st. - Row 1 (Side 1 of Zipper):
Ch 1(does not count as a stitch). Workscstitches evenly along the top edge of the zipper tape. Aim for approximately 45-50scstitches across the 7-inch length. Ensure your stitches are even and spaced out, working through the fabric of the zipper tape.- The number of stitches may vary slightly depending on your yarn and how tightly you crochet onto the zipper. Make a note of your final stitch count.
- Turn: Turn your work so you are now ready to work back along the
scstitches you just made.
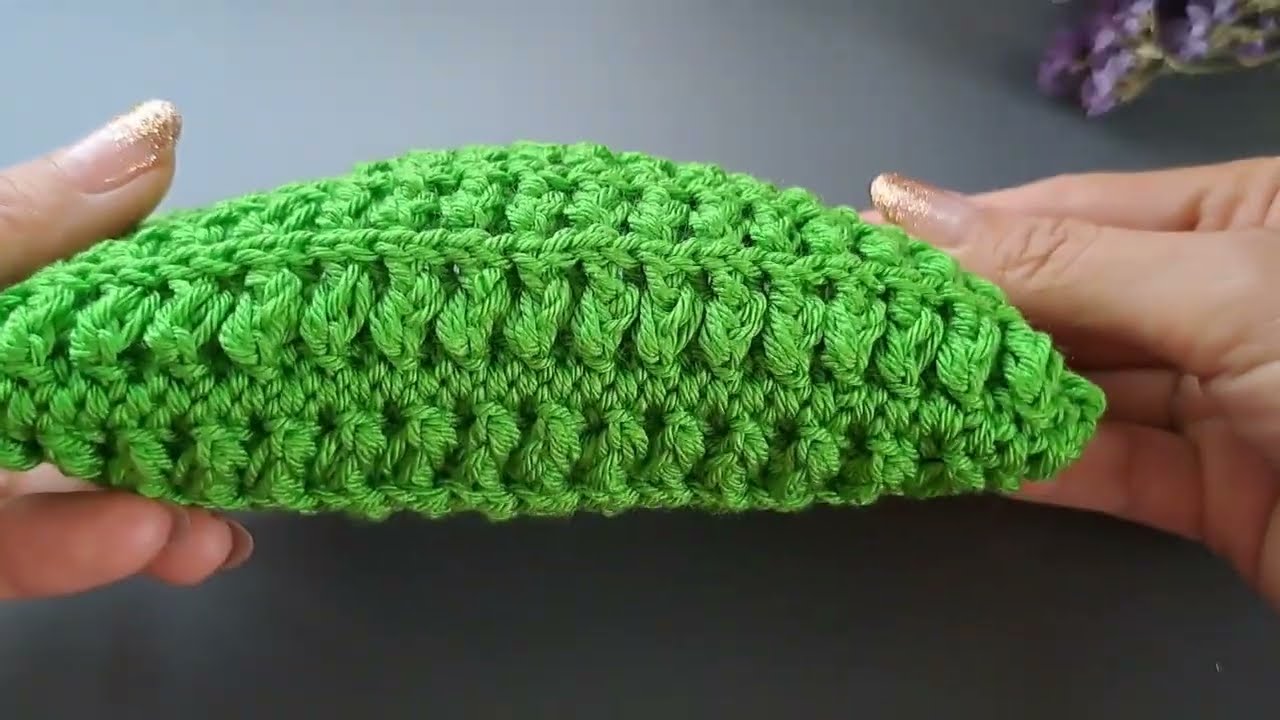
Part 2: Building the Pouch Sides with Textured Stitch
The textured stitch in the image looks like rows of Bobble Stitches separated by solid rows.
Important Note: The Bobble Stitch will “pop” to the wrong side of your work. Since we want the texture on the outside of the pouch, we’ll alternate the side we work the Bobble Stitch on.
Side 1 of Pouch (Working away from zipper):
Row 1 (Backbone for Texture – RS): Ch 2 (counts as first dc). Dc in each sc across. (Your sc count from Part 1). * Ch 1 (does not count as st). Turn.
Row 2 (Textured Row – WS): Sc in the first st. BO in the next st, sc in the next st. Repeat from * to * across the row. The last stitch should be an sc. * Ch 2 (counts as first dc). Turn. * Ensure the Bobbles pop out to the “right side” (which will be the outside) of the pouch.
Row 3 (Solid Row – RS): Dc in each st across. * Ch 1 (does not count as st). Turn.
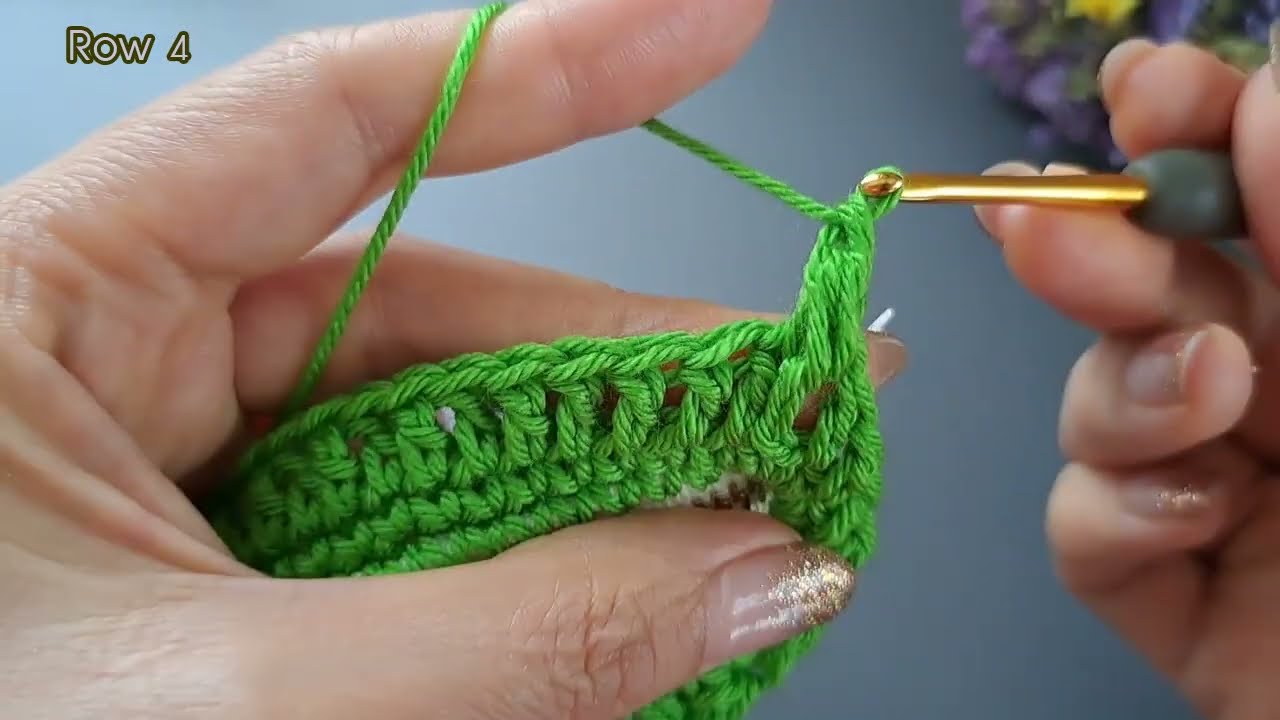
Row 4 (Textured Row – WS): Sc in the first st. BO in the next st, sc in the next st. Repeat from * to * across the row. The last stitch should be an sc. * Ch 2. Turn.
Repeat Rows 3 and 4 until you have approximately 4-5 Bobble stitch rows and 3-4 solid dc rows. The image shows about 5 textured rows on one side.
- End with a
dcrow (Row 3 repeat). - F.O., leaving a long tail for sewing.
Part 3: Crocheting onto the Other Side of the Zipper
Now, you will repeat Part 1 and Part 2 on the opposite side of the zipper.
- Re-attach Yarn: With the zipper still closed, turn the pouch so you are looking at the other side of the zipper tape. Attach your yarn to the zipper tape at the same end you started the first side (the side opposite the zipper pull).
- Row 1 (Side 2 of Zipper):
Ch 1. Work the same number ofscstitches evenly along this side of the zipper tape as you did on the first side (e.g., 45-50sc). - Turn: Turn your work.
- Repeat Part 2 (Building Pouch Sides): Work the exact same number of rows (alternating textured and solid rows) for this side of the pouch as you did for the first side. Make sure your Bobble Stitches pop to the same “outside” direction.
- F.O., leaving a long tail for sewing.
Part 4: Seaming the Pouch
- Fold and Align: Fold the two crocheted sides of the pouch together, matching up the rows and stitches perfectly.
- Seaming: Using your yarn needle and the long tails you left, sew the two sides together securely. You can use a mattress stitch for an invisible seam, or a whip stitch for a visible but neat seam.
- Sew along one short end.
- Sew along the long bottom edge.
- Sew along the other short end.
- Weave in Ends: Weave in all remaining loose ends neatly inside the pouch.
Video tutorial
Finishing Touches:
- Zipper Protection (Optional): If the zipper tape ends are exposed, you can sew small squares of fabric or crochet a tiny
screctangle and sew them over the ends for a cleaner finish. - Zipper Pull: The image shows a decorative zipper pull. You can attach a charm, a tassel, or a small bead to the zipper tab if desired.
Your textured crocheted pouch with a zipper is now complete!