 by
by 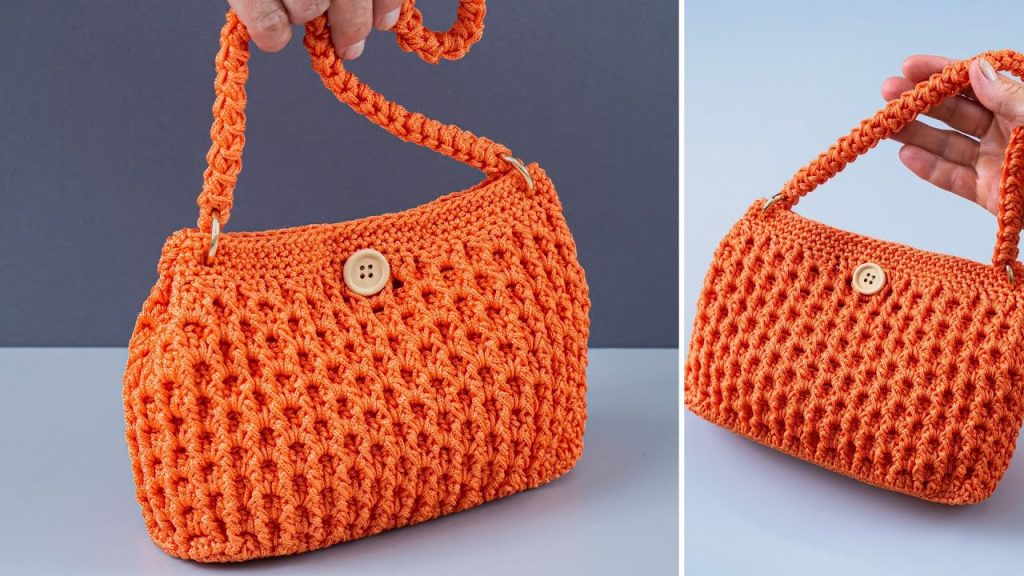
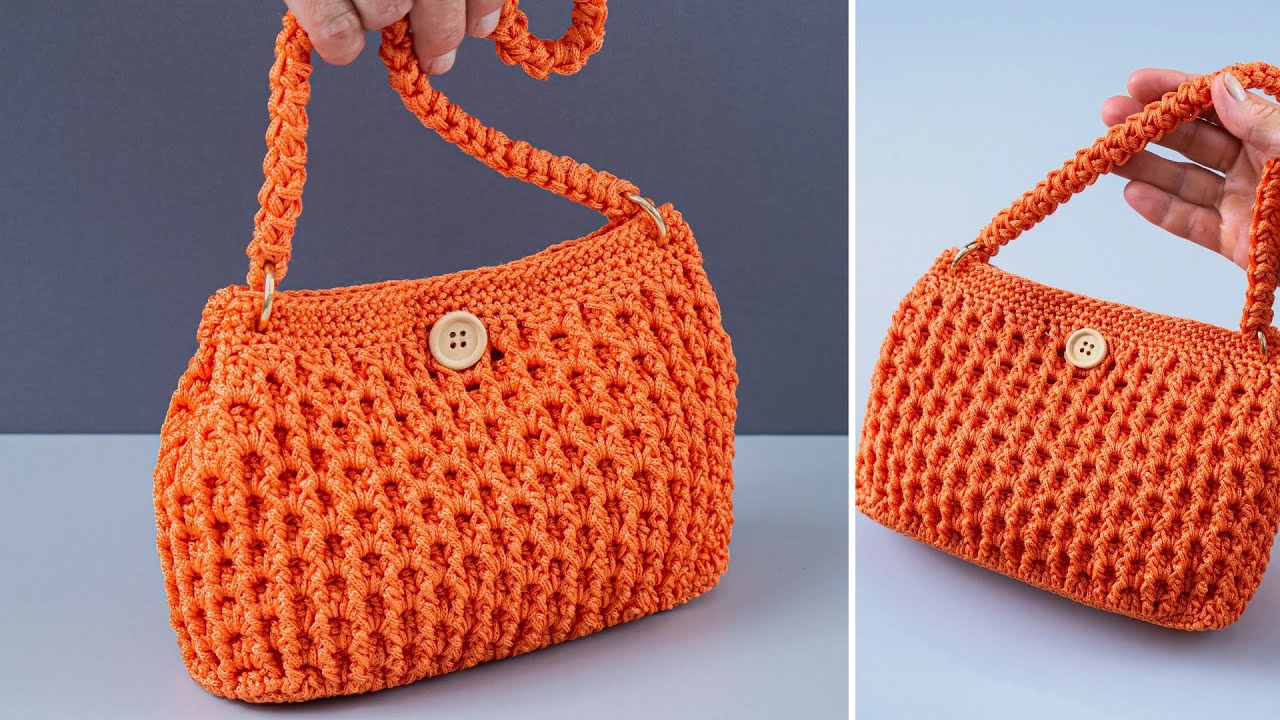
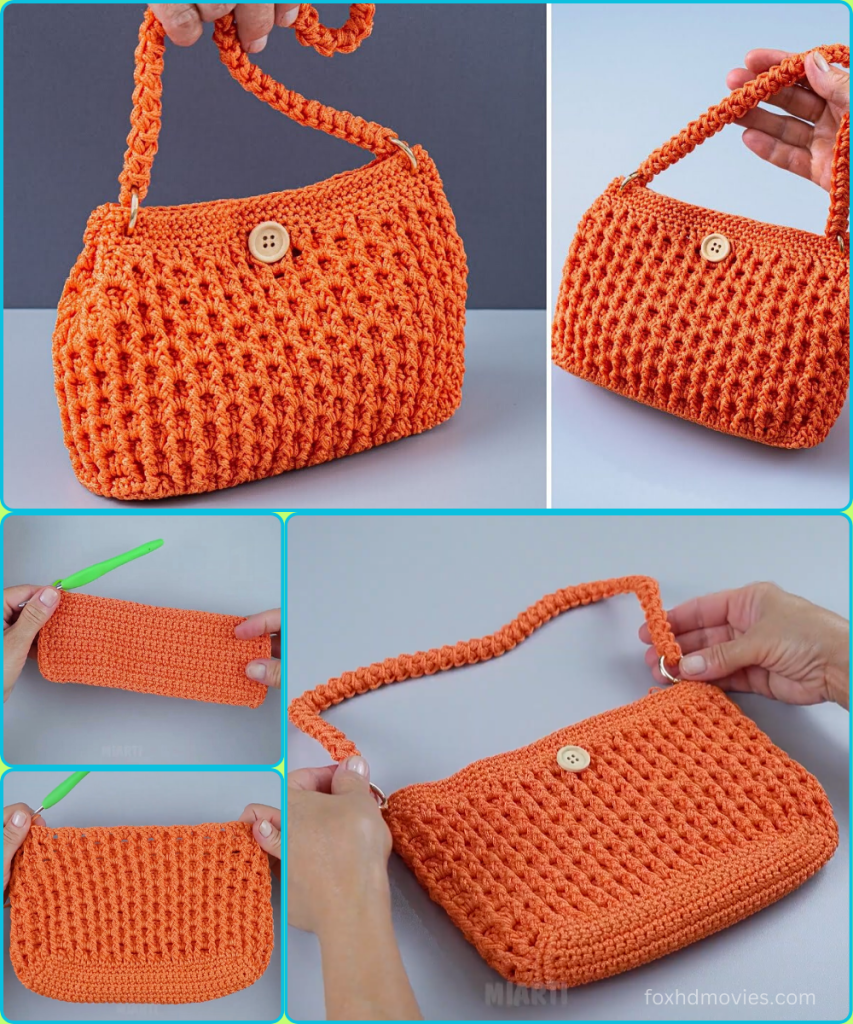
Looking for a crochet project that’s both stylish and fun? This handbag uses a wonderful “Puffy V-stitch” to create a bumpy, bobble-like texture that’s both charming and durable. The solid color lets the stitch work be the star, and the simple handle and button closure make it a perfect everyday bag.
This pattern is worked from the bottom up, starting with a sturdy rectangular base. The body is worked in the round, with the handle and closure added at the end.
What You’ll Need:
- Yarn: Worsted weight (Aran/10 ply) cotton yarn is ideal for this project, as it holds its shape beautifully. Macrame cord or a similar sturdy yarn would also work well.
- Color: A single color for the entire bag (the bright orange in the example). Approximately 200-250 yards.
- Crochet Hook: Size H/5.0mm (or hook size to achieve a tight, firm fabric).
- Yarn Needle: For weaving in ends.
- Scissors
- Button: A wooden or decorative button for the closure.
Abbreviations Used:
- ch: chain
- sl st: slip stitch
- sc: single crochet
- dc: double crochet
- puff st: puff stitch
- V-st: V-stitch: (dc, ch 1, dc) in the same stitch or space
- Puffy V-st: Puffy V-stitch: (puff st, ch 1, puff st) in the same space
- st(s): stitch(es)
- rnd: round
- FO: fasten off
- [ ]: repeat instructions in brackets
- ( ): stitch count at the end of the round
Special Stitch: Puff Stitch
- Puff st: [Yo, insert hook into stitch, yo, pull up a loop] 3 times in the same stitch. (You should have 7 loops on your hook). Yo, pull through all 7 loops on hook. Ch 1 to secure.
Gauge:
Your finished base should be approximately 22 cm x 8 cm (8.5 inches x 3 inches). This will ensure your bag has the correct dimensions.
Part 1: The Base
We will create a rectangular base by working in rows and then in the round around the perimeter.
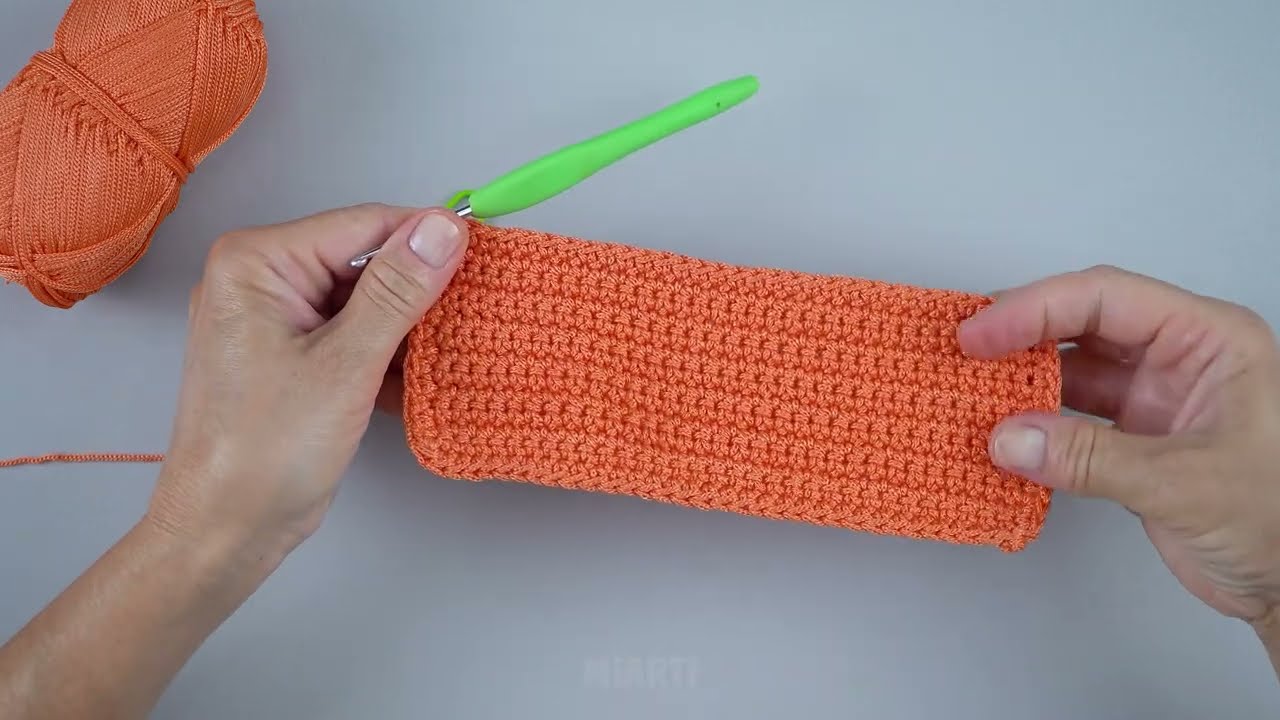
- Ch 21.
- Row 1: Sc in the second ch from the hook and in each ch across. (20 sc)
- Row 2: Ch 1, turn. Sc in each st across. (20 sc)
- Repeat Row 2 for a total of 8 rows, or until your rectangle measures approximately 8 cm (3 inches) wide.
- Now, we will work in the round around the perimeter of the rectangle.
- Without turning, ch 1. Sc in each st along the short end, 3 sc in the corner. Sc in each st along the long edge, 3 sc in the corner. Repeat for the remaining two sides. Join with a sl st to the first sc. (Approx. 56 sc total)
Part 2: The Body (Puffy V-Stitch)
We will now build the sides of the bag using the two-round Puffy V-stitch pattern.
- Rnd 1 (V-Stitch): Ch 3 (counts as 1st dc). Dc in the same st. [Ch 1, skip 2 sts, V-st in the next st] around. Join with a sl st to the top of the initial ch 3.
- Rnd 2 (Puff Stitch): Ch 3 (counts as 1st dc). Dc in the same st. [Puffy V-st in the V-st’s ch-1 sp, ch 1, skip 2 sts] around. Join with a sl st to the top of the initial ch 3.
- Note: You will be working your Puffy V-stitches into the center of the previous V-stitches’ ch-1 spaces.
- Repeat Rnd 1 and Rnd 2 until your bag reaches the desired height (about 10-12 rounds total), ending with a Rnd 1.
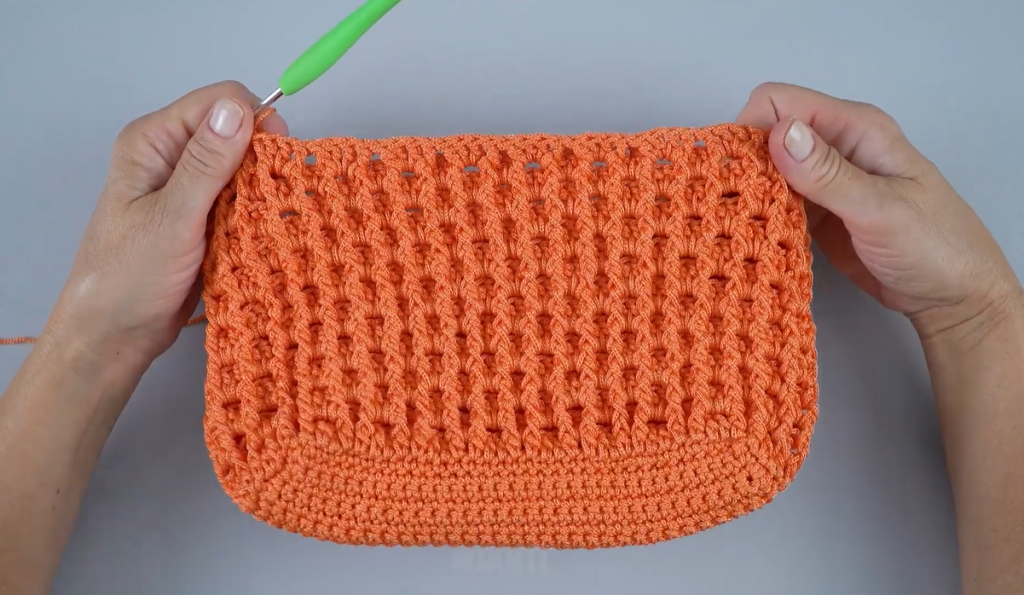
Part 3: The Top Edge & Handles
We will create a sturdy top edge and the two handles.
- Top Edge: Ch 1, sc in each st and ch-1 sp around. Join with a sl st to the first sc.
- Rnd 2: Ch 1, sc in each st around. Join with a sl st to the first sc.
- Rnd 3 (Handles): You will now create the loops for the handles. Ch 1, sc in the first 8 stitches. Ch 20 (or to your desired handle length). Skip the next 12 stitches. Sc in the next 16 stitches (this is the back of the bag). Ch 20. Skip the last 12 stitches. Sl st into the first sc.
- Rnd 4 (Securing Handles): Ch 1, sc in each of the 8 sc. Sc in each of the 20 chains. Sc in the next 16 sc. Sc in each of the next 20 chains. Join with a sl st to the first sc.
- FO and weave in all ends.
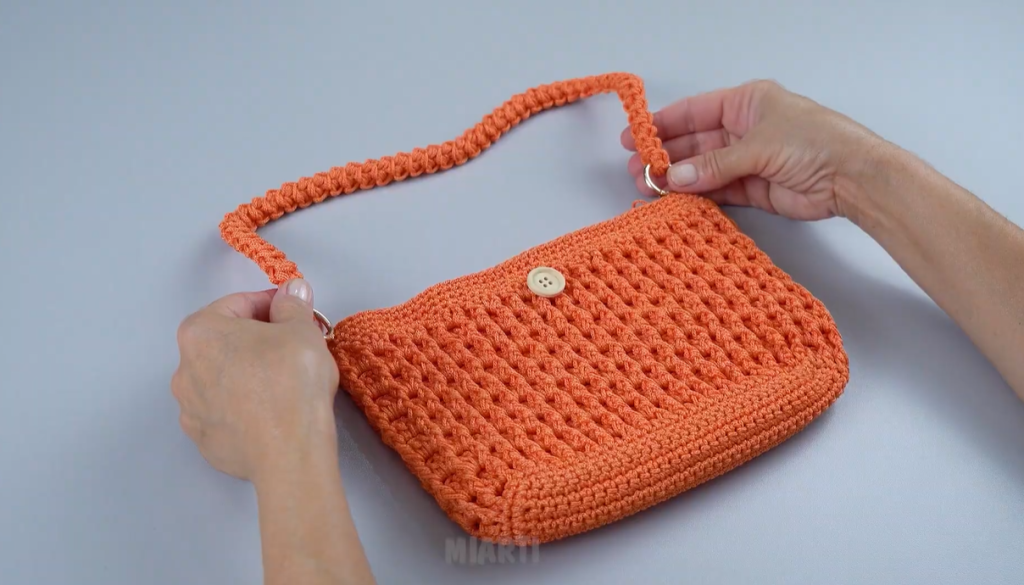
Part 4: The Closure
- Sew your button onto the front of the bag, centered horizontally, about 2 inches down from the top edge.
- On the corresponding spot on the back of the bag, create a small chain loop that will fit over your button.
- Attach yarn to the back of the bag with a sl st. Ch 5 (or enough to fit your button). Sl st back into the same stitch.
- FO and weave in ends.
Video tutorial
Finishing Touches:
- Weave in all remaining ends securely.
- Blocking (optional): Lightly steam or spritz your bag with water, then stuff it with a towel and shape it as it air dries.
You’ve now created a beautiful, one-of-a-kind bag with an amazing texture. Enjoy your new accessory!