 by
by 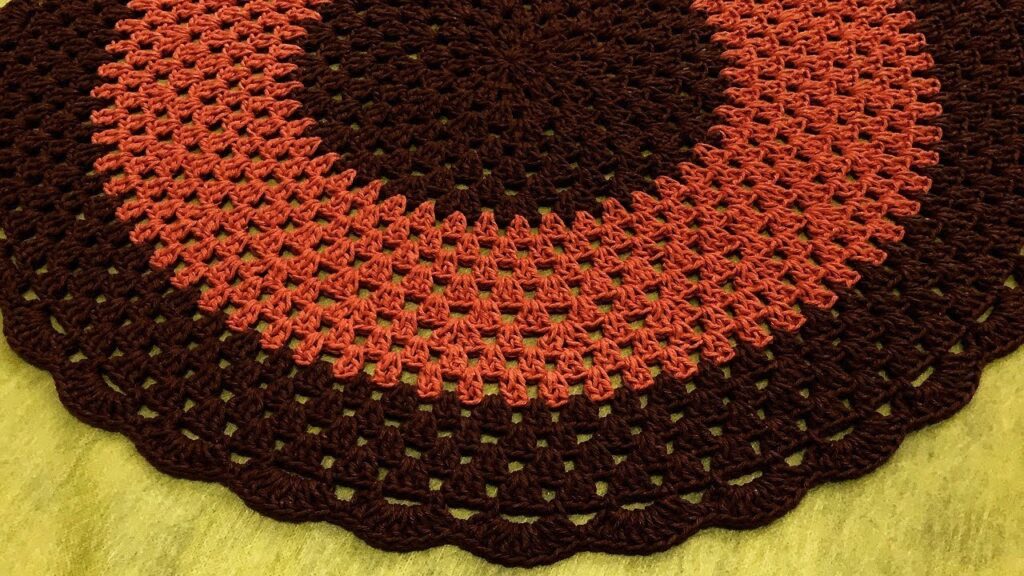
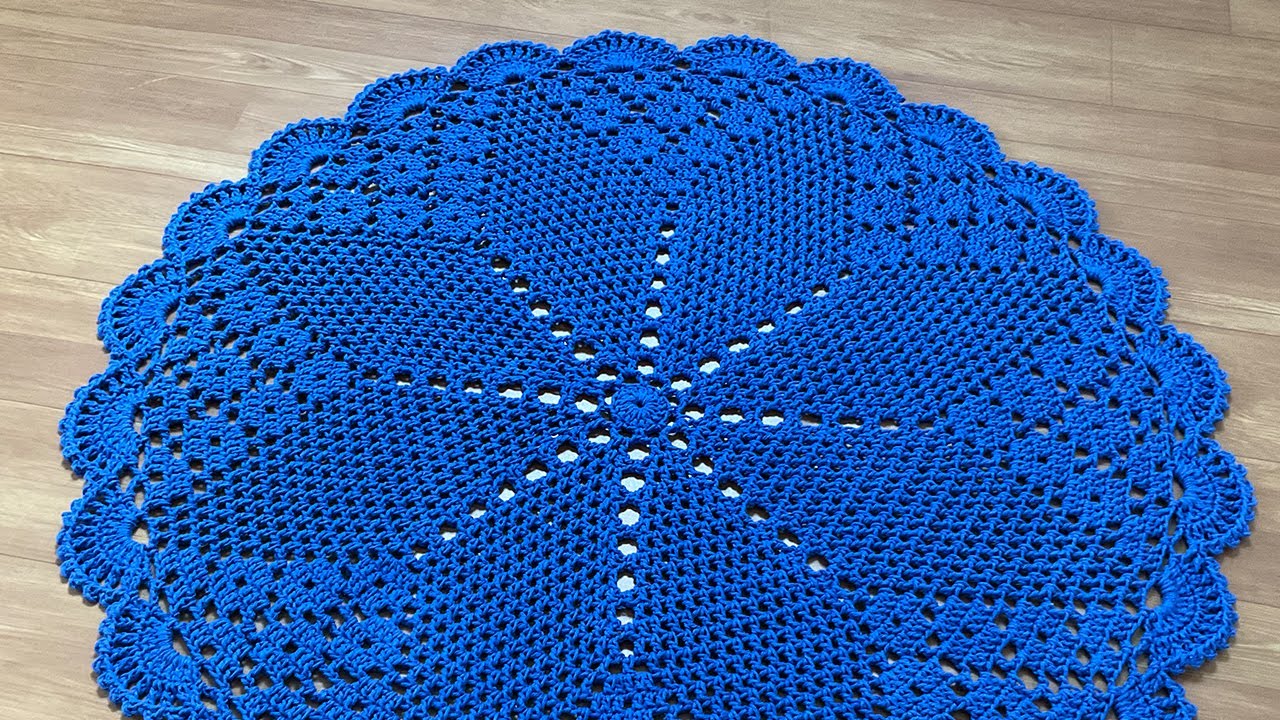
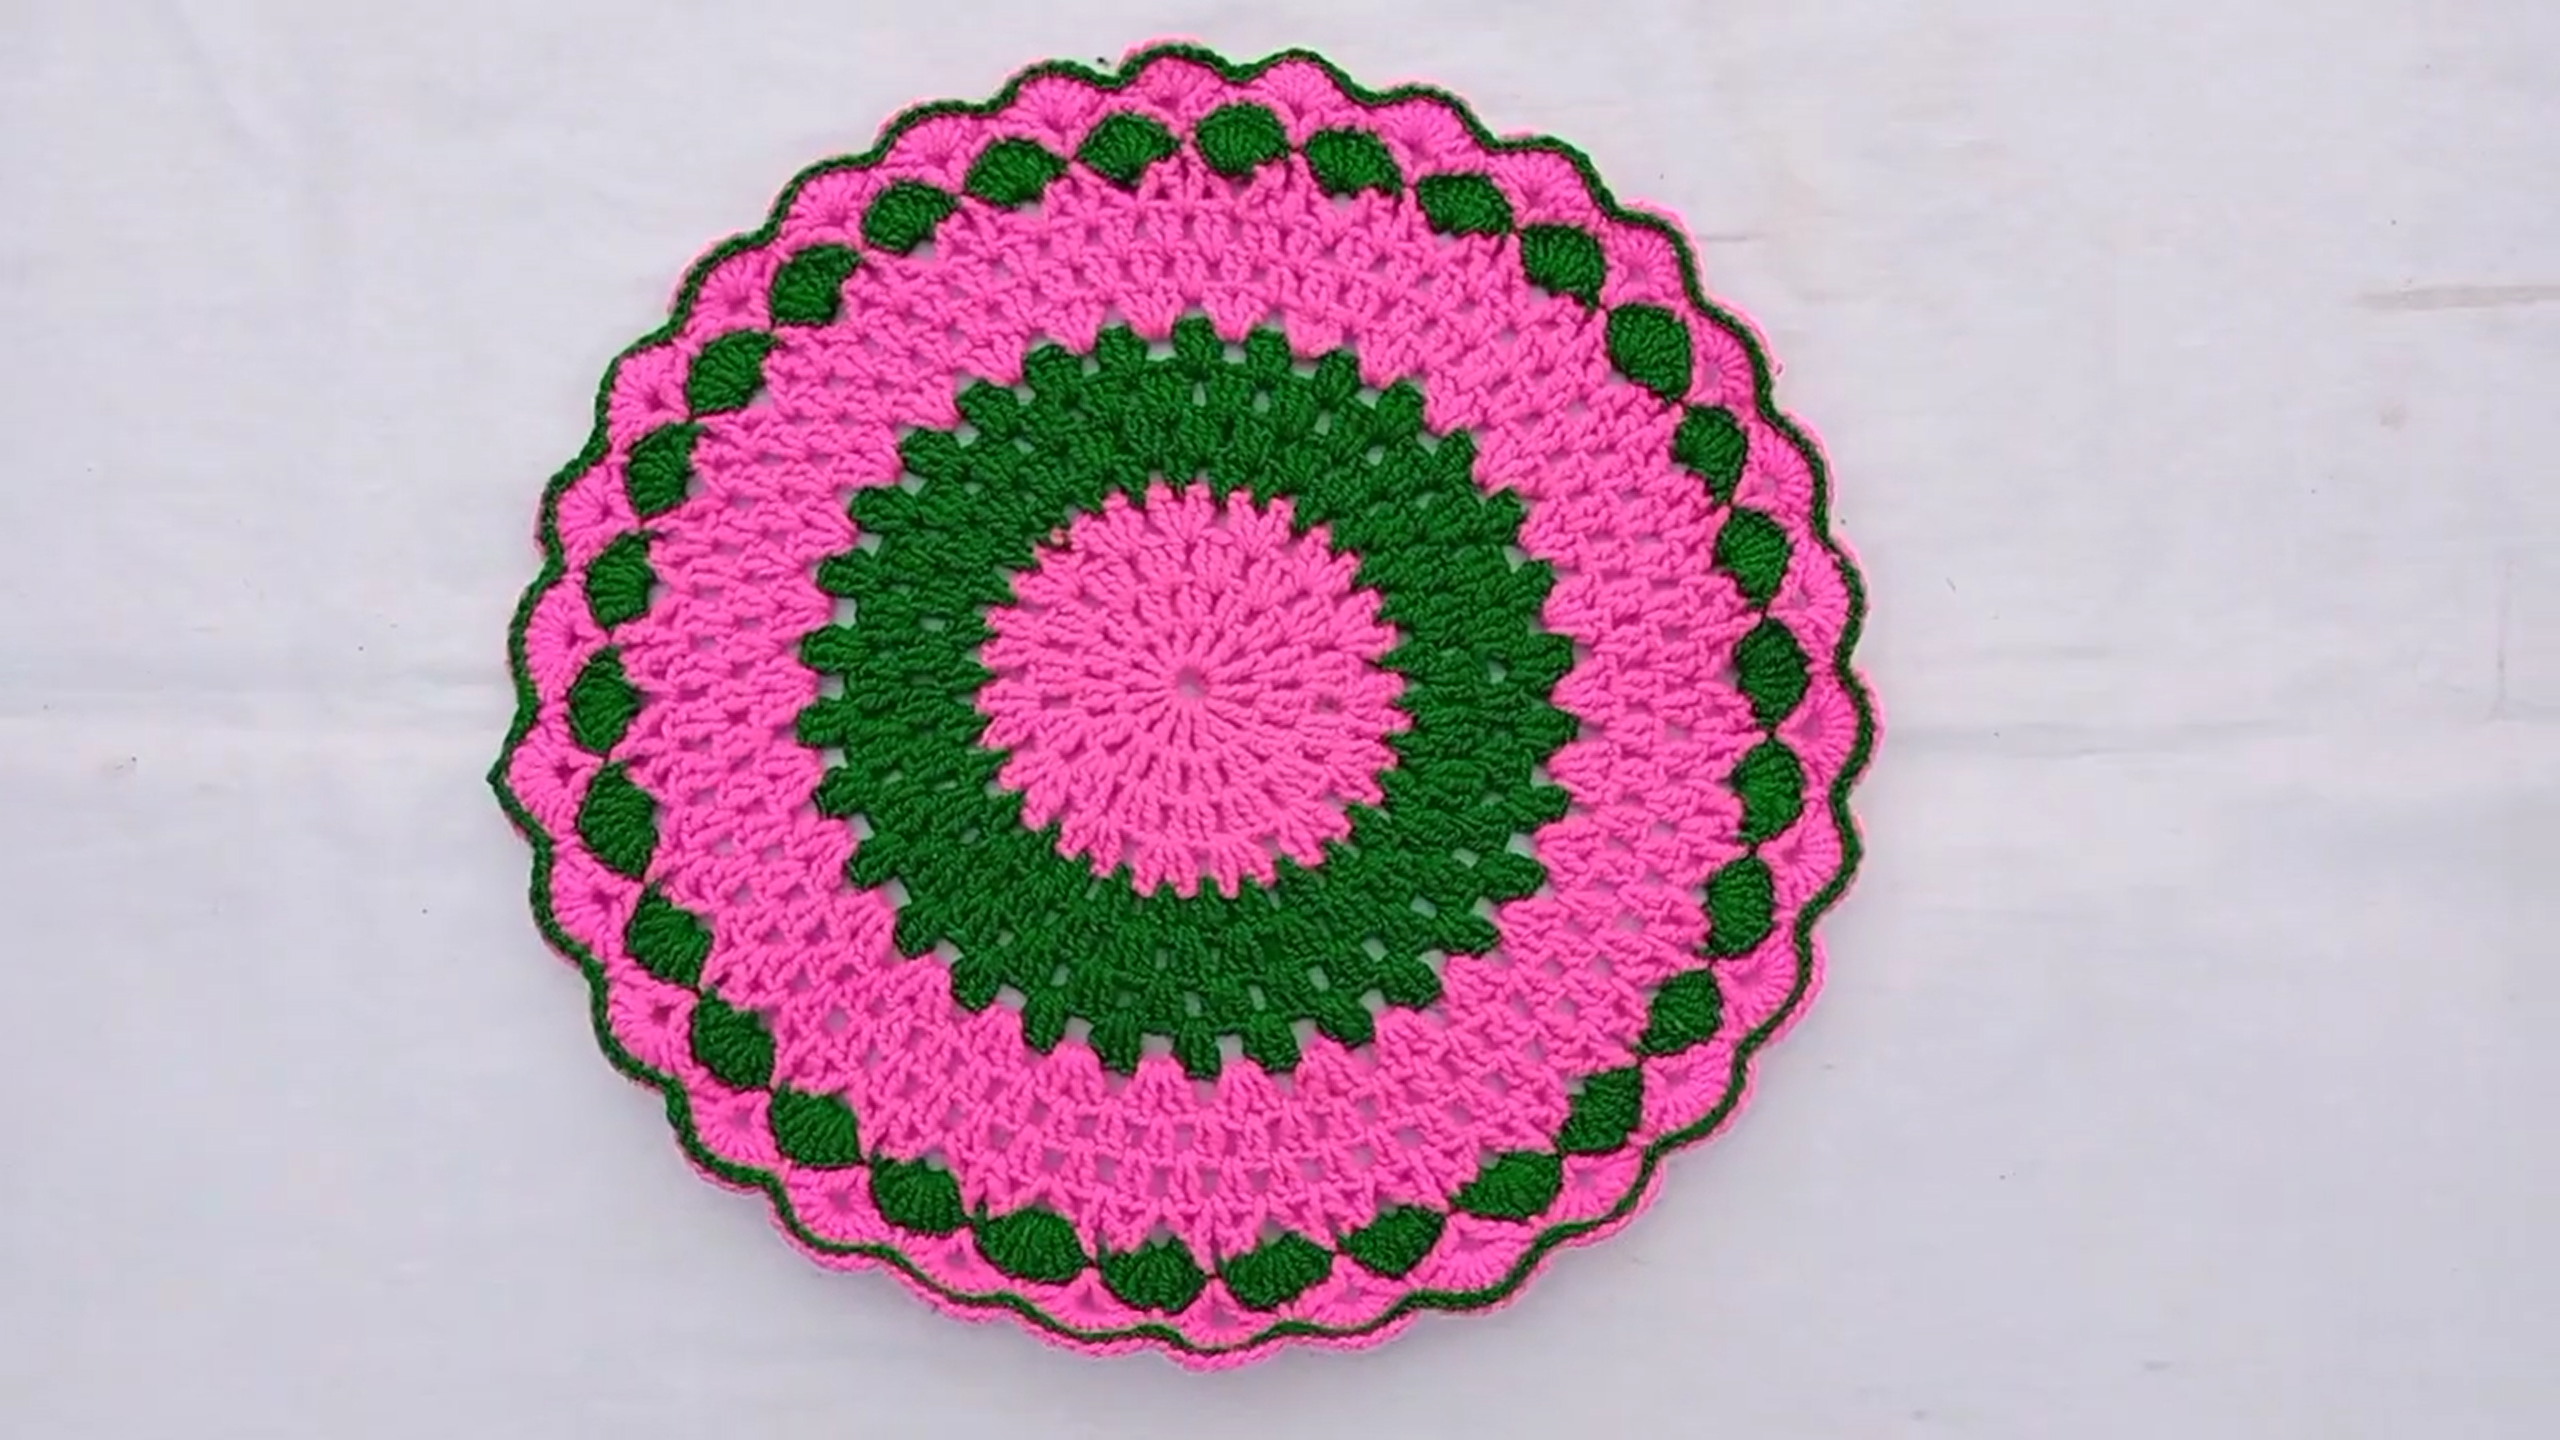
There’s something so comforting about a handmade rug, and this classic design, often called a “granny stripe” or “shell stitch” round rug, is both timeless and satisfying to create. Using simple stitch repeats and color changes, you can whip up a beautiful accent piece for any room.
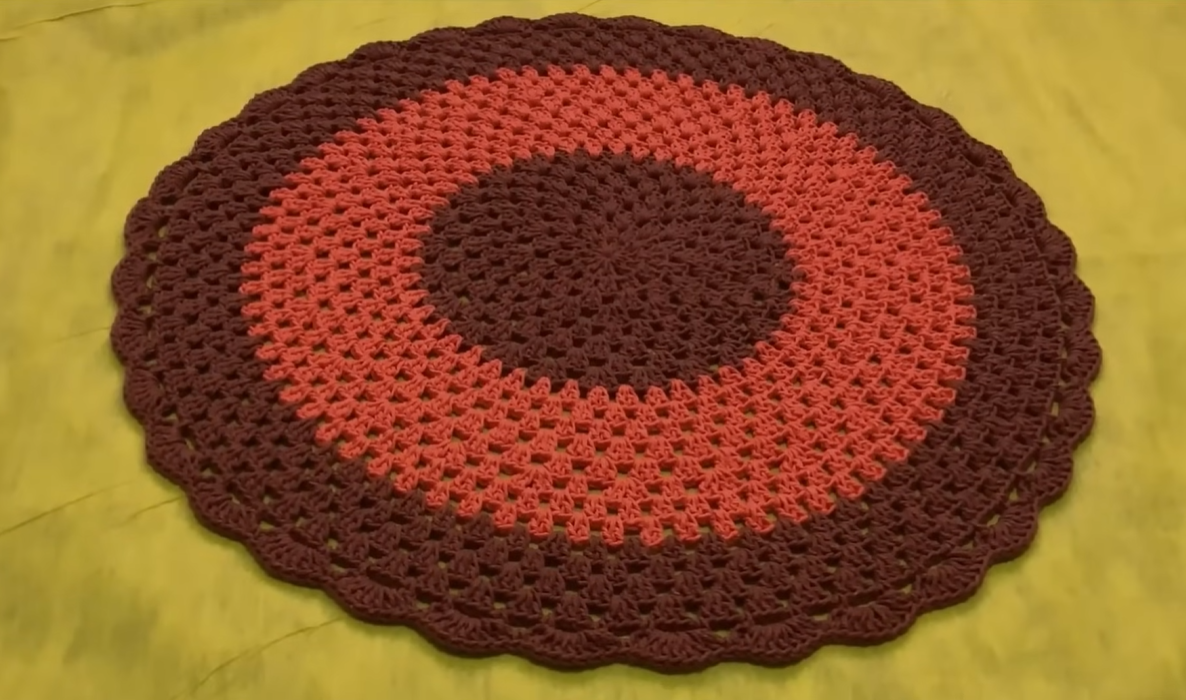
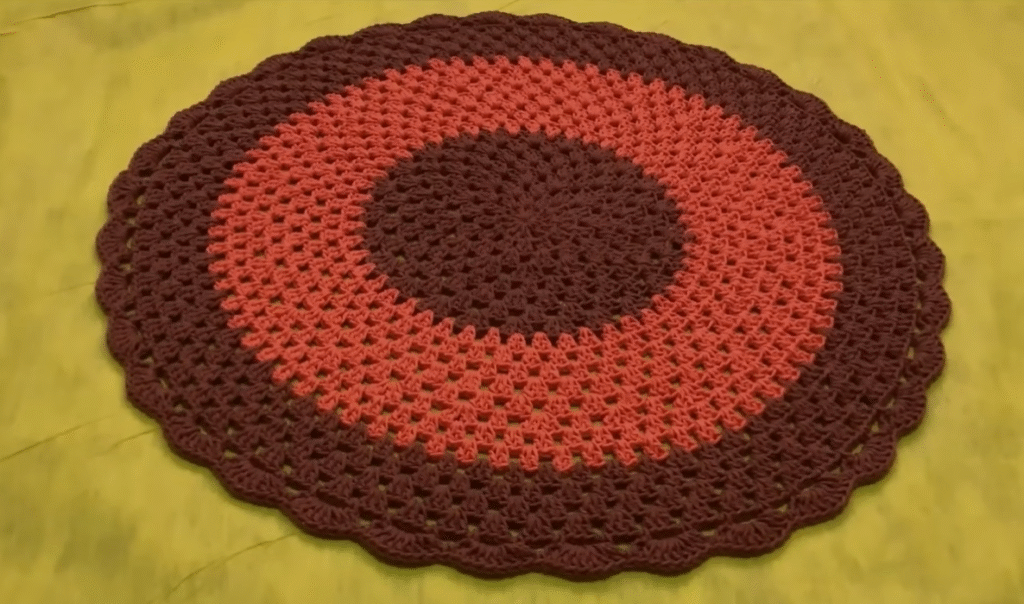
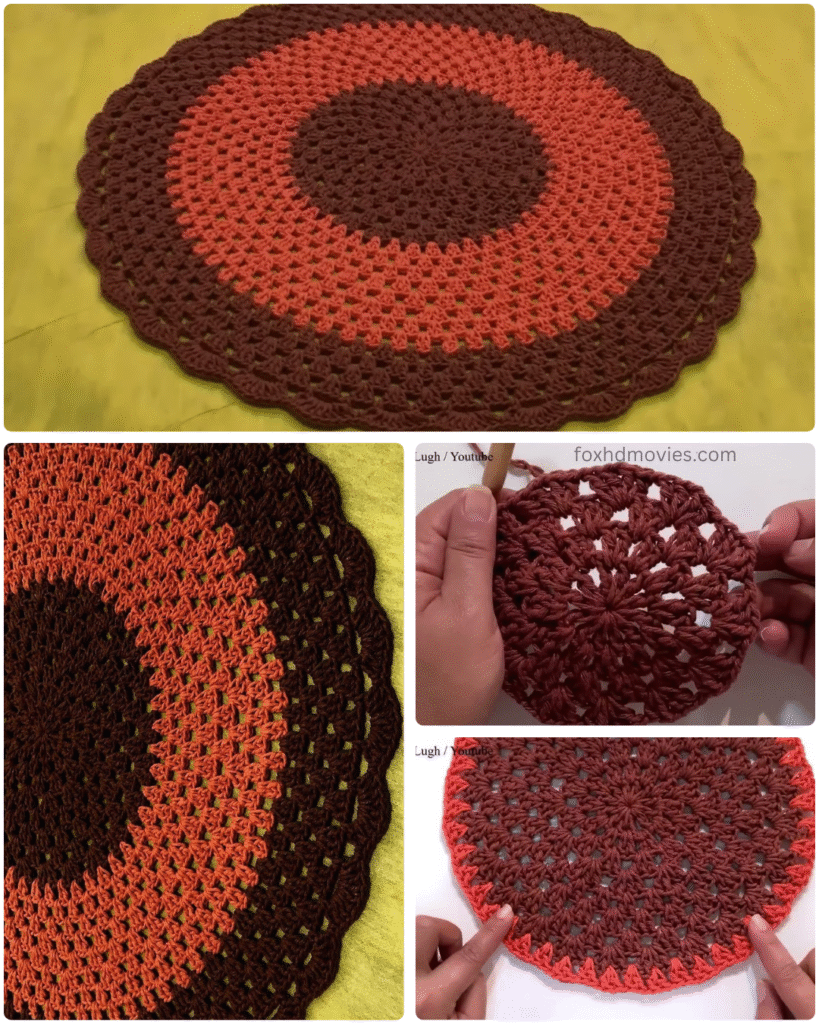
The rug in your picture showcases the beauty of this pattern with its distinct color blocking and lacy edge. It’s perfect for using up yarn scraps or for creating a bold statement with your favorite shades.
What You’ll Need:
- Yarn:
- Bulky (Category 5) or Super Bulky (Category 6) yarn is ideal for a substantial rug. Cotton or an acrylic blend would work well. You’ll need at least two contrasting colors, as seen in your example (e.g., dark brown and rust/orange).
- Yardage will depend on your desired size and yarn weight. For a rug of this size, estimate 800-1500+ yards.
- Crochet Hook:
- Choose a hook size appropriate for your bulky yarn, typically 9.0mm (M/N) to 15.0mm (P/Q). Check your yarn label for the best recommendation.
- Scissors
- Large Eye Yarn Needle (for weaving in ends)
Abbreviations (US Terms):
- ch: chain
- sl st: slip stitch
- dc: double crochet
- sp: space
- st(s): stitch(es)
- yo: yarn over
- MR: magic ring (or magic circle)
- FO: fasten off
Let’s Get Started!
Difficulty: Easy (perfect for advanced beginners comfortable with double crochet)
Notes:
- The beginning chains usually do NOT count as a stitch unless specified.
- Join each round with a slip stitch to the top of the first dc (not the starting chain) unless directed otherwise.
- Work your stitches with firm tension to create a dense fabric that will hold its shape as a rug.
- Color Changes: Change colors on the last yarn over of the slip stitch join at the end of the round or at the beginning of the new round as directed.

Pattern for a Granny Stripe Round Rug:
(Start with your main color, e.g., Dark Brown)
Round 1: (Center)
- Start with a Magic Ring (MR).
- Ch 2 (does not count as st). Work 12 dc into the MR.
- Pull MR tight to close. Sl st to the top of the first dc to join. (12 dc)
Round 2: (First Granny Round – increasing evenly)
- Ch 2. In the same st as join, work (3 dc).
- Ch 1, skip 2 sts, (3 dc) in next st. Repeat from * to * around. You will create 4 clusters of 3 dc separated by ch 1 spaces.
- Ch 1, sl st to the top of the first dc to join. (4 “granny clusters”)
Round 3:
- Ch 2. (3 dc) in the first ch-1 space.
- Ch 1, (3 dc) in the next ch-1 space. Repeat from * to * around.
- Ch 1, sl st to the top of the first dc to join. (Each round will automatically increase by 4 clusters if you work 3 dc into each ch-1 space.)
Round 4:
- Ch 2. (3 dc) in the first ch-1 space.
- Ch 1, (3 dc) in the next ch-1 space. Repeat from * to * around.
- Ch 1, sl st to the top of the first dc to join.
(Change to your contrasting color, e.g., Rust/Orange)
Round 5: (New Color)
- Ch 2. (3 dc) in the first ch-1 space.
- Ch 1, (3 dc) in the next ch-1 space. Repeat from * to * around.
- Ch 1, sl st to the top of the first dc to join.

Continue in this pattern, changing colors as desired:
For each subsequent round:
- Ch 2.
- Work (3 dc) into each ch-1 space from the previous round.
- Ch 1 after each (3 dc) cluster.
- Sl st to the top of the first dc to join.
How to make it bigger and maintain flatness:
The beauty of this “granny stripe in the round” pattern is that it naturally increases itself to maintain a flat circle! By working “3 dc, ch 1” in every ch-1 space around, your circle will expand evenly.
To achieve the look of your rug:
- Color Blocks: Work several rounds in one color before changing to the next. The image shows approximately 3 rounds of the dark brown, then about 4-5 rounds of the rust/orange, and then back to brown for the outer rounds.
- Scalloped Edge (Optional Final Round): The very outer edge of your rug has a lovely scalloped finish. You can add this by incorporating a shell stitch or fan stitch in the final round.
Example of a Scalloped Edge Round (using your last color):
- Ch 1 (does not count as st).
- In the first ch-1 space, work (sc, ch 1, 5 dc, ch 1, sc). This creates a mini-shell.
- Skip the next (3 dc) cluster.
- In the next ch-1 space, work (sc, ch 1, 5 dc, ch 1, sc).
- Repeat steps 3-4 around the entire rug.
- Sl st to the first sc to join.
- FO.
Alternative Scallop: Some patterns just use (5-7 dc) in alternating ch-1 spaces, skipping the middle cluster. Experiment to see what look you prefer!
Video tutorial
Finishing Up!
- Fasten Off (FO): Once your rug reaches the desired size, cut your yarn, leaving a long tail. Yarn over and pull the tail completely through the last loop on your hook to secure.
- Weave in all ends: Use your large eye yarn needle to neatly weave in all starting and ending tails. This is particularly important for rugs, as they see a lot of wear! Make sure they are very securely hidden to prevent unraveling.
- Blocking (Recommended): Lay your finished rug flat. You can gently stretch and shape it into a perfect circle. For acrylic, a light steam (don’t touch the iron directly to the yarn!) can help relax the fibers. For cotton, mist with water and let dry flat. This step helps define the stitches and ensures your rug lies perfectly flat.
This simple yet effective pattern creates a beautiful, durable rug that will add warmth and style to any room. Enjoy your new handmade decor!