by
by 
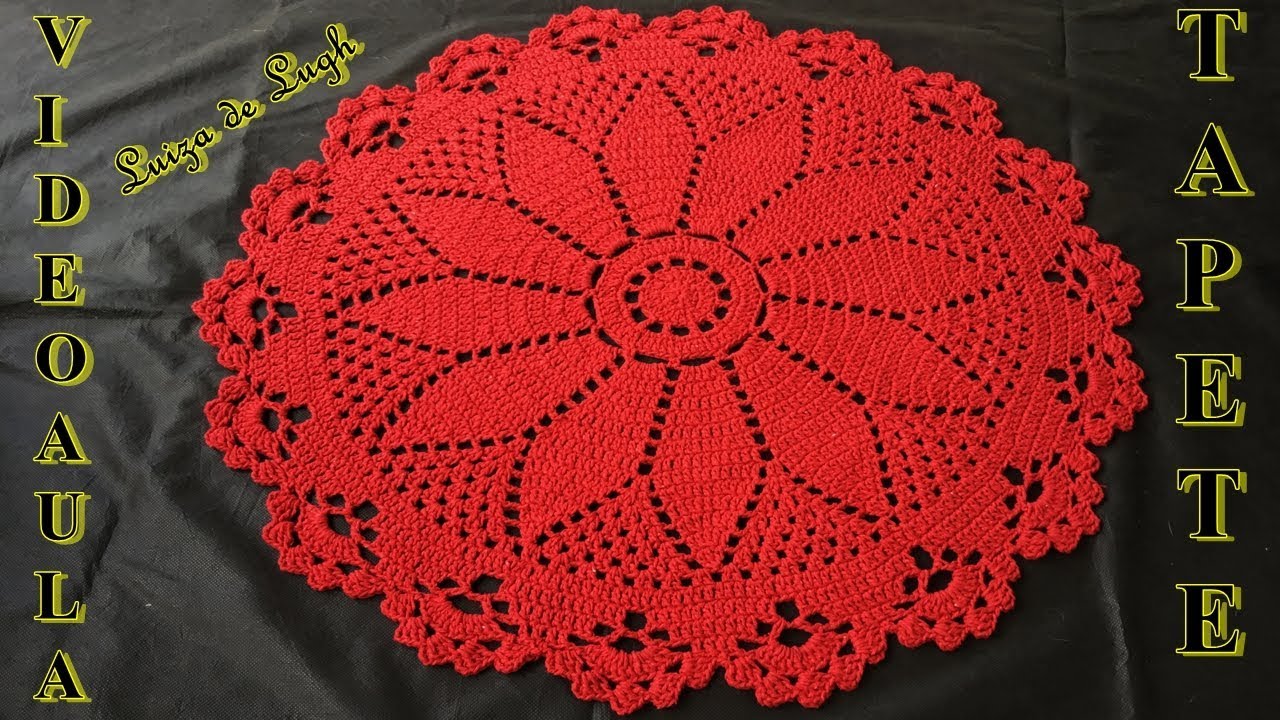
Bring a touch of botanical elegance into your home with this beautiful floral medallion crochet rug! Featuring a striking central flower design and delicate openwork, this rug is more than just decor – it’s a piece of art that you’ll be proud to display.
The rug in your image showcases intricate stitch work, creating a textured and visually captivating piece. While the exact pattern from the image (attributed to “Luiza de Lugh”) might have specific nuances, this blog post will guide you through creating a similar large, round, floral-inspired rug using common crochet techniques.
What You’ll Need:
- Yarn:
- Bulky (Category 5) or Super Bulky (Category 6) yarn is highly recommended for a rug with good body and drape. Cotton yarn or a cotton blend is excellent for durability and washability. You’ll likely need a significant amount for a large rug (e.g., 800-1500+ yards).
- Tip: If you want to use worsted weight yarn (Category 4), you can hold two strands together to achieve a bulkier effect, but your yardage will double.
- Crochet Hook:
- Choose a hook size that is appropriate for your yarn weight. For bulky yarn, a 9.0mm (M/N) to 15.0mm (P/Q) hook is common. Always check your yarn label for the best recommendation.
- Scissors
- Large Eye Yarn Needle (for weaving in ends)
Abbreviations (US Terms):
- ch: chain
- sl st: slip stitch
- sc: single crochet
- hdc: half double crochet
- dc: double crochet
- tr: treble crochet (yarn over 2 times)
- dtr: double treble crochet (yarn over 3 times)
- st(s): stitch(es)
- sp: space
- yo: yarn over
- MR: magic ring (or magic circle)
- FO: fasten off
Let’s Get Started!
Difficulty: Intermediate (requires familiarity with basic stitches, taller stitches, and working into spaces and stitches creatively).
Notes:
- The beginning chains usually do NOT count as a stitch unless specified.
- Join each round with a slip stitch to the first stitch of the round (not the starting chain) unless directed otherwise.
- Maintain a consistent tension throughout to ensure your rug lies flat and has an even fabric. If it ruffles, reduce increases; if it cups, add more increases or use a larger hook.
Pattern for a Floral Medallion Round Rug:
(We’ll aim for a design with 12 “petals” or segments, similar to the image.)
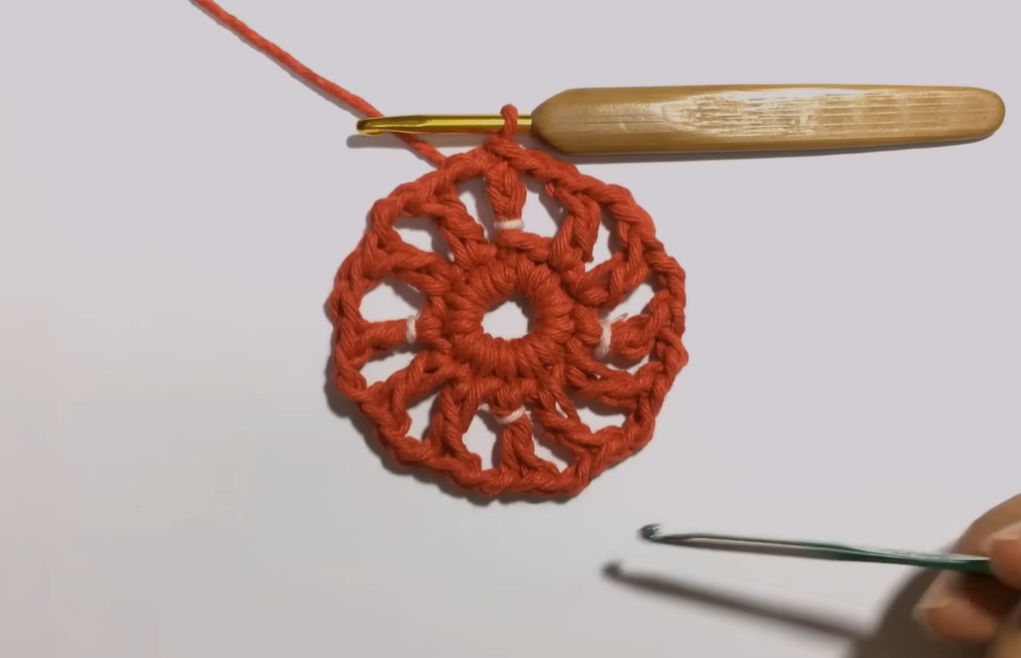
Round 1: (Center Ring)
- Start with a Magic Ring (MR).
- Ch 2 (does not count as st). Work 12 dc into the MR.
- Pull MR tight to close. Sl st to the top of the first dc to join. (12 dc)
Round 2: (Creating Foundation for Petals)
- Ch 3 (counts as 1 dc). Work 1 dc in the same st.
- Ch 1, skip 1 st, 2 dc in next st. Repeat from * to * around.
- Ch 1, sl st to the top of the initial Ch 3 to join. (12 “V” sets of 2 dc with ch-1 spaces in between)
Round 3: (Building the Petals)
- Sl st into the ch-1 space. Ch 2 (does not count as st).
- In the same ch-1 space, work (2 dc, ch 1, 2 dc). This forms the base of a “petal.”
- In the next ch-1 space, work (2 dc, ch 1, 2 dc). Repeat from * to * around.
- Sl st to the top of the first dc to join. (12 petal bases)

Round 4: (Defining Petals and Openwork)
- Ch 3 (counts as 1 dc). Work 1 dc in the next dc.
- In the ch-1 space of the petal, work (2 dc, ch 1, 2 dc).
- Work 1 dc in the next 2 dc.
- Ch 2, skip the 2 dc before the next petal. 1 dc in the next 2 dc (of the next petal base).
- In the ch-1 space of the petal, work (2 dc, ch 1, 2 dc).
- Work 1 dc in the next 2 dc.
- Repeat steps 4-6 around.
- Ch 2, sl st to the top of the initial Ch 3 to join.
Round 5: (Continuing Petal Growth and Openwork)
- Sl st into the next dc and into the first ch-1 space of the petal.
- Ch 2. In the same ch-1 space, work (3 dc, ch 1, 3 dc).
- Ch 3, skip to the ch-1 space of the next petal. In that ch-1 space, work (3 dc, ch 1, 3 dc).
- Repeat from * to * around.
- Ch 3, sl st to the top of the first dc to join. (12 larger petal tops with ch-3 spaces between)
Round 6: (Transition to Solid Background)
- Ch 2. Work 1 dc in the next 2 dc.
- In the ch-1 space of the petal, work 3 dc.
- Work 1 dc in the next 3 dc.
- Work 3 dc into the ch-3 space.
- Work 1 dc in the next 3 dc (of the next petal).
- In the ch-1 space of the petal, work 3 dc.
- Work 1 dc in the next 3 dc.
- Repeat steps 4-7 around.
- Sl st to the top of the first dc to join. (This round fills in the gaps, creating a more solid background for the next section).
Round 7: (Building the next layer/star points)
- Ch 3 (counts as 1 dc). Work 1 dc in each of the next 2 sts.
- Ch 1, skip 1 st. Work 1 dc in the next 6 sts.
- Repeat from * to * around, adjusting stitch count if necessary to end evenly.
- Sl st to the top of the initial Ch 3 to join.
Round 8: (Creating more openwork/star points)
- Ch 3 (counts as 1 dc). Work 1 dc in the same st.
- Ch 2, skip 2 sts. Work 1 dc in next st. Ch 2, skip 2 sts. Work 2 dc in next st. Repeat from * to * around.
- Sl st to the top of the initial Ch 3 to join.

Continuing to Expand and Shape (General Guidelines):
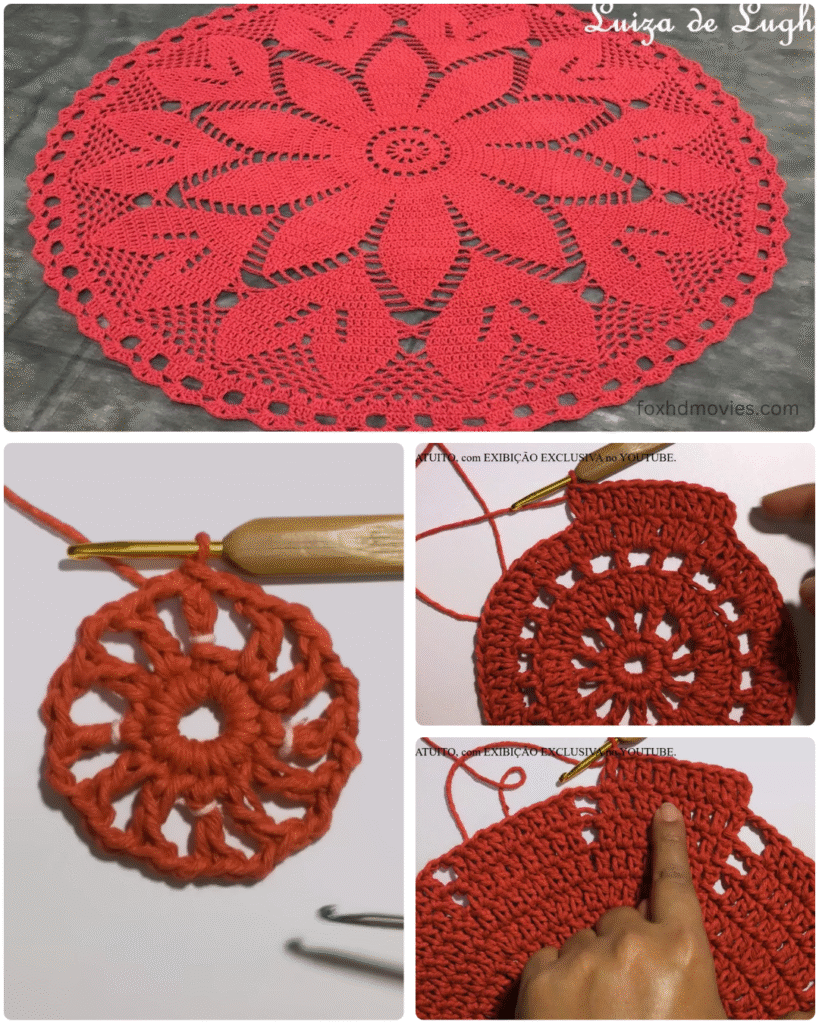
The complexity of the original rug’s pattern means exact replication in text is challenging without seeing a full stitch diagram. However, the key elements are:
- Alternating Solid and Openwork: You’ll notice sections of denser stitches (like dc) and sections with chain spaces and taller stitches (tr, dtr) to create the “holes” and lace-like effect.
- Increasing Evenly: For every round, ensure you are adding enough stitches (usually 6-12 stitches per round for DC, depending on your hook/yarn) to keep the rug flat. Distribute these increases evenly.
- Post Stitches: The subtle raised lines in the original might be achieved with Front Post Double Crochet (fpdc) or Back Post Double Crochet (bpdc) to outline sections.
- Petal Repeats: The design repeats a “petal” motif. Once you establish one, you simply repeat it around. The number of repeats (12 in the sample) defines the radial symmetry.
To continue making your rug larger, you can introduce rounds with:
- “V” stitches: (dc, ch 1, dc) in a stitch or space.
- Shell stitches: (3 dc or 5 dc) in a single space or stitch.
- Taller stitches: tr, dtr can be used in combination with chain spaces to create larger openings.
- Clusters: groups of stitches worked into the same space to create texture.
Final Border – Scalloped Edge:
The image clearly shows a beautiful scalloped edge. This can be achieved with a final round (or two) of stitches:
- Basic Scallop: (sc, hdc, dc, hdc, sc) or (sc, dc, tr, dc, sc) all in one stitch/space, skipping a few stitches/spaces between each scallop.
- Ch-Picot Scallop: A series of chain stitches with picots (ch 3, sl st into first ch) at the peaks of the scallops.
Example of a Scalloped Edge Round:
- Ch 1. In the same st as join, sc 1.
- Skip 2 sts, work (2 dc, ch 1, 2 dc) in the next st. Skip 2 sts, sc in the next st. Repeat from * to * around.
- Sl st to the first sc to join.
- FO.
Video tutorial
Finishing Up!
- Fasten Off (FO): Once your rug reaches the desired size, cut your yarn, leaving a long tail. Pull the tail completely through the last loop on your hook to secure.
- Weave in all ends: Use your large eye yarn needle to neatly weave in all starting and ending tails. For rugs, secure them very well to prevent unraveling with foot traffic.
- Blocking (Highly Recommended): Lay your finished rug flat. Gently stretch and shape it, ensuring all the petals and openwork sections are defined. You can mist it lightly with water or use a steam iron (hovering, not touching the yarn directly, especially for acrylics). Pin it into shape if needed and let it dry completely. Blocking is crucial for intricate designs like this to make them lie perfectly flat and highlight the stitch pattern.
Creating this rug is a journey through beautiful stitches! Take your time, enjoy the process, and soon you’ll have a stunning handmade centerpiece for your home. Happy crocheting!