 by
by 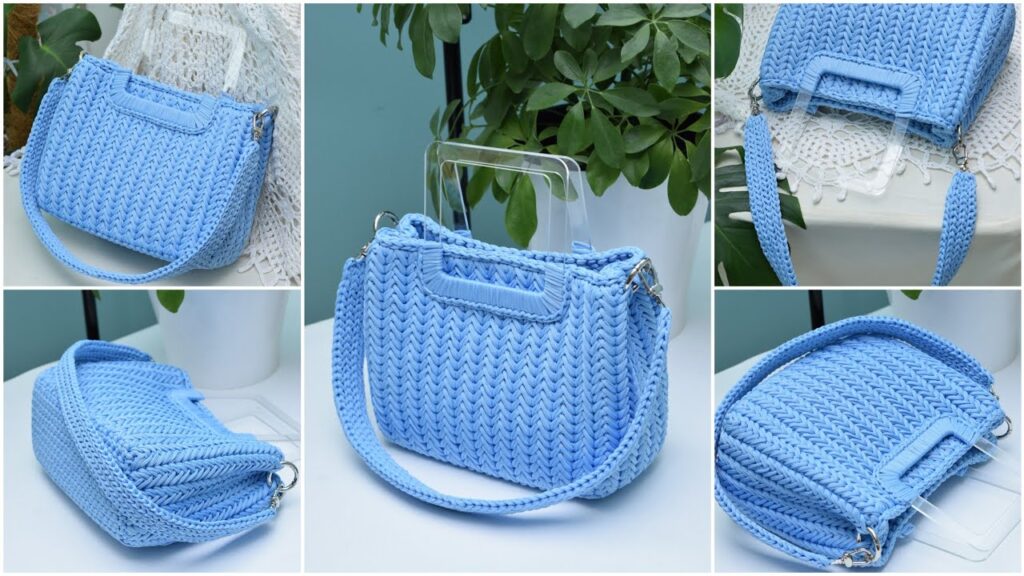
Hello fellow yarn enthusiasts!
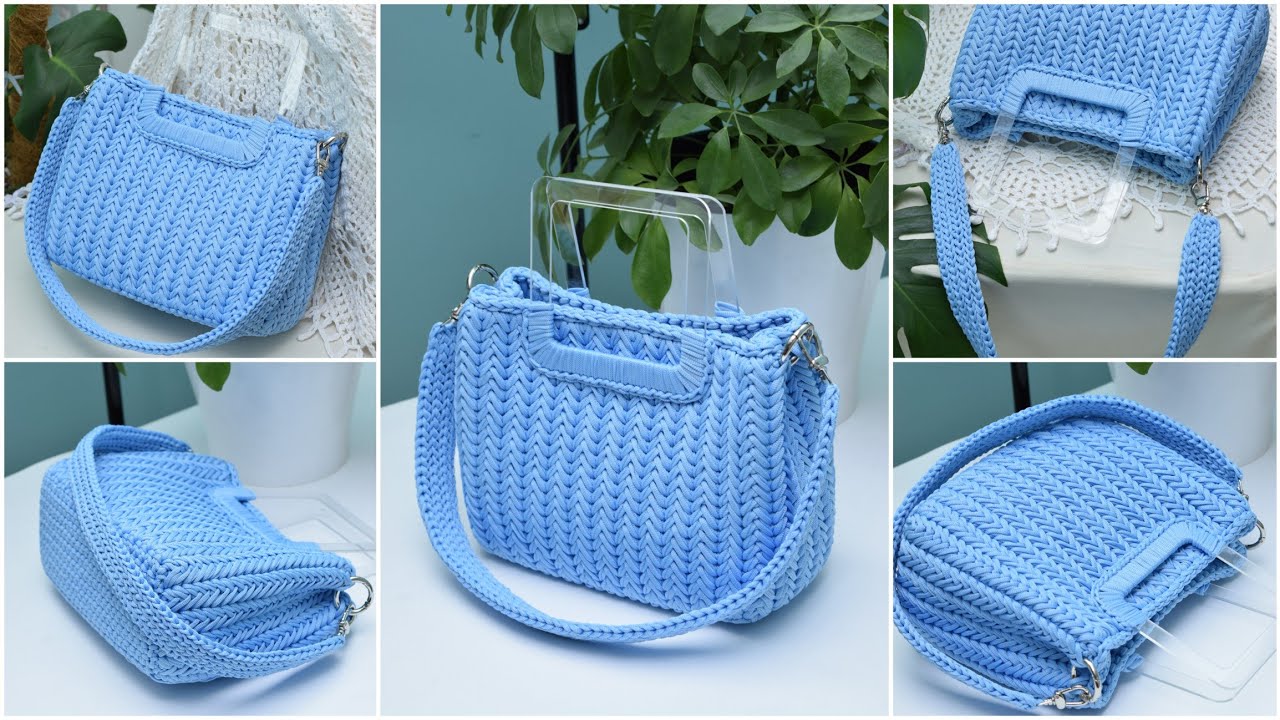
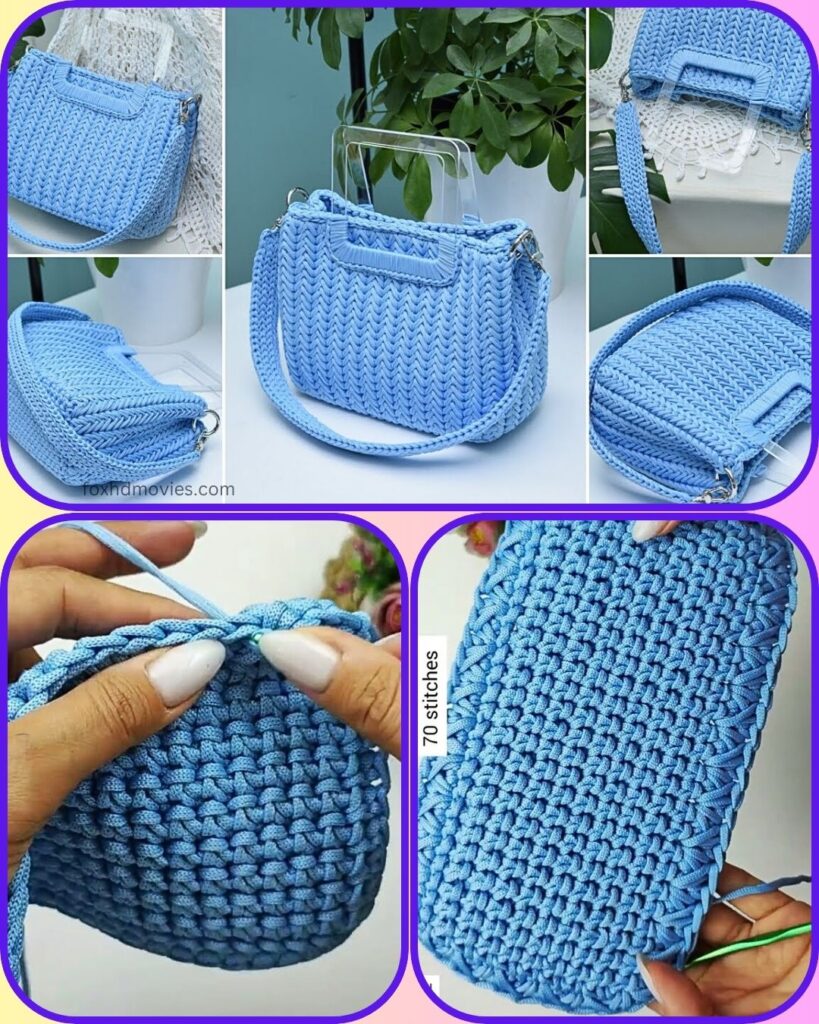
Prepare to make a splash with your next project! This “Ocean Wave Handbag” is a true showstopper, combining the beauty of a textured stitch with a sleek, modern design. The calming blue hue, structured shape, and chic clear handles make it the perfect accessory for adding a touch of handmade sophistication to any outfit. Let’s create something beautiful together!
Difficulty Level: Intermediate (Adjust this based on the actual complexity of the stitch pattern)
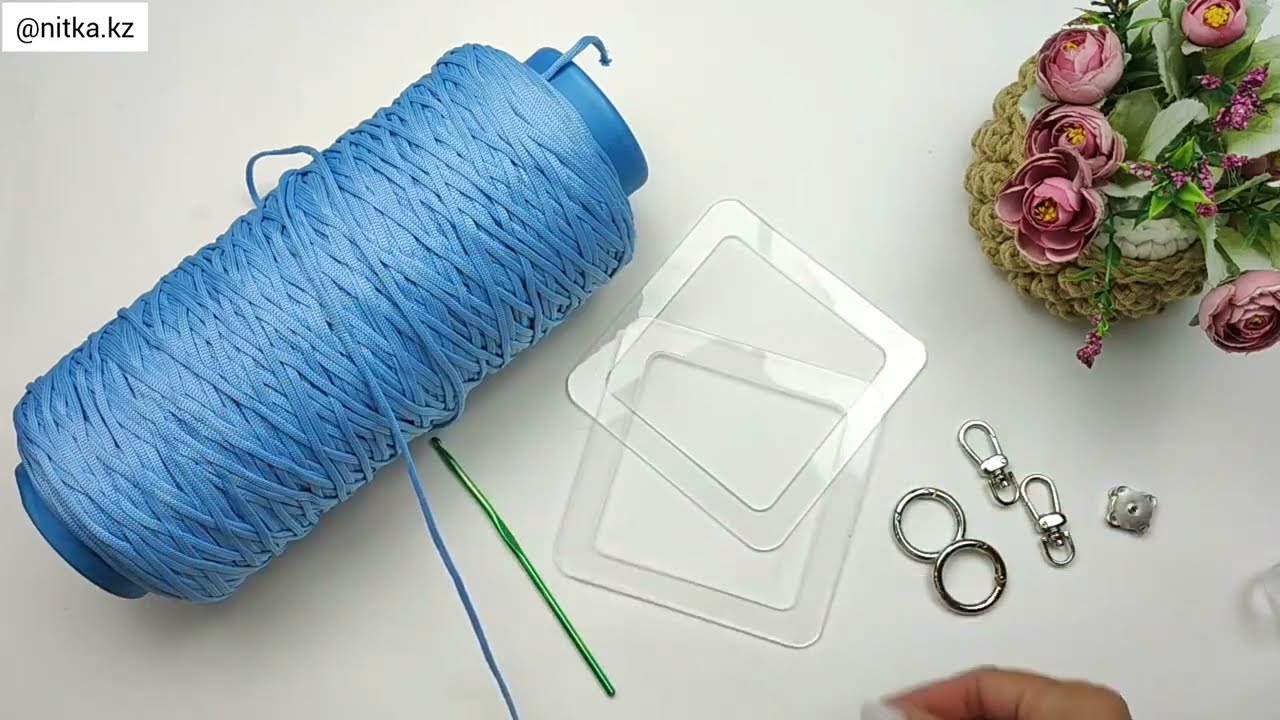
Materials You’ll Need:
- Yarn:
- Approx. [Yarn Quantity – e.g., 400-500g] of [Yarn Type, e.g., T-shirt Yarn / Macrame Cord] in your chosen color (e.g., Sky Blue)
- (Note: Yarn quantities can vary based on your tension and desired bag size. It’s always best to have a bit extra!)
- Crochet Hook: [Hook Size, e.g., 8.0mm (L) or 9.0mm (M/N)]
- Stitch Marker(s)
- Yarn Needle
- Scissors
- 2 Clear Acrylic Bag Handles: [Specific shape/size, e.g., rectangular, D-shape – approx. [e.g., 6 inches / 15 cm] wide]
- 4 Metal D-rings or Rectangular Rings (for attaching the handles and shoulder strap)
- 1 Metal Chain Shoulder Strap: Approx. [e.g., 40-50 inches / 100-125 cm] long, with lobster clasps on each end.
- Optional: Fabric for lining, sewing needle and thread (if adding a lining).
Finished Dimensions (Approximate):
- Height: [e.g., 8 inches / 20 cm]
- Width: [e.g., 10 inches / 25 cm]
- Depth (Base): [e.g., 4 inches / 10 cm]
Gauge:
- Body (main stitch pattern): [e.g., [X] of the textured stitch pattern = [Y] inches.] (Achieving the correct gauge is crucial for your bag to turn out the intended size and shape!)
Abbreviations (US Terms):
- ch – chain
- st(s) – stitch(es)
- sl st – slip stitch
- sc – single crochet
- inc – increase (2 sc in the same stitch)
- FO – fasten off
- rep – repeat
- BLO – back loop only
- FLO – front loop only
- [Specific Main Stitch Abbreviation] – [Full description of your main stitch pattern, e.g., “Herringbone sc (Hsc): Insert hook into stitch, yo, pull up a loop, yo, pull through all 2 loops on hook.” – The stitch looks like it could be a chevron or herringbone variant.]
Let’s Get Crocheting!
Notes:
- The main body of the bag is worked in continuous rounds, from the bottom up. Do not join rounds unless specified. Use a stitch marker to keep track of your first stitch.
- [Add any other important notes about tension, stitch placement, or specific techniques for working with your chosen yarn type.]
Pattern:
1. Base of the Bag (Worked in Main Color)
The base appears to be a flat oval or rectangle.
- Chain: Ch [e.g., 22]
- Round 1: Sc in 2nd ch from hook, sc in next [e.g., 19] chs, 3 sc in last ch. Turn your work and continue on the other side of the chain: sc in next [e.g., 19] chs, 2 sc in last ch. (Total stitches: [e.g., 44])
- Round 2: 1 sc in first st, inc in next st, sc in next [e.g., 19] sts, inc in next 3 sts, sc in next [e.g., 19] sts, inc in last 2 sts. (Total stitches: [e.g., 50])
- Round 3: [e.g., Sc around, working 2sc in each of the 6 corner stitches from the previous round.] (Total stitches: [e.g., 56])
- Continue increasing in the corners as needed until your base reaches the desired length and width (e.g., 3-4 rounds). Ensure the final stitch count is suitable for the body.
- Last Base Round: Sc in the back loop only (BLO) around. This creates a neat ridge for the sides of the bag to build upon. (Total stitches: [Final stitch count from base])

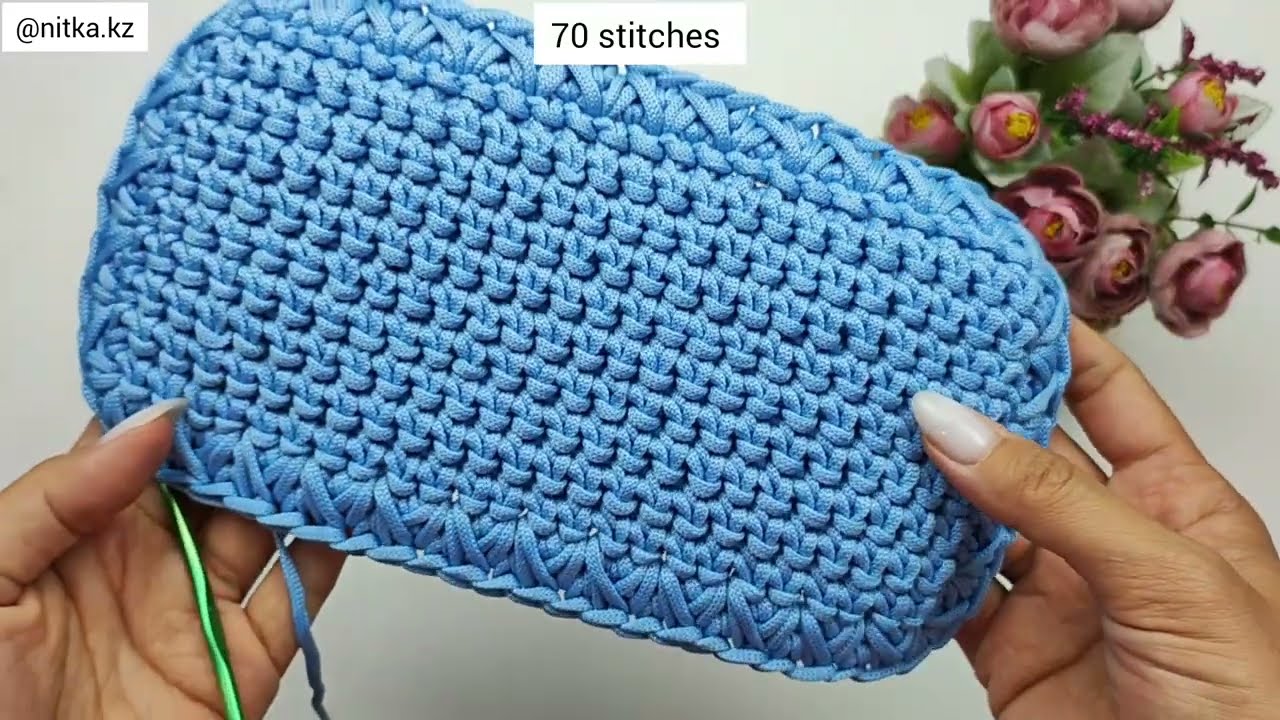
2. Body of the Bag (Worked in Main Color – Main Stitch Pattern)
This is where the signature textured look of the bag comes to life!
- Round [e.g., 5]: [Begin working your specific main stitch pattern here. E.g., Ch 1, work (your main stitch) in each st around. Continue in continuous rounds for seamless look.]
- Repeat Round [e.g., 5] (or the sequence of rounds that creates your pattern) until the body of the bag reaches your desired height, approximately [e.g., 7 inches / 18 cm] from the base.
3. Top Edging and D-ring Attachment Points
This section prepares the top for the handles and strap.
- Round [e.g., 25]: Sc in each st around.
- Round [e.g., 26]: Ch 1, sc in each st around. On this round, you’ll attach your D-rings.
- Place 2 stitch markers on the front side and 2 on the back side, evenly spaced, where your handles will attach (and where your chain strap will clip).
- When you reach a stitch marker, work 1 sc, then place your D-ring, then work another sc over the ring (enclosing it) into the same stitch or next stitch to secure it firmly. Continue sc around.
- Round [e.g., 27]: Ch 1, sl st in each st around for a neat, sturdy top edge. FO.
4. Handle Tabs / Clear Handle Attachment
The image shows a crocheted tab connecting the clear handle to the D-rings.
- Make 2 Tabs:
- Ch [e.g., 6] (or desired width of tab).
- Row 1: Sc in 2nd ch from hook, sc in each ch across. (5 sts)
- Row 2: Ch 1, turn, sc in each st across. (5 sts)
- Repeat Row 2 for [e.g., 5-6] rows or until the tab is long enough to wrap around the clear handle and attach to a D-ring. FO, leaving a long tail for sewing.
- Attach to Handles & Bag:
- Thread the tab through the opening of the clear acrylic handle.
- Using your yarn needle, securely sew one end of the crocheted tab to one of the D-rings on the bag. Then, sew the other end of the tab to itself, wrapping it around the acrylic handle to form a secure loop. Repeat for the second handle and tab. Reinforce all sewing points well.
5. Chain Shoulder Strap Attachment
- Clip the lobster clasps of your metal chain strap to the two D-rings on the top sides of your bag.
Finishing Touches:
- Weave in all remaining loose ends securely on the inside of the bag.
- Consider adding a fabric lining to your bag for extra durability, to prevent small items from slipping through stitches, and to give it a more finished, professional look.