 by
by 
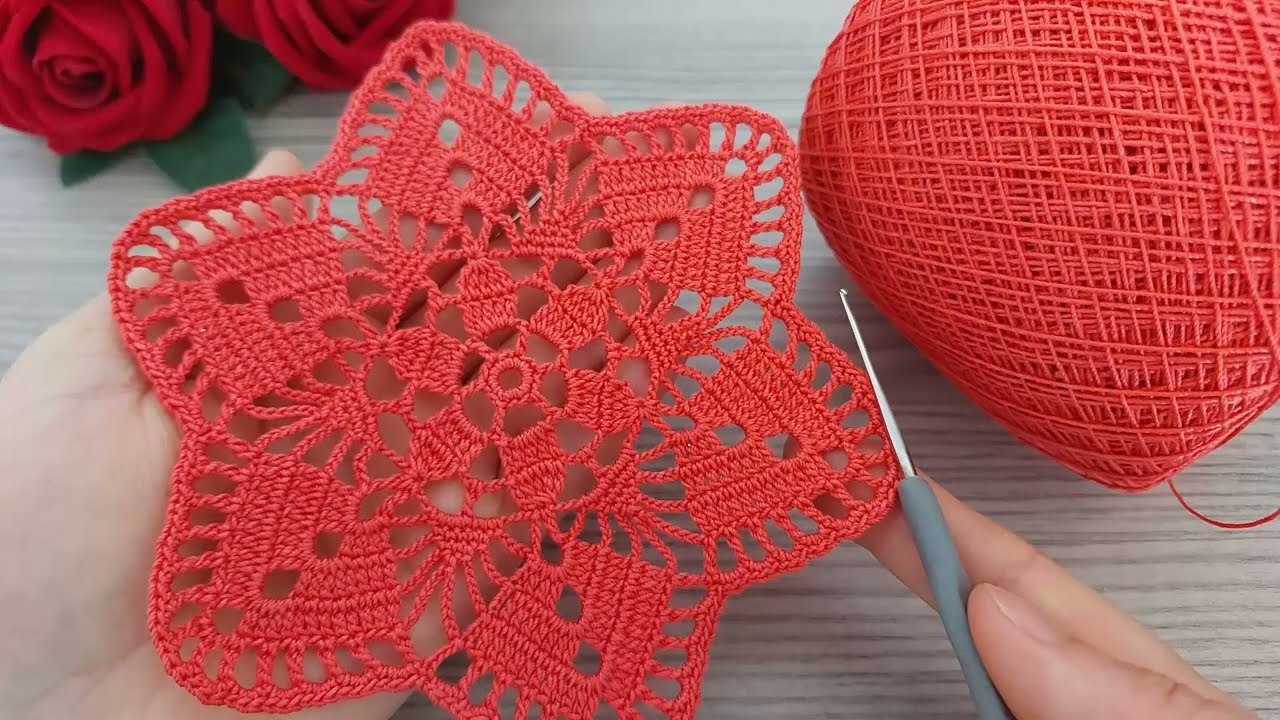
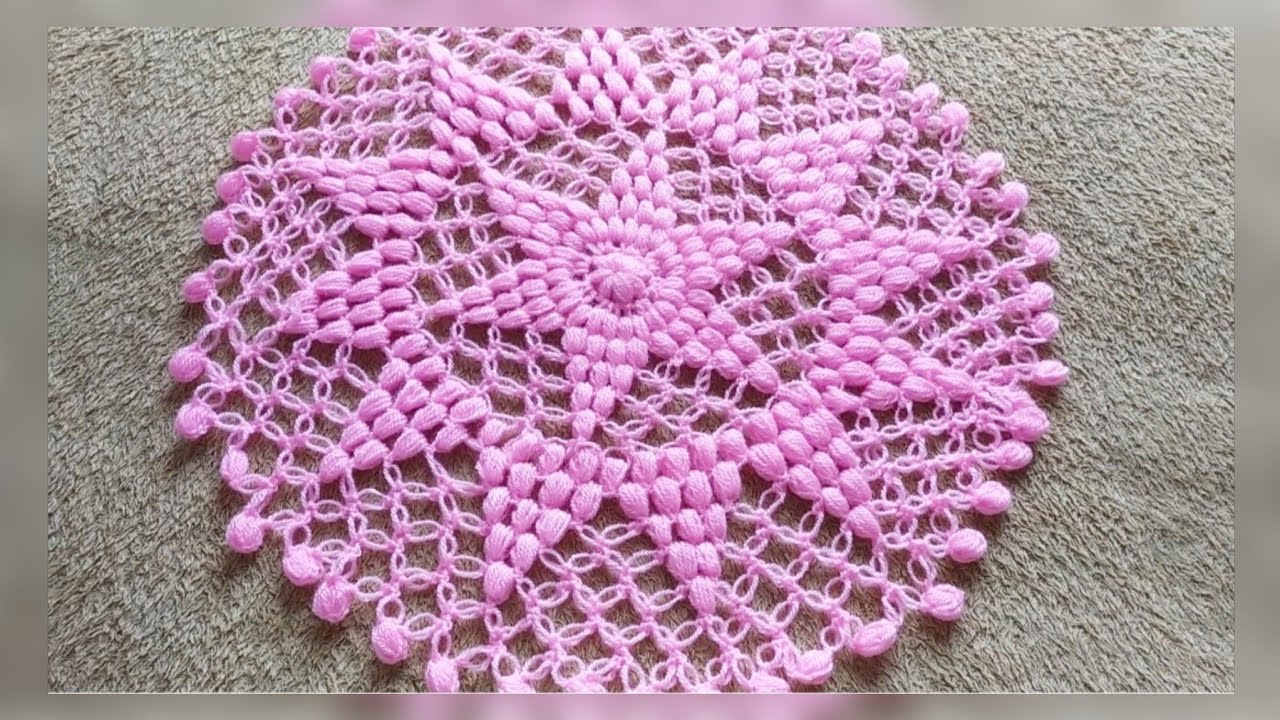
There’s something so timeless and elegant about a crocheted doily. Whether you’re looking for a charming accent for your coffee table or a sweet little coaster for your teacup, this pattern delivers a beautiful lace design with a lovely floral-like center. And in pink? Utterly delightful!
This pattern is written for a small doily (about 8-10 inches in diameter), which can easily double as an oversized coaster. You can always repeat the final rounds to make it larger!
Skill Level: Advanced Beginner / Intermediate
Materials:
- Yarn: Lace weight (size 0) or Fine (size 2) cotton yarn in pink. Cotton yarn will give you the best stitch definition and drape for a doily. (For the example image, a Fine/Sport weight would be appropriate).
- Tip: If you want a smaller, more delicate coaster, use a thinner thread (like crochet thread size 10) and a smaller hook. If you want a larger doily, use a slightly thicker yarn (like DK weight) and a larger hook, but be aware it will be less “lacy.”
- Crochet Hook: A hook appropriate for your chosen yarn. For Fine/Sport weight, I’d suggest a C/2 (2.75 mm) or D/3 (3.25 mm). For lace weight/thread, you’ll need something like a B/1 (2.25 mm) or smaller.
- Yarn needle for weaving in ends
- Scissors
- Stitch markers (optional, but helpful for marking repeats)
Gauge:
Gauge is not critical for doilies, but be aware that your hook size and yarn choice will directly impact the finished size of your doily. Work loosely for more drape, or tightly for a firmer finish.
Finished Size: Approximately 8-10 inches in diameter (when made with Fine/Sport weight yarn).
Abbreviations (US Crochet Terms):
- ch: chain
- sl st: slip stitch
- sc: single crochet
- hdc: half double crochet
- dc: double crochet
- tr: treble crochet (yarn over twice)
- dtr: double treble crochet (yarn over three times)
- sp: space
- st(s): stitch(es)
- beg: beginning
- rep: repeat
- sk: skip
- FO: Fasten off
- ( ): work instructions within parentheses as a set
- * *: repeat instructions between asterisks the number of times specified

The Lacy Pink Doily Pattern
Let’s begin! Remember to read through the entire pattern before you start.
Starting the Center:
Round 1: Ch 5, sl st to first ch to form a ring. (You can also use a magic ring). Ch 3 (counts as 1 dc), 11 dc into the ring. Sl st to top of beg ch-3. (12 dc)
Round 2: Ch 1, sc in same st. *Ch 3, sk next st, sc in next st.* Rep from * to * 5 more times. Ch 3, sk last st, sl st to first sc. (6 sc, 6 ch-3 sps)
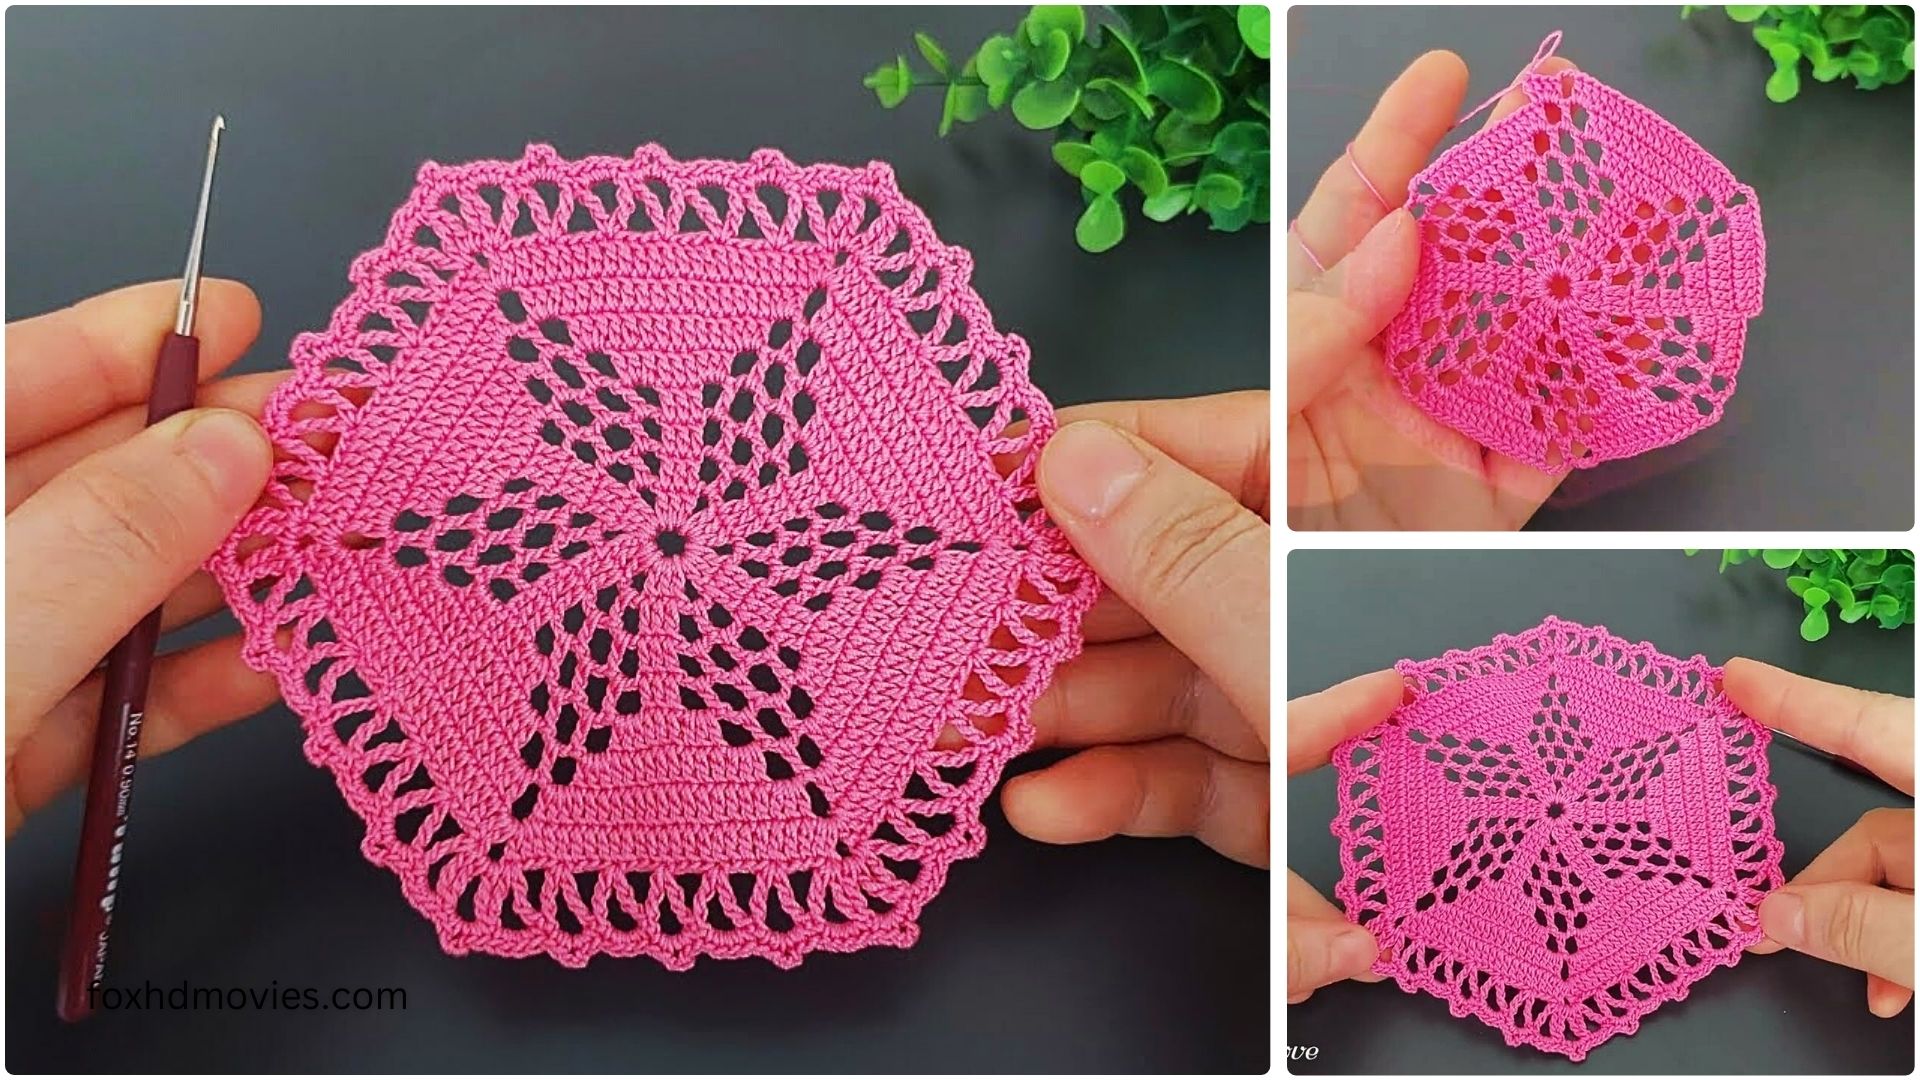
Round 3: Sl st into first ch-3 sp. Ch 3 (counts as 1 dc), (2 dc, ch 3, 3 dc) in same ch-3 sp (this forms your first corner). *Ch 1, sk next sc, (3 dc, ch 3, 3 dc) in next ch-3 sp.* Rep from * to * 4 more times. Ch 1, sk last sc, sl st to top of beg ch-3. (6 corner clusters, 6 ch-1 sps) Your work should start to take on a hexagonal shape.

Creating the Petal-Like Effect:
Round 4: Sl st into next 2 dc and into first ch-3 sp. Ch 1, (sc, ch 3, sc) in same ch-3 sp. *Ch 4, sk next (3 dc, ch 1, 3 dc), (sc, ch 3, sc) in next ch-3 sp.* Rep from * to * 4 more times. Ch 4, sk last (3 dc, ch 1, 3 dc), sl st to first sc. (6 (sc, ch 3, sc) petals, 6 ch-4 sps)
Round 5: Sl st into first ch-3 sp. Ch 3 (counts as 1 dc), (2 dc, ch 2, 3 dc) in same ch-3 sp. *Ch 2, (3 dc, ch 2, 3 dc) in next ch-4 sp (this is a side grouping). Ch 2, (3 dc, ch 2, 3 dc) in next ch-3 sp.* Rep from * to * 4 more times. Ch 2, (3 dc, ch 2, 3 dc) in next ch-4 sp. Ch 2, sl st to top of beg ch-3. (12 (3dc, ch 2, 3dc) clusters, 12 ch-2 sps) This round expands the shape and sets up for the next layer of lace.
Building the Lacy Edge:
Round 6: Sl st into next 2 dc and into first ch-2 sp. Ch 1, (sc, ch 3, sc) in same ch-2 sp. *Ch 3, sk next (3 dc, ch 2, 3 dc), (sc, ch 3, sc) in next ch-2 sp.* Rep from * to * 10 more times. Ch 3, sk last (3 dc, ch 2, 3 dc), sl st to first sc. (12 (sc, ch 3, sc) groupings, 12 ch-3 sps)
Round 7: Sl st into first ch-3 sp. Ch 3 (counts as 1 dc), (2 dc, ch 2, 3 dc) in same ch-3 sp. *Ch 1, (3 dc, ch 2, 3 dc) in next ch-3 sp.* Rep from * to * 10 more times. Ch 1, sl st to top of beg ch-3. (12 (3dc, ch 2, 3dc) clusters, 12 ch-1 sps) You should notice the pattern repeating a bit now, expanding outward.

Round 8: Sl st into next 2 dc and into first ch-2 sp. Ch 1, (sc, ch 3, sc) in same ch-2 sp. *Ch 4, sk next (3 dc, ch 1, 3 dc), (sc, ch 3, sc) in next ch-2 sp.* Rep from * to * 10 more times. Ch 4, sk last (3 dc, ch 1, 3 dc), sl st to first sc. (12 (sc, ch 3, sc) groupings, 12 ch-4 sps)
Adding the Decorative Final Edge:
Round 9: Sl st into first ch-3 sp. Ch 1, sc in same ch-3 sp. *Ch 5, sc in next ch-4 sp, ch 5, sc in next ch-3 sp.* Rep from * to * 5 more times. Ch 5, sc in next ch-4 sp, ch 5, sl st to first sc. (12 sc, 12 ch-5 sps)
Round 10 (Picot Edge): Sl st into first ch-5 sp. Ch 1, sc in same ch-5 sp. *Ch 3, sl st into first ch of ch-3 (this makes a picot). Sc in same ch-5 sp. (Sc, picot, sc) in next ch-5 sp.* Rep from * to * 11 more times. Sl st to first sc. This creates beautiful little “bumps” along the edge.
FO and weave in all remaining ends carefully.
Video tutorial
Blocking Your Doily (Highly Recommended!)
Blocking is crucial for doilies as it opens up the lace pattern and helps the doily lay flat and achieve its intended shape and size.
- Dampen: Gently wet your doily. You can immerse it in lukewarm water, squeeze out excess, or spritz it with water until it’s evenly damp but not dripping.
- Pin: Lay the doily on a blocking mat or a thick towel. Gently stretch it into a perfect circle, using rust-proof pins to secure all the points and edges. Pay attention to pulling out the picots and chain spaces to define the lace.
- Dry: Let it air dry completely. This can take several hours or even overnight.
- Enjoy! Once dry, remove the pins and admire your beautiful, perfectly shaped pink doily!
Tips for a Perfect Doily:
- Yarn Choice Matters: As mentioned, cotton yarn is ideal. Blends with a little silk or linen can also be beautiful. Avoid acrylic if you want a true lace look, as it doesn’t always block as well.
- Consistent Tension: Try to keep your tension even throughout the project. This will ensure your doily is perfectly round and symmetrical.
- Stitch Counters: If you lose count easily, use stitch markers to mark the beginning of rounds or the start of repeat sections.
- Reading Your Work: After a few rounds, try to “read” your crochet. You’ll start to recognize the pattern and understand where the stitches should go, even without looking at the pattern constantly.
- Picots: If you find the picot stitch a bit fiddly, practice it a few times before starting your final round.
Enjoy creating your lovely pink crocheted doily or coaster! It’s a delightful project that yields a charming and elegant piece for your home. Happy crocheting!