 by
by 
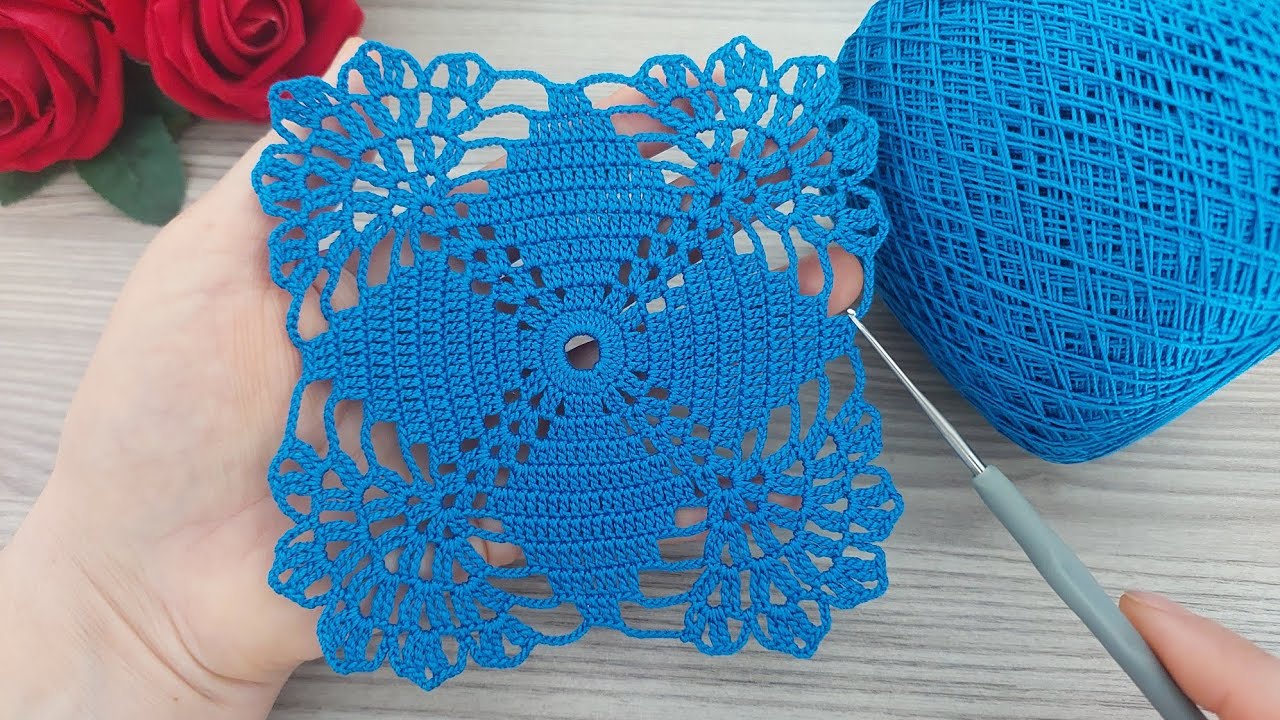
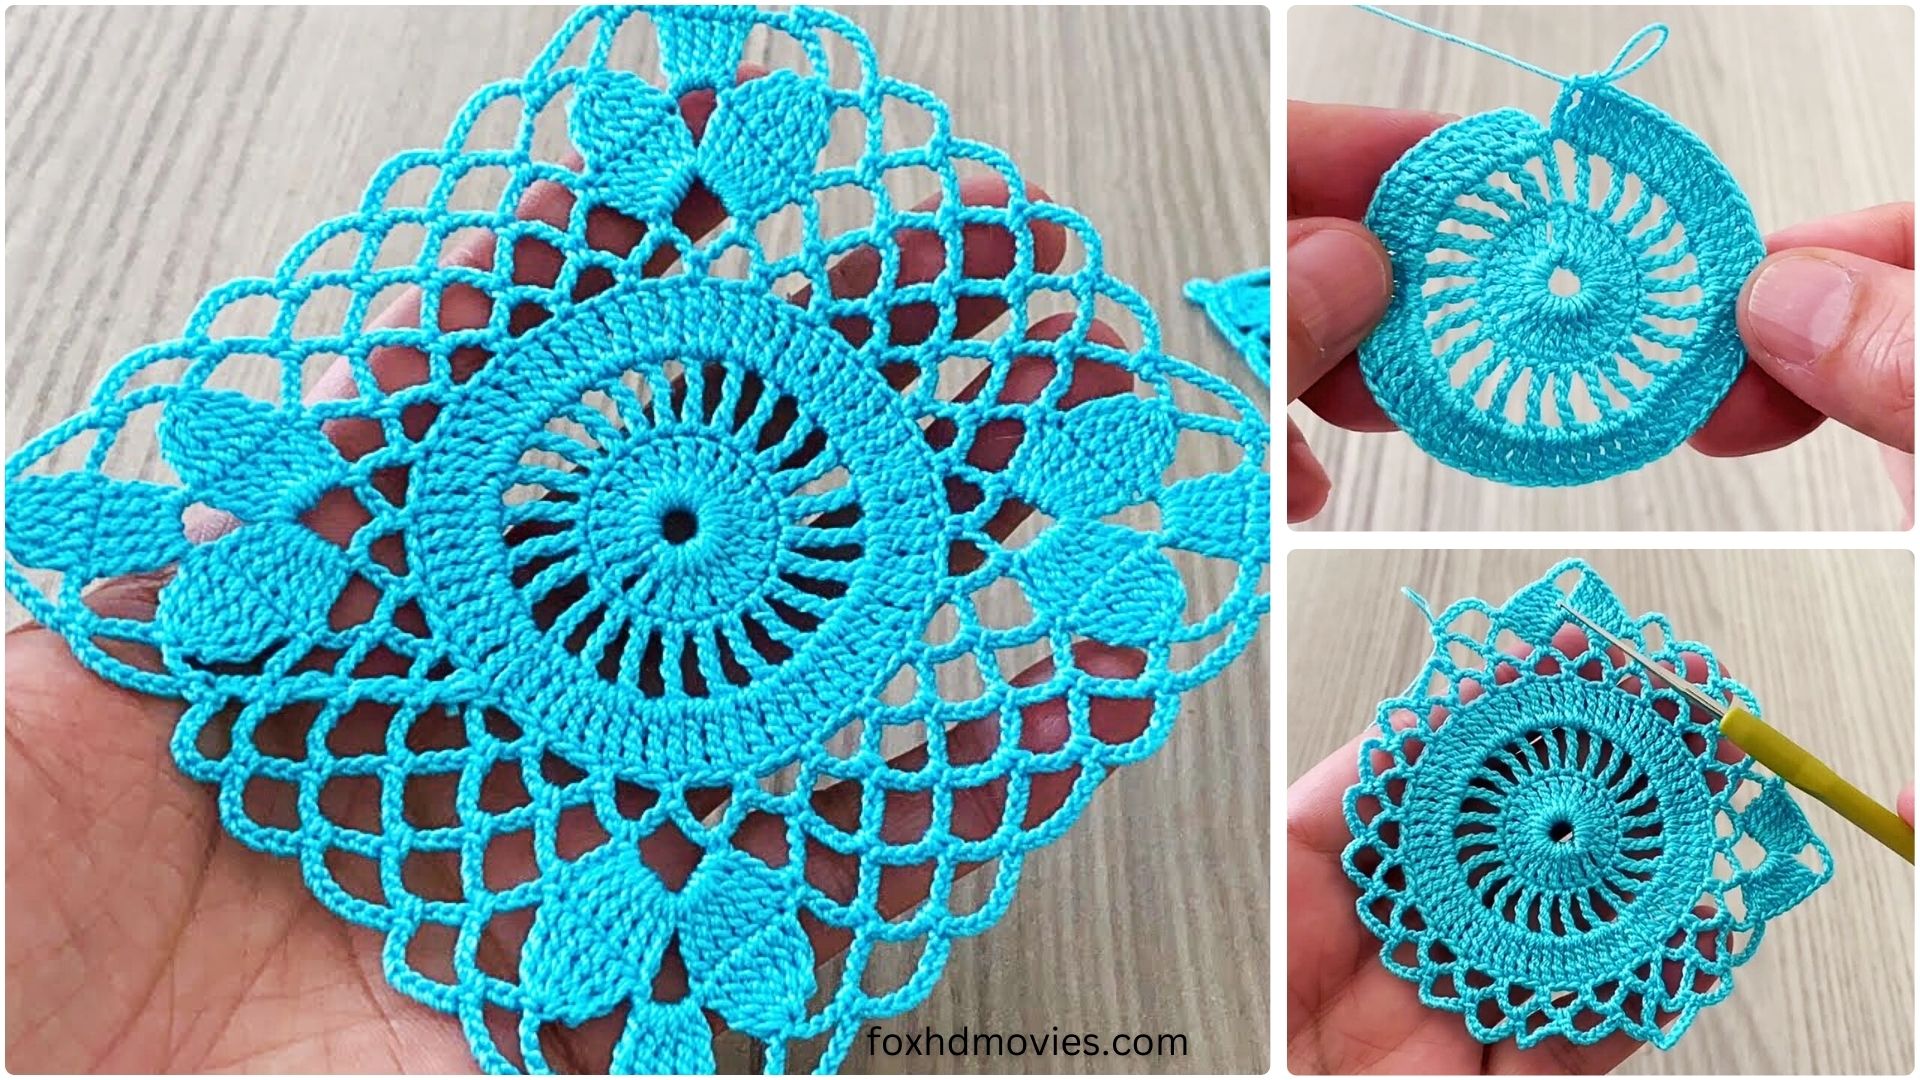
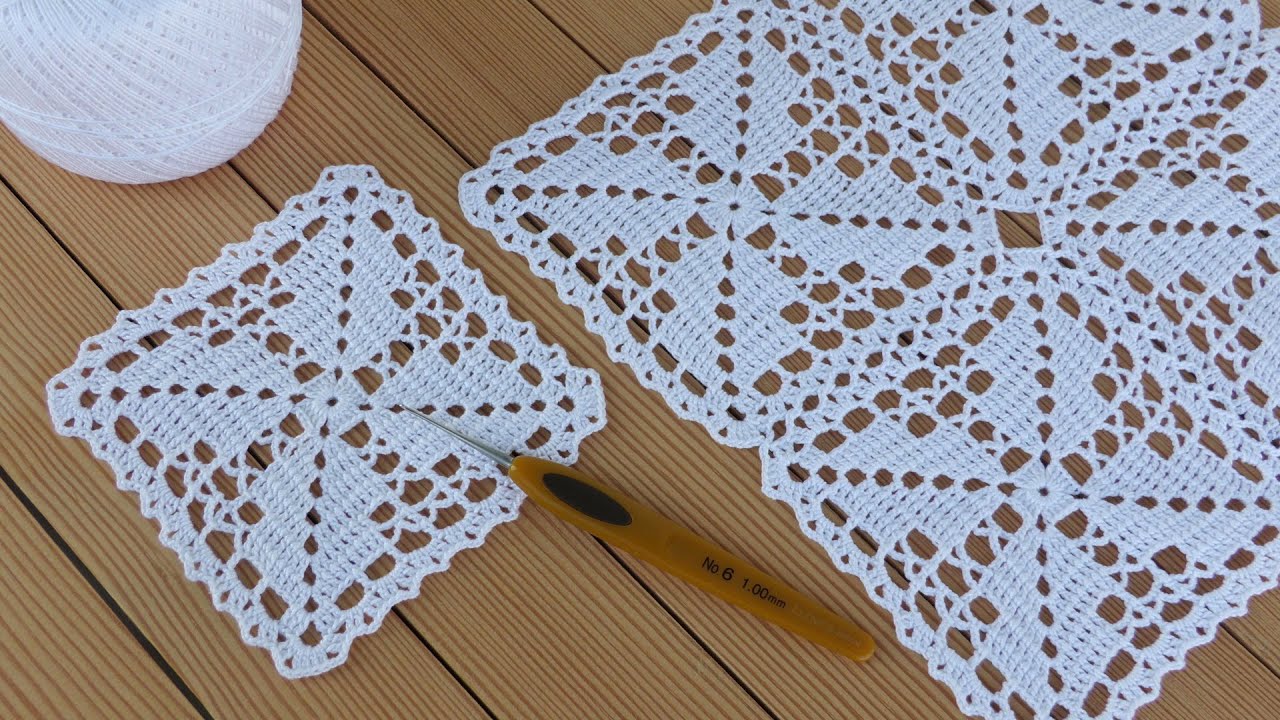
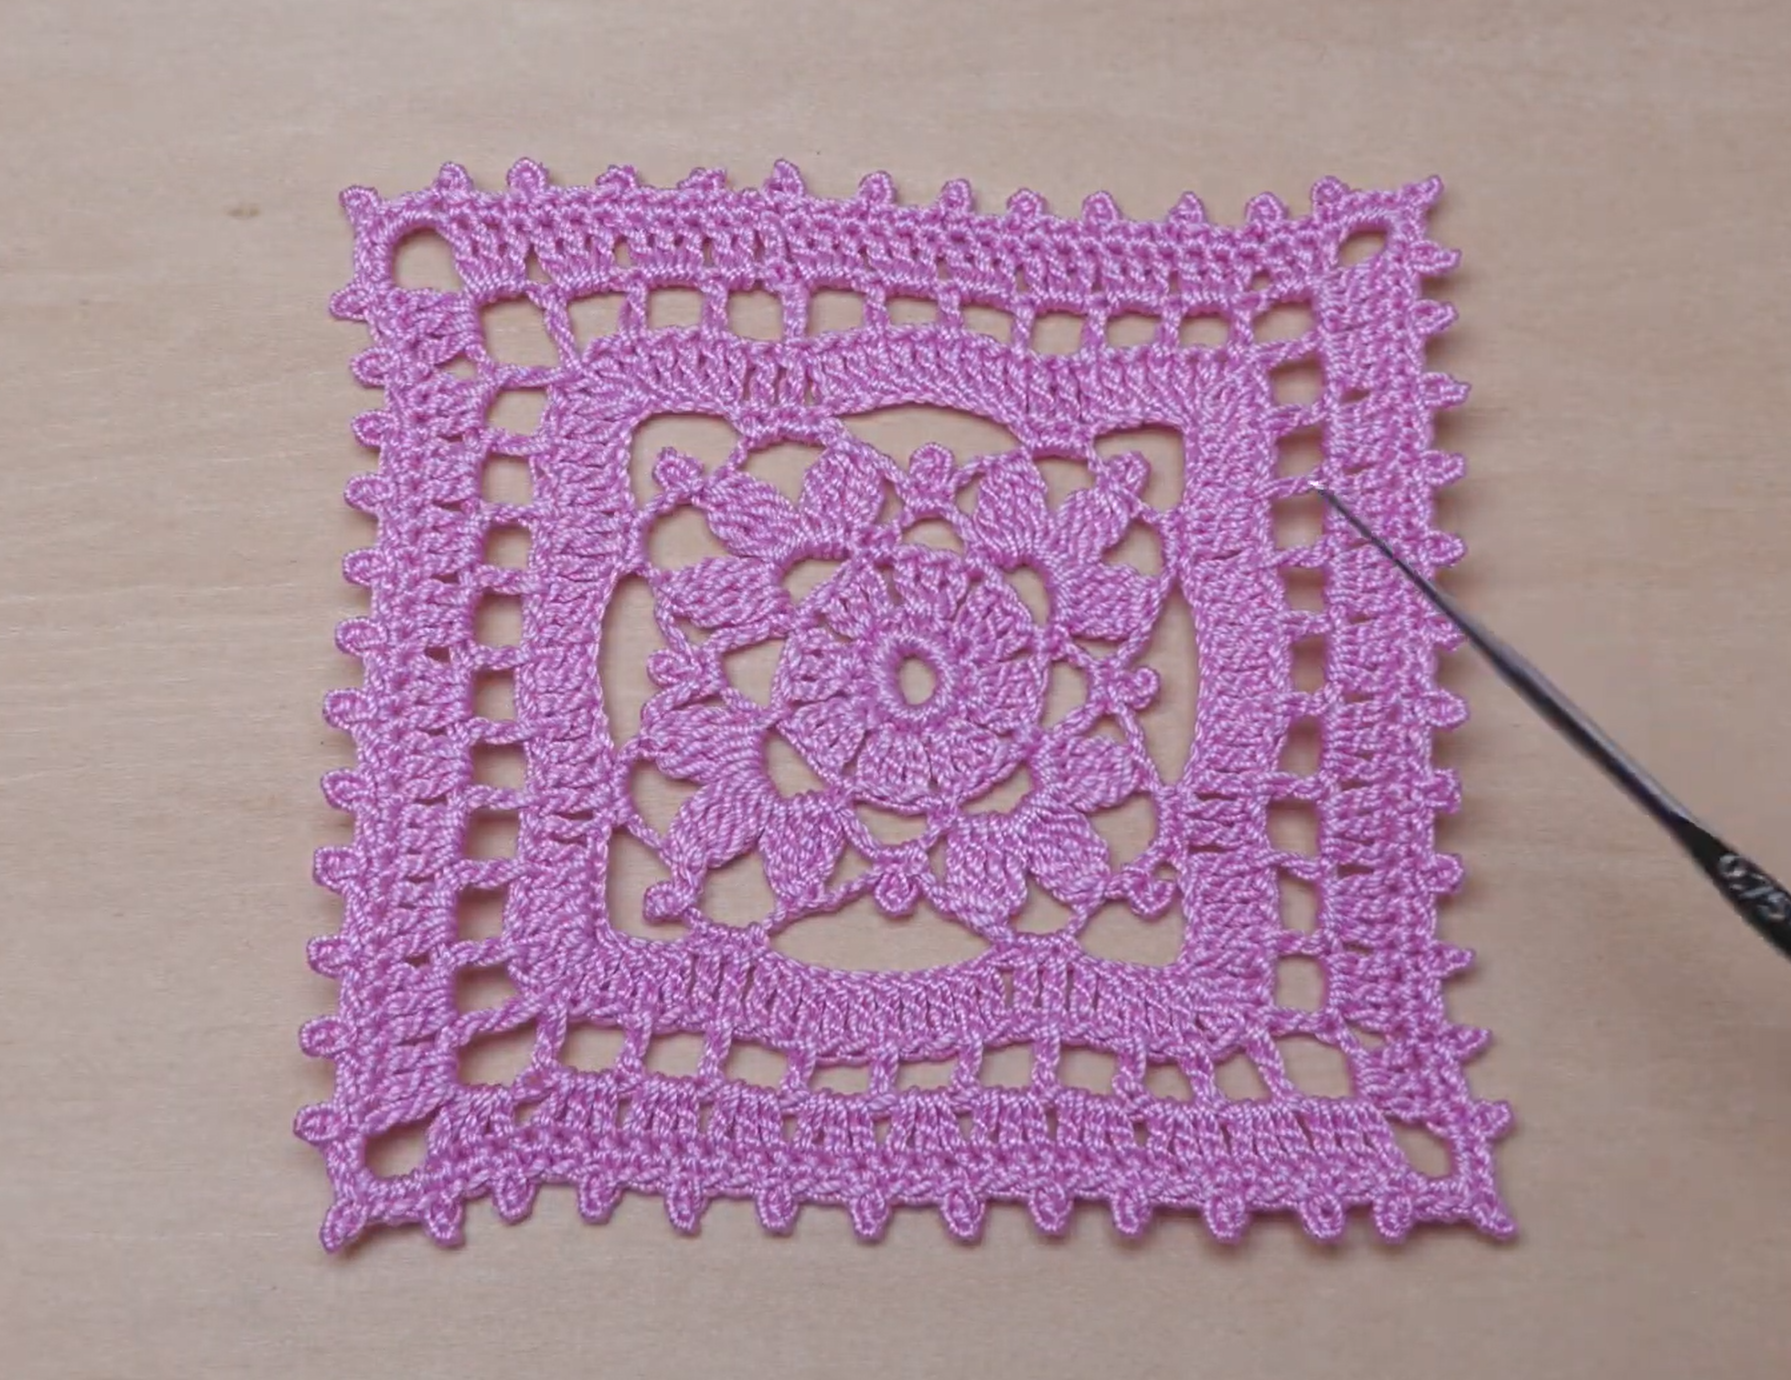
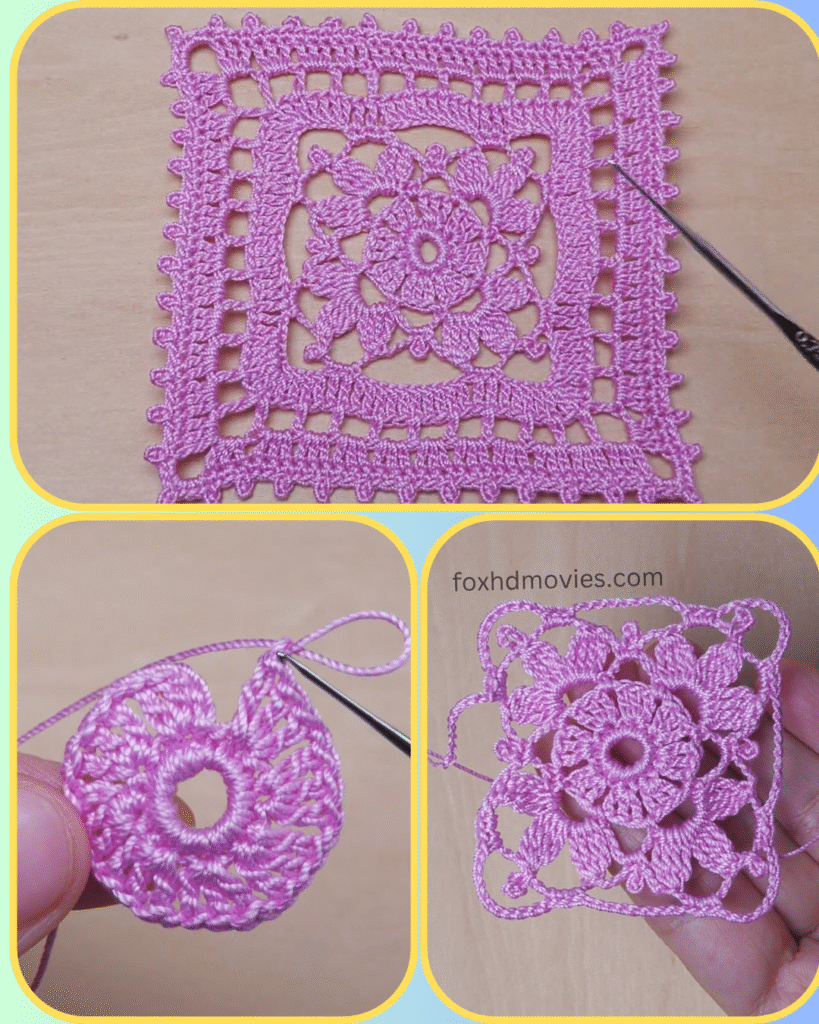
Greetings, fellow crafters! Today, we’re going to create a truly captivating crochet square motif that features a lovely central flower reminiscent of a blossoming garden, framed by delicate lace work. This “Enchanting Blossom Square” is perfect for adding elegance to blankets, throws, cushions, or even for creating a stunning table runner. The sample is shown in a delightful pink, but imagine the possibilities with different colors!
Let’s gather our supplies and get ready to hook up some beauty!
Skill Level: Intermediate
Materials:
- Yarn: Fine weight (fingering or #1) cotton yarn in your desired color (the sample uses a lovely light pink). Mercerized cotton is excellent for stitch definition in lace patterns.
- Hook: 1.50mm – 2.00mm steel crochet hook (or size needed to obtain gauge with your chosen yarn). The sample image shows a 0.75mm hook, which would be for extremely fine thread. Adjust to your preference.
- Yarn needle for weaving in ends
- Scissors
Gauge: After Round 5, your square should measure approximately 3.5 – 4 inches across, depending on your yarn and tension. (Gauge is important if you plan to join multiple squares for a larger project).
Abbreviations (US Terms):
- ch: chain
- sl st: slip stitch
- sc: single crochet
- hdc: half double crochet
- dc: double crochet
- tr: treble crochet (yarn over 2 times)
- dtr: double treble crochet (yarn over 3 times)
- st(s): stitch(es)
- sp: space
- sk: skip
- picot: ch 3, sl st in 3rd ch from hook
- FO: Fasten off
Pattern for Enchanting Blossom Square
Start: Make a magic ring.
Round 1: Ch 3 (counts as 1 dc), 15 dc in ring. Join with sl st to top of ch 3. (16 dc)
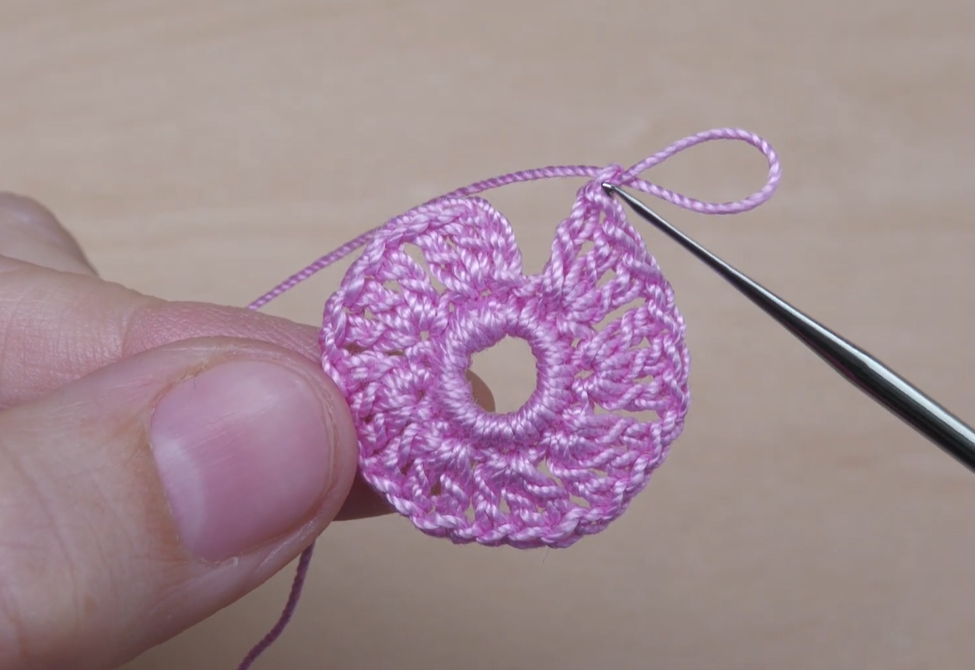
Round 2: Ch 1, sc in first st. Ch 3, sk 1 st, sc in next st. Repeat from * to * 6 more times. Ch 3, sk 1 st, sl st to first sc to join. (8 sc, 8 ch-3 sps)
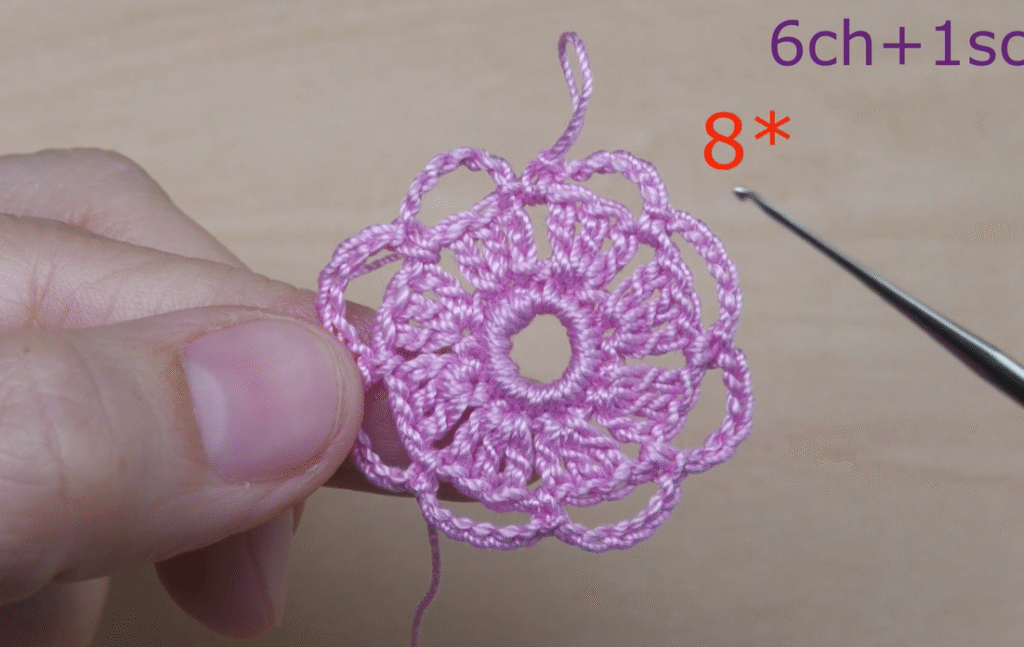
Round 3 (Petal Bases): Sl st into first ch-3 sp. Ch 3 (counts as 1 dc), (2 dc, ch 2, 3 dc) in same ch-3 sp (first corner/petal cluster). Ch 1, sk next sc, (3 dc, ch 2, 3 dc) in next ch-3 sp. Repeat from * to * 6 more times. Ch 1, sl st to top of ch 3 to join. (8 clusters of 3dc-ch2-3dc, 8 ch-1 sps)
Round 4 (Creating the “Petals”): Sl st into the first ch-2 sp. Ch 3 (counts as 1 dc), (dc, ch 2, 2 dc) in same ch-2 sp. Ch 3, sk 3 dc, sc in next ch-1 sp, ch 3, sk 3 dc, (2 dc, ch 2, 2 dc) in next ch-2 sp. Repeat from * to * 6 more times. Ch 3, sk 3 dc, sc in next ch-1 sp, ch 3, sk 3 dc, sl st to top of ch 3 to join. (8 smaller clusters, 8 sc, 16 ch-3 sps)
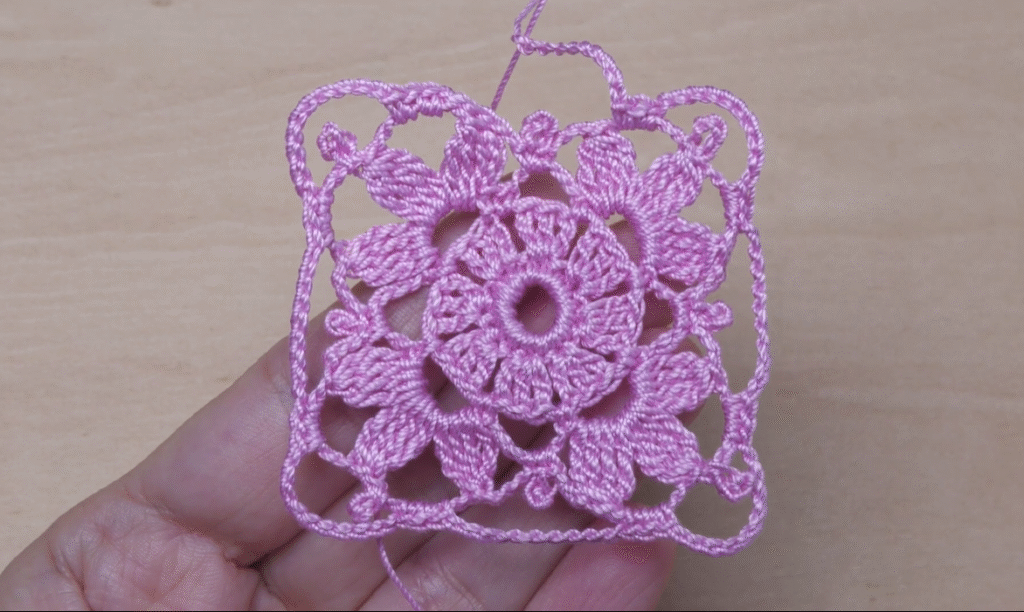
Round 5 (Squaring off): Sl st into the first ch-2 sp. Ch 3 (counts as 1 dc), (2 dc, ch 3, 3 dc) in same ch-2 sp (first corner). Ch 2, sk 2 dc, (dc, ch 1, dc) in next sc. Ch 2, sk 2 dc, (3 dc, ch 3, 3 dc) in next ch-2 sp (corner). Repeat from * to * 3 more times, omitting the final corner on the last repeat. Join with sl st to top of ch 3. (4 corners, 8 (dc, ch1, dc) groups, 8 ch-2 sps)
Round 6: Sl st into first ch-3 corner sp. Ch 3 (counts as 1 dc), (dc, ch 3, 2 dc) in same ch-3 sp (corner). Ch 3, sk 3 dc, sc in next ch-2 sp, ch 3, sc in next ch-1 sp, ch 3, sc in next ch-2 sp, ch 3, sk 3 dc, (2 dc, ch 3, 2 dc) in next ch-3 sp (corner). Repeat from * to * 3 more times, omitting the final corner on the last repeat. Join with sl st to top of ch 3.
Round 7: Sl st into first ch-3 corner sp. Ch 3 (counts as 1 dc), (dc, ch 3, 2 dc) in same ch-3 sp (corner). Ch 3, sk 2 dc, sc in next ch-3 sp, ch 3, sc in next ch-3 sp, ch 3, sc in next ch-3 sp, ch 3, sc in next ch-3 sp, ch 3, sk 2 dc, (2 dc, ch 3, 2 dc) in next ch-3 sp (corner). Repeat from * to * 3 more times, omitting the final corner on the last repeat. Join with sl st to top of ch 3.
Round 8 (Outer Edge): Sl st into first ch-3 corner sp. Ch 1, (sc, picot, sc) in ch-3 sp (corner). Ch 5, sk 2 dc, sc in next ch-3 sp. Ch 5, sc in next ch-3 sp. Repeat from * to * 2 more times. Ch 5, sk 2 dc. Repeat from * to * 3 more times. Sl st to first sc to join.

Finishing:
FO, leaving a long tail for weaving in. Weave in all ends neatly. For best results, block your finished square. Pin it to a blocking mat or foam board, gently mist with water, and let it dry completely. This will open up the intricate lace work and give your square a crisp, professional finish.
Video tutorial
Tips for Success:
- Even Tension: Try to maintain consistent tension throughout your work to ensure a uniform square.
- Counting Stitches: Carefully count your stitches and chain spaces in each round. This is crucial for lace patterns!
- Good Lighting: Working with fine yarn and intricate stitches is easier with good lighting.
- Blocking is a Must: Don’t skip this step! It truly transforms the look of your lace crochet.
I hope you enjoy creating these beautiful Enchanting Blossom Squares! They are so versatile and can be used in countless ways to add a touch of handmade elegance to your projects. I’d love to see your finished squares – feel free to share them in the comments below!
Happy Crocheting!