 by
by 
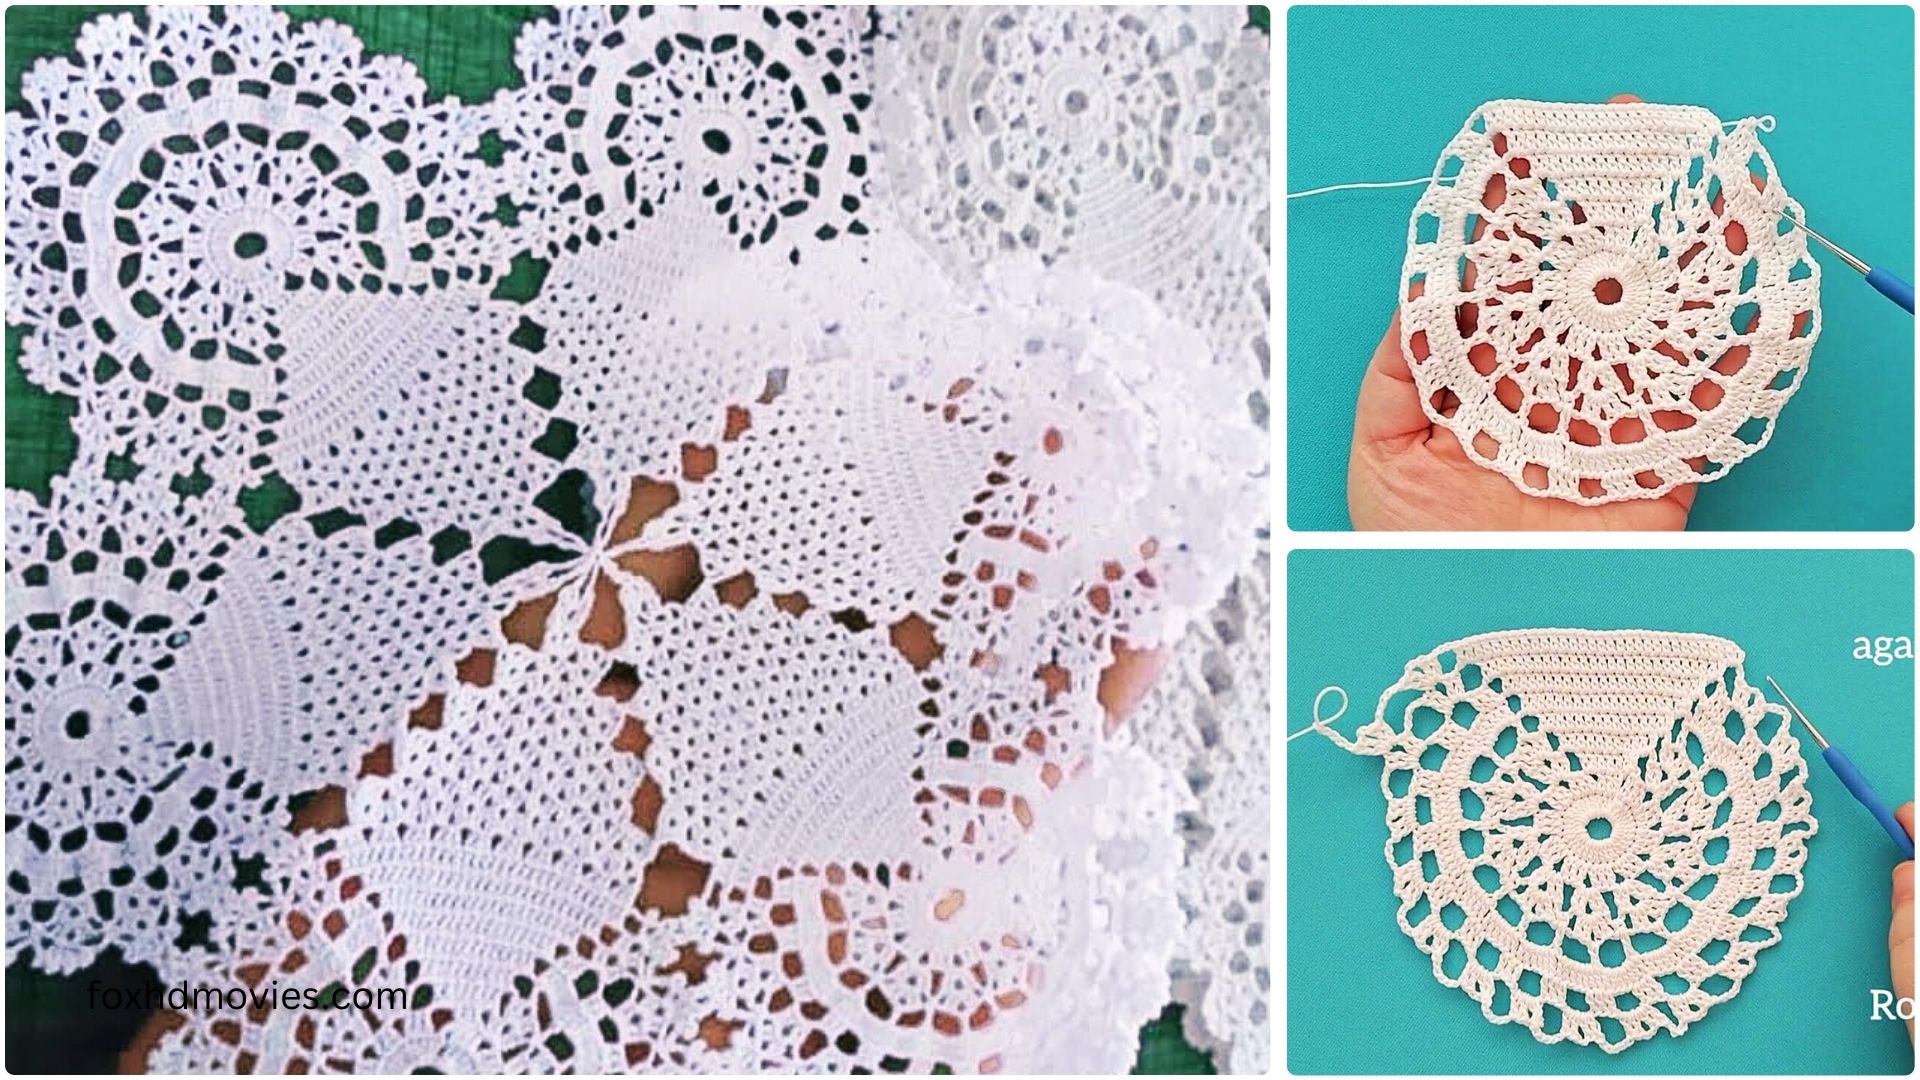
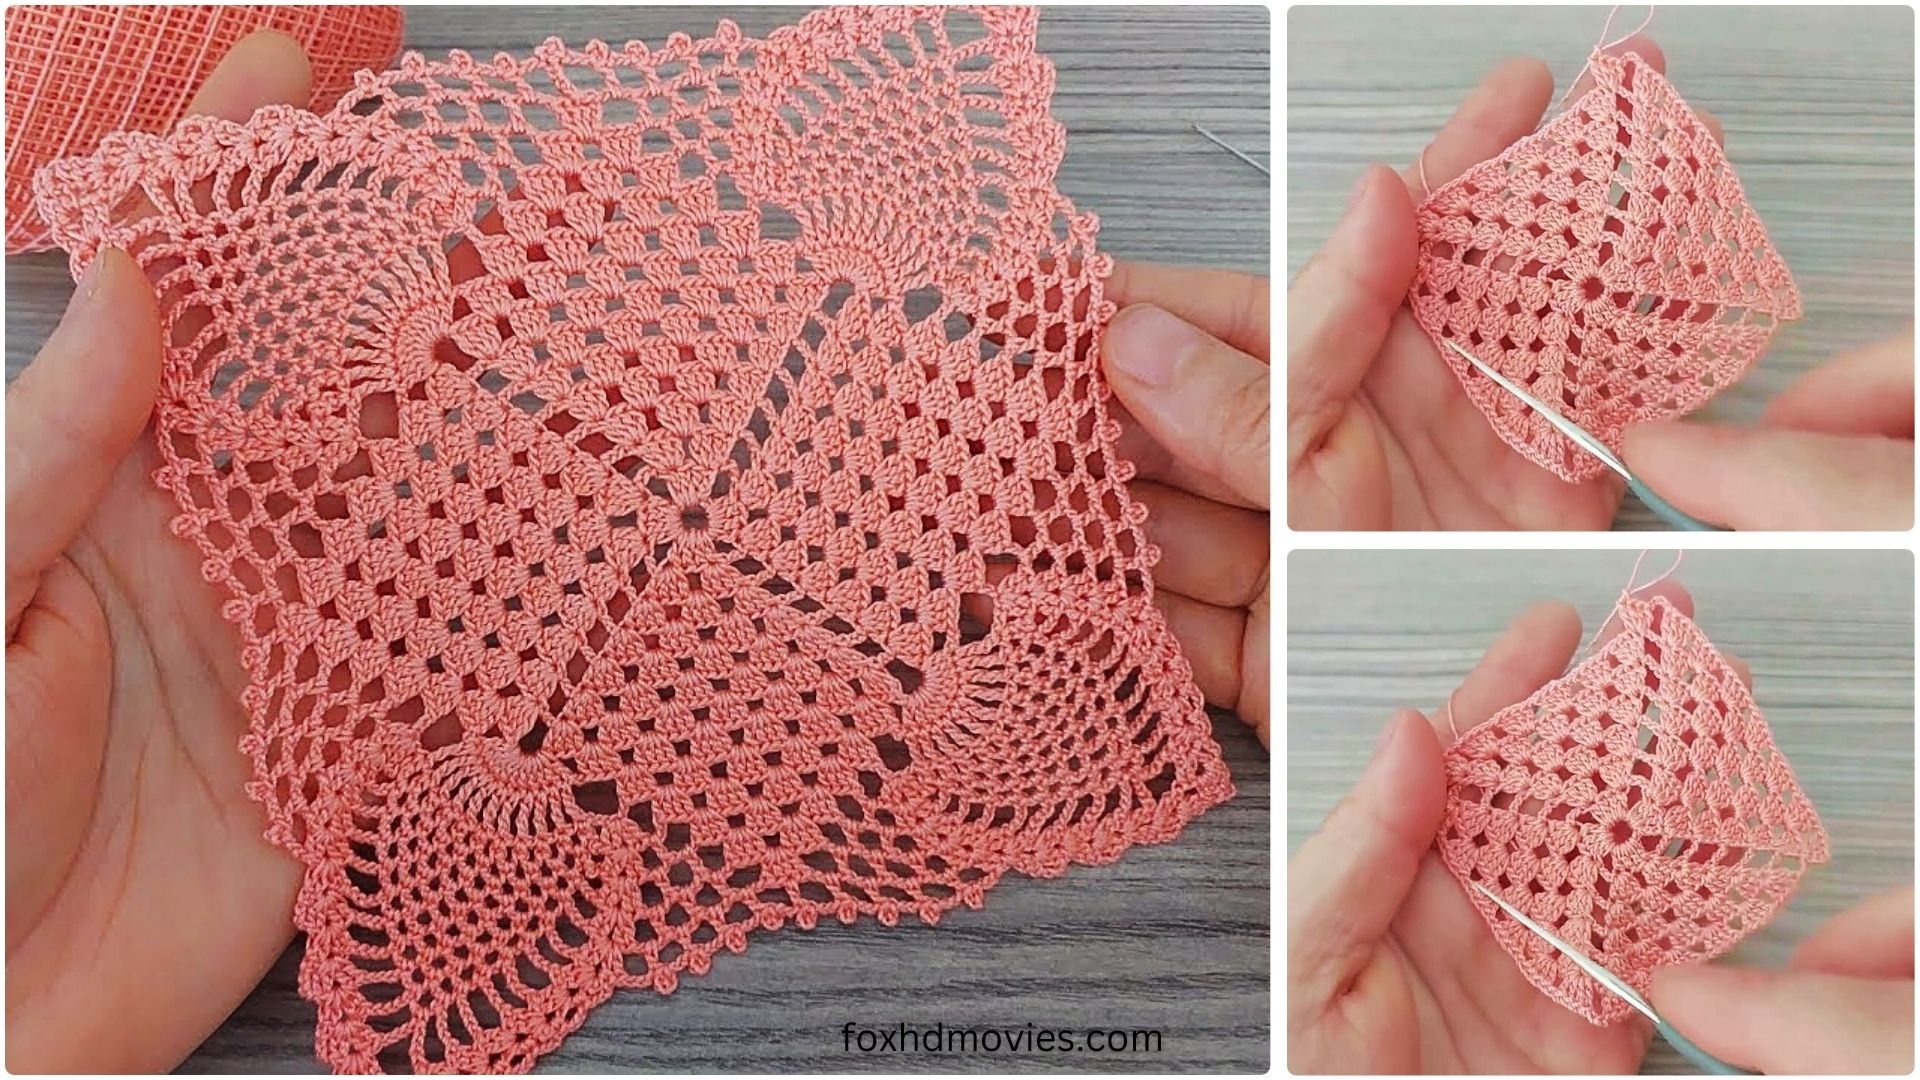
Elevate your crochet skills with this exquisite Square Floral Crochet Lace motif! This pattern combines intricate floral elements with delicate lace techniques, resulting in a truly stunning square that’s perfect for doilies, tablecloths, elegant blankets, or adding a touch of sophisticated beauty to any project. While it uses basic stitches, the construction requires a bit more focus, making it a rewarding challenge for intermediate crocheters.
Skill Level: Intermediate
Materials:
- Lace Weight (0) or Fingering Weight (1) cotton yarn: Cotton yarn works best for lace as it holds its shape beautifully and blocks well. Choose a color that highlights the intricate details! (For a larger, more substantial square, you could use DK weight, but adjust your hook accordingly).
- Crochet hook size C/2 (2.75 mm) or D/3 (3.25 mm) for lace/fingering weight yarn, or size needed to obtain gauge. (If using DK, try a G/6 (4.0 mm)).
- Yarn needle for weaving in ends
- Scissors
- Stitch markers (helpful for corners)
- Blocking supplies (blocking mats, pins, spray bottle) – essential for lace projects!
Gauge:
Gauge is very important for lace projects to ensure your motifs are consistent and your lace work is open and even. After Round 7 (when the initial square shape is established), your motif should measure approximately 4.5-5 inches (adjust for yarn weight). Adjust your hook size to achieve this.
Abbreviations (US Crochet Terms):
- ch: chain
- sl st: slip stitch
- sc: single crochet
- hdc: half double crochet
- dc: double crochet
- tr: treble crochet (or triple crochet)
- dtr: double treble crochet (YO 3 times)
- sk: skip
- sp: space
- st(s): stitch(es)
- beg: beginning
- rep: repeat
- picot: ch 3, sl st in the 3rd ch from hook (creates a small decorative loop)
- shell: (2 dc, ch 1, 2 dc) in specified stitch or space
Let’s Create Our Stunning Floral Lace!
We’ll start with the floral center and gradually build out the lace square.
Part 1: The Floral Center (Flower Petals & Eyelet)
Round 1: Ch 4, sl st to join into a ring. (Alternatively, use a magic ring). Ch 3 (counts as first dc), 11 dc in the ring. Sl st to the top of beg ch-3. (12 dc)
Round 2 (Petals): Ch 1, sc in the same st. *Ch 4, sk next dc, sc in next dc.* Repeat from * to * 4 more times. Ch 4, sk next dc, sl st to first sc. (6 ch-4 loops formed – these are your petal foundations)
Round 3 (Petal Definition): Sl st into the first ch-4 loop. (Ch 3 (counts as first dc), 3 dc, ch 2, 4 dc) in the same ch-4 loop. (First petal made) *(4 dc, ch 2, 4 dc) in the next ch-4 loop.* Repeat from * to * 4 more times. Sl st to the top of beg ch-3. (6 petals) Fasten off yarn, weave in ends.
Part 2: Establishing the Square Shape
We now begin to form the square around our flower, introducing openwork.
Round 4 (Corner Foundation): Join new yarn with a sl st into any ch-2 sp of a petal. Ch 5 (counts as 1 tr, ch 1). Tr in the same ch-2 sp. (First half-corner made) *Ch 3, dc in the next dc (center of 4-dc group from previous round). Ch 3, (tr, ch 1, tr) in the ch-2 sp of the next petal.* Repeat from * to * 3 more times. Ch 3, dc in the next dc. Ch 3, sl st to the 4th ch of beg ch-5. (4 corner “V”s with ch-1 sps, 4 dc posts between corners)
Round 5 (Lace Sides): Sl st into the ch-1 sp of the corner. Ch 3 (counts as first dc), (dc, ch 3, 2 dc) in the same ch-1 sp. (First corner shell) *Ch 2, sk ch-3 sp, sc in the next dc (from Round 4). Ch 2, sk ch-3 sp, (2 dc, ch 3, 2 dc) in the ch-1 sp of the next corner.* Repeat from * to * 3 more times. Ch 2, sk ch-3 sp, sc in the next dc. Ch 2, sk ch-3 sp, sl st to the top of beg ch-3.
Round 6 (More Lace): Sl st into next dc and into ch-3 sp of corner. Ch 3 (counts as first dc), (2 dc, ch 3, 3 dc) in the same ch-3 sp. (New corner shell) *Ch 3, sk (2 dc, ch 2 sp, sc, ch 2 sp, 2 dc), 3 dc in the ch-3 sp of next corner.* Wait, this looks a bit off, let’s refine this round to ensure it’s forming properly and clearly.

Let’s revise Round 6 and onwards to ensure clarity and proper lace formation.
Revised Round 6 (More Lace & Openwork): Sl st into next dc and into the ch-3 sp of the corner. Ch 3 (counts as first dc), (2 dc, ch 3, 3 dc) in the same ch-3 sp. (First corner) *Ch 2, sk 2 dc, dc in the next ch-2 sp. Ch 2, sk sc, dc in the next ch-2 sp. Ch 2, sk 2 dc, (3 dc, ch 3, 3 dc) in the ch-3 sp of the next corner.* Repeat from * to * 3 more times. Ch 2, sk 2 dc, dc in the next ch-2 sp. Ch 2, sk sc, dc in the next ch-2 sp. Ch 2, sl st to the top of beg ch-3.

Round 7 (Defining the Square): Sl st into next 2 dc and into the ch-3 sp of the corner. Ch 3 (counts as first dc), (2 dc, ch 3, 3 dc) in the same ch-3 sp. (New corner) *Ch 1. Now we’ll create a series of ch-sps and stitches along the side: (Dc in next dc, ch 1) repeat 3 times. Dc in the next dc (this should be the last dc before the next corner). Ch 1. (3 dc, ch 3, 3 dc) in the ch-3 sp of the next corner.* Repeat from * to * 3 more times. Ch 1. (Dc in next dc, ch 1) repeat 3 times. Dc in the next dc. Ch 1. Sl st to the top of beg ch-3.
Part 3: The Decorative Lace Border

This final section adds more openwork and decorative picots to truly make it stunning.
Round 8: Sl st into next 2 dc and into the ch-3 sp of the corner. Ch 3 (counts as first dc), (2 dc, picot, 3 dc) in the same ch-3 sp. (First corner with picot) *Ch 3, sk 3 dc. Sc in the next ch-1 sp. (Ch 3, sk dc, sc in next ch-1 sp) repeat 3 times. Ch 3, sk 3 dc. (3 dc, picot, 3 dc) in the ch-3 sp of the next corner.* Repeat from * to * 3 more times. Ch 3, sk 3 dc. Sc in the next ch-1 sp. (Ch 3, sk dc, sc in next ch-1 sp) repeat 3 times. Ch 3, sl st to the top of beg ch-3.
Round 9 (Final Border): Sl st into next 2 dc and into the picot of the corner. Ch 1, sc in the picot. *Ch 5 (this forms a large loop for the next side). (Sc in next ch-3 sp, ch 3) repeat 3 times. Sc in the last ch-3 sp. Ch 5. Sc in the picot of the next corner.* Repeat from * to * 3 more times. Ch 5. (Sc in next ch-3 sp, ch 3) repeat 3 times. Sc in the last ch-3 sp. Ch 5. Sl st to the first sc. Fasten off and weave in all ends securely.
Video Tutorial
Blocking Your Lace Motif:
Blocking is crucial for lace crochet! It opens up the stitches, makes the pattern symmetrical, and gives your motif its final beautiful shape.
- Wet your motif: Gently submerge your finished motif in lukewarm water with a bit of wool wash (if using wool yarn) or just plain water if cotton. Squeeze out excess water gently – do not wring!
- Pin it: Lay your damp motif on a blocking mat or a thick towel. Gently stretch it to the desired square dimensions, pinning each corner and along the straight edges, ensuring the openwork is visible and even. Pay attention to the picots and make sure they stand out.
- Let it dry: Allow the motif to air dry completely. This can take several hours or even overnight.
- Enjoy: Once dry, remove the pins and admire your stunning square floral crochet lace!
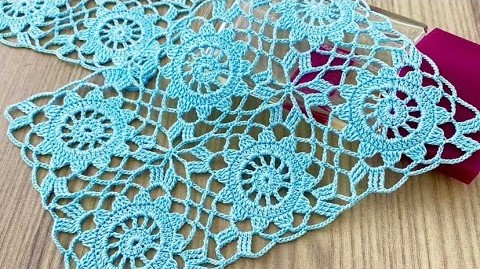
Uses for Your Stunning Lace Motif:
- Doily: A single motif makes a beautiful small doily for a dresser or table.
- Tablecloth/Runner: Join multiple motifs for an exquisite larger piece.
- Heirloom Blanket: Imagine a whole blanket made of these! It would be a true treasure.
- Pillow Front: A statement piece on a decorative pillow.
- Wall Hanging: Frame it for a beautiful piece of art.
- Garment Embellishment: Sew it onto a plain top, skirt, or bag for an instant upgrade.
This intricate motif takes a little patience, but the result is a truly breathtaking piece of crochet art. Happy hooking!