by
by 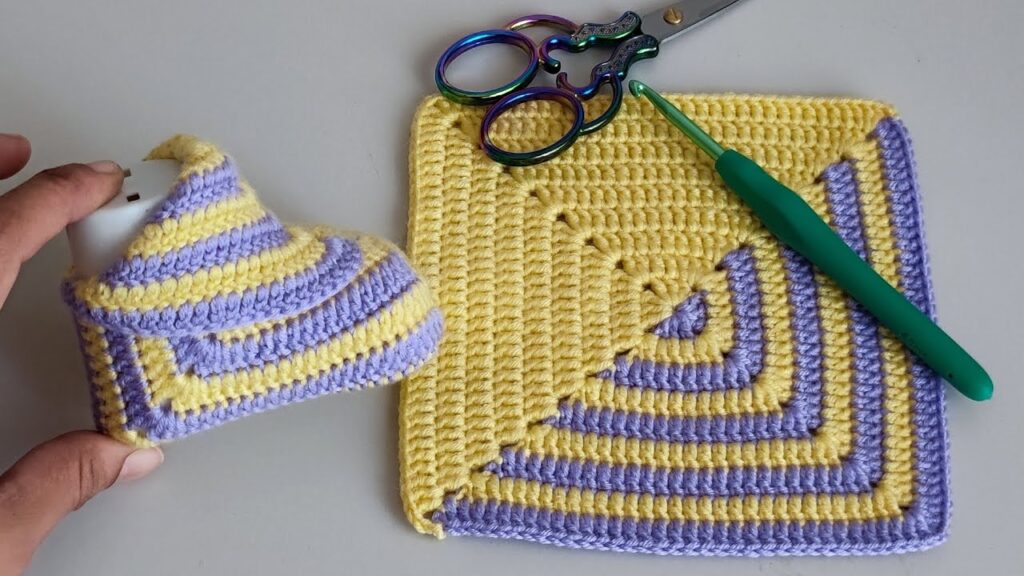
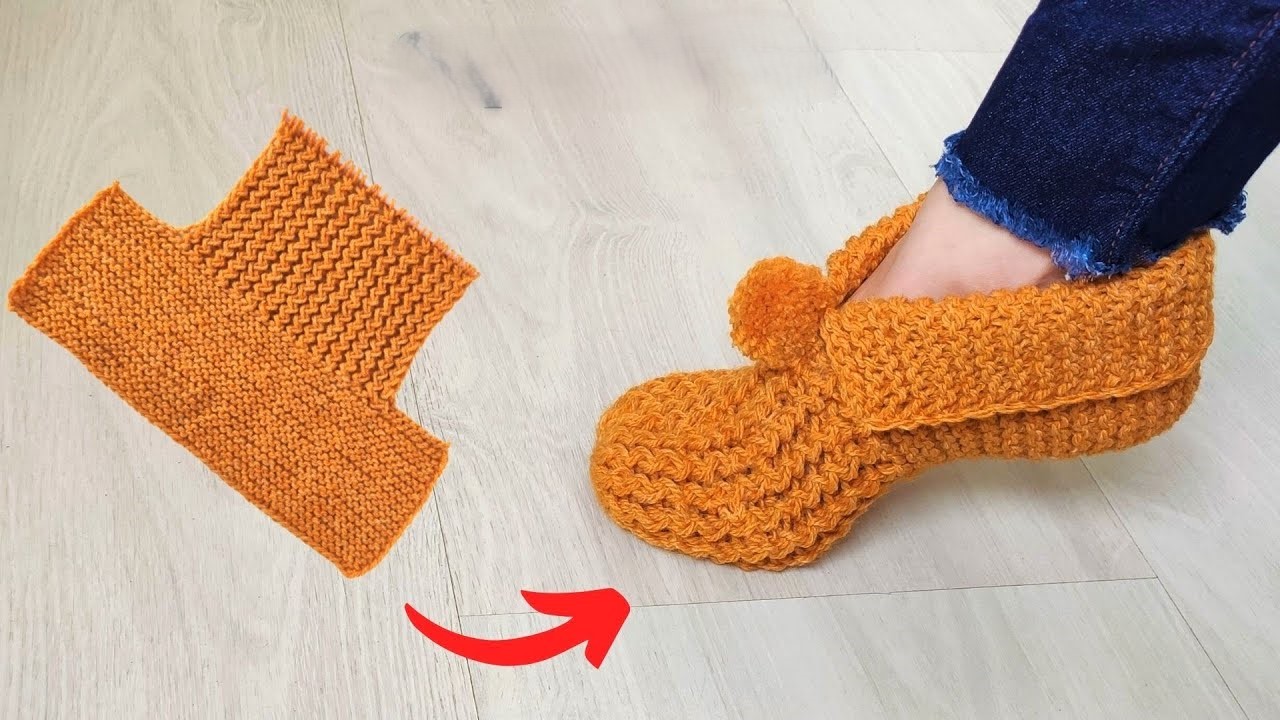
These adorable baby booties combine the classic charm of granny squares with playful yarn games that will surely catch the eye. Perfect for gifting or adding a pop of color to your little one’s wardrobe, this pattern encourages creativity with color and texture.
Skill Level: Intermediate Beginner (basic granny square knowledge recommended)
Materials:
- DK weight yarn in multiple eye-catching colors (at least 3-4 contrasting or complementary shades will work beautifully)
- Crochet hook size G/6 (4.0 mm) or size needed to obtain gauge
- Yarn needle for weaving in ends
- Scissors
- Stitch markers (optional, but helpful for keeping track of rounds)
- Small buttons or decorative embellishments (optional)
Gauge:
Aim for approximately a 3-inch square for a 4-round granny square. Adjust your hook size if needed to achieve this.
Finished Size:
This pattern is written for approximately 0-3 months (sole length around 3 inches). Instructions for slight adjustments will be included.
Abbreviations (US Crochet Terms):
- ch: chain
- sl st: slip stitch
- dc: double crochet
- tr: treble crochet (optional, for a taller effect in color changes)
- sp: space
- st(s): stitch(es)
- beg: beginning
- rep: repeat
- inc: increase (work 2 stitches in the same stitch)
- dec: decrease (work 2 stitches together)
- BLO: back loop only
- FLO: front loop only
Let’s Dive into the Yarn Games!
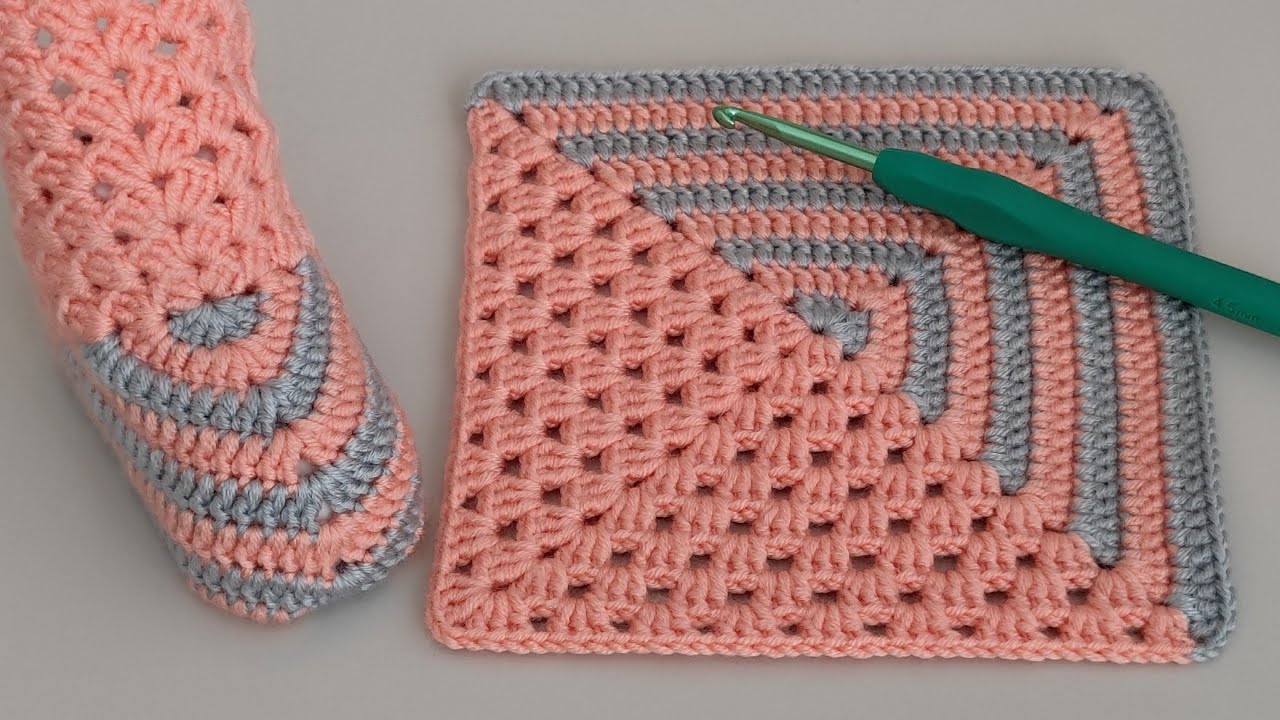
Part 1: Crafting the Eye-Catching Granny Squares (Make 4)
Here’s where the fun begins! We’ll make four granny squares, each with its own unique yarn play. Feel free to follow these suggestions or let your creativity run wild!
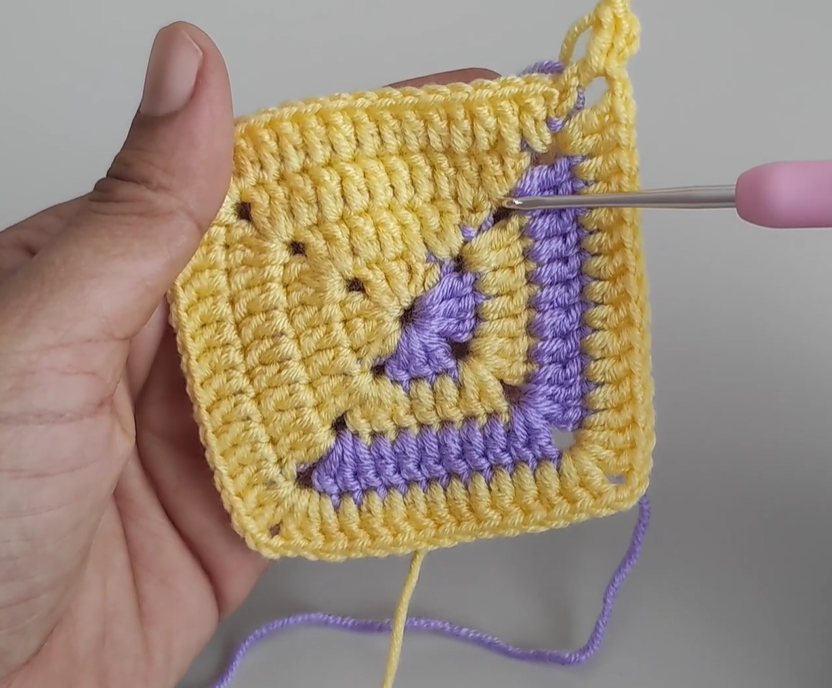
Basic Granny Square Foundation:
Round 1: With your first color, ch 4, sl st to join into a ring (or use a magic ring). Ch 3 (counts as first dc), 2 dc in the ring, ch 2, *3 dc in the ring, ch 2; rep from * twice more. Sl st to the top of the beg ch-3. (4 clusters of 3 dc, 4 ch-2 spaces)

Yarn Game Ideas for Rounds 2-4:
- Color Blocking: Change colors at the beginning of each round for bold stripes.
- Round-by-Round Color Changes within Clusters: In a single round, use one color for the first cluster, a second color for the next, and so on.
- Spiral Color Changes: Instead of joining rounds, continue crocheting in a spiral, changing colors at irregular intervals for a blended, painterly effect. You might need to adjust stitch counts slightly to keep the square flat.
- Textured Rounds: Introduce a round of bobble stitches, puff stitches, or even a row of single crochet using a contrasting textured yarn (e.g., a fuzzy or novelty yarn) within the granny square rounds.
- Ombre Effect: Use yarns in gradually shifting shades of the same color family for a subtle gradient effect across the rounds.
- Striped Clusters: Within a single 3-dc cluster, alternate colors for each double crochet.
Example Granny Square Patterns (Make 4, each different or in pairs):
Square 1: Bold Blocks Round 2: Color B Round 3: Color C Round 4: Color A
Square 2: Round-by-Round Cluster Play Round 2: (Color B: 3 dc), ch 2, (Color C: 3 dc), ch 2, (Color A: 3 dc), ch 2, (Color B: 3 dc), ch 2. Round 3: Continue with a new set of colors, ensuring they contrast well with the previous round. Round 4: Finish with another color change.
Square 3: Spiral Surprise Work in a continuous spiral, changing colors randomly every 5-7 stitches.
Square 4: Textured Pop Round 2: Color A Round 3: Color B (work a round of single crochet with a fuzzy yarn) Round 4: Color C
General Tips for Granny Square Yarn Games:
- Don’t be afraid to experiment! Swatch your color combinations beforehand to see how they look together.
- Carry your yarn loosely if you’re changing colors frequently within a round to avoid too many ends.
- Weave in ends as you go to prevent a mountain of finishing later.
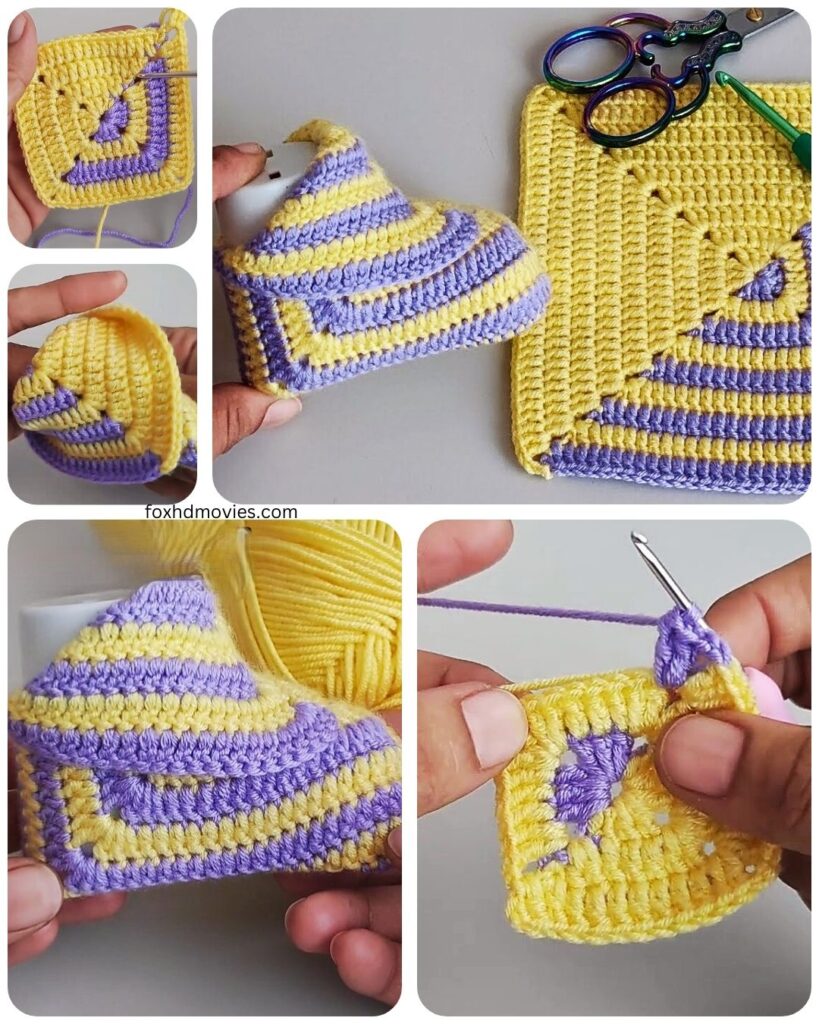
Part 2: Assembling the Bootie Sole
We’ll join two of your eye-catching granny squares to form the sole.
- Place two granny squares side by side with the wrong sides facing each other.
- Using a yarn color that complements your squares, whip stitch or single crochet along one edge of each square to join them. Aim to join through the back loops only for a neater seam.

Part 3: Creating the Bootie Upper
Now, we’ll attach the remaining two granny squares to the sole to create the upper part of the bootie.
- Take one of the remaining granny squares. Align one edge of this square with one of the unjoined edges of the sole (the longer edge).
- Using a whip stitch or single crochet, attach this square to the sole, centering it along the edge.
- Repeat this process with the last granny square on the opposite unjoined edge of the sole. You should now have a basic bootie shape.
Part 4: Shaping the Heel and Ankle Cuff with More Yarn Fun!
Now we’ll work around the back and top edges to create the heel and a cozy ankle cuff, incorporating more yarn play.
- Heel Shaping: With the right side facing you, attach your yarn to one of the back corners where a side square meets the sole square.
- Ch 1, then work single crochet evenly across the back edge of the sole square and up the side of the adjacent square.
- Continue working single crochet across the top edge of that side square.
- Now work single crochet down the other side square and across the remaining back edge of the sole square. Sl st to the first sc.
- Color Play in the Heel Cuff: For the next few rounds of the heel cuff, change colors every round or every few stitches to create stripes or a variegated effect. You can also introduce a textured stitch like a half double crochet in the BLO for a ribbed look.
- Continue working in rounds of your chosen stitch and color pattern until the heel cuff reaches your desired height (approximately 1-1.5 inches).
Part 5: Creating the Ankle Opening and Optional Strap
- With the right side facing you, find the center front of the bootie (where the two side squares meet).
- Attach your yarn to one of the top corners of a side square.
- Ch 1, sc evenly across the top edge of this side square.
- Creating the Opening: Decide how wide you want the opening to be. Chain a number of stitches to bridge across the front (around 8-10 chains for a 0-3 month size).
- Attach the chain to the top corner of the other side square.
- Sc evenly across the top edge of the second side square. Sl st to the first sc.
- Optional Strap with Yarn Interest:
- Attach yarn to the side of the opening. Chain a desired length for the strap.
- Play with Texture: For the strap, you could work a row of puff stitches or bobbles in a contrasting color.
- Braided Strap: Make three strands of chains in different colors and braid them together to create a unique tie.
- Attach a small loop at the end of the strap (e.g., a few chain stitches joined with a sl st) to fasten around a button.

Part 6: Adding a Border and Fasteners
- Eye-Catching Border: Add a final border around the ankle opening using a contrasting color or a decorative stitch like a crab stitch (reverse single crochet) or picot edge.
- Attaching Fasteners (if using): Sew buttons securely to the opposite side of the opening from your strap.
Finishing Touches:
- Weave in all remaining yarn ends securely.
- Consider adding small, securely attached embellishments that complement your yarn choices.
Adjusting the Size:
- For a smaller size: Use a smaller hook and/or thinner yarn. You can also work fewer rounds on your granny squares.
- For a larger size: Use a larger hook and/or thicker yarn. You can add an extra round to your granny squares or add more rounds to the heel and ankle cuff.
Video tutorial
Embrace the Yarn Games!
The beauty of these booties lies in the creative use of yarn. Don’t be afraid to try unexpected color combinations and textures. Let each granny square and each part of the bootie tell its own colorful story!