by
by 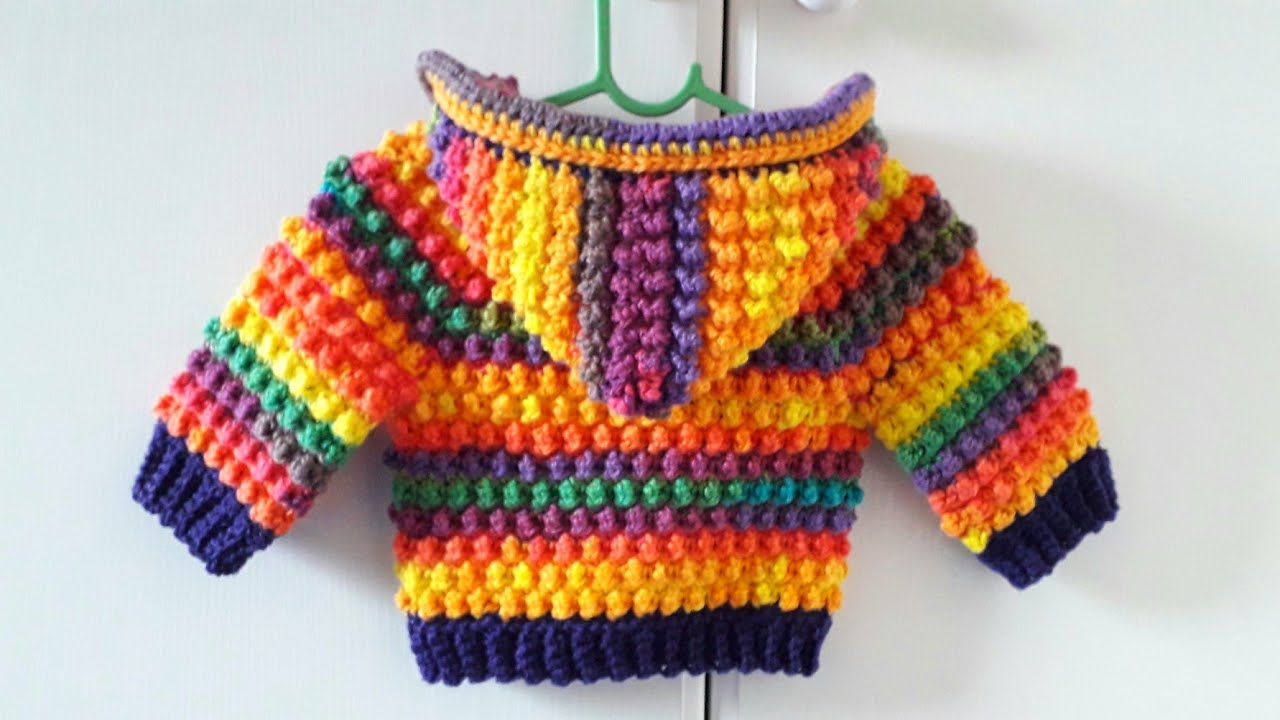
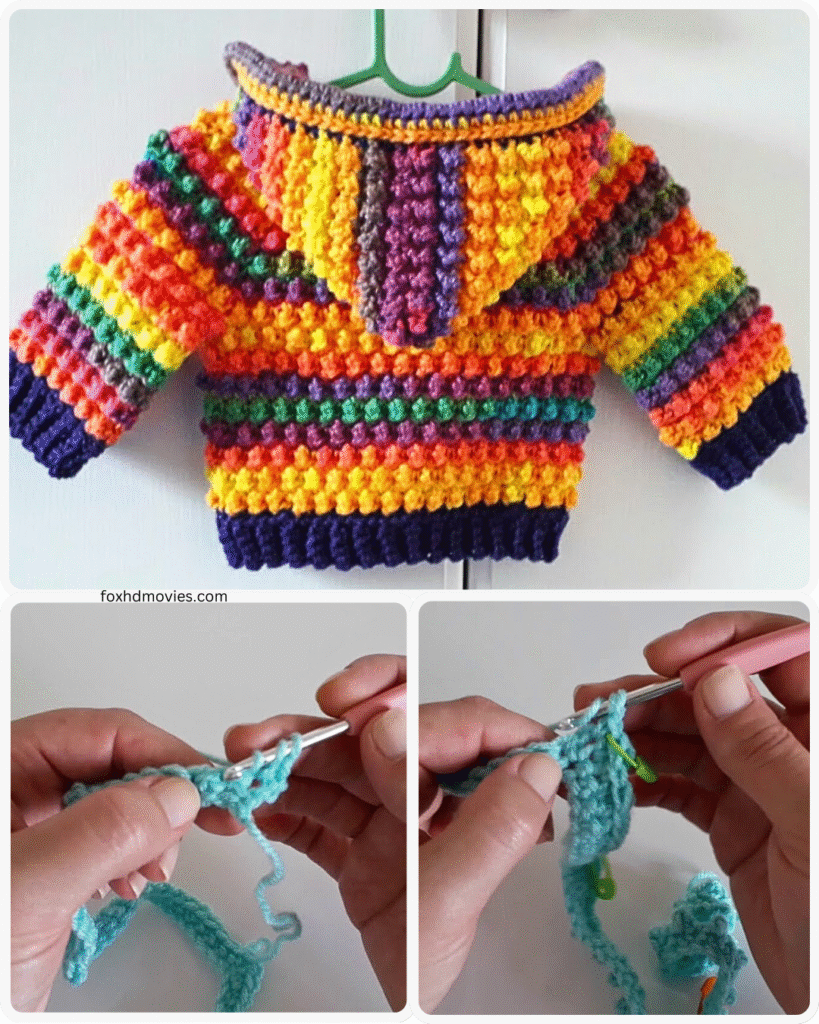
A handmade crochet baby hoodie makes a thoughtful and personal gift. Here’s a detailed pattern you can follow. This pattern is written for a size 6-12 months, but I’ll also include notes on how to adjust the size.
Skill Level: Intermediate
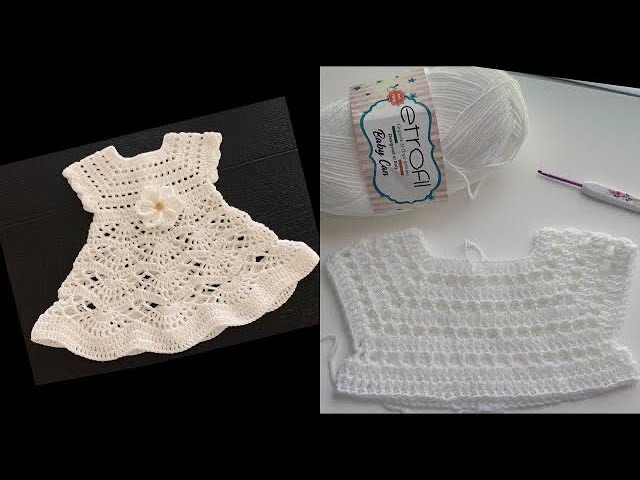
Materials:
- Worsted weight yarn (approximately 300-350 yards) in your chosen color(s). Consider using a soft, baby-friendly yarn.
- Crochet hook size H/8 (5.0 mm) or size needed to obtain gauge.
- Scissors
- Yarn needle for weaving in ends
- Stitch markers
- Measuring tape
- Buttons (2-3, depending on preference)
Gauge:
- 13 double crochet (dc) stitches and 7 rows = 4 inches (10 cm)
Finished Measurements (approximate for 6-12 months):
- Chest: 20-22 inches (51-56 cm)
- Sleeve length (from shoulder): 9-10 inches (23-25 cm)
- Body length (from shoulder): 11-12 inches (28-30 cm)
Abbreviations (US Crochet Terms):
- ch: chain
- st(s): stitch(es)
- sl st: slip stitch
- sc: single crochet
- hdc: half double crochet
- dc: double crochet
- tr: treble crochet
- fpdc: front post double crochet
- bpdc: back post double crochet
- inc: increase (work 2 stitches in the same stitch)
- dec: decrease (work 2 stitches together)
- sk: skip
- rep: repeat
- RS: right side
- WS: wrong side
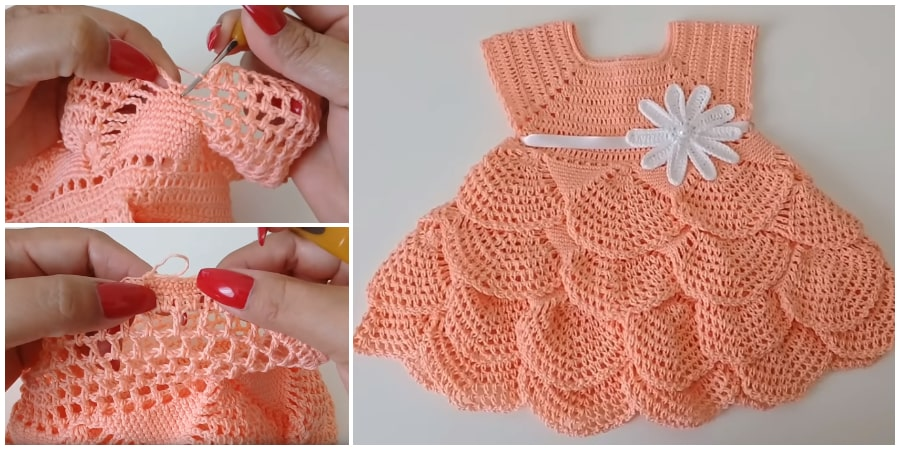
Special Stitches:
- Shell Stitch: (dc, ch 1, dc) in the same stitch.
Pattern:
Yoke (Worked from the top down):
- Chain 68.
- Row 1 (RS): Dc in the 4th ch from the hook (counts as first dc) and in each ch across. (65 sts)
- Row 2 (WS): Ch 3 (counts as first dc), turn, dc in the next 10 sts (Right Front), place marker, ch 2 (Right Raglan), dc in the next 11 sts (Right Sleeve), place marker, ch 2 (Back Raglan), dc in the next 21 sts (Back), place marker, ch 2 (Left Raglan), dc in the next 11 sts (Left Sleeve), place marker, ch 2 (Left Raglan), dc in the last 11 sts (Left Front). (65 dc, 4 ch-2 spaces)
- Row 3: Ch 3, turn, dc to the first marker, (dc, ch 2, dc) in the ch-2 space (Raglan Increase), dc to the next marker, (dc, ch 2, dc) in the ch-2 space, dc to the next marker, (dc, ch 2, dc) in the ch-2 space, dc to the next marker, (dc, ch 2, dc) in the ch-2 space, dc to the end. (73 dc, 4 ch-2 spaces)
- Row 4: Ch 3, turn, dc to the first ch-2 space, ch 2, dc to the next ch-2 space, ch 2, dc to the next ch-2 space, ch 2, dc to the next ch-2 space, ch 2, dc to the end. (73 dc, 4 ch-2 spaces)
- Rows 5-18 (or until desired yoke depth is reached): Repeat Rows 3 and 4. You will be increasing 8 stitches (2 in each raglan ch-2 space) every other row.
- Adjustment for smaller size (e.g., 3-6 months): Work fewer increase rows.
- Adjustment for larger size (e.g., 12-18 months): Work more increase rows.

Separating Sleeves and Body:
- Row 19: Ch 3, turn, dc in the stitches to the first ch-2 space, dc in the ch-2 space, ch 3 (for underarm), sk all the sleeve stitches until the next ch-2 space, dc in the ch-2 space, dc across the back to the next ch-2 space, dc in the ch-2 space, ch 3 (for underarm), sk all the remaining sleeve stitches until the last ch-2 space, dc in the ch-2 space, dc to the end. (Body: approximately 77 dc, 2 ch-3 spaces)
Body:
- Row 20: Ch 3, turn, dc in each st across, including the ch-3 spaces. (approximately 83 dc)
- Rows 21-32 (or until desired body length): Ch 3, turn, dc in each st across.
- Adjustment for shorter body: Work fewer rows.
- Adjustment for longer body: Work more rows.
Bottom Edging (Optional):
- Row 33: Ch 1, turn, sc in each st across.
- Row 34: Ch 3, turn, *fpdc around the next st, bpdc around the following st; rep from * across.
- Row 35: Ch 3, turn, *bpdc around the next st, fpdc around the following st; rep from * across.
- Fasten off and weave in ends.
Sleeves (Work in rounds):
- Round 1: With the RS facing, join yarn in the underarm ch-3 space. Ch 3, dc evenly around the sleeve opening, including the skipped stitches from the yoke and the other side of the ch-3 space. Place a marker at the beginning of the round. (approximately 35-40 dc)
- Rounds 2-18 (or until desired sleeve length): Dc in each st around.
- Adjustment for shorter sleeves: Work fewer rounds.
- Adjustment for longer sleeves: Work more rounds.

Sleeve Edging (Optional):
- Round 19: Ch 1, sc in each st around.
- Round 20: Ch 3, *fpdc around the next st, bpdc around the following st; rep from * around.
- Round 21: Ch 3, *bpdc around the next st, fpdc around the following st; rep from * around.
- Fasten off and weave in ends.
- Repeat for the other sleeve.
Hood:
- Row 1: With the RS facing, join yarn at the top right corner of the neckline. Ch 2 (does not count as a st), hdc evenly across the back neckline. (approximately 40-45 hdc)
- Row 2: Ch 2, turn, hdc in each st across.
- Rows 3-20 (or until desired hood depth): Repeat Row 2.
- Adjustment for smaller hood: Work fewer rows.
- Adjustment for larger hood: Work more rows.
- Shape the Hood: Fold the hood in half with the wrong sides together. Sl st the back edges together to seam the hood. Fasten off and weave in ends.
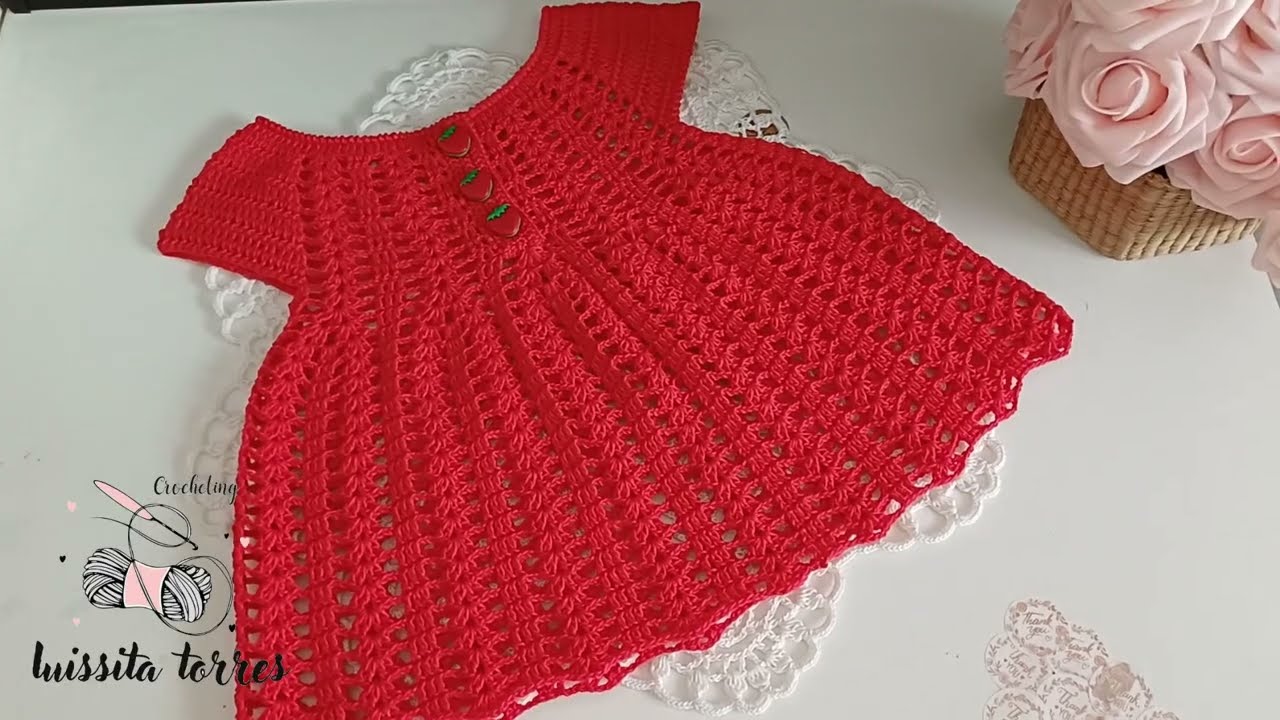
Front Edging and Button Loops (Optional):
- With the RS facing, join yarn at the bottom right front edge. Ch 1, sc evenly up the right front edge, around the hood, and down the left front edge.
- Button Loops (Right Front): Decide on the placement of your buttons. For each button loop: ch 3, sk the next st, sl st in the following st. Continue sc along the front edge.
- Work another row of sc along the entire front edge to reinforce the button loops. Fasten off and weave in ends.
Finishing:
- Sew on the buttons to correspond with the button loops on the opposite front edge.
- Weave in all remaining loose ends.
Video tutorial
Variations and Ideas:
- Stripes: Change colors every few rows for a striped effect.
- Textured Stitches: Use different stitch patterns for the body or sleeves, such as half double crochet or shell stitches.
- Appliqués: Add cute crochet appliqués (stars, animals, etc.) to the front or hood.
- Contrasting Edging: Use a different color for the bottom, sleeve, and hood edgings.
- Bear Ears: Add small crochet bear ears to the top of the hood for an adorable touch.
Important Notes:
- Always check your gauge to ensure the finished garment will be the correct size.
- This pattern provides a basic foundation. Feel free to adjust stitch counts and row numbers to achieve your desired size and look.
- Be mindful of yarn thickness, as this can affect the finished size.
- For safety, ensure that buttons are securely attached.